Michel's 72 coupe rebuild

VetteMod - Corvette Restoration, Modding & Performance Forum

Help Support VetteMod Forum:

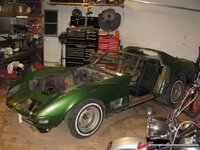
Hahaha no tricks, I move things around in the garage.
I moved the tool box because I needed to make space beside the oven for a powder coat cabinet where I'm going to sray parts.

everything is very loosely installed.
No front springs and the white little block is holding the front end.
 
Last edited:
Michel that looks great ....your thread is very helpful i am trying to figure out my best approach to fixing that inner sill that has rusted out and all you pictures give me exactly what i needed. nice work buddy!!! thks bob
 
Last edited:
Michel that looks great ....your thread is very helpful i am trying to figure out my best approach to fixing that inner sill that has rusted out and all you pictures give me exactly what i needed. nice work buddy!!! thks bob

Well thank you very much sir.
I'm glad this helped.


I'm a bit of on a stand still these days, cant work much on the car but I stilll manage to get a few things going like my starter that I took apart a few times to find out that it was working just fine, all it needed was a good fully charged battery LOL
Planing a few other things like the ignition I want to use etc.

Comments like these encourage me to get going again, LOL

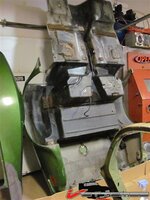
If you need any other pics of how the birdcage sits on the frame let me know.

Maybe I should make a separate thread for the birdcage repairs.
 
Last edited:
thanks for the offer for additional photos, i think your work is awesome and heres some motivation for you....6 yrs worth, its ok to take a break...

http://www.hotrodders.com/forum/well-getting-ready-get-serious-37-a-84877.html

I think I saw that thread before.

I will certainly go thru it again .
It's not the will to keep going, it's a bit of financial thing, the Vette is at the very bottom of the list of things to do. LOL

after all, it's a hobby and I'm in no rush.
A break doesnt mean it wont be finished.
thanks
 
As an Amazon Associate we earn from qualifying purchases. Product prices and availability are accurate as of the date/time indicated and are subject to change.
...Maybe I should make a separate thread for the birdcage repairs.
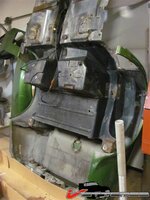
i definitely think you should do this and title it C3 Birdcage repairs, i searched the internet to find info on this and i can tell you that your documentation and practical application of cut and fit parts is by far the most comprehensive and complete rebuilding of a birdcage out there. to alot of people they are lost in how to bend metal and breaking it down to small parts is helpful. i bend metal all the time and i picked up something from your thread that i had never done before, that was with the small 90* brace on the #2 vertical support that had the crease in the middle of it. you used a radiused piece to duplicate that, i always did that type of support braces with straignt pieces and just kept adding metal to get it round, i like your way more.

also you can use the "multi quote" option to get all your photos and links in the correct format and then "copy" that from the "reply to thread" window in to a Word or Word perfect document so you can edit it and then copy and paste back into the new thread. that way you dont lose all your work if the system goes down in the middle of a lenghty explanation.
 
Well after a couples of months of walking around the garage like a zombie because I cant touch anything, my right hand doesnt work and I cant get my left arm too high and not for long,

I finaly got fed up of watching Stacey Davis , wheelers dealer's etc, videos on the internet , I finaly did somekind of "work" on the Vette!!!

Actually it took me a good chunk of the day because I worked for about 5 minutes at a time it hurts too damn much. LOL

Last week end I asked my kids to move a few things in the garage.
I set it up so I could start up a few things, like clean up the under body etc.

Soo heres the bit of work done today.

1804febd05c69cc2.jpg
1804febd05c8f247.jpg

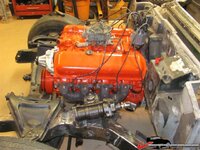
Oh and I couldnt resist turning the wrench again, took the 4 bolts of the carb and installed it.

1804febd05ca5daa.jpg

Not much, but damn satisfying.
 
You need a FASTER recovery !!!!:club::club::club:

[ame]http://www.youtube.com/watch?v=52EEzBNn48g[/ame]
 
Had nothing to do today and since I cant order parts (not before a few weeks anyway) I decided to play a bit.

First I turned the engine so number 1 is at combustion TDC - 10*

I took the old dizzy and changed the points, condenser, cap, rotor, wires, coil and installed it on the engine.

I'll check the dwell and timing later.

Still need to install the exhausts, (temp) the gas pump, hook up the rad. bring up the dash and hook up the oil pressure and RPM gauges etc.

Not much but not bad considering I have only one hand at least it's getting a bit closer to start up.

Oh I also primed the engine, I'll prime it properly again before start up.

1804ff4d9bdd1e2b.jpg

After the engine is started and everything lines up.

I'll tear the frame down, recheck the welds order the few missing parts and send the frame and birdcage to powder coat.
Then I start on reassembling the body.
 
Last edited:
thats a good looking engine...has your wife ever heard SBC with out an exhaust? that would be fun to see if she hasnt....looks good , bob
 
thats a good looking engine...has your wife ever heard SBC with out an exhaust? that would be fun to see if she hasnt....looks good , bob

If you knew them both you wouldn't be able tell who's the biggest petrolhead.:wink:
 
Last edited:
thats a good looking engine...has your wife ever heard SBC with out an exhaust? that would be fun to see if she hasnt....looks good , bob

I you knew them both you wouldn't be able tell who's the biggest petrolhead.:wink:

Denis, Jo just read your comment, she had a good laugh, LOL

Thanks Bob, trust me on this one, she doesnt care how loud this thing is going to be.

Her Harley is much louder than mine and if she could (not get in trouble), it would be straight pipes...
 
when I bought my sidepipes back in 2005 I could not make up my mind on the mufflers so I thought it's a good idea to driveit without mufflers just to see how loud it is.... stupid me..... I set off all of my neighbor's car alarms LOL

yeah, adding mufflers is a good idea :thumbs:
 
Sooo Fastphil came home today to help me.
We had a good day preparing the engine for startup.

First, we got that used dizzy that we turned into a oil primer,
http://www.vettemod.com/forum/showthread.php?t=8466

As I was seeking the local scrapyards for a used dizzy or trying to buy a oil primer I realized that nobody knew what I was talking about.

So I did a separate thread in the tool forum, to show how easy it is to make this tool.
I know a lot of people have those in theyr tool box.

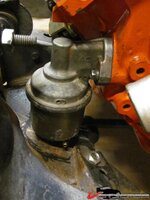
Then we installed the gas pump and as I expected, because of the frame gussets I welded, it's a very tight fit.

1804ff8ec20160c2.jpg

I knew that when I made the gussets and the options are
1: install a gas pump that is smaller than the original,
2: install electric gas pump.
3: cut thee gusset and adjust the space for the pump.
we'll see later, the original fits for the startup.

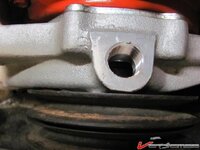
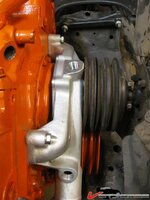
Water pump also had an issue, the pulley was slightly rubbing on the pump, but with a bit of persuation (grinder) everything fits just right.

1804ff8ec2063ec4.jpg
1804ff8ec2084a2d.jpg

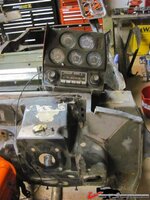
Then we brought up the gauge cluster to install the oil pressure gauge
1804ff8ec2041fd8.jpg

Soo not much but a bit closer......

Tomorow I'll get a few things, hoses clips belts etc
 
Last edited:
Indeed it was a productive day, although not the kind of productivity that is actually visible... Visually, the engine grew a rad fan, and lost a distributor and its wiring. But we got a pretty good idea of what needs to be done tomorrow (and/or any other day before we start the engine). We're still on the fence about putting the mufflers on for the startup. We're now thinking it's gonna be scary loud, so maybe we should err on the side of caution, although it's gonna create some more work for us.

We'll see what happens.
 
I happened to pass by Summit Racing in McDonough, GA the other day (one of the perks of being a long-haul truck driver), and I picked up some of the remaining necessities to get Michel's engine running.

I picked up a new Summit 110 gph mechanical fuel pump to replace the stocker we mounted last weekend. The stocker is a tight fit with one of the plates Michel welded to the frame, and the new pump isn't as tall. That, plus the added flow, made it an almost-necessary upgrade. Anything else would have been a step in the wrong direction. I also picked up some fittings to adapt the new pump's threaded fittings to the temporary rubber fuel lines we're going to use to get the engine running.

I also picked up a cheapo chromed dipstick because Michel seems to have misplaced the original one somewhere in the garage. I'm sure I'll find it immediately after we install the new one.

Nearly inconsequential in the bigger picture, I also bought a new coolant bypass hose. That's the one that goes from the front of the intake manifold and bends down 90 degrees into the top of the water pump. We had jury rigged a regular straight hose that makes a loop upwards to keep it from kinking, but we were afraid air might accumulate there and cause problems. At $5, the new hose with the 90 degree bend is cheap insurance.

Last weekend we also went to the parts store to get a thermostat and a V-belt for the water pump. It seems V-belts for cars have gone the way of the dinosaur, so we walked to the other end of the store and grabbed one intended for a lawn mower or snow blower or some other small appliance. We knew what length we needed, so we chose it and the next size up. Good thing we did because we ended up needing the next size up, which was 33 inches. The thermostat is a 160 degree unit. We chose a sooner-opening version to keep the engine from running too hot while we break in the cam.

There may be a couple more loose items that we need, but the light at the end of the tunnel is getting blindingly bright now. I can't wait!
 
Back
Top