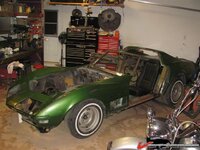
Michel's 72 coupe rebuild

VetteMod - Corvette Restoration, Modding & Performance Forum

Help Support VetteMod Forum:

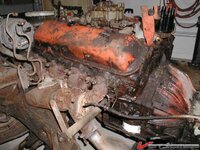
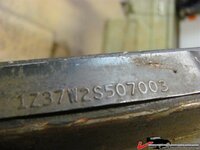
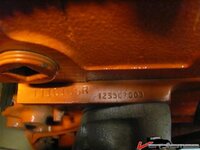
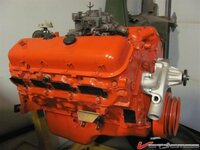
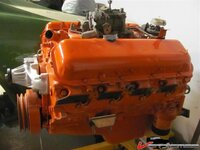
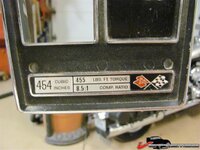
Yup thats the same engine allright.
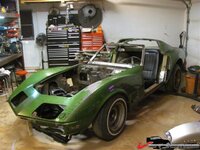
when I bought the car, it was complete, nothing was missing.

The car has been sitting in a garage since the 80's, in other words,
"She died in her sleep"

but she's about to wake up and run.

I just need time LOL lots of time.
 
Last edited:
well yes Gene, it is the engine that came out of the Vette.

1804f43c7cd18f9c.jpg
1804f43c85d5ecd5.jpg
1804f42e27fd5125.jpg
1804f42e280019fb.jpg

1804f42dfd61b2ec.jpg


1804f42e0d3d32ac.jpg

It does look a little better than before, dont you think??

1804f42e27f8c136.jpg
1804f42e27fb3214.jpg
 
Last edited:
Great work

Michel,

Looks like you are doing what I'm getting ready to start, Picked up a 73 BB LS4 vette a few weeks ago that has been sitting since the early 80's. I also got the engine and Trans in Plastic and has allready been rebuilt from a local Machine shop that I know well.

Great work and I will be looking at your methods and repairs as I start to Tackel mine. I have gutted the Inside and removed the front winshield and yes I also have some Birdcage damage. The Interior is trashed and will all need to be replaced but first Its to get the frame and Birdcage back into shape..
 
Welcome to the motley crew...TimTexas.....

I suppose the engine would look that bad, considering the work you got on the rest of the car, I feel lucky my '72 did not need all that much work, previous owners did well by it.....needed the interior, but that was 16 years ago....replaced the seats once since then....

:amazed:
 
Welcome to Vettemod Tim, dont froget to introduce yourself to others too in the "New Member Introductions" forum.

Also dont forget to make a thread about your adventure with lots of pics. LOL.

They are the best reference to all of us and to you too when you rebuild.


Thanks for the kind words.

Now my birdage wasnt that bad even if I had to replace a few parts. I've seen irreparable ones out there.

The original frame of the car was shot.

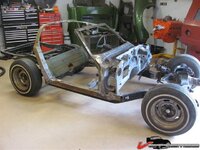
Pic after the body lift.
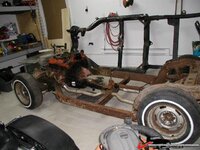
1804f43a496dbcaf.jpg

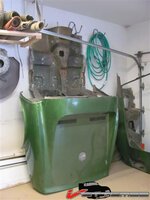
I still have what's left of it, it now lives on the ceiling of my garage .
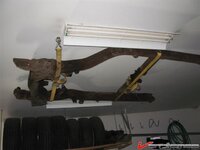
1804f43a31502ce9.jpg
The rear end was cut off by the rust and couldnt save it.

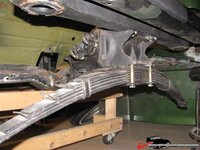
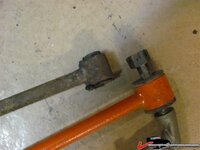
Just to give you an idea on how bad it was... heres a pic of one of the trail arms when I took them off.
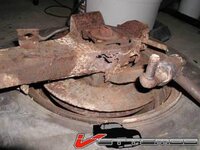
1804f43a2967f1aa.jpg

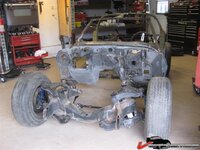
And part of the front end when I was dismantling it.
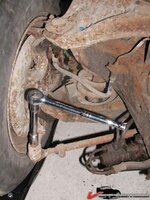
1804f43a1a058e9f.jpg

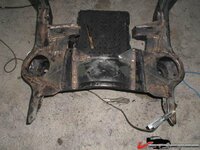
BUT when I bought the project, there was a new and complete chassis along with the car.
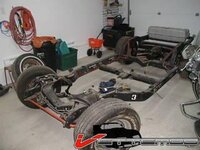
1804f43a1a029b8c.jpg
1804f43a1a047813.jpg

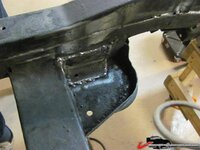
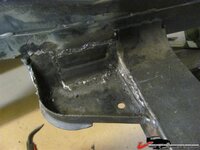
Of course, like any other frame from the 70's, the welds were pretty much crap plus, the paint the previous owner applied was badly flaking.
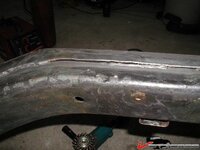
1804f43c4e3b4d47.jpg

So I decide to take the new frame apart and reweld everything.
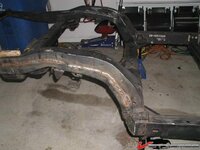
1804f43c5b6c888d.jpg

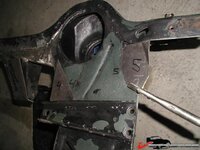
At the same time, I made a bunch of gussets to reinforce it.

I didnt have a welding machine at the time so, I rented one (with shielding gas and a friend of mine came over and welded everything.
This is where my son decided to become a welder LOL.
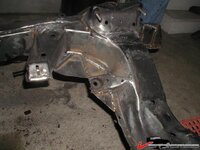
1804f43be7faa185.jpg

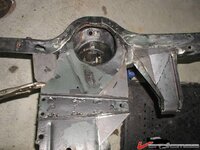
Now pay a particular attention to this area, it hold the diff and the rear suspension and there was not much welds from the factory.
pretty scary.
I know the piccs are too small but...
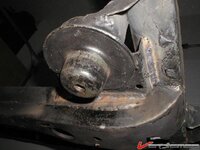
1804f43be07f1754.jpg

added more support to the trail arms pockets.
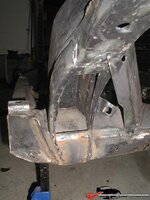
1804f43bfcb631a5.jpg

Then made some gussets for the diff front support BUT....
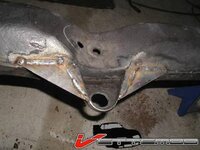
1804f43a81540397.jpg

After I tried to put the body back on, it didnt fit.
The battery box and the box besides it were hitting the gussets.
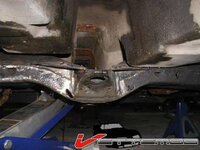
1804f43a8152e251.jpg

after a little adjustments, it now fits.
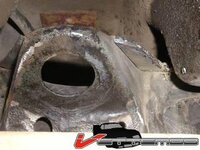
1804f43b0a247109.jpg

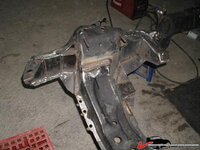
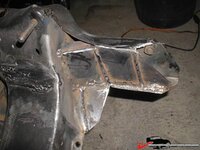
For the front end, I made a bunch of gussets.
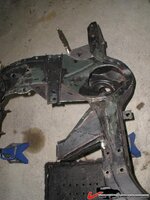
1804f43c45da576a.jpg
1804f43c3d706123.jpg

I also boxed the engine support.
1804f43c3565dd46.jpg


Boxed the front horns.
1804f43c101b97c6.jpg
1804f43c19044c4d.jpg

And welded underneat the engine crossmember
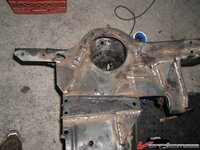
1804f43c22cd5d8a.jpg
1804f43c2f15972d.jpg

Ialso plugged the access for the steering on the frame, I knew that I was going to install the Jeep steering box.
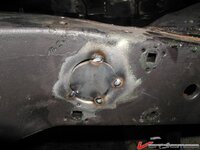
1804f43c0491ff30.jpg

I do know that a few of the gussets I made are a bit too big and I expect that some will interfere with engine, rad, headers or any other parts.
This is why I'll test fit everything first before and will adjust them.

 
Last edited:
And if anybody wonders why I go thru all of this.

Heres a little story I posted somewhere else about why I love that Vette.
again excuse my english...but this summs it up pretty much.


I'll always remember the first time I saw a C3.
I was a kid around 10 or 11 years old and I was coming back from school. It was raining, I was walking head down hurrying up because I was soaked, then almost in front of the house, there it was.

A brand new 69 or 70 blue coupe cant remember the year but I remember the "454" on the hood and the "Stingray" logo on the sides.

Until that time, I had not notice performance cars and as we know now, there was plenty of Road runners, Dusters, Camaros and such but I had never seen a C3.
It stopped me in my tracks and could not get my eyes off of it.

I kept asking myself "what the hell is that?"

I walked around it admiring the lines, the pointy chrome nose, the rear flat window, the door handles, the chrome ball of a shifter, this car baffled me and I couldn't care less about the pouring rain anymore.

Then I saw a guy walking toward the car flipping his keys around his fingers, unlocked the door and got in.
He started it and I got some more shocks.

The rumble of the side pipes and then, the head lights flipped open. Wow! Where did those come from?
I was amazed and as if it wasn't enough, the wiper door flipped open and wipers got out of theire hiding to clear the driver's view.

Thats was it! I was hooked.

I promissed myself to get one.
Dreamed about it for years.

Later in life I had a 69 Road runner (should of kept that one) a few Nova SS, and other performance cars but somehow a C3 Vette was always in the back of my head.
Then I found the one I have now.

I'm still amazed by the lines.
 
Last edited:
As an Amazon Associate we earn from qualifying purchases. Product prices and availability are accurate as of the date/time indicated and are subject to change.
Well well,
Called a few places to get the birdcage galvanized.
few problems,
1 the guys asked me to get the part sandblasted first, I asked about the acid bath that they do before but they wanted to get the part blasted anyway.
Need to make holes so the thing would drain if they think it wont drain... they will make hole using a torch!!!:eek::eek::eek:

I dont think there will be a problem draining but still, I didnt like that LOL

2 one of them said that he could not garantee the warping of the part since this will be dippaed in 800+ deg zink.
He said that a lot of the thinner metal parts like the birdcage will warp a bit...

3 also said that oily residue will be left on the part, and should be "lightly blasted " afterwards...

Quoted me for 350$ + I have to get the cage sandblasted first (another 100$) and a light blast afterwards that will garantee adherence for the body parts.

SOOOOO

I turned to powder coat.

I had previously called and talked to the guy.

http://www.sablageaujet.ca/traitement-surface/services_electroStatique_ang.cfm

they have an oven where I can get a couples of trucks and trailers in there.

Sent him pics and dimensions of the birdcage and told him that it didnt matter about the color.

250$

So powder coat it will be...
 
Before I send the birdcage to the powder coater, I'm toying with an idea.
I can ear the song "crazy" again.....

anyway, heres the deal.

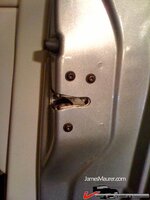
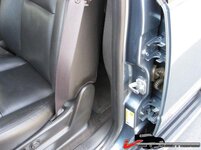
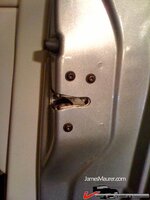
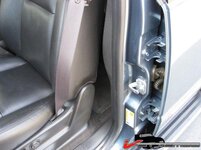
I'm thinking of replacing the door latch and striker.

I looked at my Caddy's door latches and strikers and it's the same as a lot of other newer car out there.

1804f45905fac1c3.jpg

1804f45905fdf9e2.jpg

I like the way those doors close.

I've seen that done somewhere else on a older car during a restoration, tought it was a good idea.
I think in Camaro site. Cant find it.

I can install the doors on the birdcage, and fit them and make them work properly.
 
3 also said that oily residue will be left on the part, and should be "lightly blasted " afterwards...
From what I've read here and here, the oil residue is a deliberate coating that you can ask not to be applied.
 
Before I send the birdcage to the powder coater, I'm toying with an idea.
I can ear the song "crazy" again.....

anyway, heres the deal.

I'm thinking of replacing the door latch and striker.

I looked at my Caddy's door latches and strikers and it's the same as a lot of other newer car out there.

1804f45905fac1c3.jpg

1804f45905fdf9e2.jpg

I like the way those doors close.

I've seen that done somewhere else on a older car during a restoration, tought it was a good idea.
I think in Camaro site. Cant find it.

I can install the doors on the birdcage, and fit them and make them work properly.
Not crazy at all.
I was thinking about a way to make the door sound softer, and was wondering if those aftermarket bear claw latches would be less clunky than the stock ones.
 
From what I've read here and here, the oil residue is a deliberate coating that you can ask not to be applied.

I read that too but seems to me, with the attitude, is that they are interested in more industrial parts.

I dont know, I still have time to look around, but powdercoating seems to be cheaper and I know it will be tougher stuff than what was on the car anyway.
 
Ok today was a good day to start playing on the frame again.
My friend Phil was here and helped me to turn the frame around so I could make the last patch .


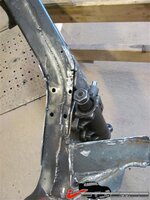
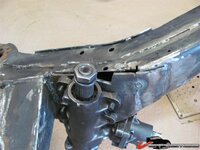
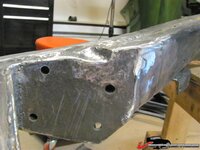
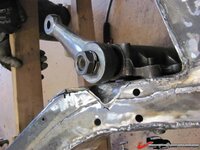
I tought the pitman arm was a little close to the frame so I made an endentation to make a bit more space for the pitman arm.

Sooo here we go.....

First we had to get the rear of the car out of the way.

1804f5d5ad873c3a.jpg

We then took out the front suspension out to get some of the weight off.and flipped the frame around.

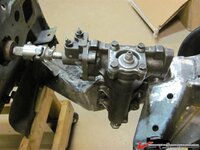
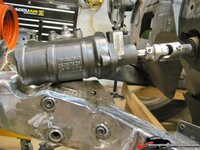
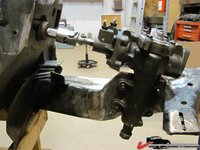
Then I installed the steering box and checked what I had to do to make a bit more room for the pitman arm.


1804f5d5ad896ac2.jpg

I had allready made a cut in the quarter inch plate that holds the box, all that was left to do was to make a piece to block the void.
1804f5d5ad8af925.jpg

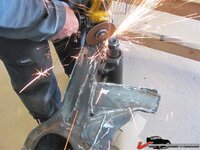
Once that was done, I decided where to cut went ahead with the cut.

Each time I cut into the frame, I'm thinking about what somebody told me once.
"It takes cahooneys to cut a frame"
Actually, all you need is a grinder and a cutting wheel!

1804f5d5ad8d4ebc.jpg
1804f5d5ad90375e.jpg

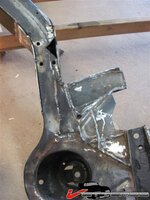
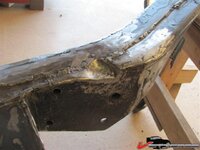
After the cut, I made a carboard and a little patch.
Trimmed it, formed it and welded it in place.

cute little patch huh?
1804f5d5ad91bde0.jpg

Before welding it, I reinstalled the box into place and checked it the pitman arm had enough clearance.

1804f5d5ad935bb2.jpg

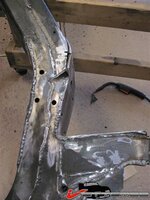
Once satisfied with the fit, I welded it and plugged the holes.
1804f5d5ad959dc0.jpg

Cleaned up the welds.
1804f5d5ad9806eb.jpg

Soo I can call the steering box install

DONE!

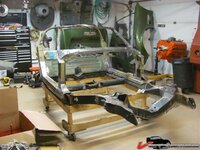
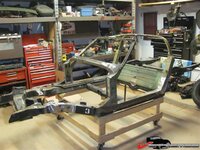
We then flipped the frame around and put it on the dolly and put back the birdcage where she belongs on the frame
1804f5d6978d7971.jpg
1804f5d686bb4bb1.jpg
1804f5d5fac0b309.jpg

Mocked up the firewall to check the steering box fit

Even if everything is loosely mocked up, everything lines up pretty good.
I'm happy with the fit.
1804f5d5fac66430.jpg
1804f5d5b36dda8b.jpg
1804f5d5b371b4dc.jpg

SOO next,
I'm going to install the front and rear suspension, install the engine, tranny and diff to make sure that theres no interference with the frame gussets.

At the same time .I'll cut the transmission crossmember and make it removable.

Start up the engine, then break down the frame and suspension components for powder coat.

Everything is ready
1804f5d5fac35eaf.jpg
1804f5d5b36b5daf.jpg


Cant wait to see a roller!!!!!
 
Last edited:
Yup, today was one of those days where you're just in the mood to work in the garage, the weather is nice, and you're feeling fine. No stress to get things done, but slowly checking things off the list. It's been a while since I've had the chance to get my hands dirty, and it was great to be able to help out.
 
Yup, today was one of those days where you're just in the mood to work in the garage, the weather is nice, and you're feeling fine. No stress to get things done, but slowly checking things off the list. It's been a while since I've had the chance to get my hands dirty, and it was great to be able to help out.


And there was NO blood shed!
 
Last edited:
After seeing MYBAD79's thread about his rear suspension, I didnt make any brackets but cut a angle and welded it there.

It's a bit overkill but this area was so badly welded that a bit more support wont hurt. (not that my welds are any better:sick:)


1804f5f5f19c78df.jpg
1804f5f5f1a3c63d.jpg
 
Last edited:
When time comes to look for parts, I get a little worried.
In my chaos, I was affraid I'd loose track of them.
But looks like I prepared well. (in my little world, this is good LOL)

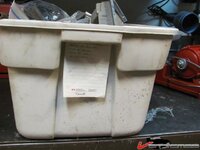
Each basket is labeled about the bags in the basket.

1804f5ff1564814c.jpg

And each bag was labeled with info on the parts inside.
in the bag on the left, the label says that one of the hanger is scrapped.
1804f5ff15676f1c.jpg

I'm not bragging here, I didnt invent this.

And trust me, I'm far from beeing organized.
I remember when I was dismantling, I tought I was over doing this labeling thing.
Today, I'm glad I did it this way.

Soo if anyone is following this, when dismantling,
LABEL EVERYTHING LOL
 
Last edited:
Soo if anyone is following this, when dismantling,
LABEL EVERYTHING LOL

No kidding. You never know how long your project will take, or even if it'll be you or someone else putting it back together. Good job Mike, this is better than having to buy parts you can't find or identify.
 
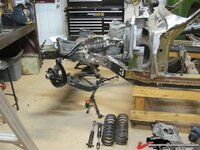
Ok I gathered all the suspension parts so I can reassemble everything.

It's a bit more work but I want to make sure that everything is there and by mocking up the frame I can see if there any ajustements to make before the paint.

So got the front in line
1804f5ffedda9d26.jpg

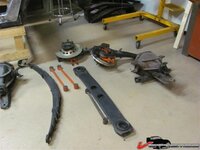
And the rear, got to tell you, I have 2 diffs, and both were on the top shelve.
80 pound a piece going down the ladder.... that was fun LOL

Anyway heres the rear ready for clean up and reassembly

1804f5ffeddd878c.jpg

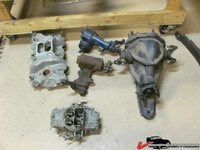
Later I think I'll have a few parts for sale huh?

1804f5ffede07f29.jpg
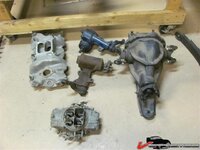
On the shelves I have the original set of springs, 2 steering box, a diff an old intake and the one of the carb that was on my Nova loooong time ago, it was on top of a 302 that came out of a Camaro.
This thing reved like crazy.
I dont think I'll sell that one.
Makes good garage art LOL
 
Eh, each his own work habits, but for decades all I have done is toss bolts into a bucket and dowse with gasoline to degrease, and sorting is simple, I go over the lot and wire brush them down, then divide them out by size on a piece of plywood, obviously a bunch of lets say head bolts for a SBC they all go by length and count in one area, the rest go by dia/length into other piles....

all like size bolts/nutz in a pile....

so upon assy again, I see I need 16 con rod nutz....easy, only two LARGE bolts for the rear mains....easy....etc....

I swear I could take any entire car apart and toss the fasteners into a couple drywall buckets, divided between large and small, and hardly miss a bolt...

I dunno, just used to it I guess....:surrender:

now when it comes down to some car I dunno about and it's going to take months to put it back together, I can understand marking some of the mystery parts....the ones you look at and say WTF was on their minds, the silly bastards....:eek::surrender:
 
I know what you mean Gene, but I cant trust myself with this LOL

If the bolts is not tagged and baggd, it's on the part it came from.

For example, on the diff, here..
half shaft, drive shaft, crossmember support bolts, I know where they are.

1804f5ffede07f29.jpg

When time come to clean up , paint etc, usually I do them one part at a time so fewer bolts to loose.
 
So, this morning I started to mock up the rear suspension.

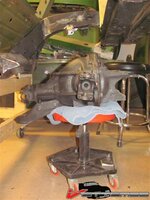
The frame is sitting on a wood buck and is a little high, the diff is about 80 pounds sooo a PITA to get it up there, hold it and put the bolts in by myself....

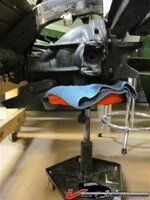
So looked at the little bench I was sitting on, it has an hydraulic lift....I then "transformed" it into a small lift LOL

1804f60d15be2348.jpg

All I had to do is to lift the little paddle and up the diff went, almost into position and was then way easyer to bolt on..

1804f60d15c18c8b.jpg

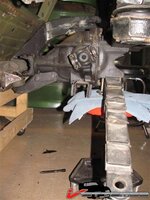
Did the same thing with the spring assemply.

1804f60d15c32e77.jpg

Starting to look like a Vette rear end huh?
1804f60d15c4a590.jpg

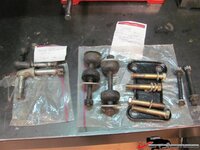
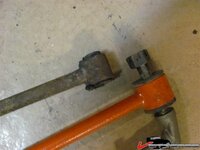
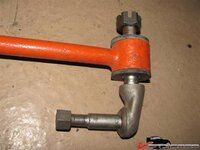
Now as I started to assemble the cam for the camber ajustement, I notice something that doesnt look right.

on the hanger side everything's ok
You can see that the rods are not the same as the originals but the diameter for the hanger is the same on both

1804f60d15c6dbc4.jpg

1804f60d15cb1d7d.jpg

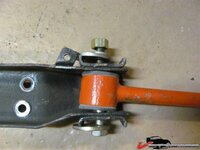
My concern is on the cam side,.
The cam bolts are significantly smaller and the rod is floating in there, is there a sleeve that goes in there??


1804f60d15c8eb5f.jpg

Both rods are the same, I dont have the old one to compare and in the GM assembly book theres seems to be no sleeves.

What am I missing here?

Maybe the cam isn't the right one, was too rusted to be saved and I didnt keep it to compare the size of the cam bolts


1804f60d15c6dbc4.jpg
 
Yes, the cam bolts are 1/2" you need a sleeve or get some proper adjuster sleeves and throw away the cams and drill out the hole in the camber bracket & use a square plate w/a 5/8 center hole to secure it.
 
Yes, the cam bolts are 1/2" you need a sleeve or get some proper adjuster sleeves and throw away the cams and drill out the hole in the camber bracket & use a square plate w/a 5/8 center hole to secure it.


Sleeve part ok but the hole and the sqare bracket...
Not sure I understand Marck.
 
Last edited:
I have a set of these struts and poly ends leftover .... i got the square plates too, pm me if you' re interesseted .....
I don't really like poly but it's good enough for a year or two, keep an eye on it ....
 
Last edited:
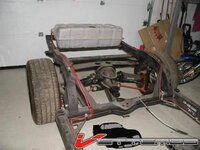
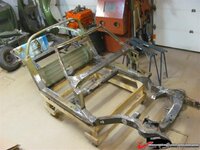
Well, it's been a while since this thing been standing on her own wheels.
I assembled the frame everything seems to fit allright.

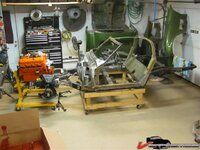
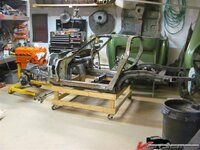
Next I'll install the engine and trans to check if any of the gussets needs to be trimmed to fit better.

I want to check if theres any parts that needs to be changed.

Everything on the suspension is new, except the lower control arms bushing, sooo I'll change them.
Also I'll check if the sterring links work proprely and wont interfere with the oil pan and such.
At the same time it will be a good time to start the engine.

1804f6e33e104ace.jpg

1804f6e33e1363af.jpg
 
Last edited:
Haaaa what the hell??

I couldnt resist seeing it partly assembled.

1804f6e8d77d32fa.jpg
1804f6e8d7812c40.jpg

Just fun to see it look like a car again

And by the way, the steering work just fine, no issues and nothing is in the way.
 
Back
Top