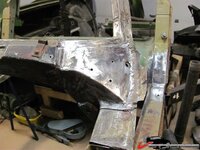
Michel's 72 coupe rebuild

VetteMod - Corvette Restoration, Modding & Performance Forum

Help Support VetteMod Forum:

Man that is a lot of work, I give you credit for bringing it back. I think I would have parted it out by now. Keep up the nice work and documentation.

Yes, for sure, no ****....he IS good, isn't he...:shocking::beer::1st:
 
I'm not sure exactly where Michel's Corvette came from, but given the general condition of local cars and the fact that it is now 40 years old, I'd say it's actually not in that bad condition. In any case, the rebuild is sort of therapeutic for Michel. :)
 
Gee guys, thanks.
I'm not used to that soooooo:blush::blush:

The car wasnt that bad, it sat since the 80's and most of the damages were in the rear of the seat area. the rest of the birdcage is realy sound.


I'm just trying to do what I can with very limited budget and tools, plus, I did a lot of research and not to many people want to tackle the birdcage in this way.

Theres not much info and pics, so if this could help somebody, hey maybe another Vette will be saved LOL.
Who knows????

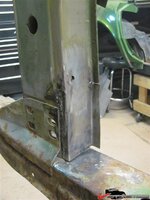
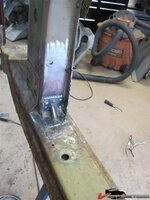
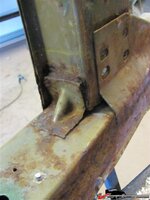
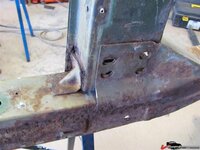
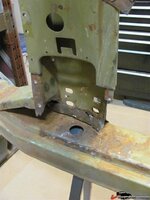
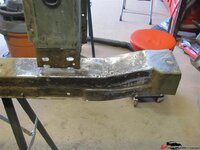
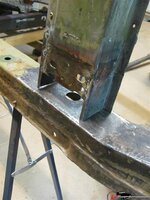
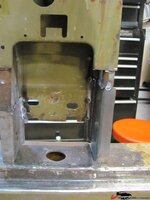
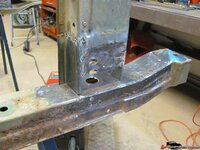
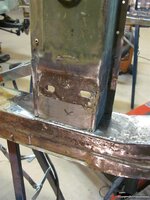
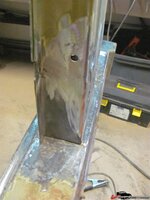
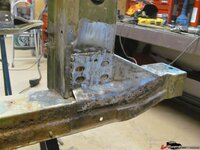
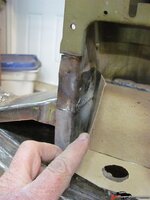
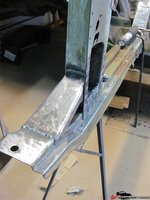
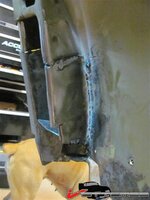
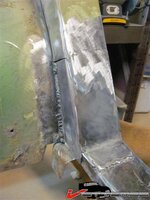
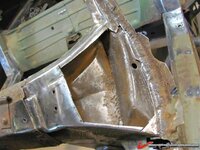
So heres the final on the drivers lower front pillar repairs.

I welded the parts together.

1804f0b37f97f662.jpg

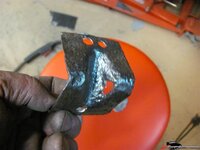
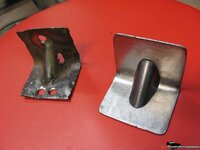
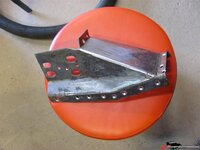
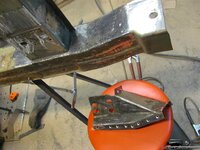
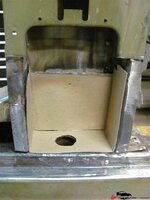
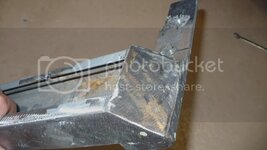
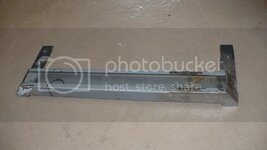
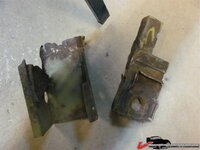
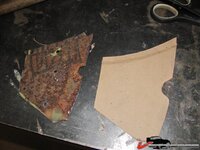
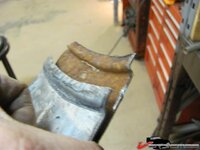
then I looked at my little bracket and decided to make another one, this one is chewed up by rust and too thin to work with.

1804f0b37f9c2ceb.jpg


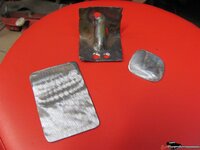
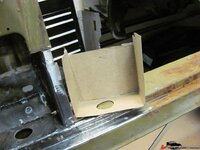
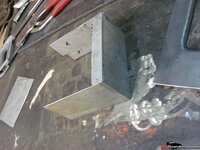
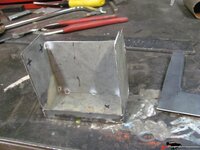
so I went thru my cut carboard and cut steel routine.
1804f0b3a95bbf2b.jpg


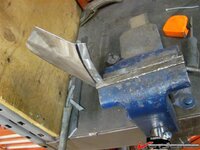
bent it 90deg
1804f0b37fa52f0d.jpg

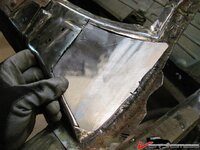
and test fitted them, I think this close enough.
1804f0b3bad4fa62.jpg

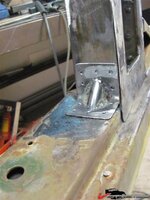
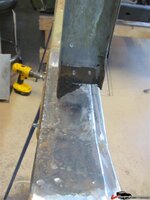
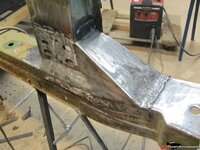
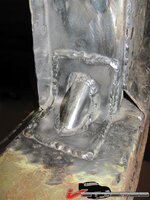
Of course I had to mess it up with my crummy welds:cussing:
1804f0b37fac6e55.jpg
1804f0b37fb0836c.jpg

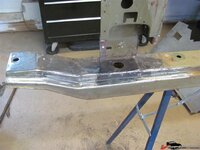
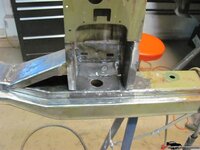
All theres left to do is to flip the birdcage upside down and punch the hole for the body mount.

I can do that later when I do the other side witch is next...because this side is done!
1804f0b37fb3465f.jpg

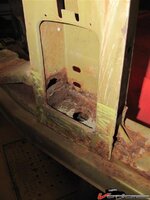
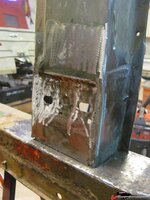
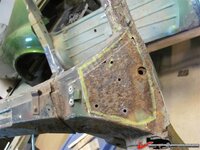
Now for the passenger side.... same challenge but a bit worse.

1804f0b46434dce0.jpg
1804f0b4643156d4.jpg
1804f0b46c2eede1.jpg


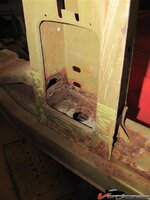
The channel looks like crap but seem solid, in any cases, after the sandblast, if the channel isn't that good, I'll double it with a complete insert inside.
 
Last edited:
Ok, I worked on the dump truck all day hauling rocks.
So tonight I had only a few hours to play in the shop.

I'm not going to bore you with too many pics since they will be pretty much the same as the driver side.

It will be a bit more of a challenge tho.

So heres what I got out of it tonight.

1804f0cf5d810d28.jpg

Heres what's left
1804f0cf5d867011.jpg

Like I tought, the channel, even if it looks like, hell is pretty solid.

I dont think I will replace it.

I do think that even if I patch it up, and weld an insert inside I wont lose to much solidity.

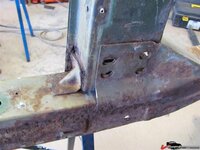
As you can see, the pillar needs work.

I think on this side, I'll make an inset like on the other side but the walls will be higher, doubling the walls of the pillar.

I'll see tomorow.
 
Last edited:
I tell you what man, you do THAT **** and you can build a MOON rocket....

Sears as Rowbuck....

Uhhh....I have this project.....


:suicide::lol::stirpot::clap:
 
Ok sooo heres some more of bubbas birdcage fix.....
I said I wasnt going to bore you with much of the same but...

I took out all the rusty parts and I didnt want to twist this guy. so I took it out first to get better access to the pillar.
I busted the spot welds and cleaned it pretty good.
1804f0de43fb85f6.jpg

Then I kept cutting until....
1804f0de43d04ad6.jpg

I then cleaned up the channel and like I suspected, it's pretty solid. Looks much prettier now huh?
1804f0de43d5a6d1.jpg

Enough cutting , time to rebuild.
1804f0de43da39cd.jpg

1804f0de43deda3f.jpg
1804f0de43e48cab.jpg
1804f0de43e8d650.jpg

Then the front lower part of the pillar .
1804f0de43ed52f7.jpg

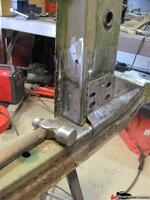
Tacked and welded everything together, then cleaned up the welds.

1804f0de43f28153.jpg

1804f0de43f71514.jpg

Next, I'm going to put this guy where he belongs.
1804f0de6652df6a.jpg
 
As an Amazon Associate we earn from qualifying purchases. Product prices and availability are accurate as of the date/time indicated and are subject to change.
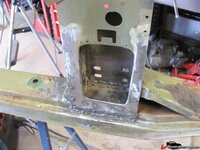
Ok sooo the lower support for the pass. side pillar is installed.
Welded and cleaned up.

1804f0dffd703f98.jpg

I cleaned up the spot welds since this is where the hinge will connect, I need a flat surface here.
1804f0dffd7538a6.jpg
1804f0dffd7994f8.jpg

Next, is make the inset and the front of the pillar acces to the body mount.
I'll also hve to make new holes for the hinges.
 
Last edited:
Nice work as usual. I keep thinking though, maybe it would have been a good idea to weld in some reinforcement bracing before cutting apart such important structural junctions?
 
Hi,

Very nice work you are performing on the bird cage:thumbs::thumbs:

The cage did not look too bad in the beginning of your thread but as always, you only see 25% of the rust. The rest is hidden...

Keep the pictures coming, interesting to follow your work!

/Daniel
 
Thank you very much guys.

Phil the inset bends will cover this from the inside.

here is the mock up of it
1804f0e1dc73f910.jpg
1804f0e1dc6e65ba.jpg

If you look at the way I did the inset on the other side, I'll make the sides longer so the welds will be reinforced.
1804f0e1dc784f17.jpg
 
Last edited:
Nice work as usual. I keep thinking though, maybe it would have been a good idea to weld in some reinforcement bracing before cutting apart such important structural junctions?

I know Phil and I remember that we talked about that.
I think Stinger brought that up too when I was considering taking the birdcage out.

The reason why I'm not too concerned is that before I took it apart I took the measurments.
I also have measurments and spotwelds location from the GM assembly manual.

I noticed that on one side of the pillar, the hinges holes were 1/8 higher than the other side so theres seems to be a lot of tolerances, and the hinges can move 1/2 inc from one side to the other. Thats why they use shims.

When I drilled holes to break the spotwelds, it left marks so I could put it back exactly in the same place. So that didnt worry me too much
the rest was a matter of putting the pillar 90 deg with the door sill and make sure the hinges holes on both side were at the same hight.
 
Last edited:
Hi,

Very nice work you are performing on the bird cage:thumbs::thumbs:

The cage did not look too bad in the beginning of your thread but as always, you only see 25% of the rust. The rest is hidden...

Keep the pictures coming, interesting to follow your work!

/Daniel


AMEN!!!:beer:
 
I guess I will have to be happy in ignorance, because I not tearing my car down to see the rust....

:crutches::goodnight:
 
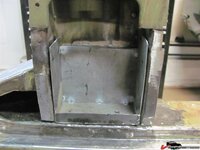
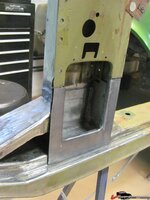
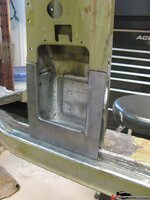
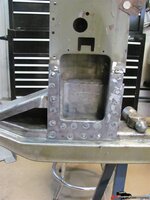
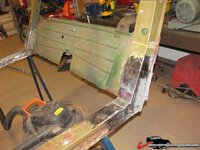
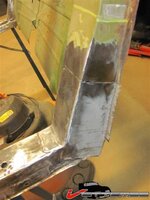
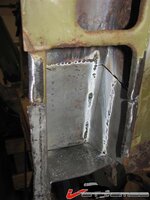
Well yesterday I did a bit of work on the cage.

Made the inset

1804f1039da11933.jpg

welded it together
1804f1039da5f723.jpg

Check for fit
1804f1039daa2d4b.jpg

Then made the cover
1804f1039dae678b.jpg
1804f1039db3a4ff.jpg

then welded the cover in place
1804f1039db886db.jpg

I didnt have time to finish, got to work at noon yesterday and just got home. pretty long day and I'm bushed


1804f1039dbd3dbf.jpg
compared to what I started with...
1804f0b4643156d4.jpg

1804f0b46c2eede1.jpg
1804f1039dc2b25e.jpg


I'll admit that this part (the lower front pillar) was scaring me a bit.
but I'm real happy how it turned out.
I still got to drill holes for the hinges and make the little support in front of the pillar.
and of course the holes for the body mounts bolts.
 
Last edited:
Again, very nice work:1st:

When I´m working on sheet metal I normally coat all surfaces difficult to reach after welding with a Zinc spray befor I weld the parts together. It gives good rust protection and ensures that rust will stay out a little longer.
However, it is a must to remove the paint where a weld is to be put, otherwise it is almost impossible to weld the parts...
Normally paint and rust inhibiting fluid will not reach all areas.
Just a tip from me with good intention!

/Daniel
 
Again, very nice work:1st:

When I´m working on sheet metal I normally coat all surfaces difficult to reach after welding with a Zinc spray befor I weld the parts together. It gives good rust protection and ensures that rust will stay out a little longer.
However, it is a must to remove the paint where a weld is to be put, otherwise it is almost impossible to weld the parts...
Normally paint and rust inhibiting fluid will not reach all areas.
Just a tip from me with good intention!

/Daniel

Youre right Daniel, I did not think about that at first.

The piece of steel I'm using is galvanized, at first I took off the coating off, because of the gasses released from welding galvanized stuff.

But after I left it there, you can see in the passenger's side pics that the coating is still on the steel.

I'll try to shoot some of the zink chromate primer or something similar where ever I can.

I always take ANY experiences from others.
thanks for the heads up,
 
Last edited:
Nice Work! Where did you learn your metal working/welding skills?

What are going to coat the cage with before you install it?
 
Nice Work! Where did you learn your metal working/welding skills?

What are going to coat the cage with before you install it?

No skills in welding, I first borrowed a welder (110v) and played with it, scrutinized over and over the welding sites. (weldweb, lincoln, etc.)
then I bought a 220v welder, this is the very first project I tackled with the new welder.

http://www.vettemod.com/forum/showthread.php?t=6090

My son is a welder and looked a lot at his books etc.

Metal working?? same thing, I just love rebuild threads, look at how they do things etc.
Troy Trepanier, Jeff Lilly, Roger at Ironworks etc. Now THATS major skills!

I do learn more by doing it tho.
If I need a particular part, like air bags support for a Mustang, I'll look at what metal I have in the garage.

I'll look at a metal shelves and if theres a bend I need in it, I'll cut it put it together.
Thats what I did with a support for air bag tank in FastPhil's Cobra.
Or for my part of channel that was rusted.


For the parts I used for the pillar support???

This was the back of metal box, Somekind of a industrial fridge I think, it was a little over 16 gauge thickness and a bit thicker than the metal used by GM for the cage. It was also galvanized,

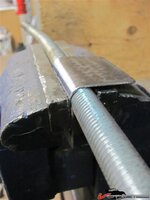
I just cut some carboard, cut the steel and bend it with the vise and hammer,
Need a radius? I'll take a 5 eights threaded bar and stick it into the vise and bend the metal over the bar.
no big deal. trust me LOL

The best part of all this????

Total cost of material used? a big fat zero!
Just a few cutting and abrasive disks.

And the cage will be rebuilded to new.. or better than it was anyway.

now for the coating? still debating, powder coat, paint, galvanized..... I dont know yet.

 
Last edited:
Here is some (ok, maybe a lot) more of Michel's handiwork. These pics are from the air suspension install we did on my 2003 Mustang Cobra. They're actually sort of in reverse order, so it may make more sense if you look at the pics starting from the bottom. If you're interested in seeing the build thread, you can check it out here:
2003 Mustang Cobra convertible getting Accuair e-level setup!

P1030727.jpg
P1030725.jpg
P1030724.jpg
P1030722.jpg
P1030719.jpg
P1030717.jpg
P1030436.jpg
P1030450.jpg
P1030432.jpg
P1030426.jpg
P1030420.jpg
P1030419.jpg
P1030405.jpg
P1030404.jpg
P1030320.jpg
P1030301.jpg
 
I didnt have much time to work on the car but since theres no work today I played a bit in the garage.

I started on the driver side lower pillar.
I didnt take too many pics since it's pretty much the same as the other side.

1804f359ae3a7538.jpg

1804f359a81bbcf1.jpg

1804f359a81ecded.jpg

1804f359a820f6f8.jpg

1804f359a824bfbe.jpg

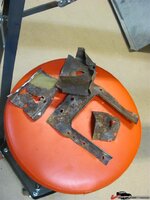
And part of the crap I took out on this side.

1804f359a8229123.jpg

not finished but enough for today, still have to finish the welds and fix the rocker.

Also I have to make insets for the rear of the birdcage body mounts to reinforce everything.

Then, it's going to be the lower windshield post area to fix,
all minor stuff compared to the front and back lower pillars, lol
Shouldnt be so hard to fix.
 
Last edited:
Heres another rust killing rampage on the birdcage.
Last night I finished the lower pillars of the cage.
Made the little support
1804f3982f9a2601.jpg

then cleaned up all the welds and trimmed the exess all over soooo I can call the lower pillars of the birdcage DONE!


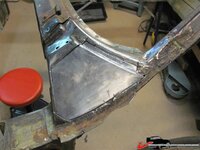
Today I tackled the lower windshield post on the driver side.
1804f39827374530.jpg

cut the rusted part out and cleaned up what I could the inside.

1804f398273ad333.jpg

Next, I went to my cut carboard and cut steel routine
1804f398273cf246.jpg
and came up with this
1804f398273f0574.jpg

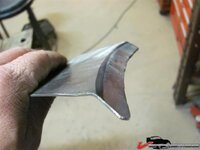
Now this is where it got a bit tricky, this part has a convex or concave in it depending witch side you look at it.

So I decided to mark and start bending the lip first.

1804f3982742a5b0.jpg

getting there slowly
1804f3982744c0d6.jpg
1804f3982746dc6b.jpg

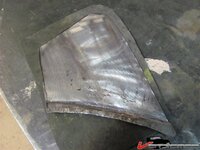
Then I took a piece of 1 eight thick rubber mat and hit the part with a hammer, this way I was able to get the concave in the part.
I dont know how to explain it (language barrier again lol ) but youll get it with pics.
1804f3982748fe8f.jpg

1804f398274b19a3.jpg

Then I trimmed it until it fitted good.

1804f398274d2141.jpg

Next, I'll fire up the welder and tack it into place and weld it.
 
Last edited:
bang up job, very nice. Love the metal forming tutorial here, should be a good help to a lot of folks. Excellent how you show how to get a lot done without expensive forming tools.
 
Thank you Marck, sometimes a little imagination and a few basic tools goes a long way LOL
I bet that it would be much easyer with proper tools but got no choice.


Next I welded it up

1804f3993ed1ba2c.jpg
1804f3993ed4fe89.jpg
 
Last edited:
Nice job, as always.:thumbs:
Don't forget to reproduce the rivet holes a the very same place before you scrap the rusted part, it will be critical when putting the front clip back.
 
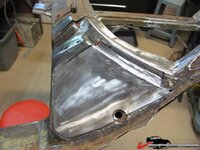
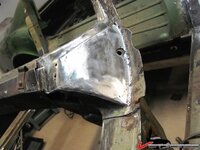
OK last night I was planning what I was going to do today, I noticed something that bothered me a bit.

The piece I had just made didnt look right.

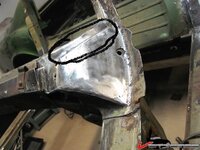
1804f3ad7cfe413d.jpg

The part I highlited was supposed to have a radius.
I was affraid the straight part was going to interfere with the windshield.

I compared it with the rusted part that I took out and decided to redo this radius.

so I did redo it
1804f3ad7d01f0c8.jpg

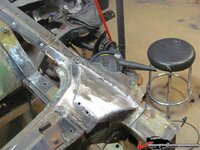
Next , I cleaned up the welds and patched up the front where the firewall meets the cage, drilled the holes for the rivets...
and called this one DONE!
 
Last edited:
1 Michel, you are a serious craftsman....no ****,

gotta ask what you do for a living, bet it's tech work of some sort....

:friends::loveletter:
 
Back
Top