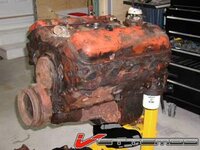
Michel's 72 coupe rebuild

VetteMod - Corvette Restoration, Modding & Performance Forum

Help Support VetteMod Forum:

1 Michel, you are a serious craftsman....no ****,

gotta ask what you do for a living, bet it's tech work of some sort....

:friends::loveletter:

I'll let him answer, but it's not tech work. :p

Then the only other field to exhibit that kind of passion for detail would be serious artist of some sort....
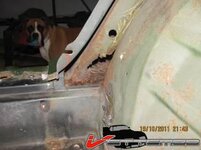
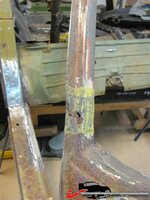
:D
 
Hahaha thats a good one Gene, I'm no artist, and trust me I'm far from beeing " technical"

I drive a truck for a living.
Used to be a highway driver but now I drive local, a dumpster or a big frigging cement truck LOL


Thanks for the kind word...
 
Last edited:
Hahaha thats a good one Gene, I'm no artist, and trust me I'm far from beeing " technical"

I drive a truck for a living.
Used to be a highway driver but now I drive local, a dumpster or a big frigging cement truck LOL

Here a link to my facebook page and the trucks I had thru the last 15 years or so

http://www.facebook.com/media/set/?set=a.62751764446.87763.673449446&type=3

Thanks for the kind word...

Link didn't work, but I believe you, but you STILL obsessive/compulsive.....

I"m more compulsive, most friends have shared same traits through the years, most being more obsessive.....

:smash::smash::thumbs::surrender:
 
What he conveniently forgot to mention is that he did at one time work as as machinist/fabricator. But he's a trucker at heart. :thumbs:

I have known and worked with a few trucker types over the years, both OTR and local....good men, but serious craftsmen, well maybe, but not that I ever thought of them that way.....

:smash::thumbs:
 
As an Amazon Associate we earn from qualifying purchases. Product prices and availability are accurate as of the date/time indicated and are subject to change.
Then the only other field to exhibit that kind of passion for detail would be serious artist of some sort....
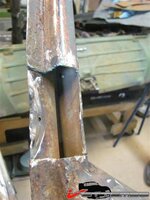
Now come on Gene, this is not metal body work or chassis welding or something like that.
Actually it's pretty ruff fabrication and I'm glad it will be all covered with fiberglass LOL

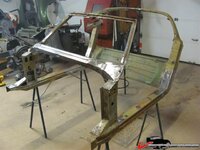
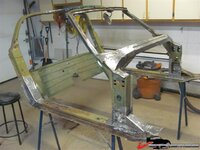
The reason I post so many pics is that when rechearching for birdcage repairs, I didn't find too many who tackled this and I dont think it's that bad of a job to do.
Besides... I didnt have much choice.

I'm glad that I decided to repair the birdcage.

I just cant imagine how the car would've turned out if I wouldve ignored that not so big hole
1804e9f807fc0cf3.jpg
 
Last edited:
Well another bit of work done.
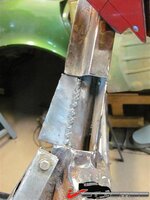
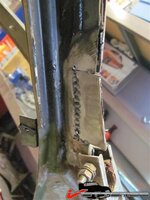
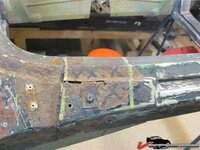
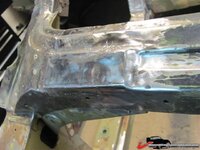
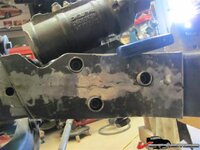
This is the lower windshield post on passenger side

1804f3c0665932a3.jpg

1804f3c0665be218.jpg

this part was a little thin so I replaced it too.

1804f3c0665e08d9.jpg

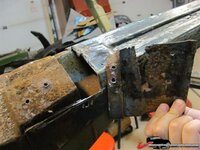
from behind
1804f3c066605c91.jpg

1804f3c06661e709.jpg

all welded, trimmed cleaned up and DONE.

1804f3c066645be0.jpg

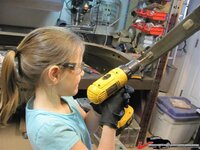
This afternoon my niece asked me to go and pick up one of her daughter at school, she... hahem, "didnt feel well".

I went to school and picked her up, once home, she went for the TV watching cartoons while I was in the garage.

She always ask if she could help when I'm in the garage and this time was no exception.

Sooo I guess the cartoons were a bit boring, she showed up in the garage.

I said I didnt mind as long that she felt ok and her "tummy hache" wasnt too bad.

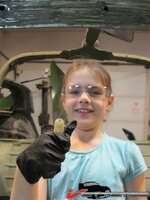
She took a drill and busted the rivets of the inside upholstery holder on the post I was going to work on.

Pretty serious too dont you think???
1804f3c06665ee2b.jpg

1804f3c066683bf0.jpg

Then she returned to her cartoons.
 
Cute kid, reminds me of my shrimps when they WERE shrimps....

took a girl scout troop into the garage and jacked up one of my cars, and showed them/let them change oil and filter, and do brakes on the front discs....the rear drums went undone, that's a bit much for little girls....

:rofl::D:loveletter:
 
Last edited:
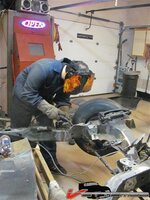
Allright here we go again.

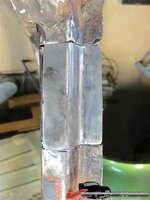
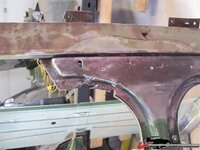
This time I'm doing the lower windshield

1804f3c32f80b8a0.jpg

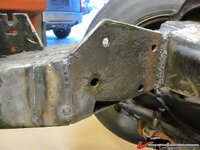
I started by cutting the rust away first.

1804f3c32f842f52.jpg

Then after a good pass of wire brush I was pleasantly surprised.
I tought I was going to have to rebuild this side too but it's very solid.

1804f3c32f865636.jpg

This is what I took out
1804f3c32f888c94.jpg

And this is what's going in.
1804f3c32f8ce204.jpg

A few adjustments and trim.

1804f3c32f8acef2.jpg

And weld, cleaned up and this one is DONE too!

1804f3c32f8ef1aa.jpg

I think that all is left to do is a little part between the rear of the T-Tops and I'll stop bothering you with the birdcage repairs. LOL
 
Ok soooo heres another session of rust repairs on the birdcage.

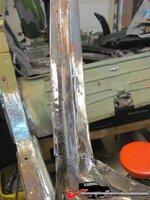
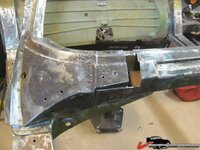
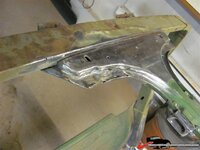
This time I repaired the area rear of the T-tops.

view from the top
1804f3d5a837135e.jpg
from inside
1804f3d5a832aea8.jpg

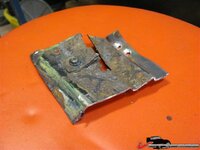
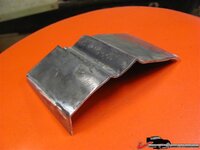
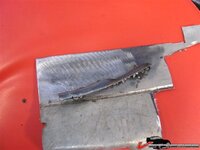
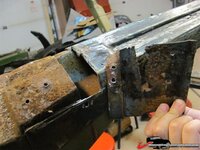
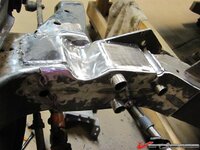
I didnt know how to reproduce the 2 bends and since it was solid material I cut it and welded it on a piece of steel that I was going to trim later.

1804f3d5a839d651.jpg

I then welded the part back on with the new steel.
1804f3d5a83bf932.jpg

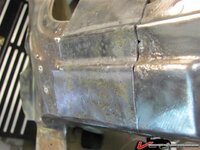
trimmed it and did the other side
1804f3f00f634087.jpg

1804f3d5a841df72.jpg

So here it is, all patched up and ready for sandblast, paint powder coat, galvanize,Por-15 ....I'm still not sure yet.


1804f3d5a844c572.jpg

1804f3d5a846f7e6.jpg

You'll notice that I also did the lower windshield too on the driver side.
When I did the passenger side, I noticed that theres seems to be water that accumulates where the 2 pieces overlaps.

It's welded now on both sides, water wont get there anymore.

1804f3c32f842f52.jpg
so might as well do the driver's side too huh?

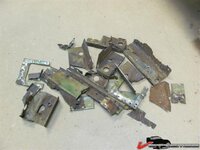
and heres part of the crap I took out
1804f3d5c0ea5fc5.jpg
 
Last edited:
Ok so since the birdcage is done, I can go on and get to the next project.
The Jeep steering install.
A while ago I started to install it but I wasnt satisfied with the results.

I didnt have much time to play in the garage and was rushing.
Resulting bad parts and I trashed everything and I just put the project aside.

This time things will go much better.

Before I took apart the body, I took all the measurments and mocked up the body on the frame and the box in place.

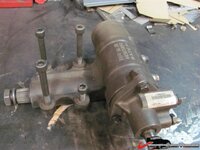
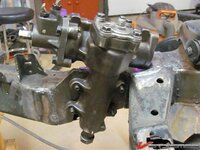
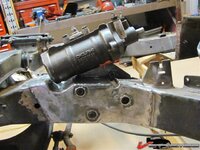
The steering box is from a Grand Cherokee 2004.
1804f3e42be52e61.jpg

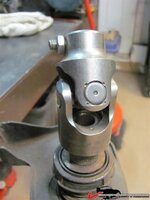
I bought a Borgeson stering knucle to replace the old rag joint.
1804f3e42be75082.jpg

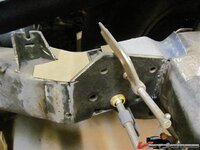
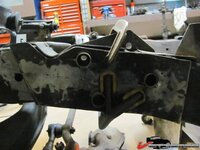
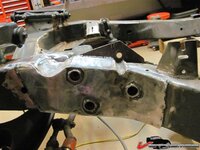
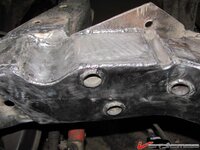
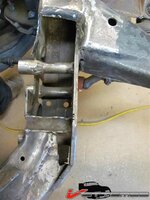
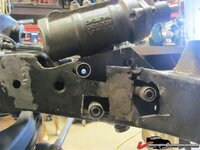
The frame was cut to make room for a quarter inch plate that wil support the box, 3 bolts will go thru the frame and one will be on top of the plate

1804f3e42be1f258.jpg

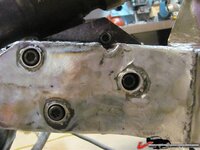
Inside that plate, I welded 3 tubes that are going thru the frame.
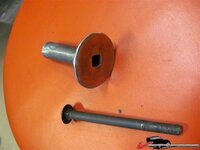
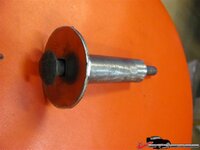
1 eights of an inch thick washers were welded on the tip of the tubes so when I tighen the bolts, the frame wont crush and the bolts will sit straight.


For the outside of the frame, in the wheel well, I made a plate to cover everything and the tubes will protrude, they will be welded and trimmed so they wont interfere with the wheel movement.
1804f3ef71d9500b.jpg
1804f3efaee8e370.jpg


Then I put back the front suspension and steering links together and
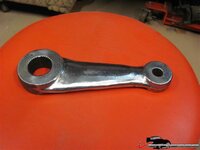
cut and tacked weld the pitman arm making sure I had the correct alignement.


I know I know these things cant be cut and welded...

My son was working at a welding place and they specialise in pressure boiler making and repairs etc.
He took it to work and they determined what kind of metal it was.
They heated it up, TIG welded it, and put it in somekind of a sand box to let it cool off for a day and a half.
So I think this should do the trick.

1804f3ef71d2ef6f.jpg
 
Last edited:
Sorry guys if I'm not that clear about all this, You have no idea how hard and frustrating it is to explain something like this in another language LOL

I'll post pics as I go along, it will get much clearer...
 
Last edited:
Sorry guys if I'm not that clear about all this, You have no idea how hard and frustrating it is to explain something like this in another language LOL

I'll post pics as I go along, it will get much clearer...

we've got quiet a few members from outside the US, don't worry ... your English is great, I'm sure I'd had more difficulties understanding your French :smash:

keep up the impressive work and keep the photos and updtes coming :thumbs:
 
Good to see my girl is having a good time with uncle Mike. Maybe she'll one day help me work on one of my cars in my own garage (when I get one)!

Nice work Mike, can't wait to stop by and see it in person. Been too long.
 
Sorry guys if I'm not that clear about all this, You have no idea how hard and frustrating it is to explain something like this in another language LOL

I'll post pics as I go along, it will get much clearer...

we've got quiet a few members from outside the US, don't worry ... your English is great, I'm sure I'd had more difficulties understanding your French :smash:

keep up the impressive work and keep the photos and updtes coming :thumbs:

thanks MYBAD79
 
Good to see my girl is having a good time with uncle Mike. Maybe she'll one day help me work on one of my cars in my own garage (when I get one)!

Nice work Mike, can't wait to stop by and see it in person. Been too long.
Thanks Phil, Eve is always curious about the car and what's going on in the garage LOL.

Pretty cool.
 
Last edited:
SO here we go, I have a few hours and today if I'm lucky the welder should come home and I'll kidnapp him to do a bit of welding LOL.

Anyway here s where I am so far.

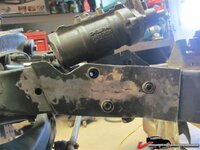
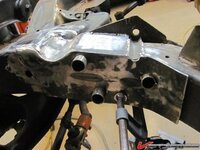
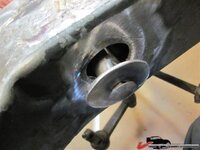
Heres a view of the small tube capped with a washer so the bolt sit straight.

after that I welded a bigger tubing that will protrude out of the other side of the frame.
1804f414c50c6606.jpg

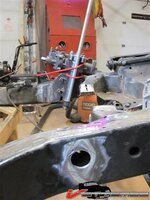
Next, (I know ,I know this looks like crap) I made holes to make room for those tubes.

1804f414c511b373.jpg

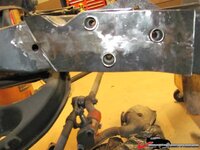
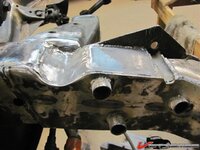
I then formed a plate to follow the frame contour (that was fun) and drilles holes for the tubing.
that part is on the outside of the frame or in the wheel well, the bolts are not all the way in yet.

1804f414c514207c.jpg

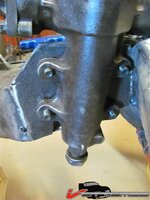
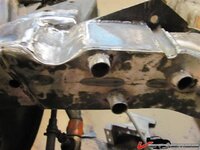
heres the steering box mocked up to show how it will be held to the frame.
the bolts sit straight on the washer.
the washers are a bit over 1 eight thich.

1804f414c50e9479.jpg
1804f414c5168955.jpg


And heres how it will look on the other side of the steering box.

1804f4154d89ad7e.jpg

1804f414c5168955.jpg


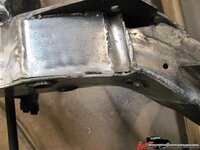
Now if this plate passes the inspection of the welder, it will be welded to the frame and the tubes will also be welded, then whatever protrude will be cut and trimmed.

1804f415585bd594.jpg

1804f414c5168955.jpg


and on the top of the frame a plate will be made to cover and tie everything together.

Note here that the outside plate is just sitting for the pic, it will fit much tighter than this...
1804f4153bae3e8e.jpg
 
Last edited:
The reason I installed it that way is that IF ever I have a power steering problem, I will be able to reach the bolts from the wheel well instead of inside the frame in the engine bay.
 
Ok so here we are again.
My son Steven got here and we started fixing bubbas (His dads work LOL work)

1804f419ef8e6b8d.jpg

He first reinforced the welds and made a few passes to join the quarter inch plate to the engine support.
1804f419ef915b92.jpg

Then we went for the top of the frame, installed the plate and tacked in place the side plate that I had previously made.
By the way he reinforced this plate before.

1804f419ef93b50e.jpg

1804f419ef95ef4d.jpg

He then started to weld the tube to the plate.
1804f419ef984cb3.jpg
1804f419ef9af451.jpg

Once the tubes were welded, I cut the protruding part.
1804f419efb19542.jpg

And cleaned up the pieces to make them pretty for the pics.
1804f419efb3fe54.jpg

Then, he made a pass on top of the frame.
1804f419efb61955.jpg

Soooo here where we are today, since he had to work tonight he had to go.
Next, I'll turn the frame upside down, make the last plate under and finish up everything.
 
Last edited:
I know you've been dreaming of this very moment for years. Enjoy the achievement, you deserved it my friend.:drink:
 
I know you've been dreaming of this very moment for years. Enjoy the achievement, you deserved it my friend.:drink:

Thank you my friend ;-)
I know he works hard and doesnt have much time, but it was fun to get my boy to work with me.

About the Steering install...
Might not be the most orthodox way to install a Jeep steering but I think it will turn out ok.
 
Last edited:
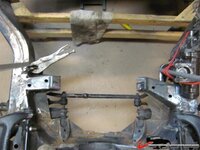
So with the steering in place I want to align the idler arm to make sure that it's on the same axis the steering box.

(Gee...I'm not sure if that's clear) :eek::eek:)

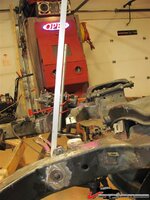
anyway, I first installed a temp tubing that is aligned with the steering box.
I used the center markings on the box housing.
1804f42a07684ad9.jpg

Note that on the idler arm side of the frame, I punched a hole where I'll position the new location of the lower bolt that retains the idler arm.
This will give me room to rotate the idler arm when I align it.
(crap this is getting more confusing... more pics will explain)


Then I made a plug for the bolt and welded a tubing so when I tighten the bolt, the frame wont crush.

1804f42a076a9ca0.jpg
1804f42a076cafe4.jpg

I then installed the Idler arm and will tack the plug later when the alignement is determined.
1804f42a0777746c.jpg


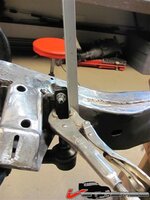
I then installed the idler arm and using a piece of alu angle, I put it against the idler arm.
This will way I'llbe able to align it with the piece I put on the steering box previously.

1804f42a076eb38e.jpg

Here I rotated the idler arm until it was the 2 pieces were aligned as close as possible.
1804f42a0770dc94.jpg

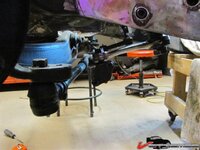
view from under and the idler arm seems to be on the same axis as the steering box.
1804f42a07730fb6.jpg

view from the top
1804f42a0775362b.jpg

Once aligned, I will only tack weld.
I will then assemble the frame, suspension springs, drop the engine, trans and diff wheels and tires etc.

Then I'll see if everything works fine (suspension and steering) adjust the alignements, make sure nothing hit anywhere, (oil pan, headers etc)
Then I'll weld everything in it's final position.
 
Last edited:
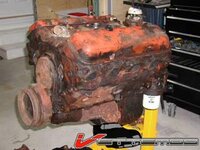
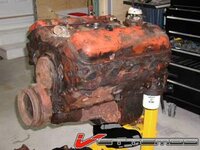
Oh yes, put the engine back in.....
1804f42ac6d115ff.jpg
HUMMMM.....

YGTBFKM....that is NOT the engine that came outta your vette....

no WAY man, looks like a junkyard relic from some overworked pickup....

:surrender::eek::suicide:
 
Oh yes, put the engine back in.....
1804f42ac6d115ff.jpg
HUMMMM.....

YGTBFKM....that is NOT the engine that came outta your vette....

no WAY man, looks like a junkyard relic from some overworked pickup....

:surrender::eek::suicide:

Actually I think that is the engine that came outta his vette... but it looks better than that now.
 
Oh yes, put the engine back in.....
1804f42ac6d115ff.jpg
HUMMMM.....

YGTBFKM....that is NOT the engine that came outta your vette....

no WAY man, looks like a junkyard relic from some overworked pickup....

:surrender::eek::suicide:

Actually I think that is the engine that came outta his vette... but it looks better than that now.

Looks like it lost a round or two, some Florida alley gators beat hell out of it....

you know, rednecks with tats and caps on backwards, smokes hanging in lips....

:smash::smash::smash::thumbs::eek::surrender:
 
Back
Top