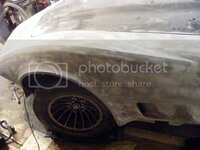
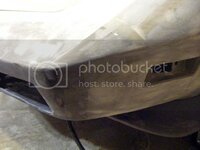
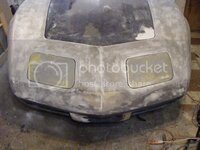
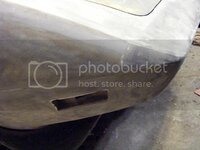
My '76 restoration (long post)

VetteMod - Corvette Restoration, Modding & Performance Forum

Help Support VetteMod Forum:

Denpo, sure wish i could have helped with the nose emblem. Its just one thing after another here. Good news is the 1st vmc will be in place next Tuesday. I am so far behind now though it could be 2 months before I could get to your project. Glad you found somebody to help you.
Scott
Glad to know you're moving foward and away from your misfortune.
Who knows how far I'll be in two month? The story ain't over.
Stay tuned :beer:
 
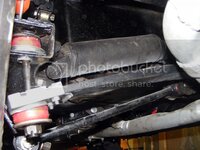
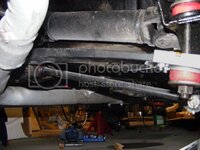
Last week I had a little bodywork break, and decided to install a Xmass gift :

monospring2_zpsb8da06a3.jpg

monospring1_zpsea96c9d8.jpg


VBnP 330lbs monospring. Big thanks Aaron, haven't felt that Xmassy for a long time. I still got to assert the insulation, I will probably extend the stock heatshield somehow, or wrap the exhaust on the particular area.


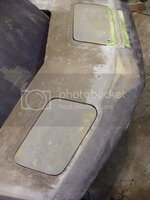
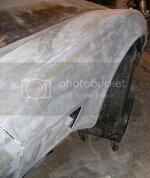
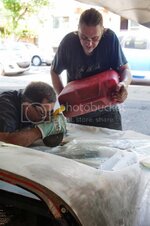
Then back to bodywork. I finally made the no-return leap and installed the front bumper for good with 3M 8115.
Then started the glassing of the seams and the overall shape.
Even with pre installation adjustment, I still have a lot of areas to fill.
bodywork-43-glassingfrontbumper_zps24fc0a2a.jpg

Once it's done I can finish mudding the front of the car. Then I'll decide if I want to start the rear window mod. It's all about time.
 
Front is almost done, bodyworkingly speaking.
Still details here and there, but the front spoiler is finally glassed in and I could mud the whole front.
As already said, the front clip is from a failed resto, and it show the guy to started was pretty heavy handed with sanding tools.
I surely added my share when razor scrapping the lastest remains of paint.

bodywork-45-frontfinished_zps9449a482.jpg


bodywork-46-frontfinished2_zpse27947a1.jpg


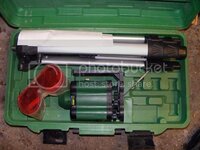
I bought a laser level at a garage sell, it's gonna be usefull for making the centerline perfectly aligned.
bodywork-47-frontfinished3_zps1404ea3d.jpg


bodywork-48-frontfinished4_zps0eb51e0b.jpg


bodywork-49-frontfinished5_zps3011e469.jpg


Of course I still have to set the door free many other detail, but I thought this was still update-worthy.


I also make a set of SS mounting tab for the front spoiler
bodywork-44-frontspoilertabs_zpsbf9d5a34.jpg

I'm thinking about adding a layer of fiberglass to the back while installed, to force it to keep the desired shape...
 
Your doing a lot better than I am. I am trying to get my daughters boyfriend involved with the resto. Time will tell lol.
 
Your doing a lot better than I am. I am trying to get my daughters boyfriend involved with the resto. Time will tell lol.
Thanks man!
Time told me the novelty factor fade off rather quickly.
As soon people find out you're still months, if not years away from completion they stop showing up, and I just can't blame them for that.
I still can call them from time to time when I need help on stuff you can't do alone, but I do alone all I can.
 
Ok guys, time for an update.
Lots of little works here and here, nothing spectacular, but necessary.

First I made what I hope is my lastest Summit order.
Bought a fire extinguisher, I guess it's kinda necessary with those cars.
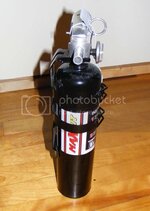
fireextinguisher_zps9cce77fe.jpg


Also bought a set of studs. I switched to M12 1.50, a tad bigger.
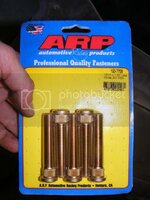
ARPstuds_zps32eb7857.jpg


As I installed them on the front hub I also did something I initially ommited : changing the bearing cups. At the time I only changed the bearing themselves. Now I have a press it's a quick job.
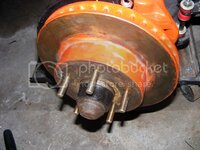
ARPstuds2_zps5d6c15c2.jpg

Excuse the crappy paint, it's just for rust prevention.

Also on the list, a new set of ligths, those are sealed halogen, They are 8$ each, when I saw the price of the unsealed conversion I prefered to count on my relay mod to get good lighting.
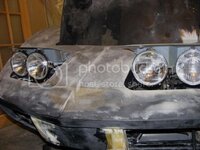
headlights2_zps36ac3e09.jpg

I started doing polishing work, on the left the rings are polished, not on the right.


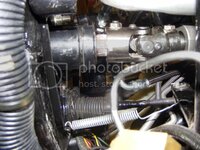
I also realigned my steering column. After speaking with guys at Borgeson, it appeared my column mis-alignement was a possible casualty of the Borgeson swap.
So I removed the column and grinded a flat on the shaft at the correct angle.
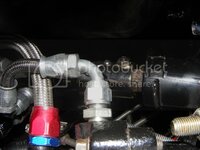
U-jointalignement_zpsf082fc83.jpg

U-jointalignement2_zpsbbd96a93.jpg


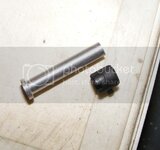
Another small fix was the horn button on the column. I a pin that mounted on a spring that was too short. I had a new one machined.

Now the steering system is complete from the wheel down to the wheels.
willy_nilly.gif


Another small work, I fixed a crack in my front grill :
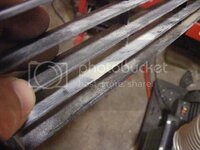
Frontgrills_zpsf484445a.jpg

To be honest I don't know yet if I'm gonna use them, just in case...

I also received a set of french lock from a forum member (thanks 1970greenLS5 ). They are installed.

I also received a set of brand new door panel I bought from Rogman. I initially painted all my interior part with some sort textured spray-able vinyl, I was aiming low, trying to mask imperfection.
Now with those door panel, no more shame.
So I stripped all the paint, I'm gonna repaint everything the correct Corvette black, just paint.


I also sorted out all the engine bay wiring, especially the electric headlight actuators.
I'd like to be able to do some electric tests soon, that would be the first step toward restarting the engine.

 
As an Amazon Associate we earn from qualifying purchases. Product prices and availability are accurate as of the date/time indicated and are subject to change.
It's looking great. Did you have to drill out the wheel hub or your rotor to get the 12mm studs to fit? I would also like to see the front so I can see the front spoiler when you have time. I bought the two side pieces of my spoiler for almost nothing but I still need to figure out what I want to do about the middle piece.
Thanks,
Darren
 
Last edited:
It's looking great. Did you have to drill out the wheel hub or your rotor to get the 12mm studs to fit? I would also like to see the front so I can see the front spoiler when you have time. I bought the two side pieces of my spoiler for almost nothing but I still need to figure out what I want to do about the middle piece.
Thanks,
Darren
Thanks Darren.
Yes I had to drill them. Since I did the drilling ages ago, I just can't tell you for sure what size I used. I think I took the smallest drill bit size that wouldn't fit in the hole (1/16 or 1/32 larger). Very little metal have been removed.
For the front spoiler check post #386 you'll see a complete view.
I ruled out the 3 pieces pace car style spoiler, it was made from piss poor mold I got for 20$ (you can call me captain Cheap), and the resulting side pieces would have taken me way too much for to make fit. Plus I learned you have to shave the wheel arch lip at the front, which I was reluctant to do.
I opted for a one piece spoiler you'd find in pre-pacecar car era. Smaller, rounder a the corner,probably less effective but visually more pleasing to my own taste. To each its own.

Just as I glassed in the bumpers, I will leave the spoiler as a separate piece because it has a great potential to be crushed or damaged at some point. Which is ok because I did buy a pair of them (75$ for the two, how could I resist).
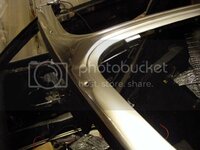
Speaking of good deal, today I bought a set of mint door glasses and an undented T-top bar (you know the chromed H-shaped trim between the T-tops), 130$ for the lot. Not too shabby.
 
Nice to see some progress, i haven't done anything to my '79 in month ... New body mounts are still in the box/bag ....

What wheels are you going to run and what are you doing about the lug nuts? 1/2" might be easier (better availability) ?? Or maybe the lug nuts I sent you fit? I think those are M12 with conical seat....
 
Nice to see some progress, i haven't done anything to my '79 in month ... New body mounts are still in the box/bag ....

What wheels are you going to run and what are you doing about the lug nuts? 1/2" might be easier (better availability) ?? Or maybe the lug nuts I sent you fit? I think those are M12 with conical seat....
Thanks Karsten, no wonder the Vette feels lonely, you've been doing great job on the Karmann.
Wheel will be Turbine wheels, didn't you know already I'm totally nut about those wheel, praying one day someone produce 17" replica of them.
Funny fact, when I search for "Turbine wheels" on Google Image, a pic from my thread is 6th in the list :eek:. Searchs are personalized, so maybe it's just me.
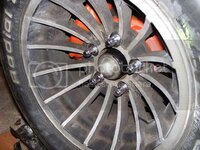
The M12 choice comes directly from the spaces you sent me, I'm just sticking with that. I bought a set of M12 conical, with the matching oval washers.
wheels2_zps42064695.jpg

I'll have a ring machined to fit the hub to the wheel, it's just that I'm wondering if it's not gonna be a hub cap at the same time, I got to talk with my machinist about that.
 
First a flash back from my previous post.
Here the contact pin I had to made redone. For a reason that escape me, the stock one was waaay too short.
interior-6-horncontact_zps995794c1.jpg


interior-7-horncontact2_zps83ebb5b6.jpg

Sorry the original one was nowhere to be found at the time of picture, but it was at least 3/8" shorter.


So I got sick for the moment doing bodywork. Too hot anyway. So I got back to the interior.

I'm getting better at the polishing, spent some time on the T-bar chrome trim I just bought. It was (almost) dentless, but full of scratches.

interior-4-Polishing_zps82a1ea1d.jpg

interior-5-Polishing2_zpsdff1b01a.jpg

Still not perfect, deepest scratches still shows. I'll make a second pass, I just didn't want to rush it.

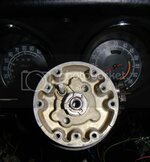
Then I decided to reinstall my driver side dash.
I decided to redo them once again.
-Repaint the back from blue to white to match led backlight.
-Installed a ring of led in the backside, will be hooked to a dedicated dimmer.
-Stripped the chrome rings, re-polished the edges, repainted it black semi flat.
-Repainted the pad itself the Corvette correct "Landau Black"
-Finished wiring my headlight actuating signal wire, when I first did the mod it was rather hacked.
-Polished the plastic screens.
-I cut the pesky tab on the column support that force the ODO strip reset cable to an hard blend. So hard in my cable it couldn't function. At first I though I did something wrong, checking and checking again. A search on the web revealed it's a original GM loosy design that stuck. Boy this one got me nervous.

interior-3-dashinstalled_zpsbec67aac.jpg


Bonus pic, you gotta love NOS parts :
interior-2-NOS_zps03b3489b.jpg
 
Not much done this weekend, I'm reviewing my electric harness, I'd like to reconnect the battery ASAP.
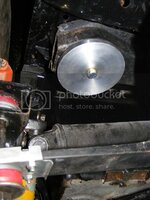
In the meanwhile my machinist found time to make me something I told him about a while ago :

Rear crossmember stabilizer discs

rearcrossmemberstabilizer_zps4755bdb4.jpg


Some may remember my ghetto laser level.
Well, something it's not even worth ghettoing.
I snatched this on my way to the market, the guys was running a small garage sell on his front porch, 10$.
laserlevel_zpsf7b1bd69.jpg

Cost me as much in battery, works like a charm.
 
It happened an hour ago: the engine cranked!
Except occasional maintenance hand crankings, the engine haven't moved for almost 3 years.

I've sorted out all the electrical bug I've encountered so far, a mix of missing ground, unconnected wires and DOA light bulbs.
I had to reposition the ignition switch which was too much backward and the rod couldn't get it fully engaged.

Feels good to know the electrical of the car is 60% done and enough to get it started.

No weird noise from the starter, looks it is sufficiently engaged, let's hope it's not too much. I wish I checked that when doing my T5 mod.

I've check the dizzy, it gets juice, so it should just need some gas to start for good.

Checked so far :
-Headlight motors
-Ignition (switch, starter and dizzy.
-Brake indicator light
-Flasher
-Headlights
-Brake light (from handbrake and ignition switch)
-Bright indicator/dimmer switch conversion
-Dash lights
-Window motors
-Blower
-rear storage light

Still to be checked :
-RPM gauge
-Fuel tank sensor
-seatbelt indicator
-open door switch
-Courtesy lights
-trunk light
-Backup up light (can't get the T5 into reverse, may have to let the tranny turn a little for that)
-wiper motor, still have to look at how let them run without the windshield. If I remember correctly the wiper motor has a lot of torque.
-Radiator fan
-cowl flap actuator.

Next weekend sounds like a good time to let the beast roar again
rock.gif
 
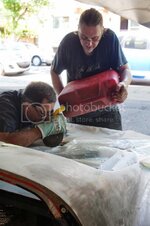
Today was the day.
The vette has finally been started.
Michel, Sylvain and Jo came to help, thanks guys!
Didn't take that long for the carb to fill in. It first ran on 7 leg, because of the timing light connector.
Once the header paint has cooked and the fogging oil have been burned up, we saw no smoked.
After I tuned the clutch I even put it in first have have to make its first meter on its own power.
Two year in a row I've been bragging about the fact it would run very soon.
Well, now it's done.

[ame]http://www.youtube.com/watch?v=NlKL77XK8NE[/ame]

[ame]http://www.youtube.com/watch?v=6elmtpORhOw[/ame]

[ame]http://www.youtube.com/watch?v=USrqEgmvGSM[/ame]

[ame]http://www.youtube.com/watch?v=jENfOE3sA7o[/ame]


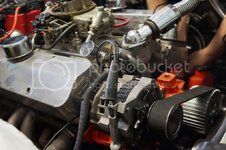
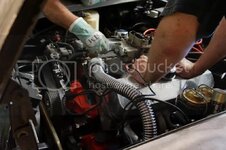
Pictures by Sylvain (this mofo has such a better camera!)

DSC02215_zps8a055b7d.jpg


DSC02217_zpscc73dd6c.jpg


DSC02211_zps4ef7d8f9.jpg


You gotta love my ViseGrip/Shifter handle.
DSC02212_zps289fd509.jpg


DSC02216_zps0393e7b1.jpg


The power steering side didn't go that smooth, I'll post detail about that later.
For now it's time to celebrate, BBQ time!!!
 
Awesome, looks like you'll be driving soon....

Not much clearance between pulley and the frame brace, huh ??
 
Congratulations! Always cool to see an engine come back to life. Gotta love the sound of the cog drive. Can't wait to see/hear it running on all 8!
Thanks Phil, and wait no more :

This video was taken just when the above video finish.
Once the engine is warm it keeps the idle.

[ame]http://www.youtube.com/watch?v=0CAWEkjX3VY[/ame]
 
Last edited:
excellent

Ahh - Soon for me -- I wish and hope.
Regarding the previous photo of engine bay -- "The Gauges"
http://i1248.photobucket.com/albums/hh481/denpovette/DSC02216_zps0393e7b1.jpg
Are they (2 - I guess) Power steering pressure and Brake - or??
An Inquiring Mind wants to know.

Nice Start-up too - Cheers Jim
Thanks Jim, thank Aaron.

Gauges are mechanical oil pressure and water temp.
I plan on putting electric sender back since I want to make my own digital gauges, but so far I reused the mismatched set that came with the car.
We didn't really take time to see how hot the engine get. Concerning the oil pressure it seems to follow a rule of 20 psi by 1000 RPM.
I read it's supposed to be 10 psi by 1000 RPM.
Maybe then engine has been rebuilt with some kind of high pressure oil pump.what you guys think?
 
I mentioned earlier that I was still having problem with my Borgeson steering box. Well turned out I hooked it up the wrong way, doh.
Redid the hose, fired it up yesterday, and it's all good.
I also had problem with the reverse speed, it was the shifter that wasn't allowing enough travel, once adjusted, all the speed are
engaging nicely.

If I was living in the country side, with no cops around, I could take the car for a little spin, since it now runs, stops and turns as expected.
As I live is a rather crowded area, I'll have to wait until I put the taillight, the licence plate and the front flasher back on to do so.
 
I mentioned earlier that I was still having problem with my Borgeson steering box. Well turned out I hooked it up the wrong way, doh.

Oh, I missed that one. lol
No you didn't buddy.
As Sylvain said on CF I should have listened to you.
You mentioned the hypothesis, but I was way too cocksure I had it right.:tomato:
Thank you again, you really nutured the car back to life, double checking everything and nipping problems in the bud.
The power steering leak we saw was probably due to overfill, No more leaks so far.
 
Awesome, great to see you got it back to life !!!!!

Oil pressure? With cold oil you can see 70 or 80 psi when you rev it to 2500 rpm , as much as 50 psi at idle depending on what oil you use .... It's probably a high pressure/high volume pump if you see that much pressure, I'm using the melling hv pump that is advertized to deliver 25% extra volume, i am soon downgrading to the 10% extra volume pump, think the number is 10551 or so ... Once the oil is hot it's all good but when cold it's stupid high pressure....

Now the reason for the HV pump is the better stronger housing, the stock Melling pumps have very weak castings, I have a thread with photos on that topic ....
http://www.vettemod.com/forum/showthread.php?t=9074&highlight=Pump+casting
 
Last edited:
Back
Top