SBG's C3

VetteMod - Corvette Restoration, Modding & Performance Forum

Help Support VetteMod Forum:

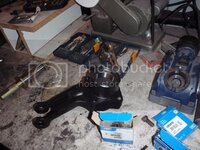
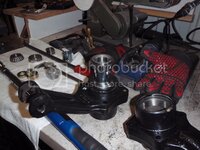
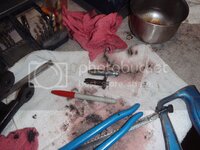
press races in place
P2040001_zps8c01a026.jpg

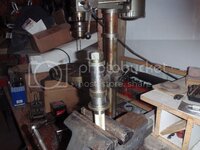
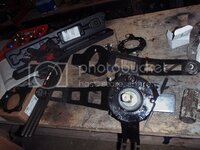
schnazzy tool (not from Napa)
P2040002_zps8ae137f6.jpg

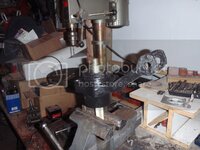
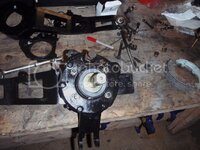
works like this
P2040003_zps6764edec.jpg

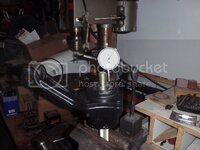
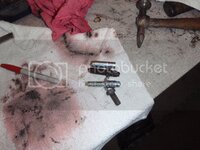
used for checking play (should be between .010 and .025)
P2040004_zps7a2b0061.jpg

shims are in the inside but this shows assembly

P2040005_zps745f8d16.jpg

starting the assembly of trailing arm
P2040006_zps0c303bdd.jpg

I'd post this on CF, but I'm sure I'd get grief for using mexican races with japanese bearings.... oh, and I'm .002 off on the tolerance (too wide).... ask me if I give a schmit :D
 
more progress
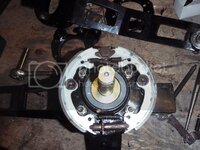
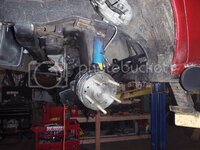
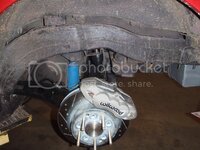
For those who wish to rebuild brakes - here's how the brakes go together
P2060001_zpsf21bd416.jpg

one of the problems I had was a frozen adjuster... best I could find locally was one from a Camaro - so a bit of modification was in order
P2060002_zps57e64a6f.jpg
there, fixed
P2060004_zps6dd25c36.jpg
this is the completed parking brake assembly
P2060003_zps51124570.jpg
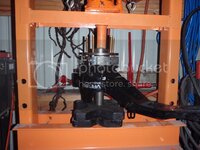
my press paid for itself tonight
P2060005_zps0baf6b1d.jpg

hey, getting back together
P2060006_zps7eaf136e.jpg
and the other side
P2060007_zps22daf5e8.jpg

I've got a ways to go yet, I need to change the geometry of the lower control arms, and put the rest back together... then get it aligned (not enough alignment shims either - but I made due)
 
anyway, despite the grief I've been getting, I did manage to get it pretty close to done (literally, one bolt away - one bolt that I have to purchase)

true ARP bolts for lug bolts
P2070001_zps03f363c3.jpg

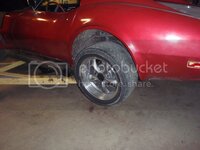
I'll be so not stylish - but I so don't care, I've never seen a person stylishly slide into a wall after losing their tire... but then again, I hang out at the wrong places (churches, courts, etc)

and it looks pretty much exactly like it looked before
P2070002_zpse0d260cd.jpg
 
guess I overlooked this for a while, nice progress !!!

were you able to get he endplay correct with he shims that came in the kit? I had my shims custom ground (thanks Gary) to get he clearnace perfect to under .002" .... think I ended up at .0015" dry without grease.....
 
guess I overlooked this for a while, nice progress !!!

were you able to get he endplay correct with he shims that came in the kit? I had my shims custom ground (thanks Gary) to get he clearnace perfect to under .002" .... think I ended up at .0015" dry without grease.....

I ended at .0011, and .0023 without having to shave shims

also, I realized after I put it together, I could have simply put the large shim (the bell shaped one) in my lathe and taken .0005 off

and I'll say this forever, the smartest thing I unknowingly did was buy the set up tool... that makes life SOOOOOOOOOOOO much easier

the one place I didn't have enough shims was for the johnny joints in the trailing arms - I ended up using one of my thick shims (that didn't get destroyed being removed) to make up the difference....
 
Last edited:
As an Amazon Associate we earn from qualifying purchases. Product prices and availability are accurate as of the date/time indicated and are subject to change.
Alignment
P2100001_zps57e5034c.jpg
P2100002_zpsf8012ed7.jpg

replacing bumpstops
P2100003_zps0b871786.jpg

now to finish the interior and get the last little bits on the outside (aluminum strips)

I can safely say I won't need a radio as I already have stereo :thumbs:.... it is a bit loud for the geriatric and tree hugging types :grin:
 
time for a review of the updates to my car.
First, a recap
tubular control arms
remove power steering
adjust steering box
bilstein shocks
poly joints
van steel arms
adjustable control rods
johnny joints
420# spring
stock springs front, minus 1.5 coils
1 1/8" sway bar
no rear sway bar


:bounce::bounce::thumbs::thankyou::clap:

granted, it's wet out... so I had to be kind of careful - but dang this thing drives and handles excellent!
 
well, continued with the finish-it-up list

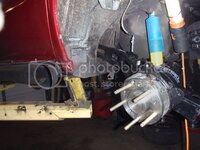
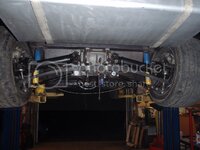
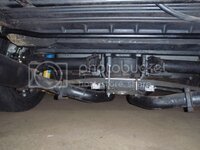
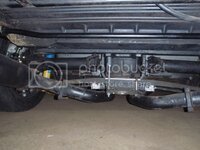
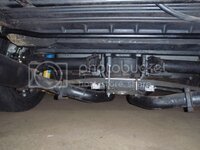
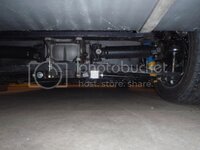
to remind, here is the rear end before, note the driveshafts go down to the wheels?
P7310004.jpg

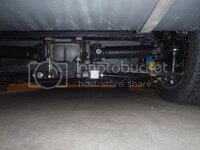
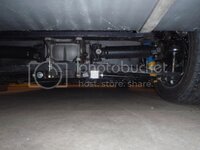
now - much better
P2120002_zpsc85262bd.jpg

the theory being, with the driveshafts as the upper control arm, you want them to pull in and the bottom to push out (more camber) in a corner.... now it'll finally do so correctly.... sad thing, I've no idea how I managed to get it lower - car sits at the same ride height

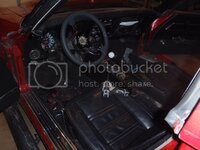
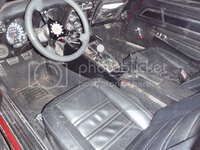
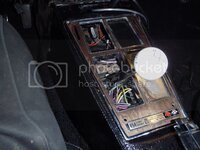
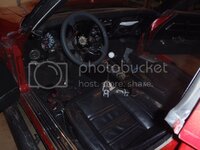
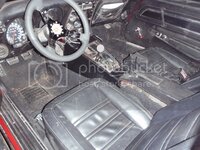
and the interior... new steering wheel, and now full dash lights (special, huh?)
P2120001_zps22966a5e.jpg
P2120003_zps805295b3.jpg

I just need to find a new brake console (will check with friend tomorrow).... finally down to the last little bit list :thumbs:
 
Longer outboard bolts on the rear monospring. They will remove the tension on the spring and lower the ride height and road clearance.

Cheers - Jim
 
well, continued with the finish-it-up list

to remind, here is the rear end before, note the driveshafts go down to the wheels?
P7310004.jpg

now - much better
P2120002_zpsc85262bd.jpg

the theory being, with the driveshafts as the upper control arm, you want them to pull in and the bottom to push out (more camber) in a corner.... now it'll finally do so correctly.... sad thing, I've no idea how I managed to get it lower - car sits at the same ride height

and the interior... new steering wheel, and now full dash lights (special, huh?)
P2120001_zps22966a5e.jpg
P2120003_zps805295b3.jpg

I just need to find a new brake console (will check with friend tomorrow).... finally down to the last little bit list :thumbs:

You may have improved your camber gain but you definitely made your toe steer much worse.

Sent from my SAMSUNG-SGH-I747 using Tapatalk 2
 
My observation - 1269511c1c844b03a.jpg

Maybe jump on it, roll around the shop. bounce the rear, etc. They may be threaded the same - but not riding the same on the TAs - at least in that composite of before/after - admit they are left/right too - but i expect they ride symetrically - just looking at the spring.
As an overall ROT - longer bolts will lower the ride height with the monospring.

Good Luck and, Cheers - Jim
 
well, continued with the finish-it-up list

to remind, here is the rear end before, note the driveshafts go down to the wheels?
P7310004.jpg

now - much better
P2120002_zpsc85262bd.jpg

the theory being, with the driveshafts as the upper control arm, you want them to pull in and the bottom to push out (more camber) in a corner.... now it'll finally do so correctly.... sad thing, I've no idea how I managed to get it lower - car sits at the same ride height

and the interior... new steering wheel, and now full dash lights (special, huh?)
P2120001_zps22966a5e.jpg
P2120003_zps805295b3.jpg

I just need to find a new brake console (will check with friend tomorrow).... finally down to the last little bit list :thumbs:

You may have improved your camber gain but you definitely made your toe steer much worse.

Sent from my SAMSUNG-SGH-I747 using Tapatalk 2

Probably not - the bushings were absolutely toast and allowing the passenger side tire to hit the inside of the wheelwell....

That said, this is step one, next step is lowering the control arm to parallel with the ground

.... and I'm not a pro, and would like to hear why there would be a toe problem with this set up
My observation - 1269511c1c844b03a.jpg

Maybe jump on it, roll around the shop. bounce the rear, etc. They may be threaded the same - but not riding the same on the TAs - at least in that composite of before/after - admit they are left/right too - but i expect they ride symetrically - just looking at the spring.
As an overall ROT - longer bolts will lower the ride height with the monospring.

Good Luck and, Cheers - Jim

actually, it rode at the same height with or without the sway bar..... though, sharp eye :thumbs: - I was looking for an illustrative picture rather than an exact picture .... and that picture does illustrate the difference in driveshaft angles before and after. Also, it's a different spring.... what is the same is the lip of the fender to the ground..... so I still don't know why it changed so much

Also, I actually raised the rear to get more travel.... so no need for longer bolts.
 
Different spring rate between the two springs. They are differing thicknesses... Just sayin'


As to the toe issue - all stock C3 TAs have an inherent toe problem - Revolutionary design for its time -- BUT.
Consider the center of rotation at the forward mount - as the TA swings up and down, the fixed length half shaft and lower strut do their thing -- but the forward rotation point of the TA, changes the toe setting as the IRS moves through an entirely different arc during its up and down motion.
We are stuck with this challenge - until moving to a different set up. The Giovanni - does a lot to improve the set up - but still does not deal well with Toe setting change. Likewise some of the Greenwood setups as I recall still don't eliminate toe change well. The C5/6 setup and some other home-builds include Toe Control rods.

All in all, we make (and chose) our compromises.

Cheers - Jim
 
Last edited:
Different spring rate between the two springs. They are differing thicknesses... Just sayin'


As to the toe issue - all stock C3 TAs have an inherent toe problem - Revolutionary design for its time -- BUT.
Consider the center of rotation at the forward mount - as the TA swings up and down, the fixed length half shaft and lower strut do their thing -- but the forward rotation point of the TA, changes the toe setting as the IRS moves through an entirely different arc during its up and down motion.
We are stuck with this challenge - until moving to a different set up. The Giovanni - does a lot to improve the set up - but still does not deal well with Toe setting change. Likewise some of the Greenwood setups as I recall still don't eliminate toe change well. The C5/6 setup and some other home-builds include Toe Control rods.

All in all, we make (and chose) our compromises.

Cheers - Jim

yes but, I take the other comment as specific to my set-up.... incorrect?

also, I understand what you're saying about the spring.... except - the car is at the same ride height.... somehow the differential moved down.... and I'm not sure why


and please focus on the words - car is at the same ride height....
 
well, continued with the finish-it-up list

to remind, here is the rear end before, note the driveshafts go down to the wheels?

now - much better

the theory being, with the driveshafts as the upper control arm, you want them to pull in and the bottom to push out (more camber) in a corner.... now it'll finally do so correctly.... sad thing, I've no idea how I managed to get it lower - car sits at the same ride height

You may have improved your camber gain but you definitely made your toe steer much worse.

Sent from my SAMSUNG-SGH-I747 using Tapatalk 2

Probably not - the bushings were absolutely toast and allowing the passenger side tire to hit the inside of the wheelwell....

That said, this is step one, next step is lowering the control arm to parallel with the ground

.... and I'm not a pro, and would like to hear why there would be a toe problem with this set up
John Greenwood explains it better than I ever could. Look in Part 4 of the VIP article.
 
I've read the article, good stuff.... so your comment was a general one - cool :thumbs:

Tonight, most hated work.... finishing sheet metal
P2140001_zpsa2ecca22.jpg

P2140002_zps2e4feec1.jpg
 
more work
tried to save the rear emblem
P2170001_zps1475c40a.jpg
nope - crooked, and didn't stay together... so unless I solder it (which probably won't work either) it looks like a new one is in order

some interference issues with the shifter
P2170002_zps9149917d.jpg

a bit of spacing and some heat - fixed
P2170003-1_zps0cd15f4d.jpg

getting closer.... still waiting for the e-brake cover.... but close
P2180004_zps3d9a7ed7.jpg

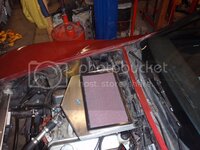
and polished/grained air cleaner
P2180005_zpsd4f3a8d4.jpg
 
toe issue

When the inner u-joint is lower than the outer any bump motion raises the wheel. This motion does increase the camber but it also moves the hub closer to the vehicle center line (as the angle between the half shaft and ground increases the cosine decreases) The fancy pivot on the trailing arm accomodates the motion but the shim packs fix its position. The trailing arm pivots around your ball joint and since the hub moves in the wheel toes out. Increased toe out is not a desirable condition.

When the inner u-joint is above the outer the first part of the bump moves the hub out (smaller angle bigger cosine) so it induces more stable toe in error. Once past center in the bump the toe change with travel reverses back through the start setting and then to increase toe in as above.

The initial setting of the ride height so the inner piuvot is higher than the outer give a range of motion where the toe change isn't evil. We can't overcome all the problem but we minimize it.

Grampy
 
When the inner u-joint is lower than the outer any bump motion raises the wheel. This motion does increase the camber but it also moves the hub closer to the vehicle center line (as the angle between the half shaft and ground increases the cosine decreases) The fancy pivot on the trailing arm accomodates the motion but the shim packs fix its position. The trailing arm pivots around your ball joint and since the hub moves in the wheel toes out. Increased toe out is not a desirable condition.

When the inner u-joint is above the outer the first part of the bump moves the hub out (smaller angle bigger cosine) so it induces more stable toe in error. Once past center in the bump the toe change with travel reverses back through the start setting and then to increase toe in as above.

The initial setting of the ride height so the inner piuvot is higher than the outer give a range of motion where the toe change isn't evil. We can't overcome all the problem but we minimize it.

Grampy
so the net effect is it induces (more) oversteer?
 
this should light someone up
more refinements
new alternator
P2200001_zps19b06115.jpg
installed, but, of course, nothing goes easily - those wires look terrible so I'll have to do some rewiring (ugh)
P2200004_zps5889dcc8.jpg

there used to be a company in the Pacific Northwest that changed its name about every 5 years or so - coincidentally with them being sued for the crappy alternators and starters they sold to the chain auto part stores. It's name was Powermaster at one point.... recently, I found out there is another Powermaster... they make quality stuff (solved a problem with one of my Search and Rescue trucks).... anyway... :hi::waxer:
 
this should light someone up
more refinements
new alternator
P2200001_zps19b06115.jpg
installed, but, of course, nothing goes easily - those wires look terrible so I'll have to do some rewiring (ugh)
P2200004_zps5889dcc8.jpg

there used to be a company in the Pacific Northwest that changed its name about every 5 years or so - coincidentally with them being sued for the crappy alternators and starters they sold to the chain auto part stores. It's name was Powermaster at one point.... recently, I found out there is another Powermaster... they make quality stuff (solved a problem with one of my Search and Rescue trucks).... anyway... :hi::waxer:

Some years ago, I had the main power wire from the alt to the horn relay break off and start flashing/arcing with the engine idle, it caused the FI computer to fry....damnit....

SO one of the best moves I have done is wiring the car totally differently on that point, the wires go inward to the valve cover valley, rearward to the firewall, and out to the horn relay on the fender....the way Pontiac wired all their engines, years ago....that relieves any stress points off the wiring....

:crutches:
 
there used to be a company in the Pacific Northwest that changed its name about every 5 years or so - coincidentally with them being sued for the crappy alternators and starters they sold to the chain auto part stores. It's name was Powermaster at one point.... recently, I found out there is another Powermaster... they make quality stuff (solved a problem with one of my Search and Rescue trucks).... anyway... :hi::waxer:
That explains a lot of things, isn't it TT? :noworry:
 
there used to be a company in the Pacific Northwest that changed its name about every 5 years or so - coincidentally with them being sued for the crappy alternators and starters they sold to the chain auto part stores. It's name was Powermaster at one point.... recently, I found out there is another Powermaster... they make quality stuff (solved a problem with one of my Search and Rescue trucks).... anyway... :hi::waxer:
That explains a lot of things, isn't it TT? :noworry:

they were out of Chinese alternators :rofl:
 
seems like you can chase wiring forever and everywhere you touch it can be replaced

Chick I used to know about 20 years ago, had a '63 Convertible, and her wiring was a DISASTER and her fuse block could not hold fuses on account of the rusted fuse holder spring clips, taking it apart, I found all the stuff was heated to the point of melting in spots, the steel and copper did not get along well, so I rewired the entire car for spade fuses, them plastic jobs....

but funny, that my '72 vert has never had the issue, :bonkers:
 
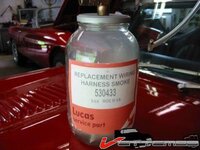
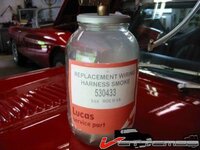
When you´re having electrical issues, theese come in handy :lol:
I used quite a few of them on my last project, the Volvo P1800 with a lucas system...
18775138f82d556ad.jpg
 
When you´re having electrical issues, theese come in handy :lol:
I used quite a few of them on my last project, the Volvo P1800 with a lucas system...
18775138f82d556ad.jpg

That's genuine Lucas Electronics smoke, it's completely incompatible with AC/Delco smoke. In fact, use of Lucas smoke will immediate result in the immolation of the ac/delco harness because Lucas is just so much better at making things dark.
 
When you´re having electrical issues, theese come in handy :lol:
I used quite a few of them on my last project, the Volvo P1800 with a lucas system...

18775138f82d556ad.jpg

Damn, If I only knew that was commercialy available....
I could've made a fortune with the old Fruehauf trailers we had.
Always shorting and smokin.

Lost opportunity.
 
Back
Top