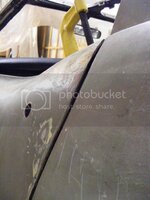
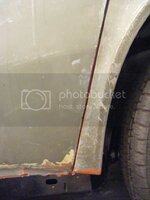
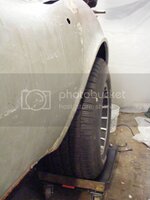
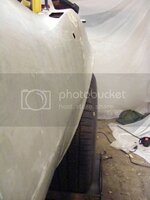
My '76 restoration (long post)

VetteMod - Corvette Restoration, Modding & Performance Forum

Help Support VetteMod Forum:

Calipers: I just converted my rear calipers to O-ring and had two bleeders leak. They did not leak before so I really wonder WTF is causing them to leak. I tightened some more and the leak stopped ... But they're now really tight, shouldn't have to tighten that much ... I wonder if you took the threads off an old bleeder could it be used as a lapping tool ??? Some lapping compound should create a better sealing surface ...
You're supposed to "over tighten" them for the bleeder to deform and take the shape of the seat, I've tighten mine to death without result.
I'm gonna take the caliper to my machinist and see if we can fix it.
Who said I was done with the mechanical problems? Me of course:cussing:
Those calipers are a full bag of bad apples.
 
even though my calipers are fine now.... the D8 Wilwood calipers are on sale and I am seriously considering buying a set.....:smash:
 
huh, more like 1/4" alas, which is absurd.

that's a lot... do you have some 8115 glue leftover ??? break the door skin seam, force a few wedges in there, pry it 1/4" out and fill the gap with 8115 glue....

lots of work but the next best optionis a new door..... :eek::tomato:
 
even though my calipers are fine now.... the D8 Wilwood calipers are on sale and I am seriously considering buying a set.....:smash:
Or those not-that-expensive wilwood dynalite with the bracket from Corvette Engineering.
Today checked the seat of the leaking caliper, it was damaged. With a drill bit, on the press drill, but turned by hand my buddy managed to clean the seat, took a little tweaking on the bleeder too.

Then....

I decided to inspect all other seats, bad news, two on the rear caliper seat are just gone. You can see remains of a seat but it's mostly a straight hole.
I'll probably give a repair kit a try, even if it means enlarging the hole, which isn't even centered. If it crack, so it be.

huh, more like 1/4" alas, which is absurd.

that's a lot... do you have some 8115 glue leftover ??? break the door skin seam, force a few wedges in there, pry it 1/4" out and fill the gap with 8115 glue....

lots of work but the next best optionis a new door..... :eek::tomato:
Still got ton of 8115, merely started using it yet.
I agree I may have to skin off the door, but I think I would then rather tweak the metal frame.
Here's a photoshop simulation :
digitalyedited.jpg

I bent down the upper corner (where the arrow points), then moved the whole door up and it looks better already.
I wish I could do that with the skin still on...

Anyway, as advised by Jeremy I'm gonna beg for some of Mike's expertise.
 
So I thought bleeding the brakes would be a walk in the park. How wrong I was.
It's surely partly my fault for not checking everything before starting the bleed, only if I knew I've been sold a set of junk part.
Turned out one front caliper had a damaged seat, but that one could be repair with a drill bit and some caution.
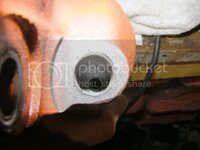
The rear calipers were another story. The seat of the bleeder were actually gone for good. They actually had been drilled out, no kidding.
See for yourself :
bleederrepair2.jpg
This is the caliper after we redrilled it to accept a 1/4 NTP repair fitting, you see that crescent shape in the bottom, that's the remain of the bubba's drilling.
I don't know what was the idea, and I don't want to....

Here's the bleeder once repaired :
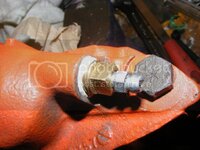
bleederrepair.jpg

The repair fitting is machined out of a regular NTP plug, couldn't find one locally and didn't to wait for an online order.
Worked well.

So now I can actually start the build.

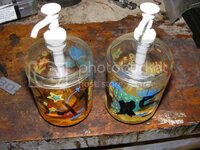
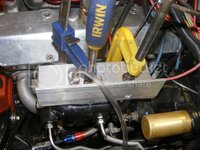
Make a "ghetto" speed bleeder :
brakebleeder1.jpg

brakebleeder2.jpg

The cutout in the middle is for the pression to go in both reservoir, saves me a fitting.
All went nicely.
The whole system was empty dry so as advised by forum member I will do a second bleed. I first let it sit for a while, will then gently whack all the lines to remove any air bubble, then bleed again.

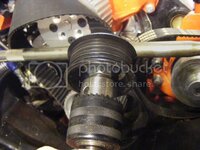
I also filled my PS pump, and started to "prime" the system with that :
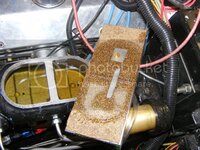
pspumppriming.jpg

Sure I can't get much pressure with it, but still I can make the fluid circulate. I'll wait to have someone around to operate the steering box and the hydroboost while I do that.

Last problem solving : my rear rims.
I have 10.5" rim at the back (8" at the front). Originally it was mounted with a small Mr Gasket 1/4" spacer. I was told it's not the best setup, so I looked for proper wheel adapter.
I was given a set of 1" adapter, nice and sturdy but is made my wheels really sticking out of the body : I would need a flare job.
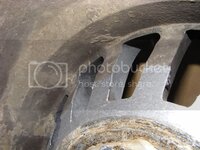
So I decided to rethink from the start : why the 1/4" spacer? Because otherwise the rims would hit the calipers. I checked and it was hitting by not much, 0.15" at worst.
So I took the wheels to my best machinist and I had this 0.15" removed from the wheel itself.
wheels.jpg
Now the rims are fitting much better, barely sticking out, I can live with that, and I'm saving months of fiberglassing.
Never like flares on Vette anyway.
That also gave me the occasion to learn how to operate that antique tire changing machine he had in a corner of his shop, and did put my summer tires on my DD while I was there.

 
New batch of stuffs :

Bought that for later:
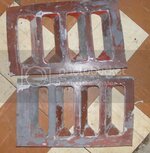
gils.jpg

May I'll put them inside out, à la Balwin-Motion. We'll see.
If I manage to do the also BM-style real window mod I'm thinking about, that would be coherent.


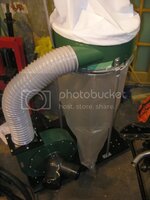
And I took the fiberglass dust issue that's coming seriously :
dustcollector.jpg
That's the Harbor Freight dust collector, 110v 2HP.
I could get it even cheaper on Ebay.
 
As an Amazon Associate we earn from qualifying purchases. Product prices and availability are accurate as of the date/time indicated and are subject to change.
After all the whining I decided to act and show the door who's boss :D

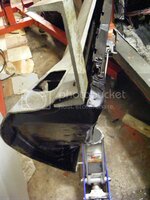
Jacked up the door with a piece of wood to distribute load (not on picture, bare with me it's a re-enactement), and hammered the corner of the metal frame of the door down approx. 1/4".


bodywork-06-molestingthedoor.jpg

Then I reajusted the door higher, and here's the result.

bodywork-10-nowitfits4.jpg

bodywork-07-nowitfits.jpg


The area that have been previously repaired is sticking out, an the frame behind looks bended, I'm gonna separate them, reajust the frame and then rebuild the skin area. Anyway the current repair is really crappy, dunno what resin they used, but the result is awfully brittle.
bodywork-08-nowitfits2.jpg

The bottom looks good too. The rear looks a little lower but it's because the bond cracked.

bodywork-09-nowitfits3.jpg


While I'm at it, here's the machined wheels installed without the spacers, good enouch for me.
bodywork-12-nomoreflares.jpg

bodywork-11-nomoreflares.jpg


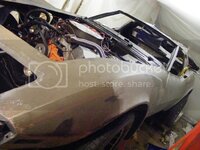
I also put the front clip on *again*, and decided it was time to remove the bumper assy that came with it. I've left it on so far to avoid any deformations, but now I'm nearing the final installation.

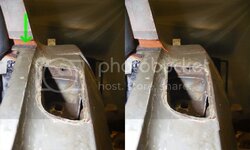
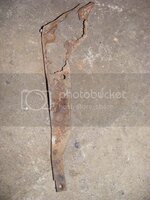
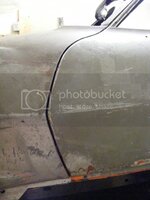
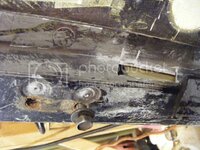
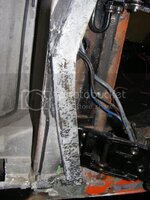
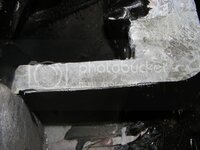
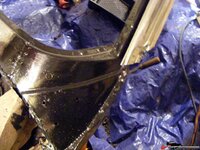
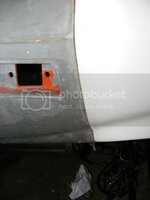
Turned out the driver fender bracket had rusted out

bodywork-14-bracketrustedout.jpg


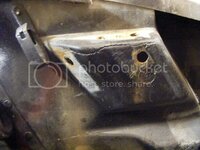
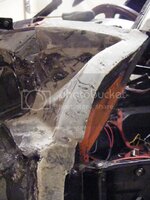
For those, if any, wondering the function of those bracket, here's the consequences :

bodywork-15-rustedoutbracketconsequences.jpg

Important note: Ken's told me about the crack before selling it to me. I knew the crack, I just didn't know the reason.

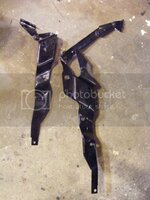
So bought a new bracket.
It was a NOS GM part, clean paint, still the GM sticker on.
Some would call blasphemy, but I stripped off the original paint only to discover light rust under !
Then the usual treatment.

I actually POR15ed the crap out of these parts.
mission codename "never again"

bodywork-16-newbracket.jpg


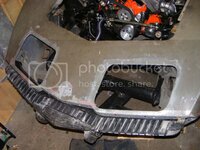
I could them proceed to install my own bumper assy on the frame

bodywork-13-bumperinstalled.jpg

It felt weird, it's probably the very first part I restored.
Poor dude spent 2 years outside on a balcony.
It helps me support the front of the clip and start adjusting things.

So far, so good :
bodywork-17-frontfit.jpg

Took me a lot of trial to get the number of shim behind the hinges right.

bodywork-17-globalview.jpg


Next step: fix the front clip crack then put the hood back on.
 
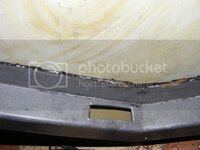
This week I took care of my radiator support.
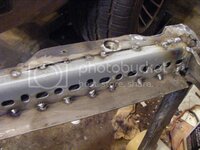
Cut the rotten bottom, and weld in some thick replacement.
bodywork-19-radiatorsupportrepair2.jpg


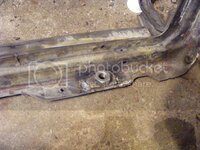
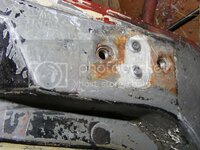
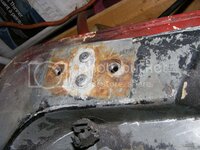
I had those broken bolts at the bottom... fixed
bodywork-18-radiatorsupportrepair.jpg

With a piece of sponge tied to some wire I could POR15 the inside of the frame.
Here is the beast back in place for the test fit.
bodywork-20-radiatorsupportrepaired.jpg


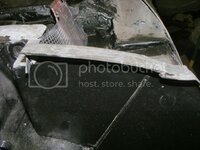
Now, in the logical following, I tried to put my hood back on the front clip, and so started to have a closer look at it and start removing all this bondo at the edge...
Well, I should have guessed it.
It also have been broken, and again fixed with this brittle low quality resin. all the fiberglass patched looked like dry straw.
So I decided to throw the towel on this, I'm not gonna try to repair a broken hood, its shape is too critical to the car aesthetic.
Contacted a corvette local hoarder (in the good sense of the term) and found a hood in perfect shape for 150$. It had a functional hood cowl flap :
newhood.jpg

My previous hood didn't have those. So far I'm thinking about keeping it and putting a switch in the dash to control it. Probably the only possible reason for closing the door would be heavy rain.

Here's the flap mechanism after a little cleaning/derust/repaint.
cowlflap.jpg

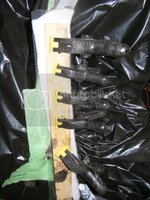
Little cleaning on the hood latches
hoodlatches.jpg


Next step is to redo the hood metal insert for the hinges, without unbounding the hood frame... gotta make some holes...
 
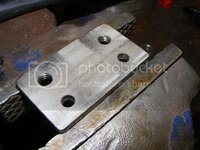
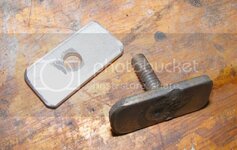
Ok, so the hood support plate where shoot, I decided to redo them in SS, no less

ssplates.jpg

This was my first foray into making SS part, boy it's another world, special drill bit, special tap, and the thing is hard as hell.

I made a hole in the front to retreive et reinsert the plates
hingeholes.jpg

Or course I had to use pop rivets to put the new plate back in, my car probably already has a negative NCRS score anyway.


hinges2.jpg

hinges1.jpg

The hood support plate required its own hole

hoodsupport.jpg

I don't think the holes really affects the structural strength of the hood, so I'm gonna leave them for now. Just like the inner fender crack, I'll take care of this when the car enters the bodywork/fiberglassing stage, the garage is not setup for this yet.
Now time to install the hood and make final front clip adjustments.
 
progress ... cant wait to see the front assembled :thumbs:
Thanks buddy.
I got to admit my updates are pretty dull those times.

I just love my new job, but it consume a lot of time.
I get less time for the resto, but it's used more efficiently. Now I can shopping for steel, bolts, drill bit and such pretty much when I want, less stress.

Concerning the front clip, I think it's coming, for real. I Installed and shimmed the new hood tonight, and everything it lining up nicely.
 
Here's what you do went you only got a couple of hours :

rebuildhoodcable2.jpg
rebuildhoodcable.jpg

I Salvaged the original plates, SS cable and teflon lined sheath are from the local by store.
I heated the plates to avoid breaking the small notches, but I pressed the new cable in hard while too hot, they got wider. lol.
When a rusted cable break, you're in trouble, I just bought myself more peace of mind.

I've removed the front clip again because something was worrying me : the contact surfaces.

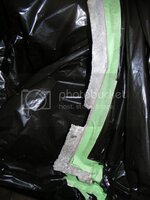
Most of them are good, thickness from 0.08" to 0.14". Like this area:
thickenough.jpg


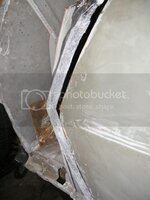
But near the door front edge, that's another story:
toothin.jpg

, I got 0.05" and it thins out to nothing toward the edge. I'm gonna reinforce it before moving on.
 
So I glassed those weak areas
I use vaccum glassing technique to use as little resin as possible.
Over the fiberglass I've put this plastic film with tiny holes then an absorbing mat, and wood shims then clamps.
glassing.jpg

Is saved me some sanding time, but not sure it's really worth the effort.
I used the thinnest fiberglass mat I could get, I don't want my glassing to ruins my hood fitting, still I was some meat to put screws for final aligment.

glassed1.jpg

glassed3.jpg


glassed2.jpg


Now time for the passenger side, I've some area to recreate.
passengerside1.jpg

passengerside2.jpg

By the way, does anyone go a picture of what this hood corner support look like when it's it's complete.


I think I'm gonna love bodywork, really.
 
Passenger side done :

passengersizerepaired.jpg

Front clip is back on, good contact surface

clipcontactarea.jpg

Now got to find someone to help me put the doors back on, then we'll enter the front clip installation last straight.
 
can you get to all the mating surfaces to make sure you've got good contact everywhere? How about modeling clay ?? stick clay to the body , maybe 15 mm thick.... and then place masking tape on top of it... then put the front clip in place and remove it again.... inspect the clay for even (smooshed) thickness, maybe 3 or 5 mm ... if some areas are 2mm and some others are 14mm you have a problem !!!

I'd do this extra step to make 100% sure that when you apply the expensive 8116 glue it really makes contact everywhere where it's supposed to....

might be overkill but you invested so much time and work so far... now you want to be sure it fits correctly.
 
can you get to all the mating surfaces to make sure you've got good contact everywhere? How about modeling clay ?? stick clay to the body , maybe 15 mm thick.... and then place masking tape on top of it... then put the front clip in place and remove it again.... inspect the clay for even (smooshed) thickness, maybe 3 or 5 mm ... if some areas are 2mm and some others are 14mm you have a problem !!!

I'd do this extra step to make 100% sure that when you apply the expensive 8116 glue it really makes contact everywhere where it's supposed to....

might be overkill but you invested so much time and work so far... now you want to be sure it fits correctly.
Excellent remark Karsten.
First, of course nothing fits, I mean to get everything to stick to they mating surface, it gonna take screws.
Now, I could actually check pretty much everywhere, and it's not bad. Maybe the vertical from surface has a bigger gap but it pretty much depends on how tight I'm gonna make it waist.

There is also this horizontal contact area, in the middle of the picture
passengersizerepaired.jpg

It's a bit off, where everything is fitting tight, the gap here is still 4-mm, but looks like it's how it came off the factory.
More more-expensive-than-printer-ink-glue there to fill the gap I get, I'm not gonna glass this.
I think I'm gonna only glue the inaccessible area before installing the front clip for good, then glue all the accessible area by squirting in the gap. That pretty much what Eckler's paper says.
Add many pressing screws and a few spreading ones and I think I'll be in bussiness *finger crossed*
 
if it's within 8mm (5/16") it's probably OK

for 3M 8116 (8115) the recommended thickness for adhesive is on the tech sheet, think it's 3-4mm, too thick and it might not work

I used screws too. how about using the screws and force the panels into position without glue first ? that's what I did. I bolted the fender flares in place "dry" and let the car sit in the Florida sun for a few hours, the fiberglass actually somewhat "gives" and the fit gets better.... maybe try that with the entire front clip.... only questionremains: where do you get FL heat in Montreal ???
 
if it's within 8mm (5/16") it's probably OK

for 3M 8116 (8115) the recommended thickness for adhesive is on the tech sheet, think it's 3-4mm, too thick and it might not work
Oh ****, I forgot that, taking glue thickness into about.
Thanks for pointing this out.
Gonna make some small shims.
Something I wish those front clips were bolted on, à la Panic :lol:

I used screws too. how about using the screws and force the panels into position without glue first ? that's what I did.
Yup, that was the plan, I'll lay down the glue only when every gap and level is sorted out.
I bolted the fender flares in place "dry" and let the car sit in the Florida sun for a few hours, the fiberglass actually somewhat "gives" and the fit gets better.... maybe try that with the entire front clip.... only questionremains: where do you get FL heat in Montreal ???
Don't worry about the heat, we're getting our share. Montreal is notoriously humid by the summer, and we hit a historical heat record last week.
Alas not enough to soften a Corvette body.
Especially when the car is in a garage with a sloping entrance that directly leads to the street :push:.
 
if it's within 8mm (5/16") it's probably OK

for 3M 8116 (8115) the recommended thickness for adhesive is on the tech sheet, think it's 3-4mm, too thick and it might not work
Oh ****, I forgot that, taking glue thickness into about.
Thanks for pointing this out.
Gonna make some small shims.
Karsten, are you sure about the thickness thing. I did some searching and looks like there's tiny glass beads in the product to ensure optimum bead thickness and it's in the 10-12 mils (0.3 mm).
 
A good rule of thumb is 1/8" min for all the "bodied" adhesives, liquid adhesives are tight.
Butter both sides before final assembly, making sure the adhesive is pressed in tight to the glass before adding any buildup for thickness.
Apply all your adhesive before assembly, adding any later won't give you a strong result.

While you're at this stage, pay special attention to the corner mounts, the ones that were secured by the pop rivets. As you probably know, they are a prime concern for trapping water and rusting the cowl underneath. If they have never been removed, it might be a good idea to do that, prep the finish the metal and use a good 2 part urethane flexible structural adhesive to secure them. After that add a good smooth bead of urethane caulk to seal the transition (metal to glass area) and feed water way to drain, especially the inboard side, close to the leaf screen. SolarSeal 900 works well and stays flexible for decades. When installing the windshield, don't use the lower corner rubber diverters, they just traps more water.
 
A good rule of thumb is 1/8" min for all the "bodied" adhesives, liquid adhesives are tight.
Butter both sides before final assembly, making sure the adhesive is pressed in tight to the glass before adding any buildup for thickness.
Apply all your adhesive before assembly, adding any later won't give you a strong result.
Make sense, and what 3M recommand, will do that.
While you're at this stage, pay special attention to the corner mounts, the ones that were secured by the pop rivets. As you probably know, they are a prime concern for trapping water and rusting the cowl underneath. If they have never been removed, it might be a good idea to do that, prep the finish the metal and use a good 2 part urethane flexible structural adhesive to secure them. After that add a good smooth bead of urethane caulk to seal the transition (metal to glass area) and feed water way to drain, especially the inboard side, close to the leaf screen. SolarSeal 900 works well and stays flexible for decades.

Concerning the corner mount, the driver one was destroyed, so i had to replace it with the one luckily still hanging from donor's front clip.
I did exactly how you recommend (good sign I might be getting it).

16554d7db00558130.jpg

Steel behind was absolutly spotless, believe it or not.
Given the state of this one, on par with the whole birdcage state, I didn't "risk" to do the passenger side, my thinking was to retain as much of the original configuration, as reference point for my front clip alignment (which just starts to NOT make me freak out).
Still I scrubbed clean all the seams and filled it out with urethane caulk. I will give an extra check at the inboard one, just in case.
Under my ownership it will be a garage queen, but I like the idea of making it as rustproof as possible.
When installing the windshield, don't use the lower corner rubber diverters, they just traps more water.
I had to dig Doc's pdf to see what they are. Didn't even know they existed.
The only other dude I've find to have opinion on the matter seems to state otherwise. CF's BS?

Thanks alot for all those advices.:thumbs:
 
Here's that quote you linked


There are supposed to be rubber diverters that attach to the sides of the windshield... one end is tucked under the revel molding and the other end is bolted to the body. If these diverters are missing, water will flow off the lower corner of the windshield, down through some openings in the steel portion of the body, and down onto the floor. This happened on mine. I found that the hood release lever was getting wet all the time. I have been told by a friend who installed them that the rubber diverters fix 90% of water leakage problems. (I can't tell you personally whether they help because I store my car indoors now.)

There are no openings in the steel portion as he claims. He probably has the area behind the rivets rusted out or the bond above the pedal assembly in the bottom of the wiper tray is broken.

All windshield water should go into the wiper tray or along the upright pinch weld at the door opening. This area sometimes is filled with adhesive or debris. Be sure to keep it completely free.
 
Moving foward very slowly these time, even in Montreal it's too damn hot for me to work confortably in the garage. As a reverse bear, with weather getting cooler everyday, I think I'm got stop hibernating (summernating?) very soon.

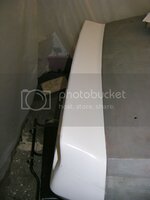
I made a set of rear bumper brackets, all SS.
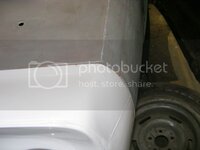
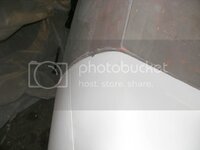
bodywork-20-SSbraket.jpg

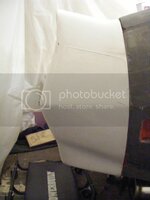
And started test fitting the bumper.
Turned out very well, glassing work should be minimal.

bodywork-24-rearbumperfitting3.jpg


bodywork-22-rearbumperfitting1.jpg


bodywork-25-rearbumperfitting4.jpg

bodywork-25-rearbumperfitting5.jpg


bodywork-23-rearbumperfitting2.jpg


Finally a trick I've found for getting correct resin mix when dealing with small quantity :
bodywork-26-mixingtool.jpg

I mix by the squirts. I'm sure the trick is as old as glassing itseft.
It's never too late to reinvent the wheel.
 
Just be careful and squirt into separate containers, as you may not get a "full" squirt once in awhile. Had that happen once, tried to guesstimate how much it was off, but got it wrong and the epoxy didn't fully cure. Did it another time, remembered the first time, and threw what I had just squirted away. Got tired of the waste, so now I use separate containers, which makes starting over without waste easier.

Also, try using a system where you do a "batch" at a time (in other words, if you need nine squirts of resin and three of hardener, first do 3 squirts of resin and one hardener, then repeat). That way, it's less likely to lose count -- now, did I squirt five times, or was it six . . . so what you have to ask yourself, punk, is do I feel lucky? :wink:

Mike
 
Just be careful and squirt into separate containers, as you may not get a "full" squirt once in awhile. Had that happen once, tried to guesstimate how much it was off, but got it wrong and the epoxy didn't fully cure. Did it another time, remembered the first time, and threw what I had just squirted away. Got tired of the waste, so now I use separate containers, which makes starting over without waste easier.

Also, try using a system where you do a "batch" at a time (in other words, if you need nine squirts of resin and three of hardener, first do 3 squirts of resin and one hardener, then repeat). That way, it's less likely to lose count -- now, did I squirt five times, or was it six . . . so what you have to ask yourself, punk, is do I feel lucky? :wink:

Mike
I not sure I understand the point of squirting into two different container?
Because this way you can measure check one last time before mixing?
 
yup, that's why.....

I use mixing cups that have a scale printed on them, if you clean them with laquer thinner they last quiet a while. or just use the cheap plastic cup version that you would use for drinks, but be careful some of the cheap plastic will melt.....
 
Just be careful and squirt into separate containers, as you may not get a "full" squirt once in awhile. Had that happen once, tried to guesstimate how much it was off, but got it wrong and the epoxy didn't fully cure. Did it another time, remembered the first time, and threw what I had just squirted away. Got tired of the waste, so now I use separate containers, which makes starting over without waste easier.

Also, try using a system where you do a "batch" at a time (in other words, if you need nine squirts of resin and three of hardener, first do 3 squirts of resin and one hardener, then repeat). That way, it's less likely to lose count -- now, did I squirt five times, or was it six . . . so what you have to ask yourself, punk, is do I feel lucky? :wink:

Mike
I not sure I understand the point of squirting into two different container?
Because this way you can measure check one last time before mixing?
yup, that's why.....

I use mixing cups that have a scale printed on them, if you clean them with laquer thinner they last quiet a while. or just use the cheap plastic cup version that you would use for drinks, but be careful some of the cheap plastic will melt.....

Huh, that kind of ruin the point of the squirt count, lemme explain.

I'm measuring by squirts when I'm doing very small quantities, the kind of quantities it's hard to measure with a graded cup (or you need a really small one).

Concerning the two cup, frankly I'm no big fan.
It raises the risk of wrong ratio (for small quantities) as some of the material still stay on the wall of the cup when you pour it in the other.
Plus, the more you time you pour it, the more chance to get bubbles. No?

Actually my procedure is the opposite :
-waste the first squirts until until it flows nicely
-pour both in same container
-Push the piston slowy all the way down, let it get back up, keep steady pace
-Count out loud
-Do one component at a time, actually minize error. eg: A x 30 times, B x 6 times. Just plan it ahead.

Regarding the mixing of the resin, I saw once in a video a guy using a ziploc bag to do his mixs. He poured the two part, remove all the air out, zip it and knead the hell out of it. Sounds like the recipe for bubble free mix, anyone uses this technique?

Melting the plastic? does it also applies to epoxy resins?
 
You're doing just fine with the mixing. :yahoo:
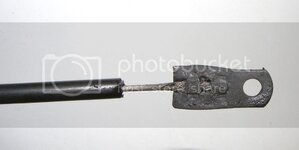
You can use paper cups (non waxed) or cut up any plastic container and use the bottom (milk jugs etc). Buy a box of tongue depressors to mix.

The pump method is the most accurate for epoxy.
Make sure the epoxy is warm enough, the secret is to let the pump up slowly so it loads properly.
Pump the largest proportion into a cup first (I usually use 3:1 epoxy) and then the smaller, then mix. Aftr mixed thoroughly, if you spread it out in a larger baking pan to wet the glass, it won't start to set up as fast as if in a smaller container. Once you do enough of it, you will be able to guess how much to mix pretty accurately.

The pumps have been around for ages. West systems made a big deal about them, but they do with all their marketing.
I buy my stuff from a boat supplier (Joe's Auto Marine) the pumps cost me around $2.50 a piece and some have lasted a year or so.

EpoxyPumps.jpg
 
If you need a "rule of thumb" for how much resin (mixed with hardner) you'll need for you laminatin project - use this:
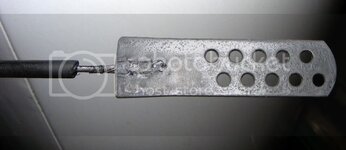
1. Lay out the fiberglass you are going to use
2. Cut to approximate shape
3. Weigh Carefully using an appropriate size scale
4. The weight of the fiberglass is the wight of the mixed resin you'll need!

To make it easy - you can "cheat" by pre-weighing a sample container of H2O and marking the ounces on the container - admittedly that is only close but you'll be ballpark.

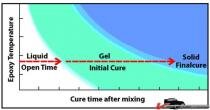
Remember you don't have to do it all at once! As long as you get the next layer on while the previous is still in the "green state" you'll have good inter layer adhesion. "Green State" is when it is still in initial cure. You can take your fingernail and make a mark in the resin - like week old frosting on a cake! Stiff but still gell-like.

If you wait - you'll need to key the previous surface (sand) to etch it for better adhesion between layers.
thum_12695040a8af3e404.jpg

This chart (shamelessly taken from West Systems) shows the green state. Note you can move up and down the cure time with temperature. More heat - faster cure. Pre-chill the resin and hardener - more difficult to mix - but longer cure times - great for summer working.

When using epoxy - measure the ratios precisely! Don't be tempted to "wing-it" you'll get poor results - may never cure (it really will but do you want to wait a YEAR?) and you'll have disappointing results.
Check the downloads section for a short tutorial that shows how you can use a Shop Vac to pull a vacuum and improve your laminations! (Look under Templates etc I recall. - "Composite Sandwich Testing")

Itchin'-for-fun! :yahoo:

Cheers Jim
 
Interesting tools, so basically the pump acts like a syringe piston, the fluid goes back down once the correct amount have been pumped in, right?. Very ingenious.

Two lastest post were damn good, thanks so much guys.:thumbs:
 
Back
Top