My '76 restoration (long post)

VetteMod - Corvette Restoration, Modding & Performance Forum

Help Support VetteMod Forum:

well, if you bought it locally I'd still make them give me some fresh glue - obviously this stuff has been sitting for a while... if you cannot get it exchanged then glue two pieces of scrap-fiberglass together and see how it holds up... im sure it'll be fine but at that price you can expect "fresh" glue

if they are nice and give you a new cartridge the at least you got the doors done with free glue ;)
Update : I had the 8116 cartridge changed, 3M rep have been super nice.
It took me the time because it's not easy to go to a place which is only open during my worktime, like pretty much all the specialized/professional stores.
With a full time job it's often easier to order on Ebay than to go buy stuff locally.
 
same here, I buy most of my stuff online and have it delivered... often it's even cheaper than anywhere local. The place where I buy my paint (PPG dealer) sells the 3M cartridges for $48 plus tax.... even Summit has this stuff online for $36 ....
 
Once again, it's been a while since last update. Sorry guys, too much work, no time for posting.


First reason it took so long, we went totally overboard with the Gilmer belt experiment.
At least a good opportunity to show younger generations the danger of a free run at the machine shop.
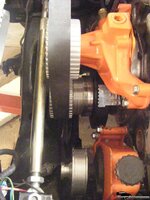
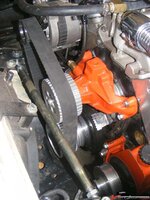
Since the I had to have a special pulley done for the steering pump, we tried to catch best of both world.
Here's the result.

16554f559b2ff0cdc.jpg

16554f559b308751c.jpg

16554f559b303c603.jpg

16554f559b30d530a.jpg

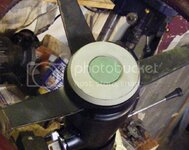
The crankshaft pullet has been machined to the serpentine pattern.
Still got to find the proper length belt.


Another thing that took time was the doors.
I think I'm done for the mechanical part of the it. Finally.
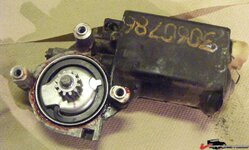
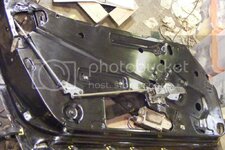
I've received my replacement regulator from Ken's corvette part, disassembled both regulator, changed the motor gear, cleaned the spring and everything.

16554f559c34cd581.jpg

I basically had to apply the same treatment to the passenger door, cleaning the rust, glassing shut so small rust hole, filling some hole and gluing bottom on the panel.


I did one experiment on the door seams between door structure and panel:

16554f559b9618705.jpg
This is epoxy resin with fiberglass powder added. The specialized shop sells it by the pound, better wear a real mask when you do the mix.
I might be wrong, but apart the consistency, wouldn't this be the perfect filler?

Once the the door gut where checked cleaned and reinstalled (except the glass), I went to the daunting task of installing and aligning the door.... alone.
Holly molly, that was some sport, for a mean result :

16554f559a8fcb01e.jpg
16554f559a9035181.jpg
16554f559a907ae8e.jpg

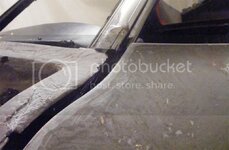
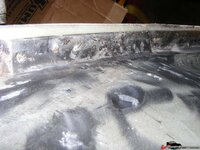
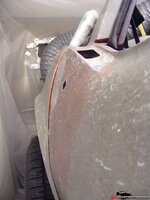
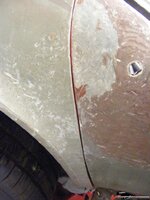
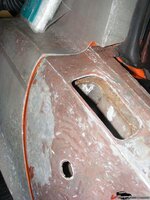
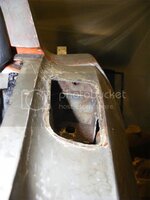
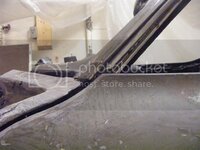
The shapes don't match. at all. crap.
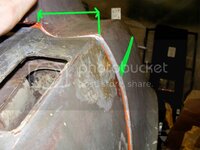
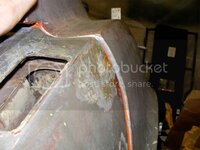
For the bottom, I think it's the rear panel's fault, but for the top is rather a case of "oh looks like it's been damaged on this side too". You see the red pattern on the door skin...
Maybe it's just normal, you tell me, anyway, some serious glassing ahead.
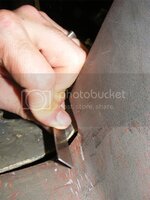
By the way, yes I know the body is full of nicks, I'm not very proud of that, that was before I discover the razor blade method. Hopefully all the damages are in the picture, the rest of the body is nice and smooth.

One cool point is that I could get the feeling of the rebuilt hinges, it's gorgeous, smooth and firm, no play whatsoever.


One last stuff:
Some may remember I bought ages ago a '80 bumper on the cheap, well, that was too cheap. I realized how hard to would be to make it look OK, so I went on a hunt and snatched a good prey at good price.

16554f559b966516d.jpg
Brand new Eckler '80 bumper. That will save me a lot of time.
 
I like the pulleys :D

not looking forward to the bodywork ??? Get epoxy resin for the door, something that will work on SMC. I just bought Evercoat SMC resin and while it seems to stick very well it took forever to cure with that white cream hardener.... never again, next time I buy epoxy resin that is mixed 1:1 or 1:2 with hardener, much better to get the mix right....
 
I like the pulleys :D

not looking forward to the bodywork ??? Get epoxy resin for the door, something that will work on SMC. I just bought Evercoat SMC resin and while it seems to stick very well it took forever to cure with that white cream hardener.... never again, next time I buy epoxy resin that is mixed 1:1 or 1:2 with hardener, much better to get the mix right....
I bought epoxy resin from allegedly THE resin specialist in Montreal Plasto. They sell under their own brand, it's 5:1 epoxy, hardener is a clear viscous liquid.
In term of material, I'm pretty much all set. My concern, regarding the doors, is more how to proceed. It not like recreating a corner and plugging a hole, it's about thickening the door panel while keeping a smooth and uniform shape. I definitely need guidance on than. I'll probably ask the "rookie" from Calgary.
By the way I'm curious to know what you guys think about the resin+fiberglass powder compound. Someone ever used it?
 
I like the pulleys :D

not looking forward to the bodywork ??? Get epoxy resin for the door, something that will work on SMC. I just bought Evercoat SMC resin and while it seems to stick very well it took forever to cure with that white cream hardener.... never again, next time I buy epoxy resin that is mixed 1:1 or 1:2 with hardener, much better to get the mix right....
I bought epoxy resin from allegedly THE resin specialist in Montreal Plasto. They sell under their own brand, it's 5:1 epoxy, hardener is a clear viscous liquid.
In term of material, I'm pretty much all set. My concern, regarding the doors, is more how to proceed. It not like recreating a corner and plugging a hole, it's about thickening the door panel while keeping a smooth and uniform shape. I definitely need guidance on than. I'll probably ask the "rookie" from Calgary.
By the way I'm curious to know what you guys think about the resin+fiberglass powder compound. Someone ever used it?

I wouldn't do anything with the door right now bodywork wiseYour main concern right now is to get the inner door frame centered between the A and B pillars. Don't even look at the gaps right now. Get it centered, then shoot us some pics. You are a long ways away from doing any glassing Denis.
 
As an Amazon Associate we earn from qualifying purchases. Product prices and availability are accurate as of the date/time indicated and are subject to change.
I wouldn't do anything with the door right now bodywork wiseYour main concern right now is to get the inner door frame centered between the A and B pillars. Don't even look at the gaps right now. Get it centered, then shoot us some pics. You are a long ways away from doing any glassing Denis.

I will Sensei, I will. *bow*
 
By the way I'm curious to know what you guys think about the resin+fiberglass powder compound. Someone ever used it?

I've never used it myself. I'm thinking it might be a little difficult to sand. Seems like it's stronger than microballons, but maybe lighter than something like colloidal silica. If you have enough, it might be worth the time to do a little practice/testing first.

Mike
 
By the way I'm curious to know what you guys think about the resin+fiberglass powder compound. Someone ever used it?

I've never used it myself. I'm thinking it might be a little difficult to sand. Seems like it's stronger than microballons, but maybe lighter than something like colloidal silica. If you have enough, it might be worth the time to do a little practice/testing first.

Mike
From my first tests, fiberglass powder mix feel just as hard to sand than fiberglass, this is definitely for "structural" filling.

Wonderfull, I learned something new today. I didn't know about all those resin thickener. Thanks.

I got to look into those type of product, looks like the kind of stuff I need for my edge sharpening idea...
 
I'm in springdale UT right now, as soon as I get back to Montreal I'll check this out, thanks.
 
+ 1 on the photos

Did you get any snow? Looks like it's supposed to be pretty nice weather the rest of the week . . .

Mike
 
Did you get any snow? Looks like it's supposed to be pretty nice weather the rest of the week . . .

Mike
Yesterday was cold windy with a little of snow, but this morning it's blue cloudless sky, pictures are gonna be awesome.
 
Quiet a while since last update, well, vacations have been fantastic but not in a restful way.
I actually caught a bit of a down since back home :zzz::zzz:

Anyway I'm kinda stuck for the moment, so I haven't spent much time in the garage lately.
The next step I'm facing (door/front clip alignment) is pretty intimidating, I need to brace myself up:hissyfit:

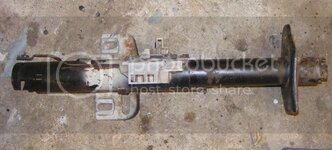
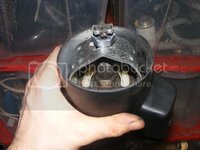
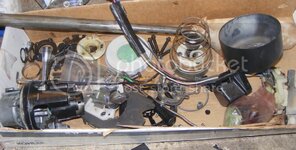
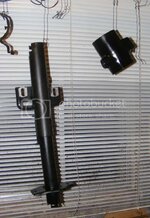
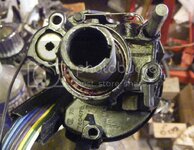
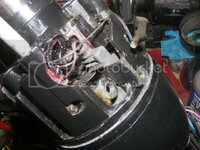
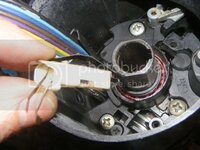
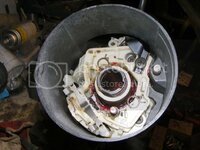
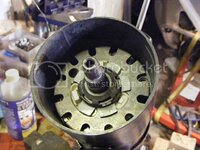
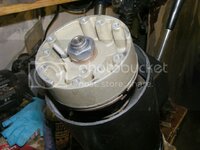
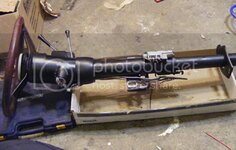
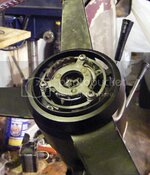
In the meantime, here's some pic from my steering column I rebuilt just before going in vacations.

The '80 replacement column was working fine, slight problem : it had been collapsed for real before.
column10.jpg

I had to stretch out 1/2 the lower inner tube on the press.


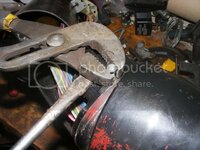
Here's my ghetto pusher to remove the column lock plate retainer.
column8.jpg

And my ghetto way to pull out the tilt axis pin.
column7.jpg


column2.jpg


column5.jpg


I did not changed the bearings, they looked good enough, I cleaned them, re-packed with synthetic grease and declared them good to go. It not like those was spinning at thousands of RPM for hours.
column9.jpg


column15.jpg


column14.jpg


column13.jpg


The plastic retainer was in surprisingly good shape, didn't break, still soft.
column3.jpg


The pin in not in the best shape and seems too short, it doesn't touch the metal leg of the piece that goes on top of that. I'll get back to that later.
column1.jpg
And yes, the clip is missing, it's just that I took the pic to soon.


column11.jpg


column12.jpg


column4.jpg
 
Interesting, I've never seen the insides of a steering column before. I think once I took it apart, I'd never figure out how to put it all back together with all those strange looking parts. How does it feel?
 
Interesting, I've never seen the insides of a steering column before. I think once I took it apart, I'd never figure out how to put it all back together with all those strange looking parts. How does it feel?
With Jim Shea's paper in hand, it was complex but totally doable, without I'd probably do mistakes. Took me two days, once you did it once you'd probably wrap it up in an afternoon.
The horn part was the most rewarding part, my original column and the replacement I bought didn't have the horn assembly, took me months to find the several parts at good price, felt good to see it in one piece.

Along with the power window regulator it was one of those unplanned rebuilt. Hopefully now I don't see anymore mechanical assembly I didn't took apart in the car, so I'm confident I'm done with Bubba's little nasty surprises. phew.
 
good job!! it makes me nervous just looking at those parts dissasembled...

:bounce: I love those mechanical jug saw puzzles.....I rebuilt my '78+ column in '95, before there was any internet information I knew of....I had nothing, but it was assembled but damaged when I picked it up for ten bux....

paid another 40 something for the parts, and so it's still there....:bump:
 
Interesting, I've never seen the insides of a steering column before. I think once I took it apart, I'd never figure out how to put it all back together with all those strange looking parts. How does it feel?
With Jim Shea's paper in hand, it was complex but totally doable, without I'd probably do mistakes. Took me two days, once you did it once you'd probably wrap it up in an afternoon.
The horn part was the most rewarding part, my original column and the replacement I bought didn't have the horn assembly, took me months to find the several parts at good price, felt good to see it in one piece.

Along with the power window regulator it was one of those unplanned rebuilt. Hopefully now I don't see anymore mechanical assembly I didn't took apart in the car, so I'm confident I'm done with Bubba's little nasty surprises. phew.

As soon as I saw those dismantled pictures, I thought "I hope you have Jim Shea's paper in hand." That thing is invaluable for working on those mechanical nightmares.
 
:bounce: I love those mechanical jug saw puzzles.....I rebuilt my '78+ column in '95, before there was any internet information I knew of....I had nothing, but it was assembled but damaged when I picked it up for ten bux....

paid another 40 something for the parts, and so it's still there....:bump:
One part (I think it's called the switch support) requires a specific torquing procedure, 4 bolts to be screwed up to 88 Lb-Inby by 22 Lb-In steps. Dunno how you can figure this out without instructions...
 
...With Jim Shea's paper in hand, it was complex but totally doable...

As soon as I saw those dismantled pictures, I thought "I hope you have Jim Shea's paper in hand." That thing is invaluable for working on those mechanical nightmares.
You betcha!
Without the paper I'd probably had bought yet another replacement column.
So yeah, thanks Mr Shea, I own you one :thumbs::beer:
The only really tricky part it the lock plate removal, you can't do it without the proper pusher.... or some kind of replacement :huh:
 
:bounce: I love those mechanical jug saw puzzles.....I rebuilt my '78+ column in '95, before there was any internet information I knew of....I had nothing, but it was assembled but damaged when I picked it up for ten bux....

paid another 40 something for the parts, and so it's still there....:bump:
One part (I think it's called the switch support) requires a specific torquing procedure, 4 bolts to be screwed up to 88 Lb-Inby by 22 Lb-In steps. Dunno how you can figure this out without instructions...

Simple, I didn't know, and so it wasn't done that way....but most of this stuff is something like crazy, like wheel torque specs.....I been hammering wheels for some 60 years now.....my Ingersoll 1/2 impact at 120 psi is good for 6 taps on each lug nut.....rough equivalent of ~70 ft lbs.....maybe more, I forget....

been some decades, aluminum/steel never had a loose wheel....

:smash::smash:
 
...With Jim Shea's paper in hand, it was complex but totally doable...

As soon as I saw those dismantled pictures, I thought "I hope you have Jim Shea's paper in hand." That thing is invaluable for working on those mechanical nightmares.
You betcha!
Without the paper I'd probably had bought yet another replacement column.
So yeah, thanks Mr Shea, I own you one :thumbs::beer:
The only really tricky part it the lock plate removal, you can't do it without the proper pusher.... or some kind of replacement :huh:

OH, the lock plate, heheh....I still have that piece I made, since '95, all it is was a piece of exhaust pipe I cut out maybe 90* of the side, it's about 2-3" long, and a plate over top of it, so to put the nut on the tele extension, very loose/up top, tighten the stock tele star nut nice and tight so the shaft cant move...then crank down on the hex nut to clamp down on the C section pipe and allow the little clip to slide in/out of place....piece of cake....

BUT I don't want to discuss how long it took me to figger out that **** with NO help, back in '95....maybe 3-4 hours, a afternoon of busted fingers and nutz.....

:smash::smash::surrender::twitch:
 
Hi Everyone, here's some news from the front.
The resto have been slowed down for a while. There's been the vacations, and then I decided to quit my job and start my own company.
Enough to keep a man away from it's cave for a while.

Let's start with the good news :
Finally I can call a wrap on two of my subproject :

-The gilmer belt setup
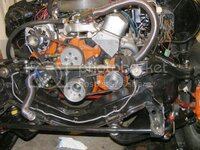
gimerbelt-11-done1.jpg

Finally received the serpentine 6 ribs small belt for my PS pump. I was really unsure I measured the length right, turned out to be the perfect size :
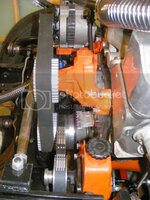
gimerbelt-12-done2.jpg


One last concern, the water pump pulley is really close to the spreader bar, only 1/8". I don't know how much an engine can move in that direction, but I got the feeling it will touch. You tell me.
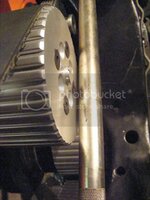
gimerbelt-13-done3.jpg


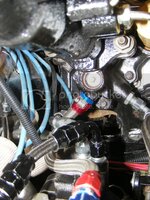
Packing the fuel line was a bit more complicated than expected. It looks a little 'messy' but everything feels solid.
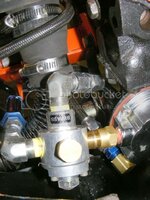
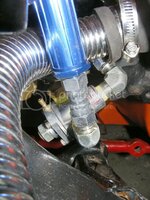
gimerbelt-14-done4.jpg

gimerbelt-16-done6.jpg

Here's my custom bracket finished, we added some meat because it was still flexing. I put a 10mm bolt instead of the original 3/8", alternator don't wiggle on its axis anymore
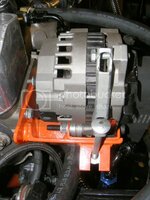
gimerbelt-15-done5.jpg


Another completed project is the borgeson/hydroboost setup.
Took me some time to get the hoses right, but now they are.
I used steel -6AN fitting for the line of high pressure, so I can tighten them really hard.
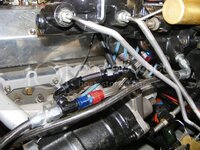
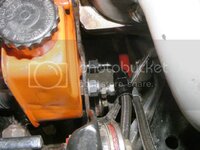
hydroboos-11-done1.jpg

hydroboos-13-done3.jpg

hydroboos-14-done4.jpg


While being away from the garage I still could find time to find good bargain.

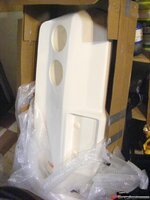
Bought a fiberglass front bumper, that's another completion, it was my last missing body part.
Got is from CF member lvmyvt76, thanks you!
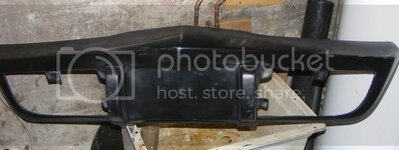
newfrontbumper.jpg


I also found a good deal on part to make my carputer :
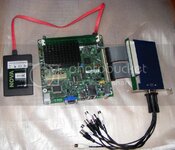
carputer1.jpg

Atom 510 motherboard, 2 Go of RAM, 30Gb SSD hard drive (to survive the rough idle vibrations), and a 4 input video capture card (yes, there will be at least 4 camera in the car).
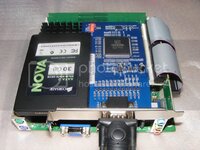
carputer2.jpg

I'll probably to a custom enclosure out of some aluminum plate.

Also ordered and arduino nano microcontrolleur to deal with the sensor reading.


Ok, that was the sunny side, now here's the trouble : door alignement.
We did a couple of attempts, all wrong.
I found this post from Stinger on CF : http://forums.corvetteforum.com/1573830691-post14.html
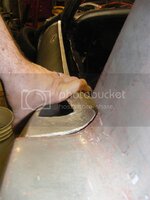
It was making sense, so I tried to first align align upper flat side of the rear of the car.
newalignementrear2.jpg

The result is not really encouraging
newalignementrear1.jpg

newalignementrear5.jpg

newalignementrear4.jpg


newalignementrear3.jpg

I don't know whish one is wrong, the door or the body, but you can definitely tell the body and the door don't come from the same car.
*sigh*
I still don't know how I'm gonna do.
Glass the door? trim the body? seperate the rear quarter panel at the door and glue is back tighter?
Any advice are welcome.

At the front I think I got it right, at least until I test fit the front clip.
newalignementfront2.jpg

newalignementfront1.jpg


So yeah I'm moving forward, it's that feeling that the finish line is moving forward in time even faster.
Still got the faith tho.

 
I think the factory aligned the quarter panels to match the door skins. To get that worked out, you'll have to break the bonding strips free and re-align the quarter panels.
 
Congrats and good luck with your new company :thumbs:

Adding some glass to the door is definitely the easiest way out of this. How much is it off? 3mm (1/8") ?? hard to tell by the pics...
 
Congrats and good luck with your new company :thumbs:
Thanks Karsten. Luck should be on my side, right now I'm gonna do iphone developement, and there's demand. I'm seriously lurking in the embarked display, my carputer will see some test development, I really like oled displays, got stuff running in my head....

I think the factory aligned the quarter panels to match the door skins. To get that worked out, you'll have to break the bonding strips free and re-align the quarter panels.
That what I started to do on the other side, the bottom on the quarter panel was sitting on a good 1/4" of this pink factory glue.
But it can't be the case here.
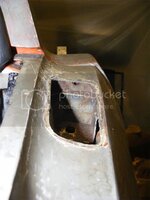
newalignementrear6.jpg

There is no way you could change this dimensions, it's in one piece as far as I know, the only bonding strip I see is where I market it.
So it's must be something else.


Adding some glass to the door is definitely the easiest way out of this. How much is it off? 3mm (1/8") ?? hard to tell by the pics...

huh, more like 1/4" alas, which is absurd.

When I got back to take the measure, I did a recap of what I'm found on this door :

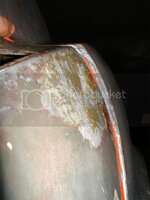
1 -Big patch of bondo above the fiberglass repair you can see in yellow (pretty much at the same area I need to glass)
2 -Some metal bended just behind the repaired area (see upper left of this pic)
doordamage.jpg

3- The hinges had been cracked and rewelded


Let's do CSI style, my take is that something impaled the door while backing up.
My guess is that the top curve shape on the door have moved up during the accident, screwing what I'm taking as reference point.
At least when I watch this pic, it makes sense.

newalignementrear3.jpg


Thanks for the inputs.:drink::drink:
 
Ok, this wasn't a good week-end.
Spent the two days preparing the event, jacked up the car, put brake in piece *again* to clean off the DOT5 fluid.
Bled the the MC, blown the lines, reinstalled everything.
Fluid started to go down the lines, so far so good.....then I notice a large drip on my driver front caliper, the one you'd get when you forgot to put the little O-ring back.
Took the caliper apart to make sure it isn't. It's the bleeder who was leaking like crazy. bleeder is brand new, I tried another one, same thing.
That was enough for the day, Put a pan under the caliper, and let it bleed at will, it was late, got the **** out of the garage.

For what I've read there is not much you can do about it, the caliper is junk.
The more it goes the more I think I'm gonna take my original calipers and get them sleeved by my buddy. At least those weren't leaking.

Ok, enough venting, have a nice week all.
 
Calipers: I just converted my rear calipers to O-ring and had two bleeders leak. They did not leak before so I really wonder WTF is causing them to leak. I tightened some more and the leak stopped ... But they're now really tight, shouldn't have to tighten that much ... I wonder if you took the threads off an old bleeder could it be used as a lapping tool ??? Some lapping compound should create a better sealing surface ...
 
Back
Top