My '76 restoration (long post)

I've considered doing a serpentine mod for a while, for the reliability, but I find the setup bulky, rather non esthetic (unless you spend big $$ for billet) and I still don't address the steering pump access problem.
Then I stumbled on a post on another corvette forum about bilmer belts.
I was hooked.
Ordered a kit on ebay, 115$
16554f2b7dc4d14c8.jpg

It's a small block long water pump setup. The short water pump model doesn't have the V-belt groove for the power steering.
16554f2b7dc5417c9.jpg

Problem is that I have a short water pump, so I had a spacer machined, and also had the holes chamfered.
16554f2b7dc50281a.jpg

I need the installation to be flush for clearance reason....spreader bar's on the way
16554f2b7dc586538.jpg

And to address the steering pump issue, I decide to put the alternator on the driver side. My machinist buddy made me this bracket :

16554f2b7dc5d1835.jpg

It's just point welded, once I validate the fitting he will fully weld it (TIG).

Here's how it look so far, I will make the tension bracket this week end.
16554f2b7dc622b32.jpg

Now the alternator sit in front of the engine rather than on its side, and a bit lower, just behind the electric fan.

Isn't that just a little overkill?
 
Isn't that just a little overkill?
Hell yes it is :D:bonkers:
I got to admit I felt for the 'superchargerish' look.
But all in all, given machine time is free, it's a very good bang for the bucks :
loss of weight, better weight placement of the alternator, not more belt slipping/throwing (except the PS pump), easy access to PS pump, AND awesome look.
 
I tried the exact same setuo on a bbc. Junk, I had to mill the crank pulley to align the ps. belt and then I threw it in the corner. Hope it works better for you.

Sent from my GT-I9000 using Tapatalk
 
I tried the exact same setuo on a bbc. Junk, I had to mill the crank pulley to align the ps. belt and then I threw it in the corner. Hope it works better for you.

Sent from my GT-I9000 using Tapatalk
I'll let you know as soon as I get my PS pulley on.
I wish I had a keyway style pump, I get ripped 60$ each I ask nearest garage to have it pressed on. I'm giving myself some time to get a better deal.

Why not just buy a 40.00 puller installer kit?
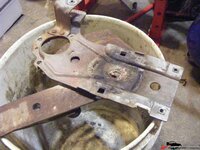
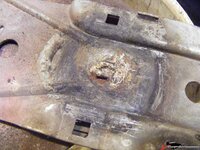
Because I didn't want to buy something I would use once.
But then I remembered that Canadian Tires is running a tools lending program, and the steering pulley installer is amongst the list.
Installed the pulley this afternoon, I need a smaller belt but looks like the shimming to align the pump with the crankshaft pulley groove will be minimal.
P/S pump support bolt are a tad short to my own taste, will buy longer ones tomorrow and then post pictures.
Thanxalot for the input, I sometimes (often?) need to be told the obvious.
 
even if you buy the tool you're paying $20 less than what you spend to have a shop install it.
that's how I ended up with a garage full of tools :lol:
 
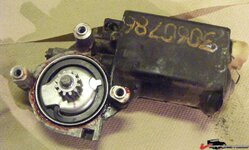
Do you guys wanna know how Bubba fixes window regulators?

Here's how :
16554f3de7c8717c4.jpg

16554f3de7c81dbf3.jpg

Of course the assembly barely moves, no wonder the motor was blowing fuse on a regular basis.
Nothing to save here, I need a new regulator for my passenger side.
Good side : I could remove the motor, it's in good condition, even with the miserable life he had.

Just when I thought the replace-that-broken-part season was over *sigh*
 
Last edited:
well, if you bought it locally I'd still make them give me some fresh glue - obviously this stuff has been sitting for a while... if you cannot get it exchanged then glue two pieces of scrap-fiberglass together and see how it holds up... im sure it'll be fine but at that price you can expect "fresh" glue

if they are nice and give you a new cartridge the at least you got the doors done with free glue ;)
Update : I had the 8116 cartridge changed, 3M rep have been super nice.
It took me the time because it's not easy to go to a place which is only open during my worktime, like pretty much all the specialized/professional stores.
With a full time job it's often easier to order on Ebay than to go buy stuff locally.
 
same here, I buy most of my stuff online and have it delivered... often it's even cheaper than anywhere local. The place where I buy my paint (PPG dealer) sells the 3M cartridges for $48 plus tax.... even Summit has this stuff online for $36 ....
 
Once again, it's been a while since last update. Sorry guys, too much work, no time for posting.


First reason it took so long, we went totally overboard with the Gilmer belt experiment.
At least a good opportunity to show younger generations the danger of a free run at the machine shop.
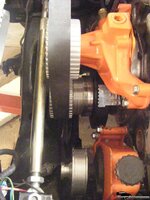
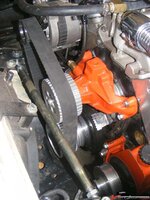
Since the I had to have a special pulley done for the steering pump, we tried to catch best of both world.
Here's the result.

16554f559b2ff0cdc.jpg

16554f559b308751c.jpg

16554f559b303c603.jpg

16554f559b30d530a.jpg

The crankshaft pullet has been machined to the serpentine pattern.
Still got to find the proper length belt.


Another thing that took time was the doors.
I think I'm done for the mechanical part of the it. Finally.
I've received my replacement regulator from Ken's corvette part, disassembled both regulator, changed the motor gear, cleaned the spring and everything.

16554f559c34cd581.jpg

I basically had to apply the same treatment to the passenger door, cleaning the rust, glassing shut so small rust hole, filling some hole and gluing bottom on the panel.


I did one experiment on the door seams between door structure and panel:

16554f559b9618705.jpg
This is epoxy resin with fiberglass powder added. The specialized shop sells it by the pound, better wear a real mask when you do the mix.
I might be wrong, but apart the consistency, wouldn't this be the perfect filler?

Once the the door gut where checked cleaned and reinstalled (except the glass), I went to the daunting task of installing and aligning the door.... alone.
Holly molly, that was some sport, for a mean result :

16554f559a8fcb01e.jpg
16554f559a9035181.jpg
16554f559a907ae8e.jpg

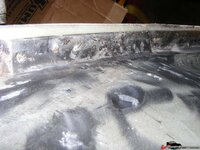
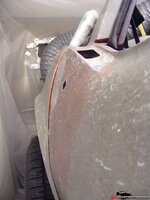
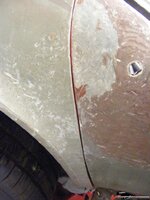
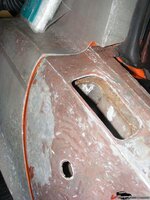
The shapes don't match. at all. crap.
For the bottom, I think it's the rear panel's fault, but for the top is rather a case of "oh looks like it's been damaged on this side too". You see the red pattern on the door skin...
Maybe it's just normal, you tell me, anyway, some serious glassing ahead.
By the way, yes I know the body is full of nicks, I'm not very proud of that, that was before I discover the razor blade method. Hopefully all the damages are in the picture, the rest of the body is nice and smooth.

One cool point is that I could get the feeling of the rebuilt hinges, it's gorgeous, smooth and firm, no play whatsoever.


One last stuff:
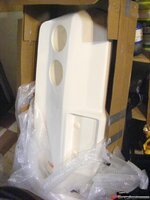
Some may remember I bought ages ago a '80 bumper on the cheap, well, that was too cheap. I realized how hard to would be to make it look OK, so I went on a hunt and snatched a good prey at good price.

16554f559b966516d.jpg
Brand new Eckler '80 bumper. That will save me a lot of time.
 
I like the pulleys :D

not looking forward to the bodywork ??? Get epoxy resin for the door, something that will work on SMC. I just bought Evercoat SMC resin and while it seems to stick very well it took forever to cure with that white cream hardener.... never again, next time I buy epoxy resin that is mixed 1:1 or 1:2 with hardener, much better to get the mix right....
I bought epoxy resin from allegedly THE resin specialist in Montreal Plasto. They sell under their own brand, it's 5:1 epoxy, hardener is a clear viscous liquid.
In term of material, I'm pretty much all set. My concern, regarding the doors, is more how to proceed. It not like recreating a corner and plugging a hole, it's about thickening the door panel while keeping a smooth and uniform shape. I definitely need guidance on than. I'll probably ask the "rookie" from Calgary.
By the way I'm curious to know what you guys think about the resin+fiberglass powder compound. Someone ever used it?

I wouldn't do anything with the door right now bodywork wiseYour main concern right now is to get the inner door frame centered between the A and B pillars. Don't even look at the gaps right now. Get it centered, then shoot us some pics. You are a long ways away from doing any glassing Denis.
 
I wouldn't do anything with the door right now bodywork wiseYour main concern right now is to get the inner door frame centered between the A and B pillars. Don't even look at the gaps right now. Get it centered, then shoot us some pics. You are a long ways away from doing any glassing Denis.

I will Sensei, I will. *bow*
 
By the way I'm curious to know what you guys think about the resin+fiberglass powder compound. Someone ever used it?

I've never used it myself. I'm thinking it might be a little difficult to sand. Seems like it's stronger than microballons, but maybe lighter than something like colloidal silica. If you have enough, it might be worth the time to do a little practice/testing first.

Mike
From my first tests, fiberglass powder mix feel just as hard to sand than fiberglass, this is definitely for "structural" filling.

Wonderfull, I learned something new today. I didn't know about all those resin thickener. Thanks.

I got to look into those type of product, looks like the kind of stuff I need for my edge sharpening idea...
 
Top