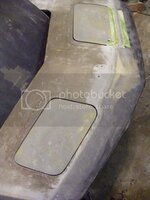
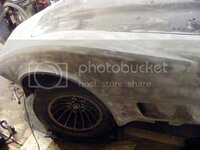
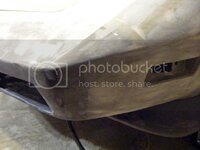
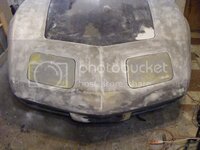
My '76 restoration (long post)

Hey thats cool, I think the side molds shouldve been separated and be in 2 pieces, but no big deal, can make another.
Humm more projects???

Yeah I think that the spoiler should follow the wheel arches, sorry LOL
 
Dont look that bad considering what you started with. I should be back in business in a couple weeks if you need some help with those molds.
 
Ok, here's a little side project I've been on for last weeks.
OLED display:

[ame]http://www.youtube.com/watch?v=FW2Ft24gRuU[/ame]

The plan is to have a set of these acting as gauges in the center console.
As the video don't show, the display is perfectly white.
The contrast is obsolute, just as the angle of vision. I never had OLED display before, they are amazing.
Took some hacking to get the most of it, my microcontroller is rather weak, so I wrote custom rendering routines for my specific needs.
I have setup some kind of tools chain that let me export all my Photoshop bitmap ressources into the proper format.
That was cool coding in 8 bit. reminds my old Commodore 64.
 
Thanks!
I'll get an update on gauge later, but if you're asking, here's some update.

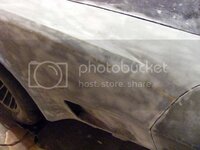
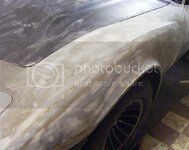
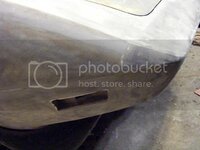
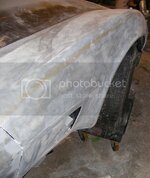
First something I did weeks ago but never felt like posting. I did some block sanding test on one front fender. Used epoxy + ceramic micro bead, sanded with 80 grits. I obviously don't looks smooth, but my hand tells me otherwise.
bodywork-35-blocksanding2_zps8bc8017b.jpg


bodywork-34-blocksanding_zps7f59ed18.jpg


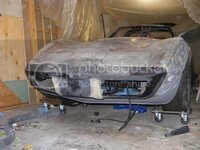
Then, the ongoing process that is taking me an humongous amount of time : the front bumper.
I had to drill the holes, modify the brackets and adjust everything. I stopped counting how much time I dismantled this.
A freaking puzzle. :suicide:

But it's coming along. Slowly, but surely.
bodywork-36-frontfitting1_zps20485eed.jpg


I gave up on the pace car spoiler, and switched to a chrome bumper era spoiler.
Smaller more subtle, and Muuuuuch easier to fit. (note: the gap at the bumper corner is normal, it was not bolted a that moment)
bodywork-37-frontfitting2_zpsc9192e92.jpg


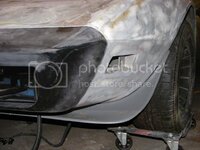
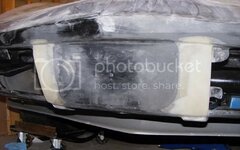
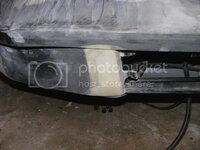
I'm pretty much done with the bumperette removal. This is also taking me a lot of time, but I wanted something special, more 'flowing' than just cutting out the bumperette. I'm still running the front crash pad, but it look less massive IMHO.
bodywork-38-frontfitting3_zpsb4c43cdf.jpg


bodywork-39-frontfitting4_zpsfbd6d2f5.jpg

bodywork-40-frontfitting5_zps11d6f46c.jpg


The base is fiberglass, and the shape is epoxy + fiberglass 'fume'.


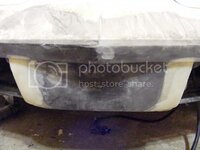
My last issue is the center area :
bodywork-41-frontfitting6_zpse970665f.jpg

I already thickened the backside with fiberglass, and I'm now grinding it down to make it fit, not done yet.
I could probably force it down to the correct height, but I'm afraid all the force I would apply went gluing would eventually come to bite me in the ass later. I want it to naturally fit in.

Bottom line : fiberglass front bumper = lot of work
 
Last edited:
Another progress I can report is the making of the nose emblem.

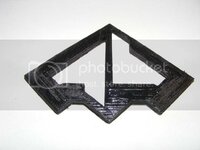
A friend made me a 3D print at the correct size (merci Pierre!)

Here is a faulty print (inverted Z doh) I use to make some acetone tests, but you get the idea of the roughness of the print.
emblem1_zps5063ee12.jpg


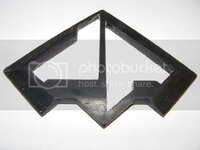
Once sanded it looks like that:

emblem2_zps637753c4.jpg


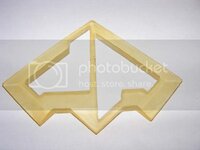
Then took a print of it, recast it in epoxy, and did all the touch up:
emblem3_zps06e0a4de.jpg
Black dots are dust caught in resin
ack2.gif


Now I have a smooth reference, I gonna make a cast for the final emblem.
 
My last issue is the center area :
bodywork-41-frontfitting6_zpse970665f.jpg

I already thickened the backside with fiberglass, and I'm now grinding it down to make it fit, not done yet.
I could probably force it down to the correct height, but I'm afraid all the force I would apply went gluing would eventually come to bite me in the ass later. I want it to naturally fit in.

Bottom line : fiberglass front bumper = lot of work

Maybe it would be easier to trim off some depth (of the nose) to get it to fit better?
Larry, I'm having trouble getting what you mean. Maybe it's because you're talking about what I'm already doing and it's my fault for not describing my method precisely enough.
What I'm doing is adding layers of fiberglass to the underside on the top of the bumper cover, and grinding down the topside of it.
Is that what you meant?
If not, could you try formulating another way?
 
Denpo, sure wish i could have helped with the nose emblem. Its just one thing after another here. Good news is the 1st vmc will be in place next Tuesday. I am so far behind now though it could be 2 months before I could get to your project. Glad you found somebody to help you.
Scott
 
Denpo, sure wish i could have helped with the nose emblem. Its just one thing after another here. Good news is the 1st vmc will be in place next Tuesday. I am so far behind now though it could be 2 months before I could get to your project. Glad you found somebody to help you.
Scott
Glad to know you're moving foward and away from your misfortune.
Who knows how far I'll be in two month? The story ain't over.
Stay tuned :beer:
 
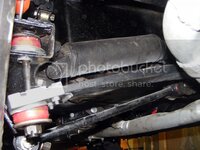
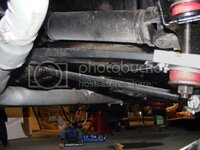
Last week I had a little bodywork break, and decided to install a Xmass gift :

monospring2_zpsb8da06a3.jpg

monospring1_zpsea96c9d8.jpg


VBnP 330lbs monospring. Big thanks Aaron, haven't felt that Xmassy for a long time. I still got to assert the insulation, I will probably extend the stock heatshield somehow, or wrap the exhaust on the particular area.


Then back to bodywork. I finally made the no-return leap and installed the front bumper for good with 3M 8115.
Then started the glassing of the seams and the overall shape.
Even with pre installation adjustment, I still have a lot of areas to fill.
bodywork-43-glassingfrontbumper_zps24fc0a2a.jpg

Once it's done I can finish mudding the front of the car. Then I'll decide if I want to start the rear window mod. It's all about time.
 
Front is almost done, bodyworkingly speaking.
Still details here and there, but the front spoiler is finally glassed in and I could mud the whole front.
As already said, the front clip is from a failed resto, and it show the guy to started was pretty heavy handed with sanding tools.
I surely added my share when razor scrapping the lastest remains of paint.

bodywork-45-frontfinished_zps9449a482.jpg


bodywork-46-frontfinished2_zpse27947a1.jpg


I bought a laser level at a garage sell, it's gonna be usefull for making the centerline perfectly aligned.
bodywork-47-frontfinished3_zps1404ea3d.jpg


bodywork-48-frontfinished4_zps0eb51e0b.jpg


bodywork-49-frontfinished5_zps3011e469.jpg


Of course I still have to set the door free many other detail, but I thought this was still update-worthy.


I also make a set of SS mounting tab for the front spoiler
bodywork-44-frontspoilertabs_zpsbf9d5a34.jpg

I'm thinking about adding a layer of fiberglass to the back while installed, to force it to keep the desired shape...
 
Your doing a lot better than I am. I am trying to get my daughters boyfriend involved with the resto. Time will tell lol.
 
Your doing a lot better than I am. I am trying to get my daughters boyfriend involved with the resto. Time will tell lol.
Thanks man!
Time told me the novelty factor fade off rather quickly.
As soon people find out you're still months, if not years away from completion they stop showing up, and I just can't blame them for that.
I still can call them from time to time when I need help on stuff you can't do alone, but I do alone all I can.
 
Ok guys, time for an update.
Lots of little works here and here, nothing spectacular, but necessary.

First I made what I hope is my lastest Summit order.
Bought a fire extinguisher, I guess it's kinda necessary with those cars.
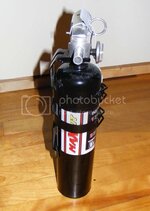
fireextinguisher_zps9cce77fe.jpg


Also bought a set of studs. I switched to M12 1.50, a tad bigger.
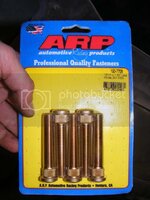
ARPstuds_zps32eb7857.jpg


As I installed them on the front hub I also did something I initially ommited : changing the bearing cups. At the time I only changed the bearing themselves. Now I have a press it's a quick job.
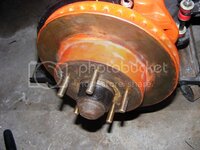
ARPstuds2_zps5d6c15c2.jpg

Excuse the crappy paint, it's just for rust prevention.

Also on the list, a new set of ligths, those are sealed halogen, They are 8$ each, when I saw the price of the unsealed conversion I prefered to count on my relay mod to get good lighting.
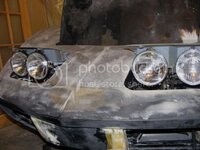
headlights2_zps36ac3e09.jpg

I started doing polishing work, on the left the rings are polished, not on the right.


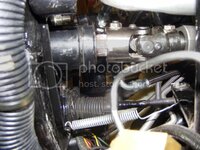
I also realigned my steering column. After speaking with guys at Borgeson, it appeared my column mis-alignement was a possible casualty of the Borgeson swap.
So I removed the column and grinded a flat on the shaft at the correct angle.
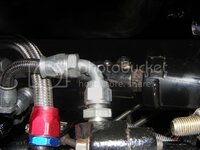
U-jointalignement_zpsf082fc83.jpg

U-jointalignement2_zpsbbd96a93.jpg


Another small fix was the horn button on the column. I a pin that mounted on a spring that was too short. I had a new one machined.

Now the steering system is complete from the wheel down to the wheels.
willy_nilly.gif


Another small work, I fixed a crack in my front grill :
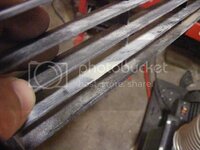
Frontgrills_zpsf484445a.jpg

To be honest I don't know yet if I'm gonna use them, just in case...

I also received a set of french lock from a forum member (thanks 1970greenLS5 ). They are installed.

I also received a set of brand new door panel I bought from Rogman. I initially painted all my interior part with some sort textured spray-able vinyl, I was aiming low, trying to mask imperfection.
Now with those door panel, no more shame.
So I stripped all the paint, I'm gonna repaint everything the correct Corvette black, just paint.


I also sorted out all the engine bay wiring, especially the electric headlight actuators.
I'd like to be able to do some electric tests soon, that would be the first step toward restarting the engine.
 
It's looking great. Did you have to drill out the wheel hub or your rotor to get the 12mm studs to fit? I would also like to see the front so I can see the front spoiler when you have time. I bought the two side pieces of my spoiler for almost nothing but I still need to figure out what I want to do about the middle piece.
Thanks,
Darren
 
Last edited:
It's looking great. Did you have to drill out the wheel hub or your rotor to get the 12mm studs to fit? I would also like to see the front so I can see the front spoiler when you have time. I bought the two side pieces of my spoiler for almost nothing but I still need to figure out what I want to do about the middle piece.
Thanks,
Darren
Thanks Darren.
Yes I had to drill them. Since I did the drilling ages ago, I just can't tell you for sure what size I used. I think I took the smallest drill bit size that wouldn't fit in the hole (1/16 or 1/32 larger). Very little metal have been removed.
For the front spoiler check post #386 you'll see a complete view.
I ruled out the 3 pieces pace car style spoiler, it was made from piss poor mold I got for 20$ (you can call me captain Cheap), and the resulting side pieces would have taken me way too much for to make fit. Plus I learned you have to shave the wheel arch lip at the front, which I was reluctant to do.
I opted for a one piece spoiler you'd find in pre-pacecar car era. Smaller, rounder a the corner,probably less effective but visually more pleasing to my own taste. To each its own.

Just as I glassed in the bumpers, I will leave the spoiler as a separate piece because it has a great potential to be crushed or damaged at some point. Which is ok because I did buy a pair of them (75$ for the two, how could I resist).
Speaking of good deal, today I bought a set of mint door glasses and an undented T-top bar (you know the chromed H-shaped trim between the T-tops), 130$ for the lot. Not too shabby.
 
Nice to see some progress, i haven't done anything to my '79 in month ... New body mounts are still in the box/bag ....

What wheels are you going to run and what are you doing about the lug nuts? 1/2" might be easier (better availability) ?? Or maybe the lug nuts I sent you fit? I think those are M12 with conical seat....
Thanks Karsten, no wonder the Vette feels lonely, you've been doing great job on the Karmann.
Wheel will be Turbine wheels, didn't you know already I'm totally nut about those wheel, praying one day someone produce 17" replica of them.
Funny fact, when I search for "Turbine wheels" on Google Image, a pic from my thread is 6th in the list :eek:. Searchs are personalized, so maybe it's just me.

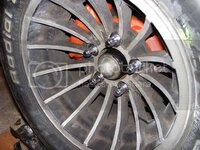
The M12 choice comes directly from the spaces you sent me, I'm just sticking with that. I bought a set of M12 conical, with the matching oval washers.
wheels2_zps42064695.jpg

I'll have a ring machined to fit the hub to the wheel, it's just that I'm wondering if it's not gonna be a hub cap at the same time, I got to talk with my machinist about that.
 
Top