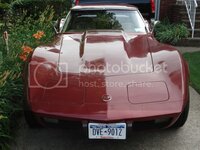
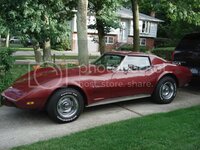
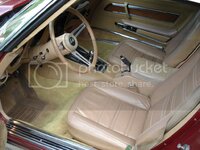
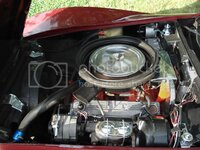
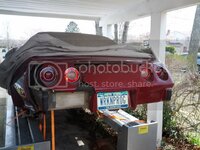
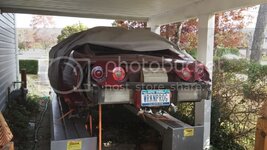
My '75

VetteMod - Corvette Restoration, Modding & Performance Forum

Help Support VetteMod Forum:

greg75vette

The Traffic Baron
Joined
Jun 9, 2009
Messages
703
Reaction score
0
City & State/Province
Lindenhurst, LI, NY
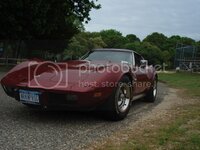
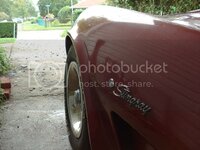
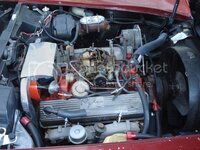
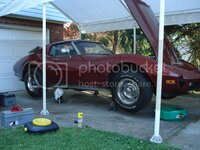
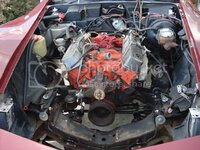
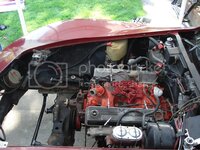
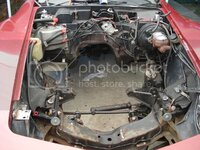
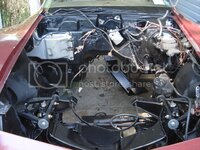
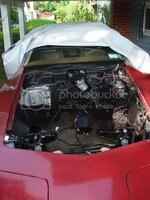
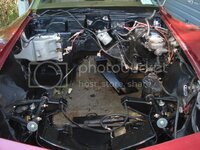
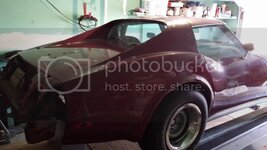
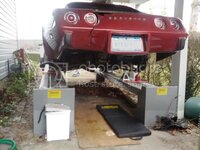
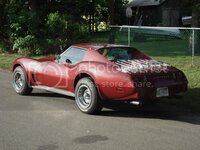
Figured I'd show off my dump. Trust me, the paint looks a lot better in photos. I wanted a project car to build to my specs. One of the primary goals was to ultimately drop an LSx/T56 into it. I didn't decide how I was going to do some serious power (N/A or turbo), but I knew I had something special to work with. I figured a mid C3 would be the best candidate since it had looks (I prefer the rubber bumper and flat back glass look), IRS, and some low hp and less collectible years. I bought Pandora in May '07 as a college graduation gift to myself. She was, what I considered the perfect platform: a low hp (165hp L48), low collectability ('75 coupe), Solid fiberglass, frame, had the mandatory third pedal and she ran pretty well. The mileage was a little high (107K), she was # matching, and the paint and bumper covers were shot: all not so great things. However, the timing and price were right and I liked the option set, so I went for it.

The summer I brought her home. I bought her near my college and on the day I bought her, I drover her about 400 miles from Rochester, NY to Lindenhurst, NY:
assortedlifepics014.jpg
DSC00502.jpg
DSC00501.jpg
DSC00505.jpg
DSC00521.jpg

I had some issues over that summer but nothing major. The following spring I decided to start making progress towards my overall goal for the car, which is simply for it to perform well and add some new tech to an old, sweet looking car. A restomod, if you will.
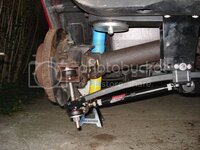
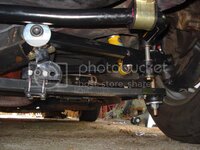
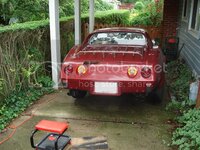
The suspension system was first. I decided on the VBP performance plus system mostly because people seemed to have liked it and I like that it has some adjustability to it.
DSC00736.jpg
I started the day after a heavy rain. Man was it wet in the driveway. That whole summer of '08 was wet. A big deal for the garage challenged.
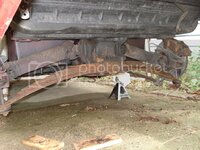
What I started with:
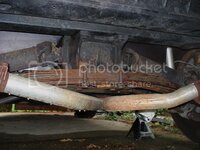
DSC00738.jpg
DSC00741.jpg
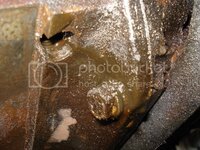
Of course I find this on the first day. Diff oil coming out of one of the spring mounting blind holes:
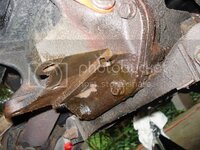
DSC00746.jpg
DSC00748.jpg
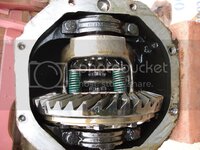
So that had to come out. Got to look over the shape of the diff. From what I saw, everything looked OK. Ironically, Gary (gtr1999) recommended me to check out some of his pages in the rebuild section on this site. Little did I know I would later join and come to realize how this is the end-all-be-all forum with my kind of people :kissass::D
DSC00757.jpg
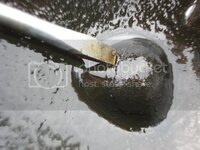
A good shot of the crack in my ass. Ass end that is:
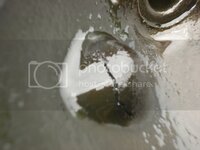
DSC00762.jpg
DSC00761.jpg
So I sprung for a new HD cover and got to paint her all pretty. She will need a rebuild, but I felt she was solid until I built up some more power out of the LS1 I was planning down the road:
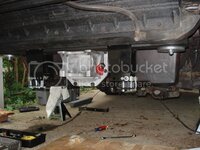
DSC00773.jpg
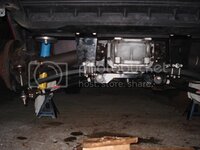
The suspension pretty much finished for the rear:
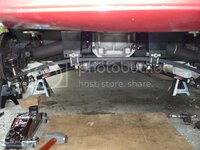
DSC00778.jpg
DSC00783.jpg
DSC00780.jpg

The front end went a lot faster. I actually did the rear first thinking it would be easier:rofl: Boy was I wrong!
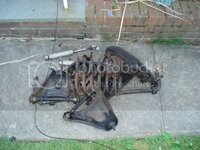
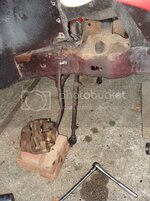
Some carnage and the 'assistant':
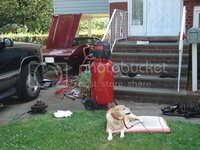
DSC00805.jpg
DSC00806.jpg
DSC00809.jpg
DSC00817.jpg
I didn't document the front as well as the rear. I flew through the front end since I really didn't have any snags. I left the brakes alone because the stockers are pretty good. I will upgrade to Wilwood brakes once the wheel/tire combo get a refresher.
I set the car low and I was quite happy with the improvement in handling. I'm she would be even better with a proper wheel/tire combo.
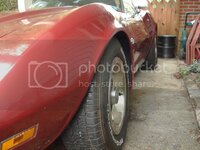
DSC00826.jpg
DSC01625.jpg
DSC00833.jpg
DSC00829.jpg
Notice how the bumpers have gotten worse through the pictures :(
This spring I had to replace my radiator core support and weatherstripping. The weatherstripping was by far the hardest project yet. I fear doing that again. Turned out my radiator was shot and my end tanks were stressed cracked. So I bought a re-core Cu/brass radiator off a forum friend which checked out well and performed through the summer (when I got a chance to drive her, had power steering issues). Why didn't I wait until my LS1/T56 swap to replace it? Didn't know the swap was happening anytime soon. Due to my flywheel being damaged in a bad start (from my wipers, long story) I had a bare spot on the ring gear. But finally, what forced my hand to do the swap nearly 2 years ahead of schedule was the throw-out bearing beginning to go from a mild squeak to a mechanical clunk. Right then I decided that I would no longer put money into an engine/trans I didn't plan on keeping. Between the radiator, power steering pump breaking, and now basically a full clutch job, it was too much for what I wasn't going to run.
Now things became serious...
 
I dunno so much that we are the 'be all end all' as 'been there done that'......

:smash::smash::thumbs:

Good project, nice to see you hanging in there, lotsa guys would have tossed the towel, but you have a vision, same as most of us....and it's allowed to change too....

looking to see more progress, so get to work....:smash::bestwishes:
 
Last edited:
Engine swap time

The swap. What I've been planning since 2006 in one way or another. That's right; before I even owned Pandora; before I even knew a C3. Ever since I became active in forums in July '07, I started researching LSx swaps into C3's. Didn't know of anybody doing it, but luckily a thread popped up on another forum that I followed from day one. So when the time came, August of 2009, I pretty much had a good handle on it.
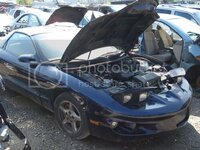
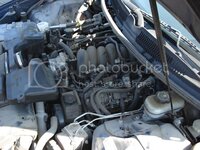
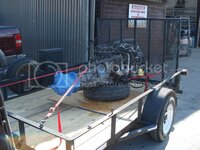
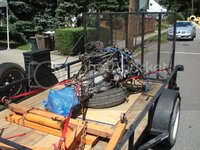
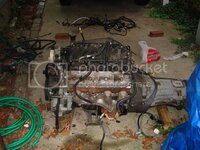
This is what I bought. A complete drop out LS1/T56 out of a 2000 Firebird, including stock rad fans, engine harness, body harness, ECU, all accessories, shifter, clutch master cylinder to the slave, etc. Some of that they 'threw in' (The dismantler didn't care and pulled a lot more than what I supposedly paid for). I got the whole thing for a decent price plus gas and tolls to Jersey:
The Donor:
DSC01661.jpg
DSC01660.jpg
At the salvage yard:
DSC01717.jpg
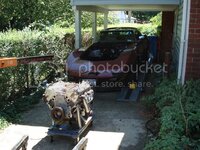
Home out front:
DSC01719.jpg
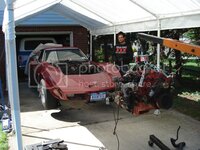
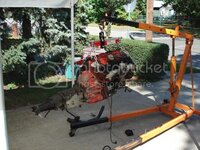
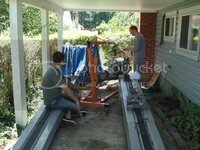
Next we had to pull the old engine and trans out. They have been loyal and the engine ran like a top the whole time I had her. I recruited my best friend who isn't exactly a 'car guy' haha and my father who happened to be home.
Before:
DSC01744.jpg
DSC01742.jpg
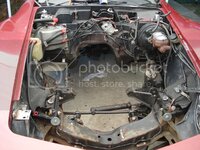
Some stuff gone:
DSC01770.jpg
DSC01772.jpg
Out she goes! It went rather smooth:
DSC01777.jpg
DSC01776.jpg
DSC01780.jpg
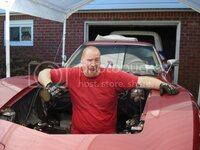
The celebratory look-like-a-******* pic:
DSC01785.jpg
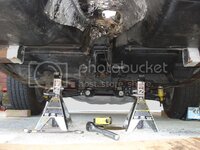
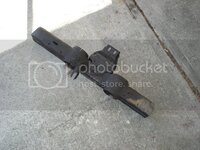
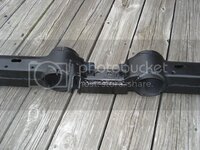
Next was cutting out the crossmember and modifying it to be removable. I'm going with Bullshark's bracket design.
DSC01818.jpg
DSC01816.jpg
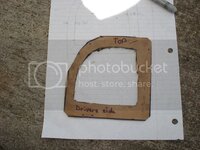
The template. Looks like a first grader's project:
DSC01820.jpg
When I have the brackets on the car, I'll take more. They're being made up by my local shop, but they had a plasma gun failure, so hopefully next week...
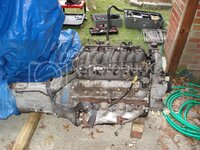
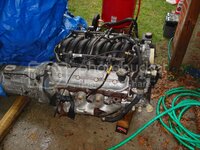
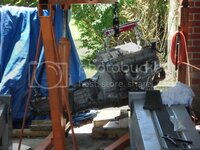
I had to breakdown the new donor engine and clean it for, what I hope, is going in before winter.
Before:
DSC01801.jpg
DSC01795.jpg
After:
DSC01804.jpg
Coming this spring, the engine will get a new stock clutch, slave cylinder, remote bleeder, flywheel, rear main seal, valve cover seals, oil pan seals, spark plugs, etc which are all bought.
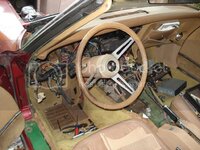
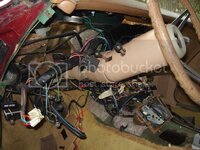
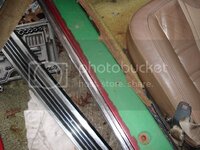
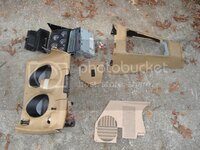
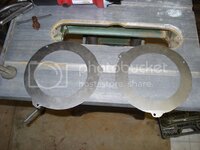
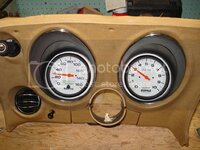
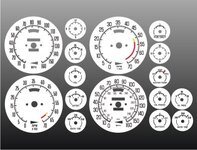
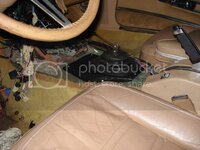
Next is making room in the interior. The shifter will be about 2.75" back and roughly centered in the tunnel. I don't think I'll use the original console plate and will just make something up out of sheet metal or plate Al. The center console and main gauge cluster had to go as well for access and wanted them out before winter to avoid cracking them in colder weather. I plan on going with Autometer NV gauges to match the cars original color: #42 Bright Green Metallic. This is a '75 only color and only about 1600 cars were painted it. You can see the color on the door sill. Whenever she gets painted, this will be the color.
DSC01823.jpg
DSC01825.jpg
DSC01824.jpg
DSC01826.jpg
DSC01829.jpg
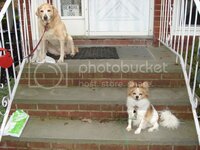
I must be lucky, the number of ASSistants have doubled in the past year...not by weight though. He's the fiancé's dog. He's not quite as annoying as he appears. The little **** grew on me and my old lab.
DSC01827.jpg
I've begun working on fitting an '85 1 ton GM truck master cylinder into the car. It fits in the main bore hole, but I need to bolt her up to the firewall and cut, tap and install an endlink to the MC shaft. I'll also be cutting the tunnel shifter hole a little bigger as well. Once I get the trans crossmember brackets welded on the car, I can drop in the engine/trans and figure out my trans mounting solution. That's all I got for now. I make slow progress, but it is progress.
 
I dunno so much that we are the 'be all end all' as 'been there done that'......

:smash::smash::thumbs:

Good project, nice to see you hanging in there, lotsa guys would have tossed the towel, but you have a vision, same as most of us....and it's allowed to change too....

looking to see more progress, so get to work....:smash::bestwishes:

Thanks Gene. I could go into bloody gory detail of how I decided on almost every direction of the project before I even knew what car I waned to use. A lot of it was thought out in college final projects (Internal Combustion Engines, Vehicle Dynamics, etc) and me just thinking. I've toned down this project quite a bit from my original vision. I want to watch the car evolve with my skill, not just take 10 years to build it in one shot and so I have an apreciation for all steps involved.
Keep in mind, before buying Pandora, all I've done with cars is change oil and install a cold air intake on my old '04 Ion QC. I learn best beign thrown into the hornet's nest, so that's what I've done. I also tend to be stubborn, haha. That's the german/irish combo in me.
Thanks for the kind words and now I must be off to bed. I think the insomnia finally wore off.
 
You're going to love the LS conversion. Mine runs great, the torque curve is much better than my old SBC, and my milage doubled.
 
As an Amazon Associate we earn from qualifying purchases. Product prices and availability are accurate as of the date/time indicated and are subject to change.
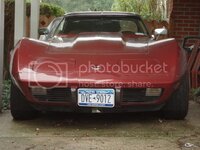
Love the "WRKNPROG" license :lol:

Yeah that's what I wanted to say, but Kelly figured out how to fit it in 8characters. It's basically "yeah I know the bumpers are shot and she's a dump, but I'm workin' on it!"
You're going to love the LS conversion. Mine runs great, the torque curve is much better than my old SBC, and my milage doubled.

I can't wait! This thing felt pretty good (below 3000prm) with the L48, so I'm hoping it will be sweet when done. It just kills me I can't get more done faster! I'm stuck with work this morning :/
 
Nice work Greg!! Can't wait to see the LS in the car, should make a great ride. I know what you mean about wanting to get it done faster, but the good news is it's gonna be worth the wait!! Besides, there's always something to do while your waiting for something else.....
 
Nice work Greg!! Can't wait to see the LS in the car, should make a great ride. I know what you mean about wanting to get it done faster, but the good news is it's gonna be worth the wait!! Besides, there's always something to do while your waiting for something else.....


Umm...sounds familiar.....so how your trip ??
 
Trip was good, productive, and that's a good thing especially when you're in DC!! Car's coming right along too...sorry about cutting you off last night, had some folks over...you'll have to come check it out!
 
Trip was good, productive, and that's a good thing especially when you're in DC!! Car's coming right along too...sorry about cutting you off last night, had some folks over...you'll have to come check it out!

No sweat, I could smell the BBQ from here.....:nuts::harhar:

back on top of the Clamper to do the front vent today, and I need prove the ebrake operation, something don't seem right, wonder if I got that damn star wheel on the correct sides....it's the way they came off the plates....but I doing some investigation on that again....hate the thought of yet again pulling all that crap apart :clobbered:
 
Update

Well, it has been a few months. I've made some progress between then now. The wiring is near completion. The non used plugs on the engine harness have all been removed and the gauges are almost finished. All I need to do is run some new wires in the engine harness, tie in the dedicated fuse/relay box and to mount fuse/relay box and computer in a sutible location. I'm looking at behind the passenger fender near the heater box right now, but I haven't decided yet.

Something that is done, which I'm happy to say, is the transmission crossmember is now removable. I went with Bullshark's design (as shown in this thread) and had my local shop put it in.

2010-04-15170349.jpg

2010-04-15170408.jpg

I'm very happy with the work and as always, these guys have taken care of me. My only wish is this was done last year in Oct when I asked them to work on it, but can't win them all I suppose.

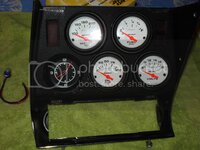
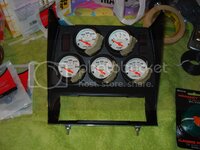
The gauges are installed and the wiring is all but finished. I used TT's/V-Twin's mounting bracket for my 5" gauges.

DSC01832.jpg

DSC01833.jpg

There were some final issues that needed to be settled before I could call the wiring done and I also need to run the wires for the new sending units/spliced engine harness wires. I also ran into this problem, but it appears to be solved now.

I originally was going to run the old clock with the new gauges, but it just didn't fly. I wound up buying another gauge to take its place: engine oil temperature.

DSC01846.jpg
Not so great, right?

DSC01908.jpg
(The masking tape is to just hold the angle rings in place during install)

DSC01842.jpg

That's all I have done for now. The near term agenda next is:
-to replace some gaskets, clutch stuff and new sending units for the gauges on the LS1/T56
-drop in the engine/trans to fab up a transmission mount
-find location and mount ECU, fuse/relay module
-finish wiring (need above first)
-Finish clutch MC install (needed a second pair of hands)
-order fuel system, air intake, cooling system parts :D
 
New Update---It's In!

Hey guys, It's been quite some time, but I finally have some more progress.

I painted the frame with POR15 and top coated it with chassis black. I also painted all the fiberglass and firewall matte black. I like how it all came out:

Before:
DSC01780.jpg

After:
DSC02021.jpg

DSC02017.jpg

DSC02020.jpg

I Installed my new flywheel, clutch, pressure plate, hydraulic T/O bearing, pilot bushing and finally the clutch master cylinder. Don't really have any shots of those. I had some issues here and there (ARP had 2 wrong bolts out of the 6 flywheel bolts incorrectly packaged, but they corrected the issue with a new pack). I've also been taking care of my fiancee lately because she's been out of work since April with her back. Not fun and kills my project time.

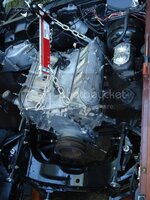
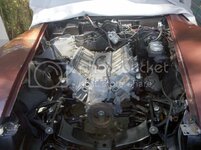
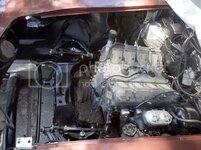
However, the big thing checked off the list is my engine and trans are in the car! I don;t have a mounting solution yet for the trans, but the engine is bolted in place.

Here are some shots:
DSC02024.jpg

DSC02027.jpg

DSC02029.jpg

DSC02032.jpg

2010-07-04110236.jpg

2010-07-04110255.jpg

I can now finish my wiring, work on the cooling system and finalize the fuel. Speaking of Fuel, I've been working with John of Injectors Plus and he has stuck with me through thick and thin! Can't wait to get my order from him.

And as a general update, I got a new '70-'74 tank from Tanks Inc. for a ridiculous price ($120) and luckily a hot rod shop not too far from me is a dealer of theirs so I didn't get hit with shipping :cool:

I'll also be using my "stock" radiator that I bought from a CF member last year when my original crapped out (before I knew I was doing the swap). I should have that mounted one of these days.

For the plan now, it hasn't changed much, but I should be able to pick up some metal for the trans mount and the various bracketry I'll have to make for the computer, clutch reservoir fuse box, etc.

My goal was to have this fired up by September, but I'm not sure I'll be making that or not. Keep your fingers crossed...
 
sorry to hear about your fiancee's back... car is looking good, keep the photos coming..... you're making good progress, looks like you'll be driving soon :D
 
You interested in selling the stock front a-arms? I'm looking for a set to rebuild for my 82.
 
Thanks guys! I made some more progress this weekend. My trans mount located itself almost dead center on the trans crossmember. So far soo good. Hopefully ill have that finished soon and have my driveline angles sorted. My other current thread is all about that.

Gary,
It takes 2 guys tp push the car up the quicklift. We usually take some time to line it up and then back her down the driveway and get a running start. Once we get it high enough, we chock the wheels. We've done it a few times without issue and really isn't that straining. One guy could almost do it. Almost.

TT,
Do it! I've had a few bumps in the road, but all the problems I've had would be nothing for you. There's a lot of potential going LS.
 
I've already replaced it with an oil temp gauge. If I knew about that before, I would have definitely considered it. Thanks for letting me know though.
 
You interested in selling the stock front a-arms? I'm looking for a set to rebuild for my 82.

Jeff,
Sorry I keep forgetting to respond to you every time I write in here. The story is I sold the A arms to MYBAD79 last year.

I have pretty much everything else if there is anything else you're interested in. Just let me know.
 
Quick Update:

Well it has been entirely too long since I've posted here OR worked on my vette. I haven't touched her since September. Truth is I haven't been around and haven't had time. I've been traveling for 5-7 weeks at a time for work (lost the whole fall last year which would have been great for vette work) and the fiance has been out of work due to her back for almost exactly a year now. On top of all that, I have a wedding coming up in 2.5 months.

As the weather improves slowly, hopefully I'll get more opportunities to get more done. Fingers crossed...
 
Ouch! sorry to hear that about your gal there, back bones are a PIA....

:gurney::hissyfit:

you all been slammed pretty bad with weather this year, take a year just to melt the damn snow....we had two WICKED months of cold here, lost a ton of plants outside, but then it warmed up by Feb....and we been fine since...maybe move?? 1000 miles south?? warmer weather helps with attitude much less aches and pains....and cost of living....

:hissyfit::drink:
 
Alright so I'm finally back into the game and I've made some headway here and there that I'll be posting once I have some shots.

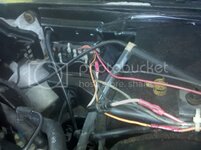
I've been concentrating on the wiring lately (see this thread and this thread) and I finally decided I needed to check out my original wiring before I get too far into new wiring. There's been this distribution panel on the firewall since I bought the car I actually thought it was stock for the longest time. I never knew what it did until today... I also had a plug for a radar dectector through my center air vent. Never traced that either.

Turns out, they're connected... Here's the shots:
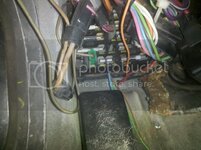
This the distribution block:
IMG_20110726_174927.jpg
All the wires spliced to other segments (but never crossed) and lead to a hole below the fuse block on the fire wall:
IMG_20110726_175053.jpg

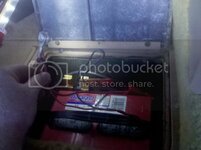
One wire lead off to the radio and the antenna raise/lower switch. Two of the wires in the above shot spliced into the plug in my center vent. The other two (black and red) went down along the frame rail and into the battery box:
IMG_20110726_175440.jpg

Look at that nice bolt and nut connection on the positive. Nice, right? I thought so. So the black and red supply the power to the antenna switch, radio and the plug through the distribution block. Nice quality work there. I guess it's the same guy that wired up the radio with wire nuts... To the PO defense, he did have an inline fuse...

So I pulled all that crap out and I'll rewire the antenna switch and radio for constant 12V power. The good news is, the dash and engine harness were untouched.

The more I dig, the weirder it gets.
 
Just came across your build. coming along, Now I see what you ment when you said just trying to get the running swap. Mine is almost all back together now, down to wire conections, fluid, and run some new fuel lines. I also need to figure out the clutch master cylinder firewall bracket. Not sure If I want to fab one or buy one. Good luck man. just get it done and running on the cheap and upgrade the small things later.
 
Just came across your build. coming along, Now I see what you ment when you said just trying to get the running swap. Mine is almost all back together now, down to wire conections, fluid, and run some new fuel lines. I also need to figure out the clutch master cylinder firewall bracket. Not sure If I want to fab one or buy one. Good luck man. just get it done and running on the cheap and upgrade the small things later.

I'm glad you found my slow-as-balls swap :********::lol: Yeah I could make excuses all day long, but at the end of the day, it's not complete and I'm not thrilled. However, time is the big enemy these days. I have pretty much every part and tool that I need for this swap minus the driveshaft, exhaust, intake and a few misc pieces. Everything else is bought and sitting in boxes or is in some state of worked on. There's a lot of my swap that isn't listed here, because it simply isn't done enough for me to feel comfortable to post up yet.

There will be a big update soon with 2 things that were a real pain in the ass for me to do.

As for your master cylinder, I had good luck so far with the my GM 85 1 ton. It was about $35 at autozone new, but probably cost $125 all said and done to get it installed.
 
Big Update

So, I've been doing a lot of work on the old girl lately. Where to begin...

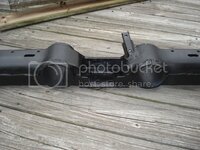
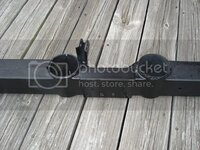
The Crossmember is done! To me, this is one of the biggest hurdles. I wound up getting pretty frustrated last year with this part and it just put a bad taste in my mouth. Turns out that where I left it, it just needed a little more trimming and it fit! :lol: However, I wound up removing so much material, I had my local guy weld up the 1/4" plate I made to bolt in on the bottom and also add some 2" angle iron to the rear of crossmember to get some strength back. I may have to revisit it for the parking brake pulley bracket to be moved. The bracket clears, but the cord might want to rub on the driveshaft. I'll worry about relocating it when the end of the job is reached. I think it came out nice! :yahoo:

DSC02475.jpg

DSC02476.jpg

DSC02477.jpg

DSC02479.jpg

The trans mounting position is adjustable as well. The transmission can slide to the passenger side a little more and I made shims to raise and lower the mount. I'll worry about all that once the driveshaft is in...that's another story outlined below.

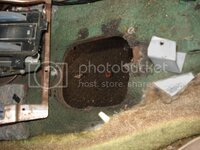
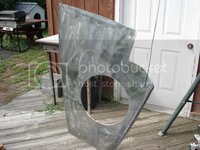
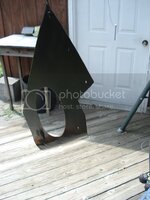
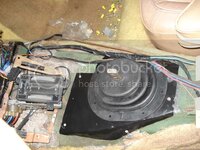
With the crossmember in, I was able to seal up the gaping hole in my tunnel. I used my sweet fab skills and belt this out of sheet metal with basic tools:

DSC02492.jpg

DSC02497-1.jpg

Not bad, right? She's a little lumpy (a ball peen will do that) but she fits like a glove. There is one section I had to bang out for clearance to a clip 'glassed into the tunnel protruding out. It's a clip for the batt cable, I believe. You can see the clearance I made on the bottom right (just below the shifter hole) on the plate.

Installed:
DSC02527.jpg

DSC02528.jpg


I also made a few decisions with what to use for the fuel system.

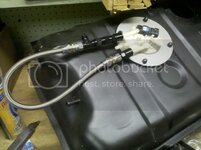
I decided to buy a new '74 tank and modify it. I found Tanks, Inc. through another suggestion (don't remember what suggestion) and they had a repop tank for $100! It's a quality piece and looks awfully close to a GM repro tank. I had the same local welder weld my Vetteworks Fbody fuel pump adapter bracket to the tank. This allows me to run a stock fbody pump with built in sump and sending unit. The sending unit is essentially useless for me, but the sump is a nice feature. The only drawback with this direction so far was I had to buy a '74 sending unit, filler neck and I'm still trying to find a cheap enough fuel cap. The prices the fuel cap and neck cost are ridiculous!

For fuel lines, Injectors Plus (Jsup) hooked me up with the majority of what I needed. I went with Teflon hose for all flex connections and bought SS hardline (mcmaster-carr) to route along the frame. All the connections are either black or silver, since they are the most neutral and you really don't see it as often as red and blue.
I also bought enough flex line to make the pressure power steering hose. I might also make the return hose, but I'll have to see.

So far, I've only done a little with the fuel system:
IMG_20110802_175117.jpg

It may not look like much, but it's something! The tank is complete minus the cap (still need one) and cap rubber surround (have it, but not installed). She's almost ready to be dropped in.
Notice how the fuel line return is sticking straight out? It still hasn't relaxed. It's that stiff! I plan on making a bracket to go from the hose to the fuel tank bracket on the side. The rest of the fuel system will be completed soon. It's next on the list.

Another big decision that was made was what cooling fan to run.

I decided on going with a new Doreman '95 Ford Taurus 3.8l 2 speed single 16" fan on Amazon.com for $90 (Advance and Autozone wanted $160 :crutches:) Why? I couldn't use dual fans. For whatever reason, I don't have the clearance between the UCA knuckles (VB&P's) and my (sort of) stock copper radiator. Only about 1.5" between the core and the knuckle bolt.
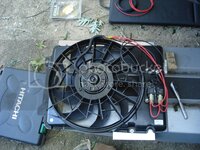
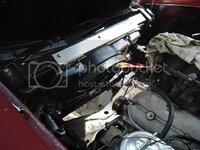
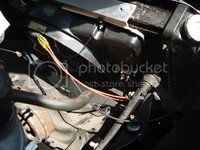
No worries. The Taurus fan fit, but I still had the trim the bottom for clearance to the sway bar.

I wired it up similar to jsejlowe's thread. However, for mine, I added a 40A type I circuit breaker and a 5A fuse for the trigger source power. The LS1's ECM has two fan leads which will ground out when in demand. If I was savvy, I would redraw the diagram. I could in MS paint is requested.

All of the fan wiring was mounted to the shroud on a back plate. The only wires coming in are the 2 from the ECM, a ground to the frame (cleaned off some of the POR15 and repainted after the ground was installed) and power off the Alt.

DSC02526.jpg

Notice that there is only one bracket on the bottom of the fan? No longer. I added a second after this shot. I ran out of time the day I was making the others.
Here it is installed and wired:

DSC02529.jpg

DSC02531.jpg

Now don't worry. The wiring looks messy, but it will all be wrapped. :flash:


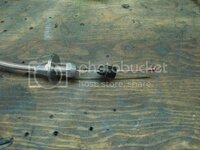
The Throttle cable is all but finished. I bought a Lokar LS1 cable to use since the stock one is about 1.5' too short. MN-Brent over on the other forum in his build thread, outlined how he adapted his pedal end of the throttle cable using the original plastic cable end with the Lokar cable.

DSC02496.jpg

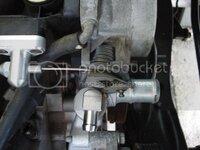
Worked like a champ :friends: My problem actually lies with the water pump. I had Josh @ Custom Image modify it back in March of 2010, but only really had it installed with the throttle body recently. Of course there was a problem...

DSC02500.jpg

:goodnight: I talked to Josh and sent him the pic. For whatever reason, he moved the tap too close to the TB. Oh well. I sent it back and he's taking care of the problem. No trouble at all. He should have it by the end of this week so I should have it towards the end of the month. No worries there I have plenty to do.

The last big thing I did lately was tackling the scariest part of the build for me: wiring :crap::********:

I had most of the stuff sorted out, labeled, etc, but just couldn't get on it. It just never clicked. Luckily, doing research on how it all works together, it just finally fit together in my thick head.

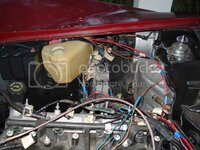
This past weekend was birthday. My requested present? Leave me the :censored: alone and let me do some Vette work :D I had 2 half days and a full day out of the 3 day weekend. One of the largest consecutive time blocks I've had on the Vette in years! I actually have about 85% of all the wiring done! All that is left for the under the hood wiring is to connect the engine fuse box to the starter and wrap all the wiring. That's it! All of the leads that need to come into the cab are in and ready to go. However, I won't do the interior wiring until the fuel lines are done. I want the wiring fresh in my head before the start up so I may find a wiring issue quicker, if one arises.
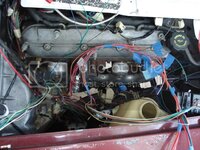
Here's some shots:
DSC02530.jpg

DSC02536.jpg

DSC02537.jpg

DSC02538.jpg

DSC02540.jpg

DSC02541.jpg

In the last few shots you can see the computer and fuse box mounted to the fender. This seemed to be the best location to keeping things simple. Also, after these shots, I further cleaned up some loose wires and took off some of the labels. The cool part is, only one is hardwired from the engine harness to the vette. All of the others are through GM plugs or can be disconnected at the sensor. So if I ever have to pull the engine, I could leave the wiring harness on and just unplug it at the fuse box(except for the lone wire). Don't know how much of a benefit that is, but I think it's cool :D

In actuality, Only 7, that's right 7, wires feed the engine. That's everything and one is a ground! It's funny how many wires there are and only 6 connect the engine harness and computer with the rest of the car.


So that's about what I've done since getting back into things in the beginning of August. Not bad for a month...

However, there are some issues I've found. Right after I finished the crossmember, I was laying under the car and noticed the diff was leaking. I knew it had a little bit of a leak, but thought it was at the cover gasket. Not so. I can now see it was coming out of the passenger side yoke seal. :hissyfit:
After some deliberation, a few emails and phone call, I decided to have the diff built up by Gary (gtr1999) into one of his Super 10 bolts. He'll also be going through my T/A's. This is something I always planned on having him do, I just didn't want to do it this soon... I was hoping to get a couple of miles on the swap before then. The plan is to pull the diff at the end of fall.

The diff issue has also changed my plan on the Driveshaft. I was going to have the stock one modified, but now I'll be getting a new one built up (chrome moly or Al, not sure yet) to match the diff. This will essentially leave me with only the 1/2 shafts being the weak link, but will be fine until the engine is built up.

So what's left for the near future?

-Fuel lines
-Tank install
-interior wiring (gauge wiring to old wiring and new wiring from the engine)
-Tunnel insulation
-New Console top plate since the shifter is relocated.
-Send off Diff and T/A's to Gary
-driveshaft order to fit the rebuilt diff
-Install the Intake plumbing (waiting on water pump)
-Install water pump lines
-Make/ install power steering lines
-Some other Misc. Odds and ends

I'm getting closer!
 
...2 years later

Well, unfortunately, I haven't gotten much more done. I bought my childhood house three months after the last post. Of course I had to do bunch of stuff on that. This meant I finally had a garage, but it became the overflow as we organized everything. Then the yard maintenance kicked in over the summer while I prepped the apartment for rent. That's when the hurricane struck :mobeer: Finally cleaned up from that and got things rolling until January when I started studying for my FE test that was long overdue. Took that in April this year and passed, thankfully. Things are clear now, right? Nope. Wife was now pregnant so I had to pick up any slack and start planning/prepping the house for our baby (plus even more yard work). My Daughter was born on my birthday, Sept. 4th and now things are settling a bit so I can get some done. Do these excuses suffice? I tell myself they do so I can sleep at night :amused:

However, I did get some things done in this time:
  • I sent off my rear end parts to Gary at the end of 2011. They came out great.
  • mounted the diff in the fall of 2012, then measured and ordered the driveshaft
  • Had some fun with u-joints and learned how to bend flanges
  • finally got the rear suspension in had a roller this past Saturday
  • moved the car and the lift into the garage yesterday


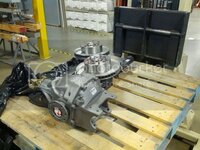
How about some pics? Here's what I got back from Gary. Like they were new, better than new!

IMG_20120623_103738.jpg

Works of art and I couldn't be happier.

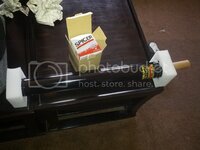
I ordered a nice driveshaft from Denny's Driveshaft. Unfortunately, I couldn't get a 1330 split trans yoke and they only recommended 500hp or less on a 1310, so I ordered a solid 1330.
Here's a link to the shaft. This means to install the shaft, I have to pull the diff again or the trans/engine. The diff loses! In reality, that's not the worst because it would be nice to get into more places and get some paint down and install some other parts, like the fuel and brake lines. Here's a pic of the shaft:
IMG_20130408_160646_zps72ed8288.jpg

Here's a link to my fun with U-joints thread: god damn Ujoints

So what does this all lead to? Well, After the half shafts were finished, I was able to install them into the car, thus completing the suspension. I slapped on the tires and set her down for the first time in 2 years.

1102131446a_zps8479a1f1.jpg


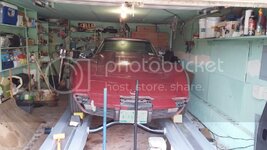
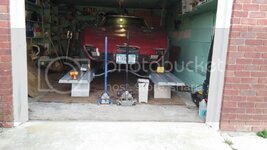
Not to waste any time, I had some friends come over yesterday to move her into the recently cleaned out garage. It took four of us to get her aligned onto the lift (me directing from the lift, 2 pushing and 1 steering). Now, she's finally in.

1103131419_zps0defec9a.jpg

1103131419a_zps39b5661b.jpg

1103131420_zps7e2ad7b2.jpg

It's a lot tighter than I thought, but it'll work. That single florescent bulb won't cut it either. I was hoping to get a little more lighting installed before sliding the vette in, but that wasn't in the cards. Now I can put in a lot more time in and won't be so dependent on the weather. It should also cut back on the surface rust I've picked up.


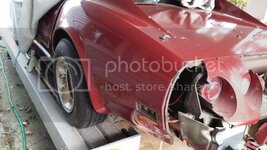
Sidebar: check out my bumper's disintegration over time. I noticed that once my car cover began to fail the bumper's condition deteriorated exponentially. I did nothing to aid this deterioration except the occasional head smack.

December 2011:
IMG_20111217_133747_zpsd9feaf59.jpg
April 2013:
IMG_20130414_111018_zps2dc04b42.jpg
November 2013:
1102131304_zpsee0f5fb2.jpg
 
Forgive my ignorance and minor sidebar distraction - who's "Lift" is that?
What are your overall impressions? Looks a lot more secure than using super tall jacks. Is one end hinged, and then you use the floor jacks to lift the other end? If you have a name/link - I'll stop asking questions...

Cheers - Jim
 
Back
Top