Plastic Fantastic 2

VetteMod - Corvette Restoration, Modding & Performance Forum

Help Support VetteMod Forum:

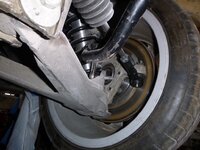
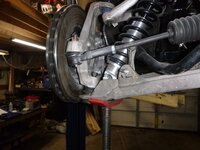
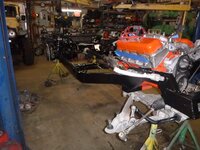
I still don't have a solution for the sway bar - it is too close to the coil over (stock had a transverse spring)....edited
DmzzfTeh.jpg

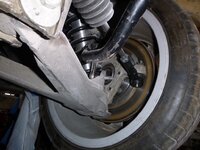
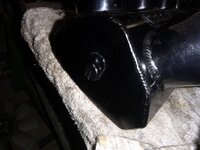
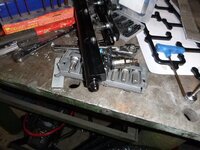
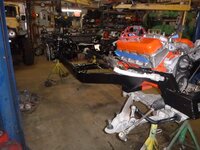
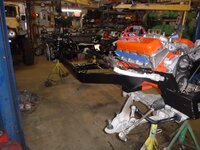
but I started reassembly of the under so that I can get the bracing done
einJV6lh.jpg
​​​​​​​
 
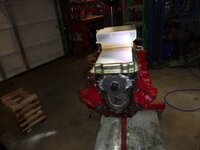
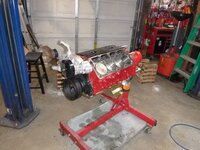
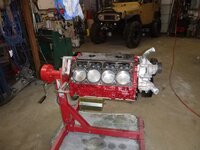
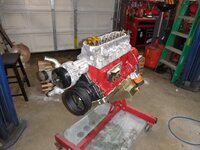
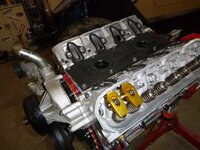
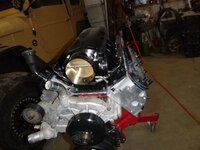
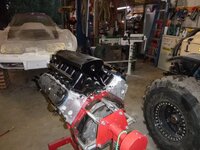
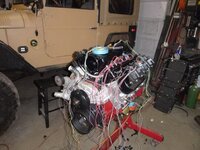
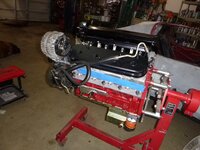
so I spent some time on the motor.... glad I did because I need to call the rocker manufacturer and find out what they were thinking

first front cover install (and oil pan)
6jE0ClRh.jpg
and water pump
AbI7tdmh.jpg

lifter install
olhvYmBh.jpg
y8gUtS5h.jpg
then onto figuring out push rod length
ixG4T4gh.jpg

the issue with the rockers - there's a cast piece that holds the stock rockers in place - that has a radius to match the rocker. The new rockers come tied together and have spacers - ostensibly to replace that part - but that puts the rockers way too low.... so I dunno, time to phone and find out what to do.
 
and maybe the most important thing.... I have a Microsquirt that I was going to use on the FJ40.... zero new dollars and zero new cents is very attractive
[ame]https://www.youtube.com/watch?v=RP10dt-4sLM[/ame]
​​​​​​​feel free to discuss here
- and as he mentioned in the video - the transmission could be the issue. I can buy a GM pre-wired harness from 150tunes for $550 - and that is already wired to run the 4L80e.... that said, this motor is temporary to the car (whatever that means) and my goal is a no-limits 3800 V6 - which leads to transmission concerns..... and I have the 200r4....
 
Last edited:
I still don't have a solution for the sway bar - it is too close to the coil over (stock had a transverse spring)....edited
DmzzfTeh.jpg

...................
​​​​​​​

FWIW, years ago I adapted a tubular sway bar from a Firebird to fit my narrowed C4 suspension. I cut, modified, and rewelded the ends of the arms to get a better positioning above the LCAs. The welding was on the arms, away from the torsion section of the bar.
 
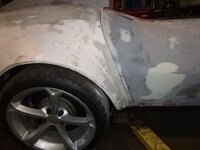
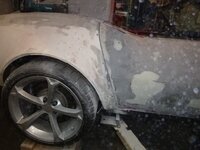
Another "I can't leave it like this"....edited
VrXd2xeh.jpg
mind you, I could have sculpted that into perfect shape but it would always bug me there's a 1/2" of vette adhesive under the paint....
so I'll epoxy some fiberglass into place.... and continue to say bad words about the supplier as this side was made 1" shorter then the other
SQdLSBqh.jpg

I think, though, this is pandemic - this is how well the hood fits (different supplier) - I will say, though, I got a substantial discount because there's a flaw on the corner (not bad, but a flaw)...... but why can't this braced piece match the fender?
vYEyCjIh.jpg
Jr7MCiah.jpg

that's the other major fix then there's nothing left but the hand sanding
​​​​​​​
 
As an Amazon Associate we earn from qualifying purchases. Product prices and availability are accurate as of the date/time indicated and are subject to change.
oops.... I thought I'd pushed the lifters down, I didn't... they work fine and I've ordered the upgraded pushrods
xxzXmLEh.jpg
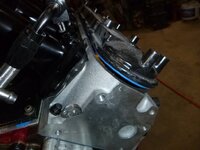
I'm not sure the gasket is going to work better then the o-rings.... fight for another day, though
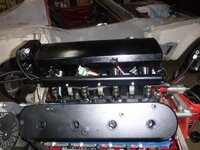
you can see the valve covers don't clear - ordered new valve covers (which were actually cheaper then a 1/2" spacer)
wudD327h.jpg
FwT28oxh.jpg

ifhD4Qph.jpg

in other news, I'm going to use the microsquirt to control the 4L80e - when I looked for a wagon before, I was thinking of putting the 430 TT motor in it; I may do that to break in the 430 motor - bonus is it would literally be plug and play since the wiring and sensors will be the same - I just have to think about wire length when I wire up the motor.edited The benefit, to catch people up, is it makes the motor or trans different units - to the point I may use two sensors (the trans controller needs water temp, rpm and tps)edited - if I use MS on all the various motors, it's a can bus connection; however, I may avoid that so I can keep the flexibility
 
the most important tools to work with electronics
OPic6pKh.jpg

what grease looks like when it's no longer good.... not shiney
hu1emA2h.jpg

as you can clearly see in this picture, the head bolts have been torqued to 25/50/75 for the big bolts and 25 for the small bolts
I0RC9J4h.jpg

more picture taking goodness, what you see here is a head bolt with 4 slots cut into it so it can be used as a ream.... ARP wants $53 for a ream, yeah, no
508dSsch.jpg
​​​​​​​ltmESiTh.jpg

time to pull injectors and get bathed in gas....
PizAUC8h.jpg
tQWT5ogh.jpg

pulled, this is the moment I realize I don't have new seals
rAQNidKh.jpg
 
Time for all those little jobs that need doing
lower ball joints
rgpE3WKh.jpg
installed... well, one side then dinner
wX04yoKh.jpg

Paint PS pump brackets
j4g3dlNh.jpg

I've done the paint without removing the sidepipes.... not again

aFyAElJh.jpg
X4r2tNFh.jpg
dDbDQCah.jpg
1NC1Dcth.jpg

the next few episodes will be more of the same.... finish inner wheel wells, create an inner boot floor, stuff I hate doing but now keeping me from finishing
​​​​​​​
 
I worked on this, first the bad news.... wrong bracket for the PS pump... and worst of all my GAS ratio was so low that I applied one WFI and went onto things involving hammers - I beat the lower ball joints in (which was satisfying)
7HRZYfph.jpg
Eb0G30uh.jpg
 
and maybe the most important thing.... I have a Microsquirt that I was going to use on the FJ40.... zero new dollars and zero new cents is very attractive
https://www.youtube.com/watch?v=RP10dt-4sLM
​​​​​​​feel free to discuss here
- and as he mentioned in the video - the transmission could be the issue. I can buy a GM pre-wired harness from 150tunes for $550 - and that is already wired to run the 4L80e.... that said, this motor is temporary to the car (whatever that means) and my goal is a no-limits 3800 V6 - which leads to transmission concerns..... and I have the 200r4....

I will have to read up on the micro squirt that looks interesting
 
I admit it, I don't want to do the fiberglassing on the hood, hood scoop and interior space (the interior space is the most hateful)... but I also need to clear some space so the work has been happening on the Buick motor... however, brief update
I thought the bracket would work.... it does
​​​​​​​FUmCjNd.jpg
 
onward
NGFeyUnh.jpg
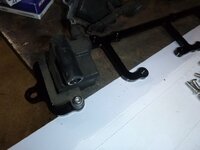
the valve covers came with nice, aluminum brackets to mount the coils... they don't work, so cleanup the old stuff
RAh6Gzwh.jpg
5eHXJhLh.jpg
oh how not much fun this is
FdazsjQh.jpg
m0Zle3Dh.jpg
it's really not hard work, basically you're just removing all you don't need (call it an even 2/3rds)
O9ei8W9h.jpg
side note, I've been griping about missing parts - like the gaskets and the fittings for this... found them stuff inside the TB
ru6bF1gh.jpg
this is supposed to be the MAP sensor.... too big, don't know what I'm going to do yet. fortunately I can mix and match sensors so it's not a huge deal, but it's still an issue
naqa3qUh.jpg
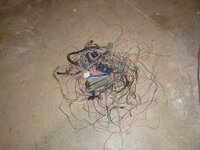
unneeded wires.... the problem is I have to add some back in because I changed sensors and I'm using drive-by-cable rather then drive by wire
mlefCYVh.jpg
 
last night I was shopping for all the connectors I need and stumbled across EFI Source - who builds a harness. It's on its way. The 'other' choice that led me to spend the 16 or so hours this would take is that the price was 2k - efi source is 10% of that.... annoying that I didn't find it earlier, but it will save me lots of time - and in an effort to have the two projects done this year... it is what it is.... that and the cost of those connectors was $100 - which is 1/3 of the cost of the completed harness.

https://www.efisource.com/wp/shop/ls-microsquirt-package-composite/#ecu
 
Last edited:
Hmmm. Did a quick look - no harness "joy" for EFLive. Got a link - or are they super-secret?

Might need for Elvira when I do the Electrodyne.

Cheers - Jim
 
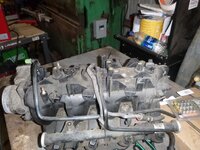
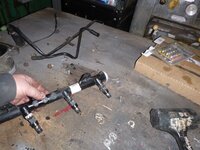
New injectors... the only thing you need to know about these is you must replace the lower seal with a smaller one - otherwise they fit perfectly

xDJj5fAh.jpg

I should have bought a tractor first...edited
hvan6n2h.jpg

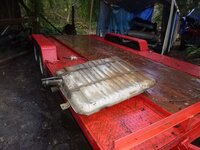
gas tank, I don't know what I'm going to do yet.edited I have the tank that is for the Fiat and already has an aeromotive fuel pump in it.edited This tank I could make work, nowever, because it's less than 7" thick, an in-tank pump is a tough fit.edited Because it's a wagon, the tank is different (side fill v. rear fill for the cars with trunks)
7sJcAOgh.jpg

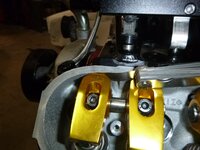
problem 1 with the rockers... there is not even .0015 of space between it and the rear wall
XhoGOx1h.jpg
but if you grind just a bit off.... it fits
xgaZ54Ah.jpg

and interference fit between the ICT bracket and the no-name valve covers
TZRzXxEh.jpg
fixed
mkFSBp9h.jpg
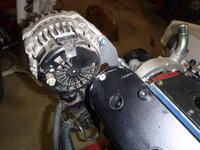
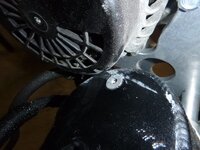
then fix the fit between the alternator housing and the covers
AYnTjVZh.jpg

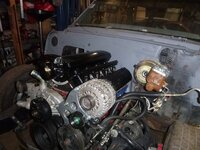
installing the ps pump
TwDiSchh.jpg
jUWaNMJh.jpg
X1PNl4uh.jpg
MgVlovbh.jpg

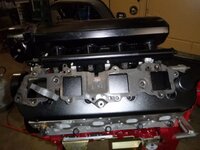
onto the intake lots of ports, not all needed
wNOjIKKh.jpg

injector fitting
1am91cGh.jpg
hard to see, but two, different sizes of o-rings (the blue is the smaller version)
y0cTLh0h.jpg
snAzLkQh.jpg
top pops in nicely
9EHYIZBh.jpg

and getting closer
​​​​​​​8aCqckch.jpg
 
So I now have 3 megasquirt suppliers.edited DIYTune, AMPEfi, and now EFISource.
I ordered the trans controller from DIYTune on Tuesday, it shipped Wednesday or Thursday.edited It is supposed to be here tomorrow.
HOWEVER
I ordered the wiring harness from EFISource (DIYTune is TN or Kentucky, EFItune is Georgia/Florida).... Get this, on Thursday night, they sent it Friday and it arrived today.edited Well done EFISource, well done - you have set a high bar indeed, but for being so good, you get praised here...
 
Last LS update...
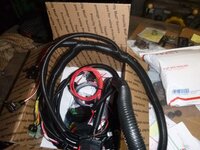
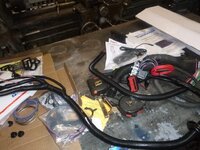
wires, wires for everyone!
mSMy6Iwh.jpg
more wires
s2alxZVh.jpg
should be fun figuring out which side goes where.... I already see a small problem in that some of the plugs need to be changed (2)
QzfUJaZh.jpg
but the trans controller/wiring looks plug and play
rEQZn5mh.jpg
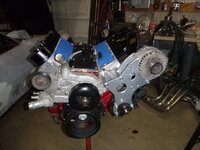
in its home (for now)
ZZPI66ph.jpg

I say last, but should say, I may do a few posts on tuning this
 
I'm interested in hearing details on the transmission setup as you make progress. My slowly progressing street rod project ('51 Chevy P/U) has a Turbo 400 trans that I put in it years ago, but I'd like to update it down the road.
 
.................

JMb0IWSh.jpg

Quick question. On the aluminum LCA crossmember, I'm trying to see what Chevrolet did. Do the LCAs bolt/tighten directly against the aluminum "tabs", or are there any steel washers between the LCA bushings and the aluminum tabs?

I'm getting nearer to fabricating version 2.0 (aluminum) of my LCA crossmember, and I'm assuming I'll need washer clearance in the pocket where the LCA bushing reside, unless there's a reason I don't need/want steel washers in there.

Thanks.
 
.................


Quick question. On the aluminum LCA crossmember, I'm trying to see what Chevrolet did. Do the LCAs bolt/tighten directly against the aluminum "tabs", or are there any steel washers between the LCA bushings and the aluminum tabs?

I'm getting nearer to fabricating version 2.0 (aluminum) of my LCA crossmember, and I'm assuming I'll need washer clearance in the pocket where the LCA bushing reside, unless there's a reason I don't need/want steel washers in there.


Thanks.

My opinion - Mixed metals -- Never a great idea. Bronze washer if you want some semi-active lube maybe - but I'd tend to stay away from steel in either of these locations on the AL setup.:
12695e3f6b6128f9e.jpg

I know we get "stuck" on the ball joint to AL upright and the ball joint to LCA - but you can use some anti-seize to limit the mixed metal interaction - corrosion - etc. Same with the steel washers if that is all you have. You are dong some very nice work there -- Really inspiring!

BTW - that is something folks often forget about steel and carbon fiber - if not isolated appropriately - you might be making a battery! Just add a little winter salt on the road - a bit of water - Voila! Cathodic/galvanic corrosion.

Cheers - Jim
 
.................

JMb0IWSh.jpg

Quick question. On the aluminum LCA crossmember, I'm trying to see what Chevrolet did. Do the LCAs bolt/tighten directly against the aluminum "tabs", or are there any steel washers between the LCA bushings and the aluminum tabs?

I'm getting nearer to fabricating version 2.0 (aluminum) of my LCA crossmember, and I'm assuming I'll need washer clearance in the pocket where the LCA bushing reside, unless there's a reason I don't need/want steel washers in there.

Thanks.


The lower control arm are attached via GM cam bolts - that is how you adjust the camber and caster. There is a steel tube (at least, presume steel but I never tested it) that keeps the bolt from crushing the rubber bushing which keeps it from the arm. The cam is steel on cast aluminum.

The upper arms are forged aluminum, however the inner sleeve is steel, as are the tabs and the bolts are steel as well. The bolts go through steel tabs that are floating in rubber in the arm itself

To the bottom arm adjustment - I presume GM knew what they were doing - and as these parts had 100k on them and there is no corrosion - I can only presume that the alloy is important here.... and in my experience some kinds of aluminum are far more susceptible to galvanic corrosion then other alloys.

In the boating world, it's stainless steel/aluminum that makes the aluminum the anode to stainless steel.... regular steel? not my in my experience. There are 12 points where they touch, 8 of which were GM-designed.

Good question - I'll give a qualified "I dunno" but with the caveat that this is why I kept it all GM, I think GM's QC is world class

and of course, I can't even imagine trying to drive this car in a situation where salt is on the road, I can't get it up my driveway if the gravel is even slightly moist. Thankfully, I'm not GM and I'm not building my cars to protect the darwin end of the gene pool.

 
.................


Quick question. On the aluminum LCA crossmember, I'm trying to see what Chevrolet did. Do the LCAs bolt/tighten directly against the aluminum "tabs", or are there any steel washers between the LCA bushings and the aluminum tabs?

I'm getting nearer to fabricating version 2.0 (aluminum) of my LCA crossmember, and I'm assuming I'll need washer clearance in the pocket where the LCA bushing reside, unless there's a reason I don't need/want steel washers in there.


Thanks.

My opinion - Mixed metals -- Never a great idea. Bronze washer if you want some semi-active lube maybe - but I'd tend to stay away from steel in either of these locations on the AL setup.:
12695e3f6b6128f9e.jpg

I know we get "stuck" on the ball joint to AL upright and the ball joint to LCA - but you can use some anti-seize to limit the mixed metal interaction - corrosion - etc. Same with the steel washers if that is all you have. You are dong some very nice work there -- Really inspiring!

BTW - that is something folks often forget about steel and carbon fiber - if not isolated appropriately - you might be making a battery! Just add a little winter salt on the road - a bit of water - Voila! Cathodic/galvanic corrosion.

Cheers - Jim

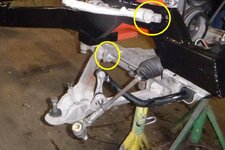
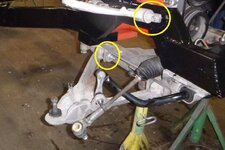
that upper circle is steel on steel - the cross shaft is rubber encased so there isn't typically aluminum/steel contact.

the bottom one is how GM designed it the cross member is cast aluminum - there isn't any galvanic corrosion...

inside the ball joint housing/control arm there wasn't corrosion either - if that is because there is no airspace or because there was no electric current since the entire front suspension is rubber-mount-isolated... I dunno.

good conversation though because I was considering grounding the engine to the cross member - now I know why I won't.

I've been tempted to move the battery to the front of the car to reduce stray voltage... now I'm pretty sure I will and use an ultralight battery so the penalty is negligible.
 
.................

JMb0IWSh.jpg

Quick question. On the aluminum LCA crossmember, I'm trying to see what Chevrolet did. Do the LCAs bolt/tighten directly against the aluminum "tabs", or are there any steel washers between the LCA bushings and the aluminum tabs?

I'm getting nearer to fabricating version 2.0 (aluminum) of my LCA crossmember, and I'm assuming I'll need washer clearance in the pocket where the LCA bushing reside, unless there's a reason I don't need/want steel washers in there.

Thanks.


The lower control arm are attached via GM cam bolts - that is how you adjust the camber and caster. There is a steel tube (at least, presume steel but I never tested it) that keeps the bolt from crushing the rubber bushing which keeps it from the arm. The cam is steel on cast aluminum.

The upper arms are forged aluminum, however the inner sleeve is steel, as are the tabs and the bolts are steel as well. The bolts go through steel tabs that are floating in rubber in the arm itself

To the bottom arm adjustment - I presume GM knew what they were doing - and as these parts had 100k on them and there is no corrosion - I can only presume that the alloy is important here.... and in my experience some kinds of aluminum are far more susceptible to galvanic corrosion then other alloys.

In the boating world, it's stainless steel/aluminum that makes the aluminum the anode to stainless steel.... regular steel? not my in my experience. There are 12 points where they touch, 8 of which were GM-designed.

Good question - I'll give a qualified "I dunno" but with the caveat that this is why I kept it all GM, I think GM's QC is world class

and of course, I can't even imagine trying to drive this car in a situation where salt is on the road, I can't get it up my driveway if the gravel is even slightly moist. Thankfully, I'm not GM and I'm not building my cars to protect the darwin end of the gene pool.

I appreciate the reply. I'm running a similar material front suspension (C4), but with a steel custom crossmember (similar material as C4 crossmember). With the future change to an aluminum crossmember I was wondering if the LCA steel bushings chew into the aluminum when the pivot bolt/nut is tightened. I never worried about it with the present steel crossmember, but with a softer aluminum piece it's gotten me curious.

Keep us updated on what lightweight battery you end up with. I've been looking to put one in my car (currently using a 16# lead/acid battery), but I haven't been able to get a decent reply from the lithium battery suppliers on which of their batteries will crank over a big block without having a battery weight damn close to what I'm already running, which makes for a damn high $/# expense when trying to take additional weight off the car.
 
I never worried about it with the present steel crossmember, but with a softer aluminum piece it's gotten me curious.

tightening the suspension when it's on the ground is important for that very reason - the bushing should never rotate on the bolt.

The C5 suspension - the upper arm rubber bushing will hold the entire suspension up due to its resistance (unless torn, of course). That lower bushing... there is a problem that the racers note with the C5, that bolt doesn't hold tight enough to keep it from rotating and changing the alignment. once this is done, I'm pinning (drill a hole and run a screw in place) to help hold the alignment). If that doesn't work, I'll replace them with threaded heims and then block the cam in place like they do on C3 rear suspensions when you change the lower arm with an adjustable one.
 
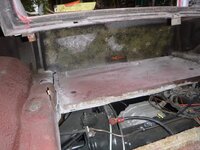
this won't seem like much but I needed an access point to the top of the tank
dZsLEMQh.jpg
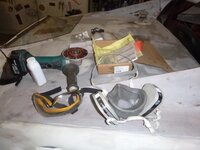
the gear necessary
6J9v4GZh.jpg
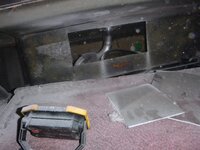
the hole
rVBE0Kth.jpg

I also went and got wood so I can build the floor - that is next... soon
 
..........

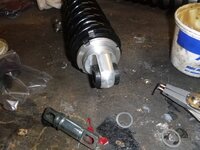
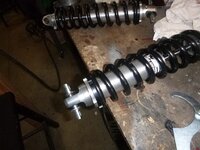
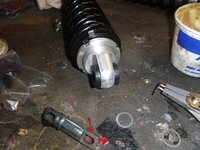
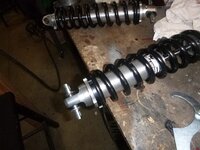
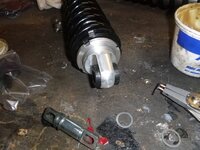
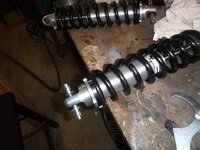
in other news, I got the parts from Aiden American so installed them
​​​​​​​h7vqzCkh.jpg
A1r6G23h.jpg

Pardon my ignorance, but I'm unclear what your change here was.

I'm trying to do a mod on my front shocks, and this post caught my attention.

the bushing was too small of an internal diameter to put that cross shaft.. I didn't realize it was too small, so it became a two order, two week ordeal...
 
..........

in other news, I got the parts from Aiden American so installed them
​​​​​​​h7vqzCkh.jpg
A1r6G23h.jpg

Pardon my ignorance, but I'm unclear what your change here was.

I'm trying to do a mod on my front shocks, and this post caught my attention.

the bushing was too small of an internal diameter to put that cross shaft.. I didn't realize it was too small, so it became a two order, two week ordeal...

I'm still unclear here. Did you replace the bearing with a poly bushing?

My reason for asking is that I'm trying to replace the bottom rubber bushings on my Bilsteins, and I'm looking for options out there.
 
Back
Top