My '76 restoration (long post)

VetteMod - Corvette Restoration, Modding & Performance Forum

Help Support VetteMod Forum:

Denis,

Looking at your rear window mod, which I really like by the way, a thought came to mind. Are you going to do anything for cabin vents back there?
I don't know if your car had "AstroVent" grills behind the rear window like mine, but even if it didn't I highly recommend doing something, probably in the buttress just behind the side window, like some of the Baldwin Motion cars or the old Ford Shelby Mustangs, or the early C2. It makes a great difference in cabin comfort.

Non-A/C cars had a vacuum operated flapper I believe, probably connected to the heater controls. My car, having A/C (when it left the factory), had permanent mounted plates covering the openings. I removed the plates and made a flapper I can open & close from the seat. I leave it open year round--full open in the summer it draws noticeable airflow through the cabin with the heater control on 'vent' and the windows closed. In the winter I leave it partially open and it helps draw warm air in through the heater.

Gills in the buttress would look cool too......
 
Last edited:
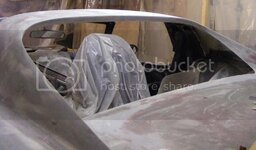
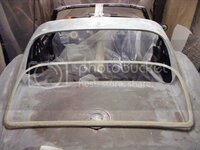
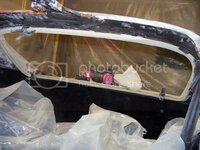
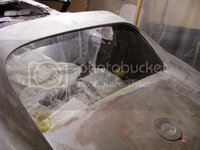
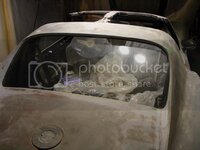
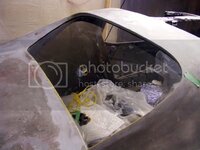
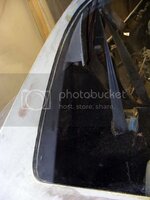
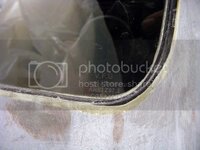
Ok, at the exception of this little gap which is closed by now, the frame contour have been bridged.


80-rearwindowmod28_zpsd0810244_44bc990cc394446eb20c2a3932333624460c39e2.jpg


80-rearwindowmod29_zpsdbedcc04_02fc9580e16fa0bc4ac696a5540542bdb744b47c.jpg


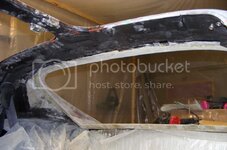
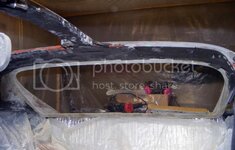
And while I was at it, I redid the upper window edge, which is made of sealant, just like the fender seams.
Driver side is done, passenger side is gutted and waiting to be glassed.

80-rearwindowmod30_zps6e1f619d_966ed03429a2c5825d5b59a37be3da20d02f64b0.jpg


80-rearwindowmod31_zps2628a2c2_8bf10d988beabd54515a39a56e3bb973caf42db8.jpg


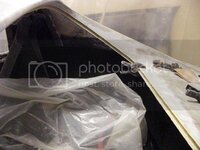
And this is how I fight the gravity in this particular case.

80-rearwindowmod32_zpsf434ff83_928830ef5cd709472d1b678818180101de3716e9.jpg


I'm already busy building some meat behind those molded edges.
Next week I'll probably get the final contour shape and get the glass cut.
Then I'll build the other side of the frame to secure the glass in place.
 
Denis,

Looking at your rear window mod, which I really like by the way, a thought came to mind. Are you going to do anything for cabin vents back there?
I don't know if your car had "AstroVent" grills behind the rear window like mine, but even if it didn't I highly recommend doing something, probably in the buttress just behind the side window, like some of the Baldwin Motion cars or the old Ford Shelby Mustangs, or the early C2. It makes a great difference in cabin comfort.

Non-A/C cars had a vacuum operated flapper I believe, probably connected to the heater controls. My car, having A/C (when it left the factory), had permanent mounted plates covering the openings. I removed the plates and made a flapper I can open & close from the seat. I leave it open year round--full open in the summer it draws noticeable airflow through the cabin with the heater control on 'vent' and the windows closed. In the winter I leave it partially open and it helps draw warm air in through the heater.

Gills in the buttress would look cool too......

First, glad you like the mod.
No, my '76 didn't have Astrovent, electric defroster instead.

Now I have conflicting thoughts about those setups.
On the Astrovent, as you describe, it's the back pressure behind the window, between the buttresses that suck air out of the cabin.
In the motion and the Shelby, they are outside and seems to rather draw air in.

Because my wildest mod so far is turning out rather fine I'm getting very cautious, like when you go to the casino for the first time and win straight away, beginner's luck, you tell yourself it's time to get out now.
I'm trying not to cross the blurry line that separate 'being creative' from 'Corvette Summer'.
So for now, no extra gills on the back, but I keep the idea of extra ventilation in mind , with a bigger window that would indeed be a inconvenience.
 
The base for the frame of the window is now complete. Done also it the filling of the top arch seal.

rearwindowmod33_zps00ec7eda.jpg


rearwindowmod35_zps11f86692.jpg


rearwindowmod34_zpsa78b5154.jpg


Now time to think about create the channel that will support the window.
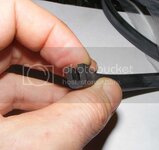
Here's the seal I bought for the task :

rearwindowmod36_zps0a62ca45.jpg
 
Denis - that is some very impressive work you are doing on the rear window mod. I am only 5' 10" and I can't imagine doing what you are doing!!!

Keep up the great work - very inspiring!!

John
 
almost identical to what Joel Rosen did with the Motion corvettes back in the day. made the interior way more useful , less like an El Camino inside.
 
As an Amazon Associate we earn from qualifying purchases. Product prices and availability are accurate as of the date/time indicated and are subject to change.
Thanks you guys for the kind and encouraging words.

Denis - that is some very impressive work you are doing on the rear window mod. I am only 5' 10" and I can't imagine doing what you are doing!!!

Keep up the great work - very inspiring!!

John
John, not sure you related to the height as a advantage or a disadvantage.
Probably both, I'm 6'6" and while it's convenient when you have to bent over to sand from outside (my back beg to disagree), I feel pretty ****** sanding from inside, laying on uneven surface (my back is full or hieroglyphs), with the arms barely extended and in awkward positions. Best workout evar!!!!

almost identical to what Joel Rosen did with the Motion corvettes back in the day. made the interior way more useful , less like an El Camino inside.
While I respect the Motion design, I'm rather after the hardtop look in term of window slope.
While the motion is a blatant, unashamed hatchback (edit: maybe fastback?) conversion, I rather see mine as a stealth space grab.
While shopping for my Vette is was pretty clear to me I didn't want a later years bubble back one, so I tried not to recreate it.
 
Last edited:
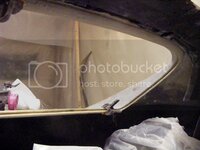
Motion did a couple of types, they did one like you are doing then they had the other style, which i never liked.
 
Motion did a couple of types, they did one like you are doing then they had the other style, which i never liked.
I see, only knew the "phase III" type, which sports a couple of questionable mode IMHO.
I'm not fan of the Jag type headlight nor the gratuitous (AFAIK) B-pillar scoops.
 
Thanks you guys for the kind and encouraging words.

Denis - that is some very impressive work you are doing on the rear window mod. I am only 5' 10" and I can't imagine doing what you are doing!!!

Keep up the great work - very inspiring!!

John

John, not sure you related to the height as a advantage or a disadvantage.
Probably both, I'm 6'6" and while it's convenient when you have to bent over to sand from outside (my back beg to disagree), I feel pretty ****** sanding from inside, laying on uneven surface (my back is full or hieroglyphs), with the arms barely extended and in awkward positions. Best workout evar!!!!

Disadvantage Denis! I know you are tall from some past posts - dunno how you do it particularly on the inside work!!!!

Still - Super fantastic job!

John
 
Gator the wonder Dog was my German Shepard that loved to ride in my 82 roadster ( yes i know they didn't make one) and when i stopped the crazy dog liked to "hide" in the back in case someone tried to get in or steal something . but there was NO way that dog would ride back there. had to ride up front.
 
You remember last time me boasting about the "finished" frame surface.
Turned out the fitting was good, but in order not to induce any stress to the glass, I needed the fitting to be perfect.
I would place the guide board in place, then knock all around the board edge from inside the car. Look for any place that sound hollow (valley), then find the place that sound plain which is responsible (hill). Sand down the hill, rinse and repeat.
It took me more than a week of evening sweat to get an all around plain sound.
I think the glass will get more torsion from its own weight in its middle that from twist in the frame.
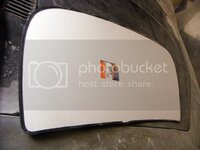
I've traced the final contour on the wooden guide board, then transferred the shape on some tracing paper, added the weatherstrip groove depth then transferred it on 3/16" foam core cardboard sheet.
Then cut the final shape I'm gonna bring to the glass shop.
Here it is with the weatherstrip fitted.

rearwindowmod37_zpsb0199103.jpg
 
Gator the wonder Dog was my German Shepard that loved to ride in my 82 roadster ( yes i know they didn't make one) and when i stopped the crazy dog liked to "hide" in the back in case someone tried to get in or steal something . but there was NO way that dog would ride back there. had to ride up front.
That's cute.
Basically he made it his doghouse.
Most gearhead dog ever, just after the awesome waving bulldog.

[ame]http://www.youtube.com/watch?v=5YzX3X9iD7U[/ame]
 
A cardboard cutout have been brought to the glass shop last Friday. I should expect the cut piece next week.
In the meantime I moved along with the rear window frame.
I made another cardboard template, fitted it with the actual weatherstrip, placed it on a flat surface made a cast of it.
First a couple layer of fiberglass woven (for flexibility), then a copious amount of epoxy+cruched fiberglass to form the core.
Right now it has round corner, I'm probably gonna fill it square and add a final layer of mat to finish the sandwich.

rearwindowmod39_zps6a82b3d4.jpg

rearwindowmod40_zps1b71a6be.jpg

rearwindowmod41_zps8d362152.jpg


rearwindowmod38_zpsf78a22ca.jpg


I'm realizing that if I make one more layer between the body side and the window side of the frame, I could make the window removable.
If I would take this path, I would yet have to find find/devise some sort of easy but safe latching mechanism, and the removed glass would likely be left at home. It's too wide to rest flat anywhere.
So it's probably gonna be a fixed setup after all.
 
Well, you could go with Dzus fasteners and Lexan back window. But I'm afraid that might Rat Rod an otherwise very clean custom.

Cheers - Jim
 
Tonight I could install my window for the very first time. 4 threaded insert where frame meat allowed.
I still got to devise some kind of clamps I can put everywhere else.
I will also build a support ridge at the bottom.
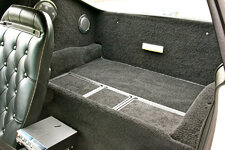
I start to see how I will build the custom interior trim, that's gonna be fun.

rearwindowmod42_zps08633efc.jpg

rearwindowmod46_zpsb85023f2.jpg

rearwindowmod45_zps31d5f83f.jpg

rearwindowmod43_zps2ac226c8.jpg

rearwindowmod44_zps13f900c8.jpg
 
I'm not gonna lie, no much happened in the garage lately.
Must be all the snow and cold, or just that it's been a looong time since last holidays.
A couple of my sub-projects depend on other people who can be qualified for the moment as "volatile", so I'll have to be patient.

Still a managed to piece together all the pieces needed to have a proper ignition shielding :

80-ignitionshield_zpsd20db824_dda4eb089ed87aa36ba12ac51e642bfcdfff6313.jpg


Still, it's Xmass, so I felt like getting myself a little treat :


LS conversion engine mounts:

80-enginemounts_zpsf0f550d6_2722c7009f04f775bfdc37c9f2199a1a93498dcb.jpg


This part has a funny story.
When I started my restoration, almost 5 years ago, I found a already one year old post in the for sale section, a gentleman had a canceled restomod project and was selling a complete brake/fuel line setup.
I contacted the person, and lo and behold, he still had the part.
While I was at it I also bought a new proportioning valve.
Fast forward two year ago, when I realized the rear bumper cover I bought on the cheap was too much trouble for the saving. I remember the post of the guy.... he was also selling a bumper cover.
I contacted him again, and lol yes, he still had the cover.
I bet you guessed it.... last month, when the idea of a LS conversion became more concrete, I remember the 6 years old post... he was also selling what you see in the picture above.
We both had a good laugh about that.


I also bought myself a set of 799 ls heads :

80-head799_zps5cda1fe1_1bfbf4020aee2fa3a03a4ae5ea053816fbe27362.jpg


80-head799_2_zps29a01373_4989ea1c0db92a8f84b6a7d21c17612a3c2ab426.jpg


Those are similar to the LS6 243 heads except for the valves and springs.
I can't wait to try myself at porting them, if you can't risk to screw things up then it ain't funny anymore
biggrin5.gif

I had to start by something, I started with the heads.
From what I read on LS1Tech, the trend has shifted to rectangular port LS3 conversion, so cathedral port heads are becoming more affordable.
Still, when it comes to the intake, I don't know what's up, but it's all the rage for the LS6 intakes.
Most of what I see on Ebay goes for over the price of a brand new Doorman replacement.
crazy2.gif
crazy2.gif

So I'm still unsure about this, maybe I'll go for a LS1 intake, even if they don't go that cheap either.
Sometimes I think that if I'd put a little more, I could get one of these beauties:
80-_57_7595791f6558b8a2df3ed6365c8a311c62beada2.jpg


I'm guilty, I admit it would be solely for the look factor.

Don't even get me started with Fast's 1k$+ piece of plastic...

I'm still on the hunt for an oil pan also,looking into either C5's batwing and low profile C6's.
The engine can be sourced from Canadian scrapyard at any time, but specific parts are easier to get from the US.

Right now I'm still at glassing the inside of the fenders, nothing worth showing really.

Happy Xmass everyone.
 
I think I'm finally done with the rear window mod.
I added 5 more mounting point with smaller threaded insert.
I will post pic a soon as I get decent fastener, for now it's just a mismatch of screws.
My favorite fastener merchant is close for the Xmass holidays.

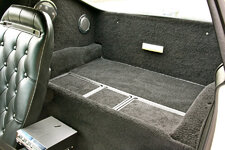
So I did a final mud pass on the rear desk
80-rearwindowmod47_zps894601a1_c2fdf247f667e40762c5f4906c3dd0d267906a74.jpg


And then start a massive cleaning, removing the plastic sheet that covered the interior for so long.
I then had the opportunity to finish a small mod I started last year.
I finally got to install the fuse adapter I bought myself last Xmass.

80-interior_36_installedfuseadapter_zps25de3cf7_bf854bb9e4c91ed608e2547c6def5fb8567fc875.jpg


It's a simple idea, but it really makes life easier, I don't count how many glass fuse I broke.

Happy New Year everyone.
cheers2.gif
 
Nice progress considering Montreal winter :thumbs:
Believe it or not, I could get the car out of the garage if I'd wanted.
Usually at this time of the year my ****** driveway is filled with 2 feet of snow topped with a thick ice sheet.
This year it's bone dry, we had a quick warm up that whipped all the snow away.
For sure the biggest share of white crap is to come, but for now I appreciate a "mild" winter to its full extend.
I confess I've spent most of my holidays time sourcing the parts for my next insanity itch.:twitch:
 
Today is last day of the winter break
ack2.gif

Did some online shopping during holidays and got a sweat deals on :
-LS1 intake manifold
-C5 Z06 exhaust manifold
-C5 Batwing oil pan

I'm now aiming a building an all aluminum 5.3 ls engine. 6.0 are still pretty costly and heavy.
I'm looking for 300-400 hp anyway, well enough for such fiberglass coffin, and on paper such engine should do the job even in stock form.

I also did the planning work on the alarm system installation, making sure it speak nicely with my door actuator setup. I want the 2 unlock feature (1rst press unlock driver door, 2nd the passenger's), and the unlock from the key feature (you unlock with the key, botch doors unlocks)
 
I've been considering a DOD 6.2 for my H3, and putting the H3 motor (an all-aluminum 5.3) in my C3... with turbos, of course.
Well, this will be without turbos for the moment :crylol:

Today I secured a deal on a rebuilt 2005 L33 short block.
Honed, ARP bolt, new timing chain, new bearings.
Gen III, aluminum block, 4.8 flat piston.
Perfect combo.
Since I'm putting 799 head, I'm rebuiding it in its original form.
So : 1.0:1 cr / 310 hp / 345 lb-ft.
LS1 intake, porting and tuning will probably get me where I want to be.
Looks like this engine is going to be built entirely out of parts.
Next step will be to locate a 5.3 vortex of similar year/gen at my usual U-pull it scrapyard for the harness, ECU and all the bits in between.
Wrenching just above 0°F is gonna be fun as (frozen) hell
crazy2.gif
 
Yesterday I made yet another trip to the border to finally pick my Xmas treat.


80-shortblock4_zps427cf328_8bcd63d10634046b0a89fefb7ef881af77b18f15.jpg


80-shortblock3_zps705e9d87_c1f01a6dab4bd1dc326267a2220397ef78a13fa5.jpg


80-shortblock2_zps8e0f24e4_e05c5ec8f89801207d491e8fc6473c052a584437.jpg


Also bought a set of Ford Motorsport 30 lb/hr injector for the intake.
80-intake_zps0e95df0a_03679fc2c6d66a37d596812b2cdc96f7d9675806.jpg


The batwing oilpan have been cleaned and inspected, hopefully the bottom gasket is still good as new.
80-oilpan_zps8567b9e1_e63471b3f99022cddf42d05da16f27b7144d3496.jpg


I also made a couple of EGR block plate for the Z06 stock exhaust

80-egr2_zps8b243614_3d08ec1e888e594b071c3cb0a494b64fe60fd729.jpg


80-egr1_zpsee9d8d0a_9e05d3ad62dec118b51c452340c13e8ef87170c2.jpg


The white stuff is phosphoric acid residue, I'm trying to neutralize rust on the header, without much success actually, only the flange part seems to be willing to react.

On top of that I also bought a set of ARP head stud.
This weekend I should pick most of the missing part, namely a oil pump, water pump, LS6 springs, and a bucket or two of metric bolts.

I also have a pretty good deal on a double timing chain setup, and maybe a partial set of 243 head valves. Given I can buy the missing ones, that would turn my 799 heads into proper 243.
 
LS6 cam lubed and installed.
I went the extra mile and used countersunk bolts on the retainer, it's not needed, but since I had to make a stop at my bolt dealer, why not.
18ft/lb of torque with blue threadlocker.
80-camshaftretainer_zps98b98fb4_ae9789a7231810db801fd75fa9ff8107a59107ea.jpg


Then came the double roller timing gear (yep, I bought it).
It's been allegedly machined to clear cover bolt dimples.
26ft/lb, blue threadlocker.

80-timinggear2_zpsae1516c2_ff6a37d5b36881e8a30f81c5e3b56119c84453e8.jpg


80-timinggear_zps5de8386e_e0ac607ac79c7557c07cee6fc70d96c95e971049.jpg


Let's see if I did my homework correctly :
Piston 1 TDC
Crank 'groove' (by lack of better word) at 2 o'clock
Sproket pin at 3 o'clock
Sproket dot a 6 o'clock.
I am right?

I also installed the lifter and lifter trays. Lifter oiling port pointing outward.

I ordered all the gaskets and o-rings that didn't come with the block, alongside with a ported LS6 oil pump, LS6 valve springs, O2 sensors, knock sensors, and new valve stem seal.
May sound overkill, but each pick up a the border is a 100 miles trip, so I try to plan ahead my purchases.

I also started removing and cleaning the valves. They're pretty filthy.
 
Back
Top