Engine upgrade for Blue Angel 69 (part II)

VetteMod - Corvette Restoration, Modding & Performance Forum

Help Support VetteMod Forum:

Bullshark

Well-known member
Joined
Mar 23, 2008
Messages
708
Reaction score
0
City & State/Province
St. Charles, Missouri
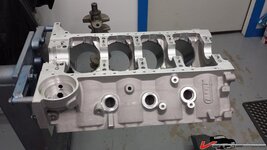
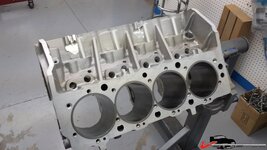
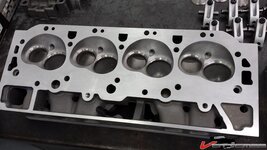
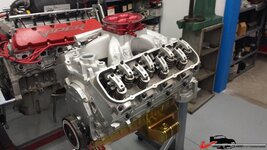
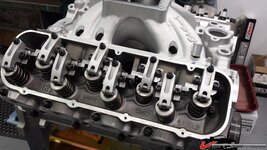
Finally ready to start engine assembly on the Aluminum Dart BB I posted awhile back.
http://www.vettemod.com/forum/showthread.php?t=9107

I kinda got the proverbial "Wild Hair" but what the hell, you can't take it with you.($$)

Design constraints were:
1) It has to fit under Blue Angel's stock GM L-88 hood and interface to the air chamber much like the stock approach.
2) Hooker sidepipes have to interface without cutting body or frame. That limited Head choices.
3) Multi-Port Fuel injection with coil on plug, sequential injection, cam & crank sync, Timing control, Wideband O2....leveraging the Holley Dominator EFI that I already bought.
4) Naturally aspirated running 93 octane pump gas.
5) Optimize HP & Torque while keeping it street worthy for cruising.
6) Interface with stock clutch bar.....for now. (May go to Hydraulic)
7) Utilize stock A/C components except Compressor (plan to upgrade that. Maybe Vintage Air??)
8) Use Dewitt aluminum radiator and Dual Spal Fan setup that I already purchased)
9) TBD overdrive Transmission. ( RamJet went with TKO500, but is it strong enough for this engine??
10) Finally, TBD rear drive suspension that won't blow up if I nail it. RamJet uses 17/45/245's in the rear to act as a fuse. :bomb::rolleyes:

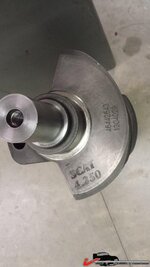
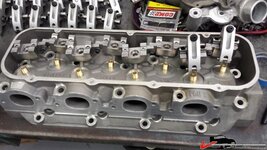
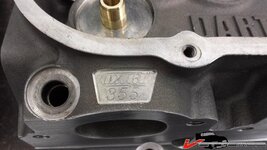
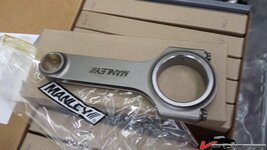
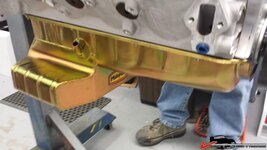
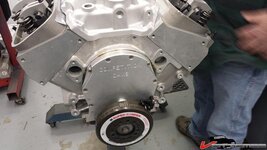
Anyway here are some parts pics
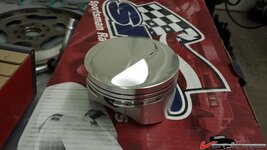
1752b26b1c96355.jpg
1752b26b1cc4de3.jpg
1752b26b1ceab2f.jpg
1752b26b1d1f51b.jpg
1752b26b1d45681.jpg
1752b26b1d6abdc.jpg
1752b26b1d849e3.jpg
1752b26b1dab325.jpg

Intake, Throttle Body, Cam & specs to follow. Stay tuned

I plan to update as we progress to engine dyno.

Bullshark
 
Close!

We're pretty close on what we are building.. I didn't go with the aluminum block, (too poor for that), still going with the carb for now along with the Muncie 4 speed. Rear will get upgraded when it breaks. No a/c for me to worry about either.

I got a bare block from the machine shop and a couple of different sets of heads to try the header fit before plunking down the cash for heads. The .300 raised ports put the #1 header tube closer to the steering box than I'd like, but I can just add a little more to the ding the factory put there and that will work.
 
Lots of guys pull the original numbers match engine and stuff it in the corner. You could be the first on the block to do that for your hood.:harhar:


If that won't work, you could always set that aluminum intake on the floor and start stacking bricks on it until it'll clear...:evil:
 
Hey Tim, are you also going with the Dart 355 CNC heads?. Right now my Hooker sidepipes fit without a clearance issue. Didn't have to dig the primary. They were purchased way back in the late 70's so probably the original design.
I also remember the engine mounts having a V spacer. Can that be removed for additional clearance without a problem?? I will be going with a different pully system to hopefully avoid crossmember issues. Do you know of any other approaches like different motor mounts, etc. that could be used if .300" turns out to be a problem.
Bob
 
I'm going with AFR 357's. .300 raised exhaust like the Dart's. I set a bare block with a set of Dart heads and a pair of .060 copper gaskets to make sure I had clearance on each side. Everything fit, but that #1 primary tube was REAL close. Even the dent that Hooker installed was nearly rubbing. I suspect taking the spacers out from under the motor mounts will fix that or maybe just adding a little bit to the existing dent. Taking the spacer out might cause a driveline angle problem or the bottom of the fan shroud. I haven't looked at that yet. The driveline shouldn't be a problem with a spacer under the trans mount. Take that one out too and drop the whole thing down.
 
Fan Shroud won't be an issue for me. I'm going with the dual Spal electric fans controlled by ECU. I will probably use the Muncie until I figure out what tranny I want. I think I'm going with a dual 10.5 inch clutch pressure plate that will enable a smaller bell housing. May make the tranny install a little easier. Not sure about that though. Had to cut RamJet's crossmember for the TKO500

Might have to use MYBAD79's rack if the steering linkage gets in the way. Damn, this projects snowballing
 
Last edited:
Mine had a 1/4 thick plate between the mount and the block on both sides. I think it was to compensate for a lower overall height between the mount thru bolt and the top of the mount. Aftermarket mounts.
 
AC BB cars had a spacer that looked like a V capturing all three motor mount holes in the block. I'll look for one in my parts stash and post it. I think it was used for clearance issues, but never did find out where. Maybe the 2 belt crank pulley and crossmember??? It was GM stock though.

See Paragon Link Below

https://www.paragoncorvette.com/p-351750-engine-mount.aspx
 
Last edited:
Holy cow.... You'll need those 245's fuses in the rear....... That is some serious "stuff" :D

Me too- I've got 295 fuses and I've been hoping it NEVER really sticks- so far, so good.

Here's a deal I just thought of-- When I replaced the motor mounts a couple of years ago and installed the shims (per the instructions that came with them) I have noticed a slight vibration at 60 MPH and up. Now I'm wondering if they tipped the engine up in the front enough to throw the driveshaft angle off and cause the vibes? No a/c to deal with and always had plenty of clearance between the pulleys and crossmember. I also noticed if the idle got below normal (900), the fan would ding on the shroud and I never could find out where it hit.
 
Tim, yes .... If you angle the engine "up" you have to shim the front diff mount up/down to restore the driveline angle .... The front diff mount is the ONE place where poly makes sense: you can cut it or shim it....
 
Did the shop check the runout? If it's not straight it'll be a bear to balance. Been there with turbine engine parts. Limits on those are way down there- like .0015, but they see a bit more RPM than we ever see.
 
Did the shop check the runout? If it's not straight it'll be a bear to balance. Been there with turbine engine parts. Limits on those are way down there- like .0015, but they see a bit more RPM than we ever see.

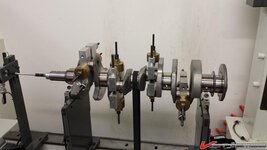
Yes, The crank was bought new from SCAT. Chip at Competition Marine Center doesn't accept anything more than .001 runout. Initial condition before balance was ~35grams on one end and 45+ on the other. He will spin it up 7500 plus before done drilling. :thumbs: Forgot what the tolerance on the machine is but he said he would have a perfect flat line balance when he was done.
 
Well, It's starting to come together in spite of the frigid cold weather up there in St. Louis. I'm starting to get bored down here in Florida and wanting to get back and finish the build. I'll wait until it warms up a little...... -9 degrees this morning I hear. I'll be content to let progress muddle along for now :crylol:

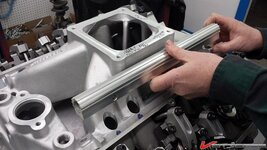
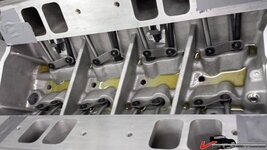
We opted for the Super Victor intake. It's not an EFI intake but we will machine it for the shorty injectors angled in about 15 degrees so as to provide for a more direct spray on the intake valves. A low profile fuel rail will need to clear the custom drop base needed to seal to the L-88 Hood chamber. An Accel 4500 series Low profile Throttle body, 2000 cfm is planned.

1752f574fbc68c0.jpg
 
Last edited:
Getting closer!! Got the Intake drilled and Injector bungs welded in. Angled 15 degrees so they inject onto valve and also more compact top end. Decided to go with the ultra low profile High Flow 4500 Style 4 Barrel Throttle body from FAST. Hopfully we can get the engine on the Dyno in a couple of weeks. Took delivery of a Tremec TKO 600 so its time to start pulling the old school engine and transmission out of the car. Donnie's got his car off to the paint shop so we have an open widow at the hanger. :bump:

175353c47d0ec97.jpg

175353ca9272338.jpg
175353ca91ccfff.jpg
175353ca91a10bb.jpg
175353ca924c5a6.jpg
175353ca9226430.jpg
175353ca91f398a.jpg
 
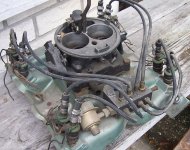
Yours is a whole lot prettier but here is a pix of the one I did in my garage long about '92 or so.....I had the pads TIG'd in place and drilled.....

this fit on a Pontiac 455, the water passage section was separated off for ease of install/mods....and lost over the years.....

:smash::trumpet:
 

Attachments

  • pontiac injection 008 - Copy.JPG
    pontiac injection 008 - Copy.JPG
    616.8 KB
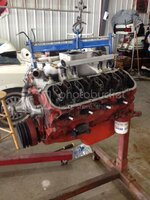
Big Block Removed

We got the old Big Block 427 and driveline removed with out dropping or damaging anything. Now waiting on the engine builder. BlueAngelEngineRemoval1_zps629781a3-1.jpg
BlueAngelBBC_zps3247994b.jpg
 
A question on the table!! Should I paint the engine block and heads an electron blue color or leave it unpainted aluminum?. Pro's and cons to either I think? Whats do you guys think?
 

Latest posts

Back
Top