My '76 restoration (long post)

VetteMod - Corvette Restoration, Modding & Performance Forum

Help Support VetteMod Forum:

:lol:

that laser is awesome

what's the computer for?

Main purpose for the carputer is vision, 2 camera at the rear, two at the front, I have a 7" touchscreen hi-luminosity panel that goes with it.

From there you can add GPS, MP3 and such. I plan an arduino-based module to sense voltage, fuel level and such, maybe I'll display my gauges on the screen too. For sure I'll do data logging.

With an antenna I could access the web, but I don't think I will, for security reason.
The car will be running long before this thing is functional, this is a much longer term project.
 
wow, that reminds me of Knight Rider in the 80's ..... would be cool to have fuel level and water/oil temps on the screen.....
 
I went to school in France, (near Geneva)
You're talking about my homeland there. I was born and grew up in a village halfway between Chamonix and Annecy.

Well I dont want to keep highjacking Denpo's thread with my hockey stories.
LOL
But we will make a mold... of a hood not a body armour.
Derail it at will my friend. Chair ridden as you are for the moment, I'm sure everyone will be glad you'll take some recomfort messing with us.

Bought some gelcoat last week, I'm dying to make a long LT-1 hood.

I went to school at Collonges-sous-Saleve... halfway between Annecy and Annemasse. I have some really neat pictures of a trip to Annecy - IMO the most beautiful place that I've ever been.
 
Last edited:
I went to school at Collonges-sous-Saleve... halfway between Annecy and Annemasse. I have some really neat pictures of a trip to Annecy - IMO the most beautiful place that I've ever been.

Man, I'm from Cluses, pretty sure you've been there at least once.
Yeah, the place is beautiful, I miss the mountains. I don't miss the people's mentality tho.
Damn the world is small.
 
wow, that reminds me of Knight Rider in the 80's ..... would be cool to have fuel level and water/oil temps on the screen.....
Well, I'll try to do something more tasteful and that ages more nicely, but yeah, that's the idea.
 
Ouch, hurt my back while doing acrobatics yesterday.
The garage, while heated is still a good place to get cold, I stay in the warm for the day.

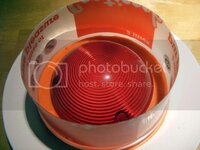
So I booted the clear taillight mod. I like the bubble lens design, but since I'm running colored led, I don't need the red of the lens.

I'm taking inspiration from here :
http://www.alumilite.com/howtos/TailLightMoldingNoEquipment.cfm

I'm not using their product, it's playdoo instead of the molding clay, and this as rubber casting product, from local resin supplier :

tailightlensmolding2_zps03d379df.jpg


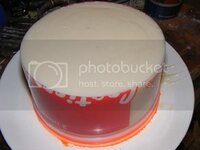
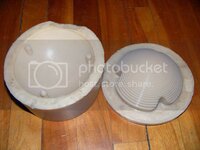
Today I made the first half of the mold :

tailightlensmolding1_zps7e652cc3.jpg

I know the lens in itself is not perfect, but I was afraid doing worse than better trying to polish it.
I hope it won't show.

tailightlensmolding3_zps77ee022f.jpg

Now got to ways 1 to 2 days.... soooo long.
 
As an Amazon Associate we earn from qualifying purchases. Product prices and availability are accurate as of the date/time indicated and are subject to change.
if the clear lens has some surface imperfections, don't worry. sand the clear lenses with 400, then 600 grit and clearcoat them. I've done this many times with old headlight lenses, even the ones on my C6 are clearcoated. that automotive clear holds up much better than plastic, and you can wetsand with 2000 grit and buff it to mirror finish.
 
if the clear lens has some surface imperfections, don't worry. sand the clear lenses with 400, then 600 grit and clearcoat them. I've done this many times with old headlight lenses, even the ones on my C6 are clearcoated. that automotive clear holds up much better than plastic, and you can wetsand with 2000 grit and buff it to mirror finish.

Roger that Karsten, thanks.
 
If the casting material is water clear polyurethane, you need to do what Karsten suggested anyway. The clearcoat will help protect from UV. Unprotected, most polyurethanes turn yellow, then haze over.
 
If the casting material is water clear polyurethane, you need to do what Karsten suggested anyway. The clearcoat will help protect from UV. Unprotected, most polyurethanes turn yellow, then haze over.
Casting material is clear epoxy I got from the glassers' shop. They didn't have the 2 part rubber, so they directed me to a all resin supplier.
There, I saw they also have and "optic resin", supposedly made for lens and such.
If the current epoxy don't give good result, I'll give this one a try.
I will smoke them a little, my LED are so damn bright anyway.
And yes, UV protection clearcoat will go on top of that.
 
Soooo, looks like there is no way I could find a cheap late C3 3 pieces.
Nevermind.
I bought a mold from my local Corvette hoarder, 20$
woohoo.gif


frontspoilermold_zpsa55ff266.jpg
 
It does appear something is missing. Trimming may present a problem.
If I were closer I would help you with it.
 
Ok, taillight mold done.
Few problems : my release agent did work at all, I had to cut the contact surface on the outside to set the two part free. So I expect a mess at the flashing surface.

tailightlensmolding4_zps9166bb1c.jpg


Removing the tailling for the mold have been a real PITA.
Instruction on the webside don't mention the use of release agent when casting, I'm a bit concern the cast part with break upon release. We'll see.

And of course I couldn't entirely get away with bubbles :

tailightlensmolding5_zps968d3070.jpg

It's still minimal, hopefully the ouside of the taillight will be bubble free.

Can't wait to test it out.
 
I used aluminum foil as a barrier whn I made my speaker enclosures, cooking spray like "Pam" is an excellent release agent ..... and cheap..... and very covinint because it comes in a spray bottle.....
:smash:
 
I used aluminum foil as a barrier whn I made my speaker enclosures, cooking spray like "Pam" is an excellent release agent ..... and cheap..... and very covinint because it comes in a spray bottle.....
:smash:

Believe it or not Karsten, but that's what I used.
But, people from my tribe still cook their food with primitive stuff like oil or butter.
So, when I used it (for the very first time), it first sprayed something very watery. I said to myself "well that must be the wizard thing people talks about".
And it wasn't.
Found out layer it had to be shaken and suddenly is spray something that looks like fat material.:blush:

Joys of space-(gar)age cooking :push:....
 
Hi guys.
After another unexpected hiatus I'm back in the garage.
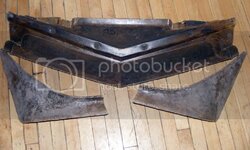
I used the crappy molds I bought and got my self a 3-pieces spoiler set.

frontspoiler1_zpsd0eff0c7.jpg

Pretty much as planned the center piece came out nicely, mold was ok and the shape was simple.

frontspoiler3_zps93aa8a55.jpg

On the other hand the side molds where ugly I had to destroy the mold to get my parts out. And they fit pretty bad....

frontspoiler2_zps5a1357c1.jpg


...especially the driver side.

frontspoiler4_zps6580b6d8.jpg

Not really unexpected, the front clip came from a unfinished restoration and clearly things have been done there before.


I'm a little concerned about the back side of the side spoilers, do they have to follow the wheel arch shape? if so I'm in for some heavy massaging.
That was fun doing those parts. I gained first hand experience with gel coat and mold preparation. The next one will be muuuuch better.... a lt1 hood scoop.


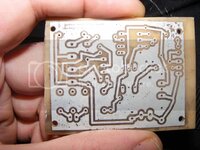
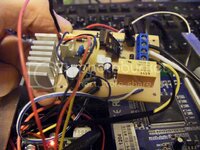
I'm also done with the shutdown controller for the embarked PC.

shutdowncontroller_zps20e49fdc.jpg

shutdowncontroller2_zpsd17e7697.jpg

It sense the 12V acc and trigger the boot of the PC. When it stops sensing it, it wait for a couple of seconds, then trigger the shutdown.
It controls the power relay for the computer itself and another for the to-come sound amplifier.
The code in the microcontroller always make sure the computer boot up and shutdown cycles are fully completed.
When the car is off, only the module is powered, I still have to measure it, but the amperage it draws should be negligible.
 
Hey thats cool, I think the side molds shouldve been separated and be in 2 pieces, but no big deal, can make another.
Humm more projects???

Yeah I think that the spoiler should follow the wheel arches, sorry LOL
 
Dont look that bad considering what you started with. I should be back in business in a couple weeks if you need some help with those molds.
 
Ok, here's a little side project I've been on for last weeks.
OLED display:

[ame]http://www.youtube.com/watch?v=FW2Ft24gRuU[/ame]

The plan is to have a set of these acting as gauges in the center console.
As the video don't show, the display is perfectly white.
The contrast is obsolute, just as the angle of vision. I never had OLED display before, they are amazing.
Took some hacking to get the most of it, my microcontroller is rather weak, so I wrote custom rendering routines for my specific needs.
I have setup some kind of tools chain that let me export all my Photoshop bitmap ressources into the proper format.
That was cool coding in 8 bit. reminds my old Commodore 64.
 
Thanks!
I'll get an update on gauge later, but if you're asking, here's some update.

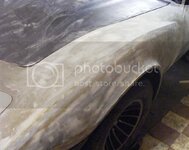
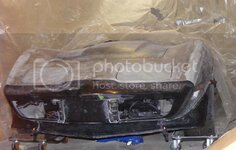
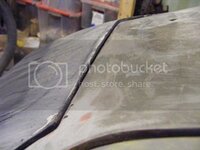
First something I did weeks ago but never felt like posting. I did some block sanding test on one front fender. Used epoxy + ceramic micro bead, sanded with 80 grits. I obviously don't looks smooth, but my hand tells me otherwise.
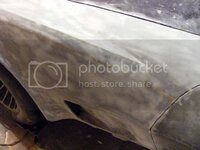
bodywork-35-blocksanding2_zps8bc8017b.jpg


bodywork-34-blocksanding_zps7f59ed18.jpg


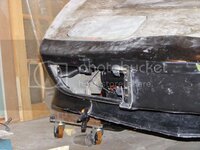
Then, the ongoing process that is taking me an humongous amount of time : the front bumper.
I had to drill the holes, modify the brackets and adjust everything. I stopped counting how much time I dismantled this.
A freaking puzzle. :suicide:

But it's coming along. Slowly, but surely.
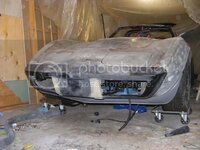
bodywork-36-frontfitting1_zps20485eed.jpg


I gave up on the pace car spoiler, and switched to a chrome bumper era spoiler.
Smaller more subtle, and Muuuuuch easier to fit. (note: the gap at the bumper corner is normal, it was not bolted a that moment)
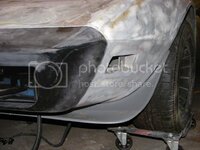
bodywork-37-frontfitting2_zpsc9192e92.jpg


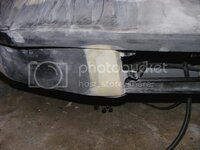
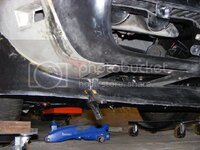
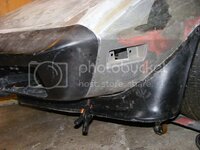
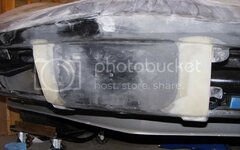
I'm pretty much done with the bumperette removal. This is also taking me a lot of time, but I wanted something special, more 'flowing' than just cutting out the bumperette. I'm still running the front crash pad, but it look less massive IMHO.
bodywork-38-frontfitting3_zpsb4c43cdf.jpg


bodywork-39-frontfitting4_zpsfbd6d2f5.jpg

bodywork-40-frontfitting5_zps11d6f46c.jpg


The base is fiberglass, and the shape is epoxy + fiberglass 'fume'.


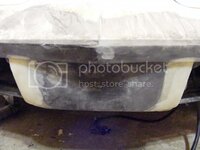
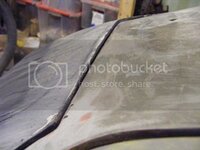
My last issue is the center area :
bodywork-41-frontfitting6_zpse970665f.jpg

I already thickened the backside with fiberglass, and I'm now grinding it down to make it fit, not done yet.
I could probably force it down to the correct height, but I'm afraid all the force I would apply went gluing would eventually come to bite me in the ass later. I want it to naturally fit in.

Bottom line : fiberglass front bumper = lot of work

 
Last edited:
Another progress I can report is the making of the nose emblem.

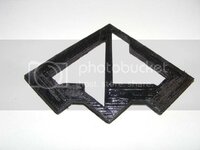
A friend made me a 3D print at the correct size (merci Pierre!)

Here is a faulty print (inverted Z doh) I use to make some acetone tests, but you get the idea of the roughness of the print.
emblem1_zps5063ee12.jpg


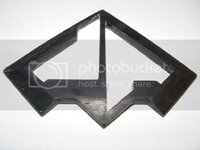
Once sanded it looks like that:

emblem2_zps637753c4.jpg


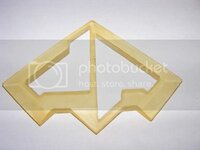
Then took a print of it, recast it in epoxy, and did all the touch up:
emblem3_zps06e0a4de.jpg
Black dots are dust caught in resin
ack2.gif


Now I have a smooth reference, I gonna make a cast for the final emblem.
 
My last issue is the center area :
bodywork-41-frontfitting6_zpse970665f.jpg

I already thickened the backside with fiberglass, and I'm now grinding it down to make it fit, not done yet.
I could probably force it down to the correct height, but I'm afraid all the force I would apply went gluing would eventually come to bite me in the ass later. I want it to naturally fit in.

Bottom line : fiberglass front bumper = lot of work

Maybe it would be easier to trim off some depth (of the nose) to get it to fit better?
 
My last issue is the center area :
bodywork-41-frontfitting6_zpse970665f.jpg

I already thickened the backside with fiberglass, and I'm now grinding it down to make it fit, not done yet.
I could probably force it down to the correct height, but I'm afraid all the force I would apply went gluing would eventually come to bite me in the ass later. I want it to naturally fit in.

Bottom line : fiberglass front bumper = lot of work

Maybe it would be easier to trim off some depth (of the nose) to get it to fit better?
Larry, I'm having trouble getting what you mean. Maybe it's because you're talking about what I'm already doing and it's my fault for not describing my method precisely enough.
What I'm doing is adding layers of fiberglass to the underside on the top of the bumper cover, and grinding down the topside of it.
Is that what you meant?
If not, could you try formulating another way?
 
Denpo, sure wish i could have helped with the nose emblem. Its just one thing after another here. Good news is the 1st vmc will be in place next Tuesday. I am so far behind now though it could be 2 months before I could get to your project. Glad you found somebody to help you.
Scott
 
Back
Top