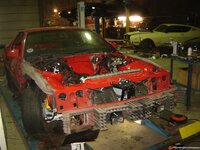
Redoing that old Camaro

VetteMod - Corvette Restoration, Modding & Performance Forum

Help Support VetteMod Forum:

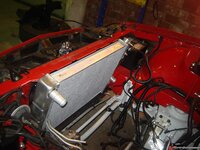
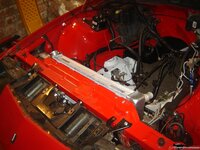
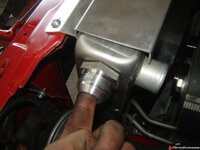
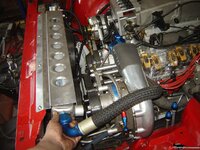
More problems with stuff one really doesn't need, a nothern/summit rad that doesn't quite fit...and they call it direct fit! Nice! Have to cut and weld the tank and fab a new mounting bracket for it, the stock one is too narrow.

24b0ef3c76fdad.jpg

24b0ef3c63a20e.jpg

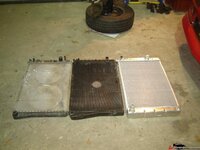
Original thicker aftermarket copper and non fitting northern aluminum rad. Hmmm...now what could be the problem here...hmmm...

24b0ef3c3639ed.jpg

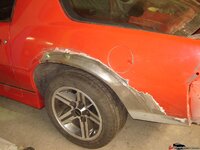
Fender done, all it needs is a little filler and paint
24b0ef3cb3061a.jpg

At least this looks nice!
24b0ef3cc61398.jpg
 
ON that radiator, the fix is simple.....

hit something till it fits....

get a larger hammer and a 2x4.....

jeez......:tomato:
 
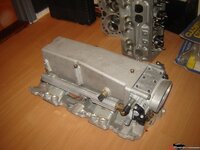
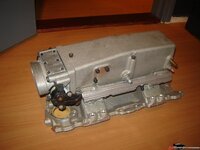
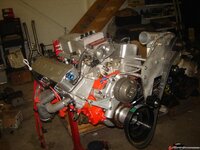
Got the prototype intake. It's most likely a GM piece, has a winters snowflake on it and a lot of porting and epoxy work done to it. Going to clean it up, most likely I'll remove some of the epoxy stuff in the plenum..it's very rough and I don't see how it improves things there....

24ae0d8ac8eead.jpg

24ae0d8ade45e5.jpg

I have seen that intake (or one exactly like it) before, I believe at the F-Body Gathering II event at Road Atlanta, back in the late 90s. It was on a 3rd gen Firebird with twin turbos, built as a development car by GM. The car itself probably doesn't exist anymore (many of them were crushed, or sold off with all of GMs troubles). I never saw it anywhere else. Next time I run into Scott Settlemier (the former Camaro brand manager for GM) I'll ask him about it. He was involved with the GM historic vehicle collection, and may have some more info.
 
bolt pattern difference? Are you talking about the 72 degree center 2 bolts? That's only for cast iron heads, happened to the TPI in 87. Vettes always kept the 90 deg. bolts, all others got the 72 deg stuff so if your manifold is off a camaro, trans am, impala...yadda yadda...it has 72deg. bolts in the middle.

Nah, I was thinking of the LT1 intake, bolt angles, straight up/down...same port locations,...so why change it?? TPIS had a very expensive similar casting for the L98 engine, back in the day....

I have a home made adaption of the LT on the L98 and it was a LOT of work...and that was one nagging question of why bother changing bolt locations and angles??

I beleive it had to do with the different cooling passages for the reverse cooling on the LT1. The Vortec heads (based on the LT1 heads) are different, too.
 
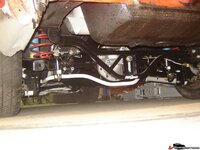
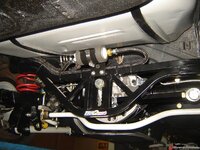
Larry, it has to do with the instant center location and where you want it for acceleration (anti squat) and braking (reduce wheel hop), the 2 conflict and a decoupled torque arms is a short sliding shaft that connects the diff to a solid point, this is used under acceleration, under braking a large beam with a snubber up front contacts another point under the car, much like traction bars, and this makes that the snubber pushes against a fixed point and all braking torque is introduced there, to a braking instantaneous center very far forward of the centerline and down low.It takes advantage of a 2 arm geometry and a virtual swing arm/instantaneous center as a result, much like the forward links on a C4 IRS. Do you have the Herb Adams book? it's in there, mentioned briefly.

Found that someone actually makes on for a 4th gen, the 3rd gen rear is almost identical, there's just less roof in the trans tunnel. This thing won't bolt up also because it mounts to the completely different subframe horns on a 4th gen but still they have a very nice kit. Worth copying or maybe modifying.

http://www.unbalancedengineering.com/Camaro/TA/

Not sure if you're aware of this, but Spohn and others make the decoupled torque arm for the 3rd gens, too. I never installed one on a 3rd gen, but did several 4th gens with them, and they make a HUGE difference! I wouldn't build a serious 3rd or 4th gen without one. On the 3rd gens, they mount directly to a supplied transmission crossmember (they make the crossmembers for every trans you can think of); on a 4th gen, they replace the "wavy plate" body stiffener behind the crossmember. With your skills though, you could probably make one pretty easily.
 
I don't care what anybody says, I like Third Gens...of course, I am from Georgia, like guns, and have a Confederate battle flag hanging in my garage! I have 2 3rd Gen TAs, both projects, and did the mechanicals and custom bodywork on a Firebird that won at the TA Nationals in Dayton, OH back in '02 (ex-girlfriend's car). Once my Vette is finished, I'll be looking for an IROCZ for my son(he's 11 now, and we want to finish it before he's 16). They have a reputation as a "mullet mobile", but with a little work they will outhandle just about anything on the road (I'll put one up against any 4th or 5th Gen, or C3), and they are easy to upgrade. Personally, I love the way they look.

BTW, what did you plate the bolts with? Chrome or some type of cad plating?
 
As an Amazon Associate we earn from qualifying purchases. Product prices and availability are accurate as of the date/time indicated and are subject to change.
Spohn does not have a decoupled torque arm, they have a remote mount one, that mounts on a crossmember (other brands have those too like UMI, BMR...) but that's not the same as a decoupled torque arm.

The bolts are all passified zinc plated.
 
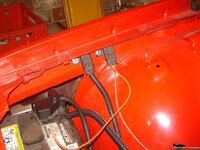
I added a factory fuse holder and relay to power the additional booster fuel pump. I like stuff to look factory and hate crappy wiring and lack of detail

24b12f3d57dea2.jpg

I positioned the relay like this so I could use a hole that was already drilled there by someone who installed a remote washer pump, probably unaware that you can simply swap out the ones in the wiper motor. Even wired it off the original prongs inside the wiper motor (pump was missing)
24b12f3d69da87.jpg

I also clocked the compressor differently, I don't want to route the pipes through the sides of the battery tray and opposite side, going totally custom. Thinking about machining the drive mandrel for grooves like a serpentine pulley and drive stuff straight from it using a 5" water pump pulley and a smaller alternator pulley.

24b12f3d7ac4f9.jpg

24b12f3d8b1330.jpg

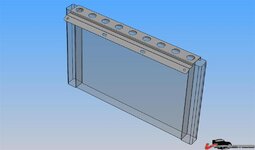
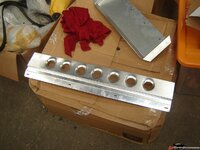
Also designed a rad upper mount, hopefully I'll have that done soon. The holes will be dimple died (.75" die) I'll share the model w/ anyone who wants it after I am done with it and can confirm it's 100% accurate and fits.

24b1301ea2752c.jpg

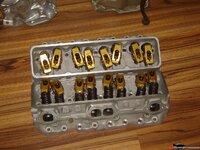
Well, got the TFS G1 heads so the engine will come apart again, I'm going to paint it red. The silver was too overwhelming with all the aluminum parts. Going to upgrade the fasteners w/ ARP most everywhere, it'll have to hold for now. If the thing grenades I'm swapping for a de-stroked 400 most lilkely.

24b2fc24835c8c.jpg

Well, tore the motor apart and decided I needed to take one of my old oil pans and fabricate a drain tube w/ NPT thread so I can use AN hardware. I hate hose clamps.

24b311e267c923.jpg

I have an hoses on most everything, same for the supercharger. I'm going to undo the FMu of all that ugly black quick disconnect fuel hose too

24b2fc24ab46df.jpg

24b2fe0cfc5a64.jpg

I figured this was the best way to do it, most room for draining right there and angled up and toward the supercharger so there's no horizontal spots in the drain line )especially since it's a rather small ID line, I use -12 stuff on my turbo motor)

I also had to hammer form and reshape the whole deeper sump section because as I suspected it didn't fit with the milodon oil pump and pickup (not a fan of the melling pumps)
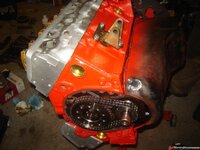
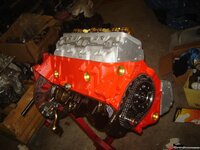
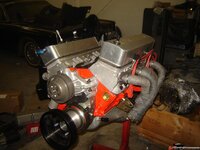
All I have to do is blast and powdercoat it now. It's getting there now. Different color, it was supposed to be red. As soon as it hit the engine (primered silver even w/ aluminum epoxy paint) it turned to a shade that's a lot more orange than red... damn! A redder shade of chevy orange. I didn't want it orange but oh well.

24b311e2a81794.jpg

24b311e287f06c.jpg

24b311e2c57f9b.jpg

The problem now is.... I think I need a zz409 cam ;)
 
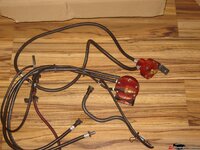
Yes, there's some red thingies with hoses, a black thingy with wires, and other gizmos with doodads in there LOL
 
And a Merc 428 CJ, complete with hood pins.....:cool:

No wonder good old hotrods are so expensive, TT/VTwin got them all.....

:lol::tomato:
 
I know what kind of intake it is, it's a McFarland design. As far as I know now there's only 3 of them and this is the only one with the fuel rails. The other 2 are still brand new and come w/ the EGR adapter (I don't have that and I was outbid on the brand new one that was for sale)

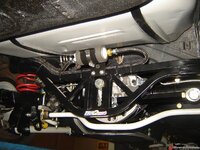
I installed the booster pump. Apparently the procharger instructions tell you to screw the pump to the floor pan and to cut a fuel line and use the supplied rubber hose to plumb it in. That stuff doesn't fly for me, so I came up with this. Some adapters on the short rubber section between tank and body and using AN hardware I routed it to the pump. unfortunately the pump has hose barbs so I had to resort to hose clamps there (I hate those things) but all in all it's a lot cleaner than per the instructions. That Fays 2 sure is handy for hanging stuff off.

24b538b3111bf0.jpg

24b38fcaecfc66.jpg

Humm....one side has rust behind the ground effects. No wonder, screws thread into bare steel. Probably self tappers too. More stuff to fix

24b3fa9590d5a9.jpg

Took the whole wing off because that side needs the door hinge bushed too

24b3fa957c2001.jpg

Thinking about going with the later GFX, the fake air ducts give it a more modern look

Didn't get to do a lot more, stripped most of the front end for spraying and fixing some minor issues.

24b48f2ca7b0eb.jpg

24b48f2cb93799.jpg

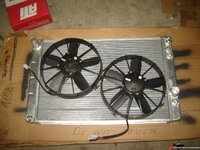
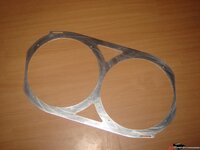
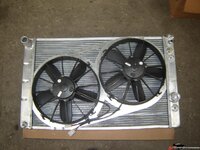
Going to install 2 Spal 12" high perf. puller fans instead of the stock dual fans, problem is I'll have to design a mounting bracket or shroud for them. More custom work to be donie.

24b524605ad058.jpg

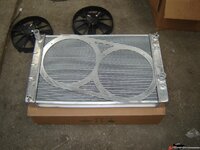
Ignore the crookedness of the radiator, that's how we receive our stuff here courtesy of UPS.

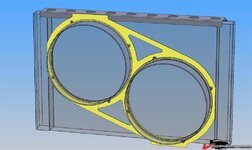
Quickly designed a neat mounting bracket. Didn't want to go with a full shroud, the fans will cool plenty as is and I don't want them to mount closer to the engine and with the fans against the core a shroud is useless. It's the yellow part in this design

24b5265012a21b.jpg

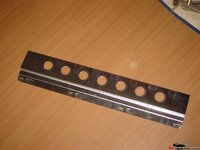
Here's ver 2.0 of the rad mount, this time I can dimple die it. This version fits around the tanks, not just the core.

24b6e75c2146cb.jpg

The fan shroud
24b6e75c111f9c.jpg

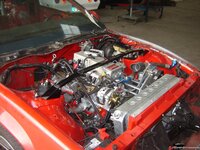
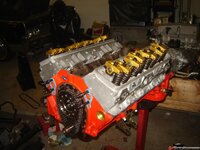
Started putting the engine back together after finally getting the zz409 cam (stupid customs here was holding on to it for a couple of weeks). Also visible is my drain hookup for the P600B.

24b6e13121c23d.jpg

The stock v/flat belt combo pulleys are giving me issues, I'll either have to convert the aluminum spacer thing for the SC pulley into a pulley by having it cut or flat belt grooves or have a new one made with a wider front diameter for a larger pulley. I already have a smaller waterpump & alternator pulley.

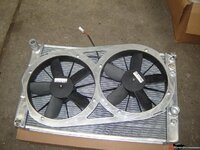
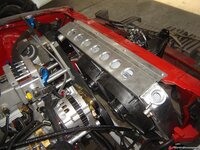
Got the radiator all done:

Fits like a glove
24b6f28ce0b21d.jpg

Used carriage bolts, the square below the head is hammered tight into the aluminum so they won't spin
24b6f29623ed87.jpg

all done, these fans move a lot of air. Gale force winds LOL

24b6f28cf5460c.jpg

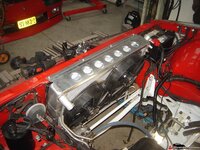
Rad mount ver 2.0 now dimple died
24b6f28d093dba.jpg

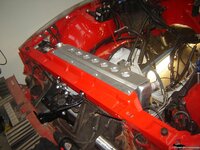
The whole shebang installed
24b6f28d1ce77b.jpg

24b6f28d2e950a.jpg

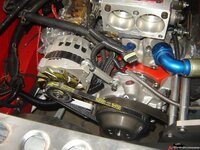
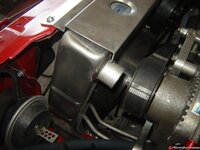
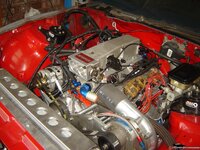
I also made good progress building up the engine. Cam installed and everything buttoned up/dialed in. Mounted the supercharger and made a custom little bracket since I don't have the OEM serpentine drive, it spaces the whole assembly forward about as much as the stock serpentine stuff does. Also, there's an additional hole that corresponds with where normally the bolt goes through the alternator. I'm going to add a 4th bolt & spacer to it since I still have 1 unused hole in the head and bracket. There's a small bolt in there now, adding a longer bolt & spacer only required drilling the supercharger bracket. No big deal. Also have the oiling system & return all hooked up. Going to either cut serpentine grooves in the drive spacer (alu spacer thing) or design a new one, larger diameter. Have to figure out the drive ratios first and see where my KRC pump ends up.

24b6f28d59b32b.jpg

24b6f28d8a9dac.jpg
 
Maybe I'm not understanding something, but wouldn't mounting the pump to the linkage channel more vibration to the pump? Otherwise, nice work on the project.
 
Last edited:
That black thing is just the mounting frame, it doesn't move and the pump is hung on rubber isolators and is clamped down with a rubber noise suppressing sleeve around it.

Neki, do you have the Fays2 system on your camaro?
 
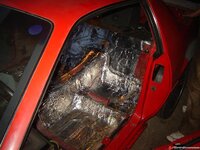
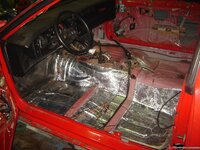
Did some more work. Started doing the inside with sound deadener

24b786cecd0550.jpg

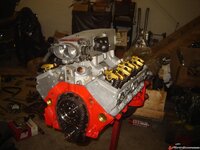
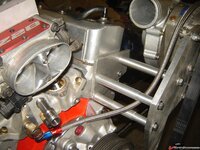
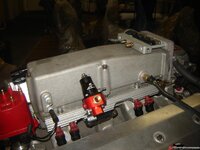
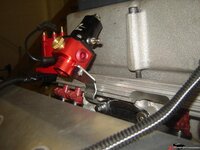
Found a clean way to mount the FPR, only need a 90deg. 3/8 -> 6 AN adapter to clear the valve cover. Also visible is the sandwich plate w/ 3 injectors, part of the superfueler.

24b786ceb6f912.jpg

24b786cdfbb155.jpg

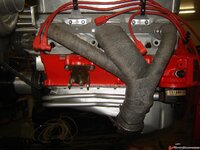
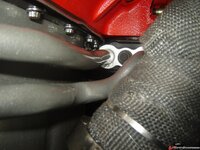
Installed a 92 F body KC4 (RPO code) heat exchanger because of the way it bolts up without using hoses & hose clamps (just like an AC comp. line) and the lines are aluminum (now powdercoated) instead of the stock steel ones that rust like crazy. It's a real tight fit with the headers. Good thing I have wrap around them.

24b786ce3596f5.jpg

24b786ce52b0e8.jpg

Added the 4th bolt to the SC bracket

24b786ce1e97ab.jpg

24b786ce966896.jpg
 
Wow, fantastic work!
Are you sure that thing is going to be street legal in NL when you're done?
 
Sure, it's a registered car. Only a yearly MOT test, nothing more. It'll pass with flying colors (should, almost everything is new LOL)

The drive system is working out pretty well, need to add the KRC pump still and add a pulley to the crank. The drive spacer for the procharger is too long as it it, about 1mm. The thickness of the pulley will add to that so I'll have to machine it down but it'll be perfect then
24bba5eee4f994.jpg

I'm not liking the stock heater hose routing, i'll need to add a longer hose for the one to the core and a shorter one to the tube on the frame
24bba5e86ee44b.jpg

the valve covers don't fit particularly well either :( It's hitting the heater box but I'm swapping that one out for a non AC one. The other side is a PITA to remove because of the hose nipple on the washer pump hanging down from the wiper motor. I'll have to modify that valve cover. Otherwise there's a good chance I'll break off the hose nipple on the pump.

24bba5e88176ee.jpg

The gold cad plated alternator pulley is for a 6 rib belt, I'm running a 3 rib and the pulley will be replaced by a KRC 3 rib one, same color gray as the water pump pulley and the still to be installed KRC power steering pulley set. The crank pulley is black but I'm thinking about painting it to match. Powdercoating would add too much thickness to the groove and I'd hate to have a slipping belt.
 
Oh, and I found out what kind of intake it is. It's a McFarland design. There are only 3 known to exist. 2 of them went on ebay, those were new but incomplete. The 1st had the EGR adapter with it, the 2nd didn't. I don't have that either but I wasn't planning on using it. Mine is the only one with the fuel rails (modified stock ones) and the plenum bolts. I was outbid on the 1st one by a couple of dollars. The other one went when I wasn't aware of it. Pretty rare, 1 out of 3. :)
 
more progress. Got the parking brake cables done, these are ACDelco pieces and they didn't fit. I had to substantially enlarge (with a file) the slots that the little lever goes through.

That's all done now, after I adjust the cable I'll know of they work OK. Manually pulling the lever on the calipers sure does hold the disc pretty darn well, better than my old calipers.

24bc236b718065.jpg

Removed my AC heater core, bought a non AC unit. No rust anywhere in sight, just a bunch of sand and crappy seam that I removed and resealed later.

24bc236b832e18.jpg

New (to me) heater box, stripped & painted. Unfortunately the old motor does't fit, the squirrel cage is much larger. Explains why the heater in this car used to blow a lot harder than in the 88 (non AC car). Swapped the resistor block for the old one off my AC unit so I don't have to cut wires and retain the relay operated stuff. I'm also going to add the little bracket for the relay that came off the old box. I simply put another brake in the bracket so it is more like a Z now since originally it's mounted with the mounting tab horizontal.

Gotta paint that area red first before I'm going to put the box on.

24bc236b946697.jpg

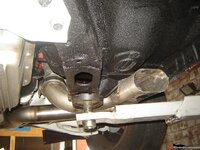
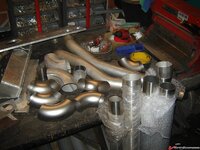
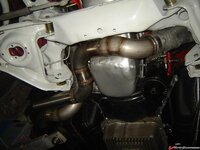
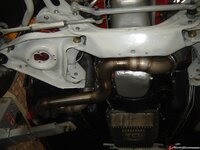
Here's the start of my new exhaust:
24bc236ba6feb8.jpg


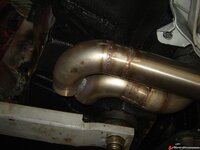
3" bend after the collector steps down to 2.75", the size that the rest will be too.
24bc236bc8ac6b.jpg

24bc236be8103b.jpg

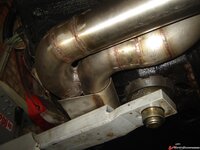
The V bands are for 3" but the 3" here is actually a wee bit smaller since it's a metric size (76mm instead of 76.2) and as such great care has to be taken when welding the V band rings on there so they don't warp.
24bc236bd7e90b.jpg

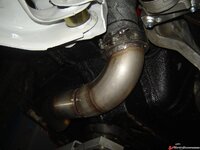
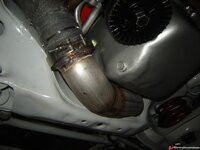
I tucked it up as high as I could without it being so close that it will hammer on the underside of the car
24bc236bf88551.jpg

24bc236c115963.jpg

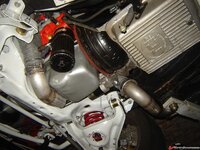
Looks like 2x 2.75" pipes are a no fit on the side, I'm going to make a 2 pipes in 2 pipes out "chamber" that both pipes will run into, so I can fit that as close to the available area there as possible.

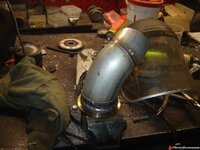
it looks like I have a problem, this will never fit
24bca1be30ec91.jpg

I'm most likely going to weld that bung closed and weld a -20 AN bung to the side tank
24bca1be4691f7.jpg

and route the hose like this (might get a shorter one and run it in front of the SC)
24bca1be561cd3.jpg

The rest fits pretty neatly.
24bca1be872e79.jpg

24bca1be65a7bc.jpg

undecided on what to do with the superfueler, I'm not liking this
24bca1be7580b2.jpg

and the added problem is, my STB won't fit anymore.


enough issues, time to carry on with the exhaust
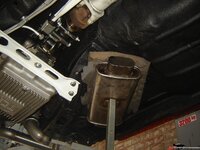
I'll merge the pipes after the bend down the length of the car and hook it up to a large oval shaped muffler w/ an oval in/out for max ground clearance.

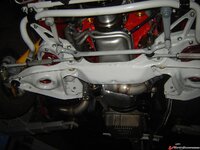
This is where I got, pretty tricky getting it all tucked up in there.

24bca1be984631.jpg

24bca1bea7f210.jpg

24bca1beb7cae9.jpg

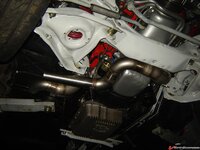
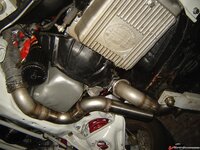
Did some more work on the exhaust. Merged the 2 90 deg bends to flow into a still to be finished oval section to get past the narrow section of the floor there

24bcb8023b1404.jpg

24bcb8024c73c9.jpg

24bcb8025b8977.jpg

Problem is, it's tight on the lift, gotta move the car to the 4 post to finish this, this is not going to work like this.

still debating whether to use the 2 separate round mufflers or this one
24bcb8026bfe97.jpg
 
What is the upper radiator hose material?

Nice work on the exhaust, damn nice work on the whole car!
 
What are the injectors for on top of the throttle body? I assume fuel enrichment for boost, but why 3 of them?
 
Yup, Superfueler, boost enrichment.

You can get those plates with 1 or 3 injectors. I have one for a single injector too and an LS style plate. I'm not sure if I',ll be using it, it's conflicting with other stuff that needs to go in there and I'd need to mount the driver and controller somewhere.
 
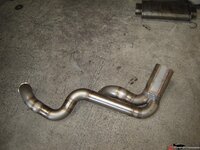
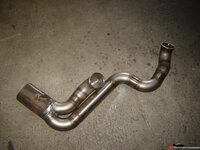
Completed the front part of the exhaust. It's going to split to 2 pipes after this but I'll have to fabricate some kind of flange or something to be able to split the entire system or I'll never be able to remove it after welding in some SFCs
24bd00c7fdb7ad.jpg

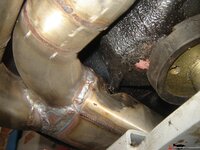
Had to notch my oval section to clear the floor. The cut looks worse than it is from the outside, it's not that bad from the inside....compromised compromises
24bd00c813095d.jpg

24bd00c82c0a22.jpg

24bd00c8450552.jpg

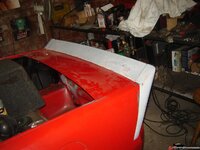
Also got my Hawks tall spoiler, that thing doesn't fit worth a damn. Some studs are crooked, the top ones (vertical) on the side pieces are way too far back, almost 3/4 of an inch. Had to drill a bunch of new holes. Looks like it needs a lot of filling and modding for a smooth fit.
24bd00c85c5872.jpg

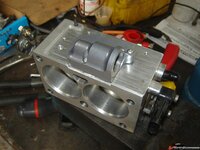
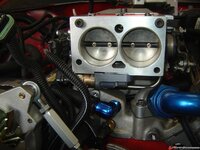
Had to modify the Accel billet TB to fit the TPIS billet IAC housing, the ridge is interfering with the IAC housing.
24bd363bb4c171.jpg

A little filing and it's all fine and dandy
24bd363bc64837.jpg

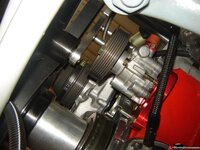
Got the KRC block mount bracket in as well as the serpentine pulley. Only needs a little shimming and it'll be perfect
24bd363bd55dcb.jpg

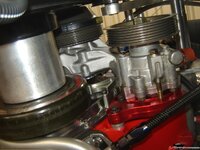
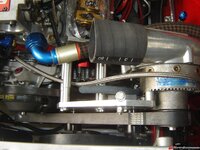
Shimmed the KRC power steering pump, it now lines up perfectly. Also swapped out the alternator pulley and shimmed that too, all I need now is a custom crank pulley. Probably will end up machining an underdrive one I have here, removing a little section from it and welding it back together. As it is, it's too long.
24bd4a3930cecd.jpg

The blue hose is the high pressure power line from pump to box.
24bd4a39775e89.jpg

24bd4a39b16b40.jpg

Edelbrock STB interfered w/ allen head bolt on intake :(

24bd4a3989cfa9.jpg

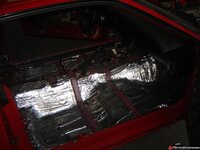
Redoing the seams and applying the dynamat like stuff is done, not a fun job at all
24bd4a39c69b78.jpg

24bd4a39d78612.jpg

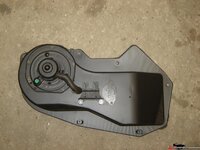
Heater box is all done now, modified the stock bracket for the blower relay, added a 90 deg bend to it w/ the sheet metal brake so it screws onto the front
24bdb5b2dce9fe.jpg

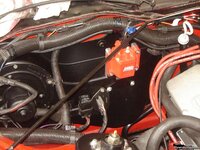
Did a similar thing with the stock coil bracket and used the aluminium blocks supplied w/ the MSD coil. All in all a pretty clean install IMO A;; that's left to do is remove that red overspray from the convoluted tubing.
24bdb5b2f289d7.jpg

Decided to move the heater valve here, I don't like it dangling up front in plain view
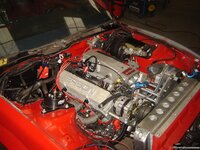
24bdb5b318cb99.jpg

Scored a 3000 series OEM GM alarm system that I'm wiring up so I have a fob w door & hatch release. Tucked the control box away here, wiring runs through the convoluted tubing. I want it to look as factory as possible. Power comes from a stock fuse holder that I mounted in the engine bay, instead of the 1 by the battery I now have 3 (the other is for the aux. fuel pump)
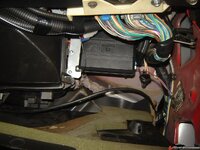
24bdb5b30521fc.jpg

I hid that unsightly horn between the bumper and front sheet metal
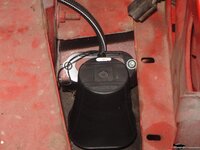
24bdb690e5bb0a.jpg

Biggest bummer of the day is, my NOS old ERSON valve covers don't fit. They are perimeter bolt and my heads are center bolt but I had 1 set of those adapters left but they don't fit. The adapters interfere w/ the rocker positioning on the twisted wedge heads :( Time to find some cast, tall center bolt valve covers. These Erson ones did clear the washer pump under the wiper motor, there was plenty of room to add the adapter too. Drat!

Got the VSC 3000 alarm installed, damn it's one nice piece! Should have done that sooner. It was a lot of work to cleanly wire it in so it looks factory. I hate butt connectors and scotch blocks. I only use shrink sleeve and soldering. Here are my 3 fuse holders, 1 for the aux fuel pump, 1 for the alarm and the other is the original one that was already hanging there.
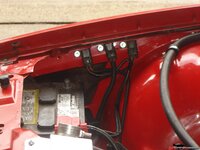
24bdca6eac796f.jpg

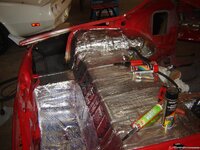
Finally done with the dynamat like stuff. I decided to do the fender wells and rear compartment. Ran out of the thick stuff and used the thinner rattle trap to finish the last section of the trunk area
24bdca6ede9cb9.jpg

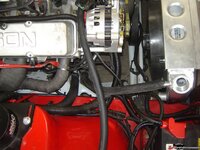
Hooked up the heater and KC4 cooler hoses. Used sleeves to protect it from chafing. Also used those spring clamps everywhere. I can't stand the sight of hose clamps, even if these things are a bitch to work with (I don't have the required pliers LOL)
24bdca6ece0045.jpg

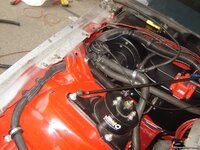
Relocated the heater valve here, much cleaner this way IMO with only 1 hose running to the motor in plain sight.
24bdca6ebdb206.jpg

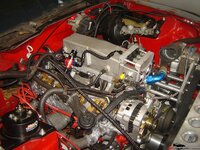
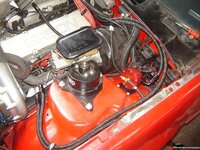
Fuel lines are all done too, incl. FMU. Not doing the superfueler, it interferes with so much stuff I don't want to mess with it.
24bdca6e980c84.jpg
 
Back
Top