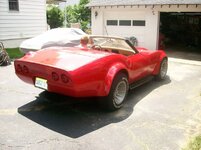
My '76 restoration (long post)

VetteMod - Corvette Restoration, Modding & Performance Forum

Help Support VetteMod Forum:

Rear suspension kit installed :

80-rearinstalled_zpsa8022f2c_77082d06d97b418e00e7bba10ffcf419c5fc206f.jpg


Funny how things come full circle.
The differential was the only part that got transferred from the rotten frame to the donor frame without any restoration.
Back then I considered the state of the whole assembly good enough.

As I had to remove the cross member to drill it, I took the time to finally restore it. unsurprisingly, under the paint I found a lot of rust. As usual, I ground to metal, phosphoric acid treatment and POR15 coating.
 
As an Amazon Associate we earn from qualifying purchases. Product prices and availability are accurate as of the date/time indicated and are subject to change.
Maybe some of you did notice, in my lastest picture you could see I was missing two bolt for the gas tank shield (top of picture).
I spotted them after posting, and now it's fixed.

I finished the back, installed long TA bolt.
The dual mount spring seems to be smaller than the single one, and I'm pleasantly surprised by how much clearance I get from the tire.
80-rearsuspention3_zpse5836b1a_f27a8f09adb5e0e8d14f1346569aa946d5f87dab.jpg


Then I had the chance to see expected stance of the car for the first time.

Driver side:

80-rearsuspention5_zpsd6e1bef7_559d3964452a1397b114ac89111dd45063210aa0.jpg


80-rearsuspention4_zps2feec788_a59078026ec01272518dfac5eba47403f5c5a912.jpg


Passenger side:

80-rearsuspention7_zps3c7e15d7_cac0c9bd02bbea00fd322a36072a156d59e9c5d5.jpg


80-rearsuspention6_zpsddcb897c_872a341cd7151f4a65c328e9000cb202a300dae7.jpg


The passenger side tire seems to stick out a little more.
It's been doing that since the beginning, I try not to worry about that, betting it would get resolved after an alignment and some rolling.
I did not take it into account when flaring, it's 1.4" on each sides.
 
You can loosen all the body mounts and push/pull the body left/right before getting that alignment done..... There's at least 10mm (3/8") slop in those holes.....
Then left/right will look fine..... Those flared fenders cover the 10" rims perfectly !!!!!
Old school !!!
 
You can loosen all the body mounts and push/pull the body left/right before getting that alignment done..... There's at least 10mm (3/8") slop in those holes.....
Then left/right will look fine..... Those flared fenders cover the 10" rims perfectly !!!!!
Old school !!!
Yeah, the thread it covered but can still see the bulging tire side sticking out :nuts:.
By the way, thank you. Those bolts are the one you gave me this spring.
 
Front suspension installed, glad those heavy and freaky coil are gone.

80-frontsuspension4_zpsc6fe900c_cf82c973d2eb3a68dc19e56a174df4caade33d6e.jpg


80-frontsuspension5_zpse4ef9478_dd705bb4c7e4515c00f056f19c4fb966df98fb68.jpg


I've put the front at the desired height.

80-frontsuspension1_zps905342ae_5b19706bf34382c89989157500496d35a653d60f.jpg


80-frontsuspension2_zps1485b7e9_4410c1763eae16ebac00991f7e3f59b6bca54d9f.jpg


80-frontsuspension3_zps4cb2416b_817d7e2767072b04badccf7c6a9f06bd9b6163ca.jpg
 
Driver side weatherstrip and striker pin installed.
I have to sand some area that actually had overbuild.
Once fixed, door closes nicely.

80-fenderflare101_zps9e5fac36_c98ca3d7f1ed56a5463126e7bfb822b455a049d1.jpg


80-fenderflare100_zps074c2a88_0bc521ab52b0d2175be679f886b3a853176dd5fe.jpg


In the meantime I rehearsed the back window cut on the spare back clip.
I'm glad I did, the area is more complicated than it seems, and yeah I didn't bother reading the AIM, the spare part was there to be sacrified anyway.
It's been hanging in the garden for a couple of years to my SO's dismay.
No pictures, way to gory.
Now I feel prepared on the procedure.
It's like the front clip, it can take time until I decide to jump in.
 
It better turn out fine because there's no turning back anymore...
hide.gif


80-rearwindowmod4_zps660250f9_4032d3214ba51c04399726654bbcb8c6832de6ee.jpg


80-rearwindowmod3_zpsc9e6b44d_185f35ea636c72080cba410042d295aa0d3a3637.jpg


80-rearwindowmod1_zps855c8355_20c1f3258931b3caf126483cc53d2d7ed96d7bee.jpg


Most of the structural reinforcement of the window is still here.

80-rearwindowmod2_zps16dc89bf_530850d184b5b978dcc124ef4ec7cdd3848d4029.jpg
 
VERY Nice Denis! I like the look. Glass - or Lexan? Removable, or permanent installation.

Sweet.

Cheers - Jim
Permanent glass so far.
I'd love something removable, but I didn't find a suitable hinge/lock combo and given the glass is much bigger, there is no such room anymore in the back to store it.
So changes are slim, but I'm open to suggestions.
 
Thanksgiving day off let me move forward on the rear window.
Made my plane checking tool in the usual ghetto fashion.

80-rearwindowmod7_zps71cc429b_74659d32412cd92ed530a018552314e36c656c87.jpg


It's not bad already.

80-rearwindowmod8_zps47f7ec0f_aa81bf2fd77740e76764205e502d865f66c9f039.jpg


80-rearwindowmod9_zps66cb9c1c_9f8c0a2e936482188adcd827cd7ff491865ed0de.jpg


80-rearwindowmod6_zps4a0e98e7_823a6a67df0d24fbf43c5b73a313eed018ae0fe9.jpg


One touchy area it the bottom corner. I have to made a smooth curve to match the back subtle bulging.

80-rearwindowmod10_zpsa0ab54a0_3f3e63e5fab2208815fc421178df0270cbd7776a.jpg


Years ago, when I bought my front spoiler, I've been given a broken one in extra. Since this will probably be the more vulnerable part on the car, I'm proceeding to repair it and have it paint so I have a spare one ready just in case.

80-rearwindowmod11_zps91ac2c2b_b07abd46e0715e60a1809ed1854cf333d736ac98.jpg


I managed to get a really good squeeze out of the resin, in the crack under the plastic wrap lay the most packed bit of fiber I ever laid, very few resin.
Once cured I'll do the real fixing, from behind. This glassing it more about ensuring the shape of the part stays right.

80-rearwindowmod12_zpsf2f24de7_2c44f91afa8c5da36e582f894ae5194969408c9b.jpg
 
Not that you need any encouragement..... But hell, this is going to look cool :cool:

The proportions feel so right to me... the more I look at it, the more I like it.

I'm gonna sound like a weirdo, but there is a car I felt in love with at first sight : the Lancia Beta.

Lancia_Beta_Coupe_2.0ie_1982.jpg


LanciaBeta.jpg


That's when I had the rear window cut that it all make sense. I loved the shape of the Lancia because of the proportion and angle of the back window. Now I have the same on the Vette.

FYI, the base of the back window have been moved backward exactly 1 foot.
 
Do you think that Lancia rear window glass has about the correct dimensions? A quick search showed the surrounding gasket and window louvers are still available on Ebay.....
Would be cool if you could find a Lancia rear glass incl the defroster.....
 
Do you think that Lancia rear window glass has about the correct dimensions? A quick search showed the surrounding gasket and window louvers are still available on Ebay.....
Would be cool if you could find a Lancia rear glass incl the defroster.....

I strongly doubt they would match, the curve on the top corner isn't curvy enough.
That's too bad because the louver is pretty rad.
For the glass, the price for custom shape 3mm tempered glass is not bad at all, and for the defrost, there's aftermarket kit. I will put one.
 
Still would be nice to have something that has some "factory" dimensions but that Lancia is probably way to rare anyways...
If you ever need a new piece of glass it would be cool to have something that is available but then again, rear glass never really breaks.....

Is that C3 hardtop a rear glass window or poly (plastic) ???
 
Still would be nice to have something that has some "factory" dimensions but that Lancia is probably way to rare anyways...
If you ever need a new piece of glass it would be cool to have something that is available but then again, rear glass never really breaks.....

Is that C3 hardtop a rear glass window or poly (plastic) ???

Well, last time I check with the glass shop, the glass was under 100$. Why bother?
I'll just keep the shape pattern.
Dunno about hardtop, never seen one IRL.
 
I've spent the week fitting my body to my mdf window.
Added another bungie rope to the setup.
With the number of turn around the wood beam it can tune the tension.
The tension that keep the mdf board against the body is actually very small, the board almost floats.
This way I ensure the board is not deformed in any way.

80-rearwindowmod15_zpsbfe99134_19bf57152137d63f440c4e0087efb3f19269c1d4.jpg


My main fitting concern was the top, I wanted a close shave and a symmetric line.

80-rearwindowmod14_zpsead0c28a_c5b0be99f152832eaf13e68a1ff3a421f26bd4a0.jpg


I added a couple of tack gluing. Once cured I'll start casting the channel from behind.
As you probably noticed, the edges of the board have been wrapped, with small hole cut out for the tacks.


80-rearwindowmod13_zpsc7e05bec_e81130e8d6b1cfd5b2aae2d9df596c05ba140d95.jpg
 
Pretty much done with the upper half of the window.
I did it first because it's the hardest part, little if no access.
With the guide board tacked, I first 'molded' a couple of reference area, where I had a little bit of access, of a convenient hole to inject the filler.
Once cured I detached the board, fill the remaining areas, and press back the board to conform it to the plan.
The filler is a mix of epoxy and crushed fiberglass.

The lower part, which is much more accessible will get a true fiberglass treatment.


rearwindowmod17_zps898f7f46.jpg


rearwindowmod19_zps6ebc6831.jpg


rearwindowmod18_zpse0b88f6c.jpg


rearwindowmod16_zps00fd5b5b.jpg
 
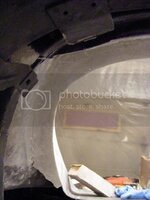
During the week I've been able to mold the center of the bottom of the window frame.
It looks twisted because the bottom is not cut straight yet.
It's perfectly in the plane as it cured against the installed guide board.
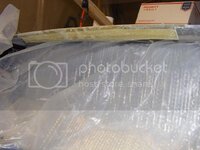
rearwindowmod20_zps3ab26aac.jpg


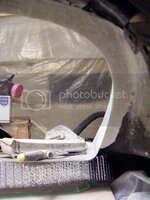
I used a long styrofoam wedge shape to force fiberglass to stick at the top and on the reference board.
You can see the wrinkles of the plastic wrap.
In the pic the wedge have already been scratched out.
I will wipe it with acetone and fill the space with something.
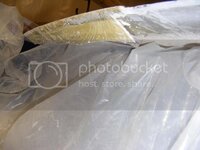
rearwindowmod21_zps4c3b0148.jpg


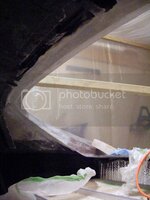
A pleasant surprise is to see the curvature of the bottom slowly appear.
Once the wedge is completed and filled, I'll grind off this bottom edge, and will rebuild it with a lot of fiberglass. For not it's mostly resin an would crack supporting the window. I keep it for now as it hold the whole shape.
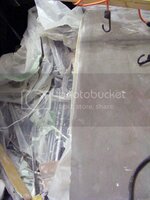
rearwindowmod22_zps874d8a84.jpg


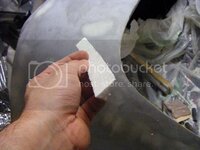
This is the kind of wedge shape I used.
Cut by hand with a razor blade at approximately the right angle (27°).
We are in the land of the cut twice measure never.
rearwindowmod25_zpsbe04db69.jpg

See
rearwindowmod23_zps6a4db542.jpg

Told ya
rearwindowmod24_zps240d2946.jpg


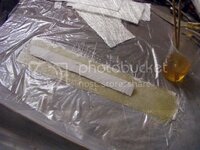
This is the smae setup I used for the central part, two more layer come on top of this before I stick it to the frame from under.
rearwindowmod26_zps9499e992.jpg


Like that.
rearwindowmod27_zpse5df2702.jpg

It's going really well, much better than I anticipated.

 
Back
Top