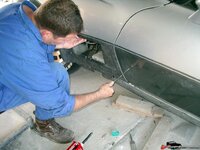
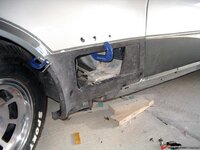
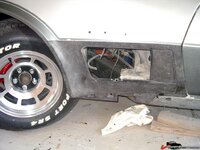
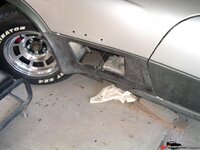
Front Fender mod

VetteMod - Corvette Restoration, Modding & Performance Forum

Help Support VetteMod Forum:

I'll keep the wood idea in mind but the way that 8115 works, it'll be ridiculously simple to glue a bit of angle aluminium onto the fender piece before I stick it to the car.

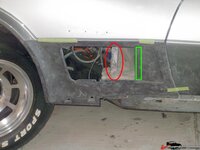
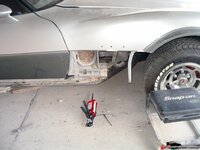
Speaking of 8115, that **** is incredible! From this pic, I said the bit in red got in the way of the new louver and would need to be removed or repositioned:
35499d9710144bf.jpg

I thought I could probably not even bother with that piece at all but in the end I decided to at least put some form of support there. So, I spent a couple of hours yesterday and removed just the amount that was in the way, cut another piece of scrap fiberglass and glued them in like this:
35499fc114e4c53.jpg

I checked it this morning and wow! I wasn't actually convinced yesterday that this stuff was as good as I've read and was prepared for it to fall off in my hand but I hung off that piece and got the whole car rocking and the piece is still there.

I should have the angle piece glued in and have the panel ready to fit this week but I'm off to Bahrain this coming weekend for our band's debut international gig! The BOSS will just have to wait...
 
I dont have a pic (freggin cam died) but on top inside theres a lip about 3/4 in. and 2 slip retainers same as the botom one.
One is close to the front and the rear is about 2 in from the rear.
Look inside the egg crate there should be 2 holes from them.

Just align the ss slip retainer on the lip and that's it.

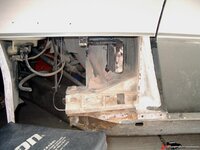
Hummm I just notice on the pic where you are cutting with the wheel that you dont have a upper lip. just the bottom one. Different than mine, a 72?

Maybe build a lip out of fibreglass or glue some kind of angle alu or something.
The two slip retainers on the upper lip, are they threaded nuts that a machine screw goes into or are they the sort to take a self tapping type screw?
 
Same type of screw used for the rocker cover and other trims on the car, it had a little philips head about an inch long screw. it was slipper over the fibreglass lips

The clip was not ss it was rusted and screw stuck to it, one got out and the one on the upper lip tore up the fibreglass.
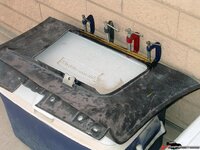
 
Same type of screw used for the rocker cover and other trims on the car, it had a little philips head about an inch long screw. it was slipper over the fibreglass lips

The clip was not ss it was rusted and screw stuck to it, one got out and the one on the upper lip tore up the fibreglass.
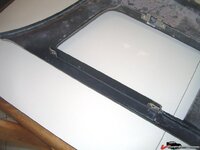
Ok, so a machine screw then. Are you able to take a pic of the lip yet?
 
As an Amazon Associate we earn from qualifying purchases. Product prices and availability are accurate as of the date/time indicated and are subject to change.
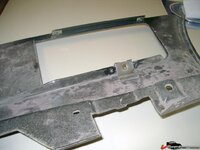
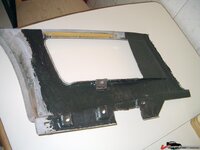
I bought a piece (5 meter length!!) of 3/4" angle aluminium and glued a piece to the fender insert. I had to trim about 1/4" inch off the "upper" edge as it looked like it might interfere with the joining of the panel later.
3549a4f609b7d86.jpg

I found some "body nuts" in town and got the holes drilled and the nuts on this morning.
3549a4f60aa43e7.jpg

3549a4f60b86f53.jpg

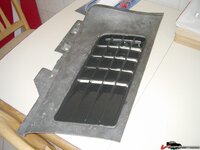
The louver fits ok and the screws pull it up ok, although there is a small gap running along the lower edge of the louver. I'll see how it looks once the panel is all bonded to the car.
3549a4f60d86f63.jpg

3549a4f60c9ceda.jpg

I'll try and get it fitted to the car next week.

I managed to replace the broken lower stud, but not without incident! I drilled deep enough into the stud so that the easyout started to bite but I decided I'd drill just a little deeper. Of course, the very tip of the drill bit snapped off. I managed to get it out using a rotary burr on my Dremel but by then, the hole was too large to use the original size stud (3/16"). So, back to the shop to get the next size up drill and tap (1/4"). Unfortunately, the hole was still a bit too big for that - I got the hole tapped but it was super sloppy. I didn't want to go up another size, plus, the shop was shut!

What would Bubba do? I found a piece of steel tube that was slighty larger outside diameter than my hole. I trimmed a piece to length, cleaned it and the hole really well then coated the piece of tube (tubelette?) with super glue then smacked it into the hole! Using a center punch, I staked the tube/parent metal join line a couple of times. That sucker's not going anywhere. I couldn't use heat to solder the piece in there as that would have ruined the finish on the outside. Anyway, I gave it a while to cure then I ran the 3/16" tap into the tube and cut a lovely thread. I ran a bolt into it after I covered the threads with Loctite thread lock. After the Loctite cured, I cut the bolt off to the right length. Perfect... :lol:
 
Last edited:
I nominate this for ricer thread of the year :D LOL

j/k that's looking great, you have some big cahonas cutting up a nice car like that :)
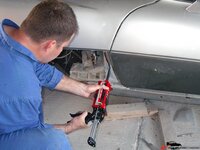
 
Bit of an update...

I got the fender to this stage last weekend but my computer "contracted" a virus and I've spent the last week trying to fix the damn thing. Anyway, moving right along...

I laid some lines of 3M 8115 where the panel would contact the car, but NOT along the cut/join line...
3549b5a47aac1c6.jpg

Then held the panel on with a couple of self tapping screws.
3549b5a3100a12f.jpg

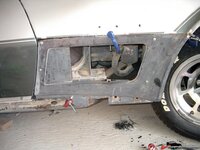
After the 24 hour cure time, I pulled the self tappers and filled the holes (and the CRAPFIRE badge holes while I was at it) and glued along the cut/join line and lay some dry wall tape in the glue. There was a slight waver along the line so I pulled it together with some clamps.
3549b5a310bc4ce.jpg

Almost done now. I just need to V out along the outside of the join line and fill that with 8115, then expoxy primer and some body filler.
3549b5a31229d2c.jpg

3549b5a31177f21.jpg
 
:thumbs: :thumbs: :thumbs:

Looks GREAT! Wayne. You did an excellent job fitting those parts....WOW! :yahoo:
 
Thanks guys. I'll take a pic this weekend with the louver bolted up to it. I'm pretty happy with the way it's gone so far. I hope to start on the passenger side this weekend, but I want to get the bright orange paint off it first...
 
I've just finished the passenger side - well, almost. I'll do the other parts tomorrow once I remove the clamps.

I made a bit of a dog's breakfast on this side. I didn't get as good a join line as I did on the other side but it should come up ok.

This side was a pig to remove too. Once I'd made the cuts on the first one, the adhesive came away reasonably easy. Not this side, I had to fight the damn thing all the way off.
3549c391c264af1.jpg

This "insert" was actually second hand and had been fitted to a car. There were some repairs I had to do to it before fitting it and also a fair amount of the glass on the inside was "exposed" so I put a light film of 8115 over the whole damn thing!
3549c391c36e710.jpg

Glued in, never coming out. You can see evidence of my crappy join line to the left of the blue clamp in the center...
3549c391c478374.jpg

3549c391c5cda9f.jpg
 
Last edited:
I agree.....don't beat yourself up over that line.....it still looks great....nice work. :thumbs:

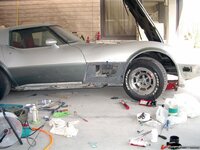
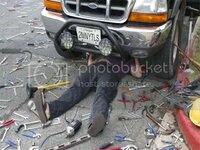
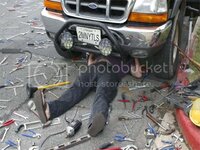
That garage on the other hand looks like :crap: .... clean that place
up before the neighbors think I'm over there helping you or something
.....looks like my work stall here in Alabama......:nuts: :rofl::rofl:


:D
 
don't be ashamed....

work.jpg

:lol:


All kidding aside........I've actually worked with guys who were just that bad.
Their Tool Boxes looked even worst :suicide: don't see how they EVER got
anything done.......and to top it off.....they would leave it and go home, never
cleaning it up....
:bonkers::bonkers::bonkers:


Just jerking-your-chain Wayne :friends:
 
No way - the tool box is "cleared" each time I finish for the day. That's a carry over from what we were taught in the RAAF and it certainly makes sure you never lose any tools :thumbs:

Doesn't stop me working in a **** pit though... :lol:
 
Last edited:
I put the louvers in on the weekend to see how it they'd look and I think I might have to highlight the edges somehow as they basically get lost in the dark panel. Maybe I'll see how it looks in the sun.

You can see what I mean though...

3549d7401f4db84.jpg

Thinking about putting some "woven" stainless mesh on the inside of the louver.
3549d7402110afe.jpg
 
Back
Top