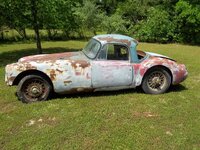
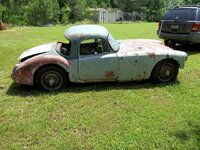
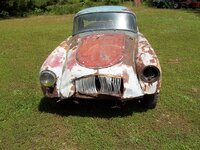
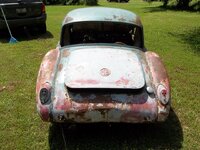
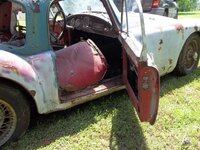
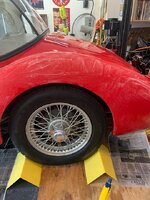
1958 MGA Coupe

VetteMod - Corvette Restoration, Modding & Performance Forum

Help Support VetteMod Forum:

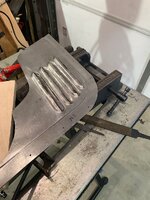
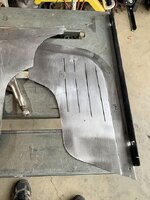
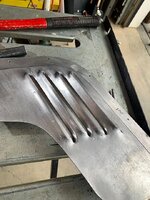
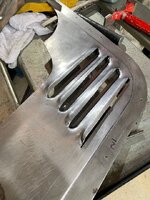
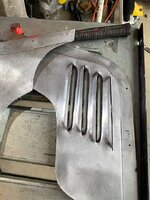
Next time I do this, I'm going to try a trick that I saw on Bitchin' Rides. They pretension the metal where they're going to make the louver (aka stretch the metal by hammer and dollying the place where the metal is going to be louvered).
I do recall that episode, I have a planishing hammer and an English wheel and can use them on this, maybe slice it, stretch it then press it, well you guys got me thinking

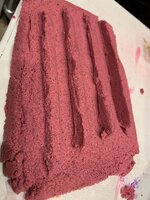
Grand pa plays with the 4 yr old grand daughter in the garage with kinetic sand all the time
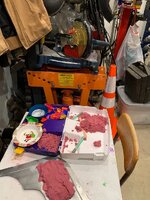
69214676299_E925155C-3716-4F95-95E5-249BD7E65FC4.jpg

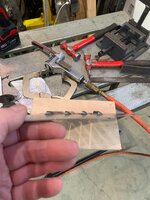
Why not make a casting mold from clay that hardens
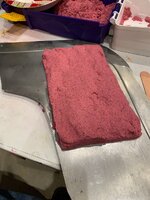
69214685729_77518B40-55DB-4EB9-9502-C358D81425B3.jpg

I can push the clay into the louvre so I actually make a bottom die and then repeat for the top die
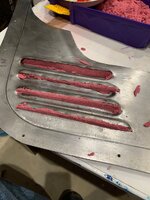
69214694398_90A65EE0-992E-4CA0-AC25-865B682DCBEA.jpg

And I think it would work

69214698931_834FCB38-88CB-4947-9F13-279A59C99B31.jpg


Now I think the sweet spot is making this for one full louvre opening both up and down with the intermediate flat spaces My panels are handed and mirror images so one die only works for one side, where there are 6 repeatable louvres

So I think I use a clay mold then use the epoxacast to make a top and bottom die. The problem I have is when I hammer and dolly one side the other side distorts, perhaps the first strike is with the dies I made first and then the finishing press is with the full die to make both sides pressed at the same time , thanks everyone for the tips and websites, I have always wanted to learn about casting things
 
Last edited:
or cast those louvers.... that same kid I posted above - did a neat cast of aluminum for his car....

I really want to start playing with 3d printing.... then cast the part after printing it. it's a wonderful time to be alive....
 
Pop
or cast those louvers.... that same kid I posted above - did a neat cast of aluminum for his car....

I really want to start playing with 3d printing.... then cast the part after printing it. it's a wonderful time to be alive....
i think I have to use an intermediate step with a clay mold that is not fluid so that I can form it to make the louvre opening have the upward push in the lower die at the same time it has the downward depression,Then I use the epoxacast on that mold
 
If you used wax on the original part, you should be able to make a 2 piece mold using casting resin. Basically, the wax temporarily blocks off the resin. Pour one side and after hardening, dig the wax out and pour the second side. Just a thought. I’m thinking the original would be vertical for initial pour.
 
If you used wax on the original part, you should be able to make a 2 piece mold using casting resin. Basically, the wax temporarily blocks off the resin. Pour one side and after hardening, dig the wax out and pour the second side. Just a thought. I’m thinking the original would be vertical for initial pour.
vertical then lay it on its side? I can visualize the clay mold aspect and with the clay I can push it into the louvre opening and make sure its straight and eyeball it before it dries to make adjustments.

With the wax paper will I get a nice straight line or is it likely to rip or snag? or even melt? will the wax paper give me a taught line between the down and up louvres
this photo is only with the first 1/2 louvre and doesn't have the up louvre next to it
IMG_5536.jpg


I am thinking with the clay i can control the size and shape then build a wall around it, for the pour and it could all be horizontal with no air bubbles. I will be doing only one full down/up louvre since that pattern repeats it self the most times.

looks like from reynoldsam.com the epoxacast 655 quart size, hardener, ease release is about $100. did not source the wax paper yet. is that in the ball park of what it should cost?

louvres from my 37 ford

feebc233.jpg
 
Wax almost like the sheets the guy uses in one of the videos (Willys video). Except chunks. I’ll see if I can find it. Modeling clay like you are using may be just as good. I know we used wax when making molds.


I was thinking you could use wax on one side to seal the original. Then cast the other side. Once hardened, pull wax and cast the second side. Split apart and remove original. All with release wax/agent of course.

The 37 hot rod louvers look good.
 
Last edited:
As an Amazon Associate we earn from qualifying purchases. Product prices and availability are accurate as of the date/time indicated and are subject to change.
thanks guys, I know next to nothing about these processes and i will look at that website. i keep reading that the epoxy gets really hot in the curing process doesnt that melt the wax?

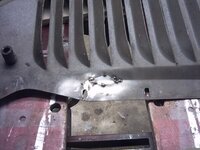
those are original 37 ford louvres, i didnt make them , looks like i was fixing a repair spot on it

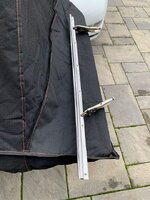
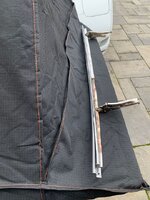
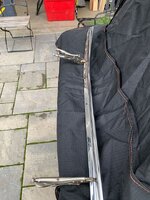
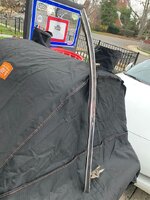
time to wrap up the door seal retainer part

Jim Cheatham was looking out for me and found an original "seal retainer" set across the pond from one of his contacts. one of the pieces has some slight damage and has a TIG weld where it twisted and creased when getting removed, but these parts are really hard to find and expensive and I am happy with them and that Jim found them for me. thanks again Jim.

They are now with me and I will be using them in my car. lets see how they match up with what I made.


heres the original set , they have that same twist that I thought was suppose to be straight.

IMG_7392.jpg

and now a side by side comparison

the end views side by side
IMG_7381.jpg
IMG_7386.jpg
IMG_7387.jpg

now the long views side by side
IMG_7383.jpg
IMG_7384.jpg
IMG_7385.jpg
IMG_7388.jpg
IMG_7389.jpg


the hand made set is about 5/8" shorter, but that shouldn't make any difference, all the ugly welds are below the carpet so you will not see them . there is a surprising amount of flexibility in both sets so that mounting them should not be a problem.
So to answer the question can you make the MGB seal retainer set fit an MGA coupe I would say the answer is yes with some substantial effort.
 
Good job on the trim piece. I posted another vid by the willys guy in the metal working thread. He’s using wax with his casting.
 
Good job on the trim piece. I posted another vid by the willys guy in the metal working thread. He’s using wax with his casting.
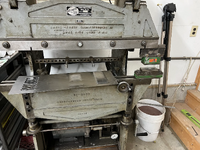
I have been watching his processes. I am not sure i understand the reason for such really heavy dies, I am getting close to having the panel done, today I did wonder if I put a stop in the lower die if that would help

IMG_7407.jpg

IMG_7398.jpg
 
Last edited:
Maybe you have looked at this, but you might consider casting urethanes available through Fiberglast: https://www.fibreglast.com/category/urethanes
Interesting I could just use short strand fiber glass body filler or even bondo with some wax paper or sacrificial intermediate piece as a mold. would the urethanes from fibreglast be the actual pressing dies?
 
Well, it looks like you have gotten the solution. Louvres are looking good.

The heavy fixtures in the videos is to keep the casting from bending and breaking.
 
Well, it looks like you have gotten the solution. Louvres are looking good.

The heavy fixtures in the videos is to keep the casting from bending and breaking.
I think the gut in the video overkilled the flask (heavy steel perimeter). I've seen draw dies made with filled urethane but a sheet steel parting plane so that you can clamp a sheet. Then the plug actually draws the metal down into the die and forms the part without distorting the surface.

Depending on the part, you are limited in the number of good parts, but good for prototyping or one off stuff.
 
lets move from proto type mock up to a nice one

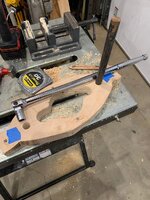
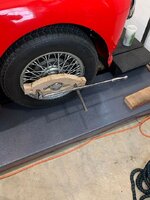
idea is to stop me from feeling guilty for beating on my first new set of chrome knock offs, and to use leverage to remove them.

Using a socket breaker bar and round stock

IMG_7433.jpg

BBDA-461A-954D-DE0FC4212332_t4uqH3N4HzShKet5Gtogbj.jpg

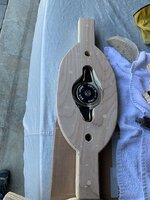
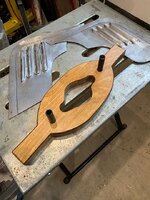
concept worked so now to make them pretty, only change was to make the handle ends 4"

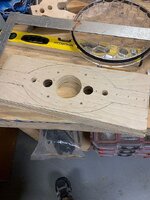
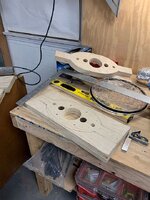
I gave most of my wood working tools to my son so we used my old tools at his shop to make these

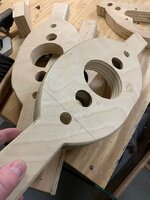
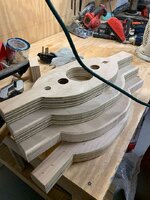
they are 3/4' birch plywood and are glued, screwed and stapled

69379314792_D09FF0A0-BFEA-46B2-8D6B-0248932EA562.jpg


69379298592_8F3E06F7-B467-46F0-BEA7-C13F0B216482.jpg

basically 2" handles 4" long on the ends and a 5 gal bucket for the arc, 3 1/2" big hole,1 1/4" end holes and the leverage holes are 3/4". 7"x 22 1/2"

69379575273_800233DA-5C76-4CAE-8BE0-12ADC42E7454.jpg

cut on a band saw and rounded over on a router table

69379622980_CA6C75EA-E3B3-4A30-B99E-C20B2F2F7B15.jpg

test fitted to three different knock offs and staples/screw holes filled with wood putty

IMG_7500.jpg

stained and polyurethaned drying on our nice 55* day

IMG_7503.jpg
 
Last edited:
lets wrap up a few projects

after some contemplation I decided to go with two removable tubes so like Mark suggested you could use the crank handle if you had a flat on the road. the tube is easy enough to remove it you want to use a breaker bar and socket in the hole instead

IMG_7518.jpg

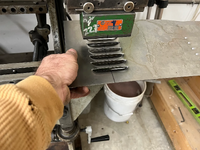
time to finish up the other inner fender panel, I am going to weld a stop to the lower die so the edges of the louvres are nice and crisp. thats a thin strip of metal to use as a stop and it will get welded in

IMG_7512.jpg


this made the edges much flatter, I think I have gone as far as you can go with a home made die that doesn't have locating dowels.
I do want to try that epoxy cast process on something

I did a much better job at cutting this time, maybe a bigger wheel cuts better

IMG_7513.jpg

still need to clean them up

IMG_7514.jpg
IMG_7515.jpg
IMG_7517.jpg

the last thing to do after cleaning them up will be to weld some weld nuts to the back of them so the panel has a nice finished look to it as opposed to using those sheet metal clips, I have to order some stainless steel weld nuts.
 
I like how the pros do it!!!!

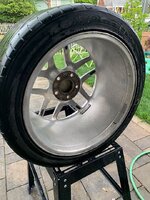
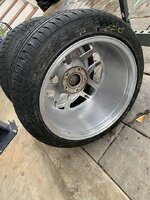
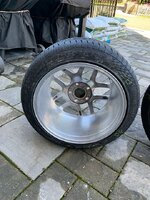
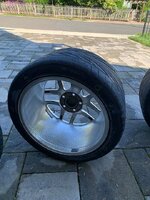
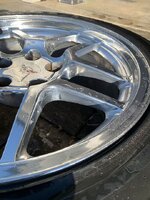
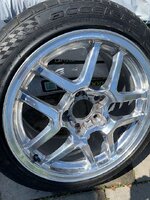
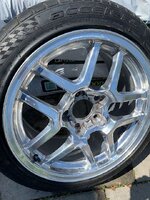
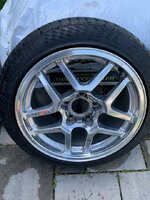
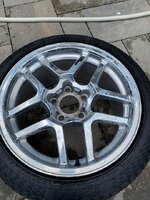
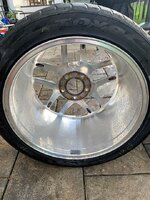
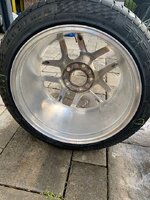
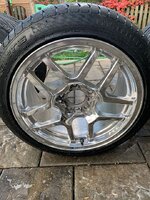
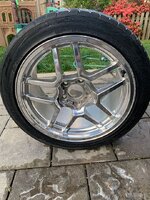
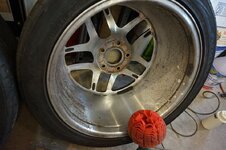
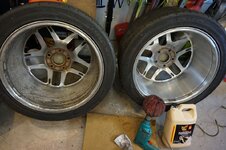
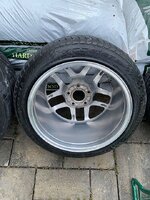
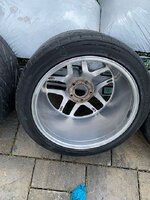
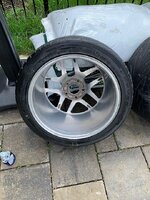
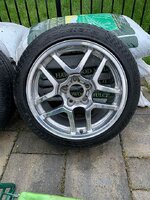
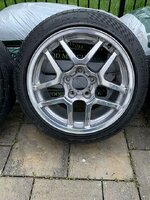
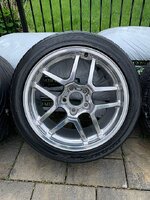
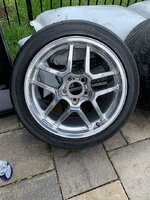
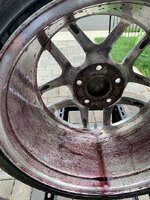
well time to put the summer tires on the C5 but they are just not shiny enough for me

so lets clean them up and see what i can do

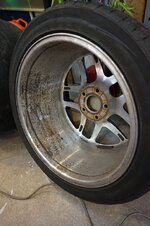
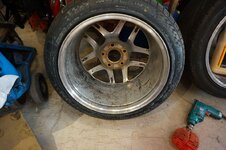
this is the typical look
70387018607_0CAB5282-E34D-4993-A955-A15EDF324B19.jpg

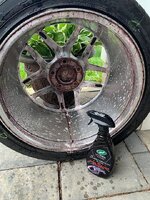
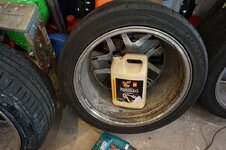
using an iron remover

70386260126_017BC45C-7E93-4DCF-A71E-B514CA842EDA.jpg

70386918779_143861C4-1416-4DC0-9068-AF949119C5C3.jpg

that along with some 800 abrasive scoring pad made them better
70387530826_4445F071-D831-49F9-9848-A528E00FCC83.jpg
70387532233_58DB2638-D816-44B2-943C-A747E1EE94B4.jpg
IMG_8260.jpg
IMG_8261.jpg


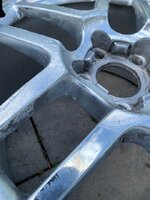
but then i went to the clear coat remover and went all in

70380562456_D77FA4AB-8F8E-4836-BB56-C6996F409E9E.jpg
IMG_8266.jpg
IMG_8266_v2qM7tDX8CBDQrponfRyH8.jpg
IMG_8265.jpg


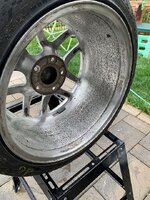
after about 5 go arounds with paint remover on front and back and using a gas powered high pressure washer it looks like i have the clear coat off and now time to wash it and start the polishing

stay tuned they get washed and first polishing tonight!!
 
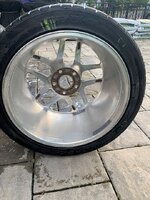
I am getting there I think its all off the front side, the machined back side is a bit more difficult to tell if I actually got it off or not. the pressure washer was a great choice for cleaning it. The problem is I can't tell if the machined side is clean and oxidized or the clear coat is dull. its definitely not turning white and coming off like the front. i guess i will do one more round of paint remover then use a buffing ball on it.

IMG_8301.jpg
IMG_8300.jpg
IMG_8299.jpg
IMG_8298_8Ln8Hb3swwJXjTHCAQeLDP.jpg
IMG_8297.jpg
IMG_8296.jpg
IMG_8295_3uX9dFNm8dFMNJksH4xtUt.jpg
IMG_8294.jpg
 
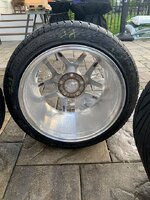
thanks they are better for sure but I hoping for that like chrome look that may only come from the clear coating, this was as much of PITA as you would have expected

i did find these from 5 years ago when I first got them and did my first cleaning attempt


DSC03352_zpsq5xjiifp.jpg
DSC03350_zpsl66zuivl.jpg
DSC03353_zpsi409twg7.jpg
DSC03354_zps7wk8ely9.jpg
DSC03351_zpsnswmwywr.jpg


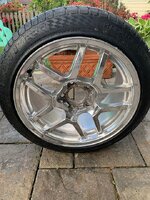
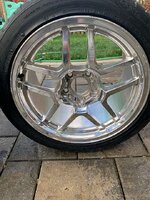
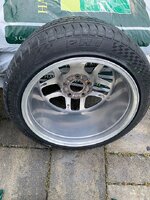
and this time arounds final product

IMG_8330.jpg
IMG_8329.jpg
IMG_8328.jpg
IMG_8327.jpg
IMG_8326.jpg
IMG_8325.jpg
IMG_8324.jpg
IMG_8323.jpg
 
Last edited:
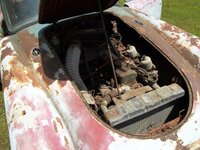
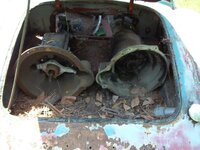
well everyone has a special day, same goes for cars. remember where we started

MGA240Z001.jpg
MGA240Z002.jpg
MGA240Z003.jpg
MGA240Z004.jpg
MGA240Z007-1.jpg
MGA240Z009-1.jpg
MGA240Z005-1.jpg

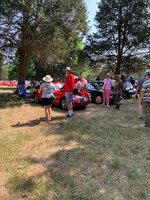
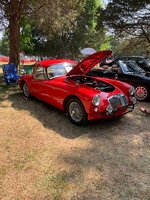
this last sunday I went to the Sully historic plantation Museum fathers day car show with my youngest son who is 30, this is a big mostly American car show about 400 cars , 30 different classes, put on by the model A car club, these guys make me look like a teen ager and they are still going strong. It was great day weather was perfect clear skys and for whatever reason my car just popped. I take the car to shows a couple of times a year and this time it had non stop attention, i have never seen this much interest in my car. I met Mike Hughes a fellow MG forum, NAMGAR member and MGA Coupe owner, this time he brought his very nice white MGC and we had a very nice chat with him. we met several other folks who had actually read this thread. I even had people asking me for the paint manufacture and the color of it. I let every kid sit in the car and they were pretty adorable, little kids just walk across the seats and the trans tunnel. I made this restoration grandkids friendly so no worries there and I have a quick electrical disconnect so no pulling of knobs is going to create any surprises. the cars were scored by judges as opposed to fellow entrants using a matrix. and all the stars aligned for me and I won 2nd place in the MG and Triumph class. I think there was about 20 cars in the class, mgtd, mgb, mgc, tr6, tr250, tr2 and tr3. my car was the only MGA. I think I need to go to more american car shows!!!!

2359-49EB-8778-10D63AAF3266_8VLQrdZUMYFj21Z2eprFaq.jpg
B5D8-4C58-9A6E-003A6F3EABFC_bAZtz99hW42wbkBQyufAz1.jpg
IMG_8736_urYtGguTPrVTX7iasVSTkd.jpg
 
That's awesome, Bob! The before and after are two amazing contrasts and the bookends to an amazing transformational journey. I thoroughly enjoyed your build and the ingenuity it took to pull it off. This forum may be a small group, but the talent chronicled here and on other member's builds is simply inspiring. Thank you for letting us tag along! :-)
 
thanks guys, I do agree that we may be small group but there is so much talent here. i learn new stuff all the time.
 
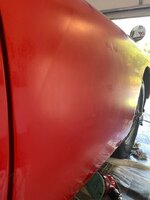
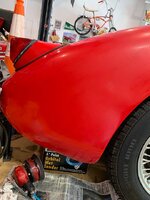
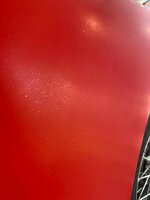
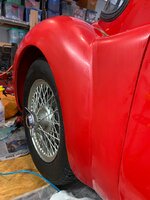
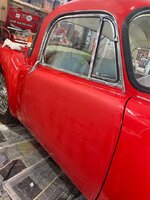
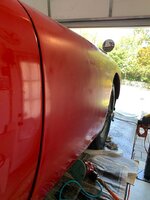
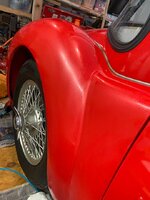
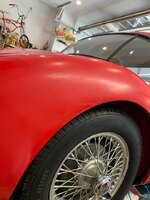
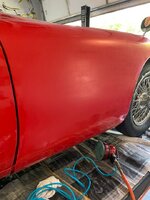
well this is several years delayed but better now then never. i have been doing this on and off for a while now and its time again to wet sand the clear coat to remove most of the orange peel and flatten out the paint. I should have done this when they were stand alone panels but I wanted the clear coat to really dry and well time seemed to slip by. again I should have done this before I put everything on the car.

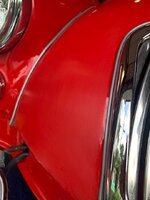
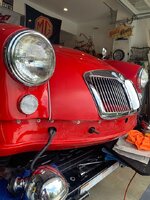
so the areas this weekend both rear fenders, both doors, right front fender, the side panels of the top behind the door. front valence, both head light areas, and on either side of the grill


sanded with a variety of papers and 400,600,800,1500 and 2500


71476427426_1E280C81-3741-408D-948D-0A8FC306448E.jpg
71467137440_ADE85876-74B0-4750-AC6D-39E2B75D3827.jpg
71485283946_661354F9-F913-438F-ACC4-358BAD8C363A.jpg
IMG_9076.jpg
71425133020_0C432504-A74B-4857-98CC-45BE0FF17773.jpg
IMG_9074.jpg
IMG_9106.jpg
71476362720_94AC2D13-CA75-4344-A507-891ABE352A70.jpg
71467120531_E0F920DE-4124-4F3B-ABD9-5C43938C140A.jpg
IMG_9075.jpg
IMG_9077.jpg
71467122486_7613C130-8279-4341-AE6E-ECA12FBED795.jpg


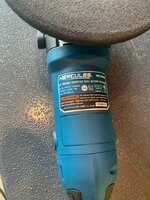
and to power through the buffing a new toy, forced rotation ( gear driven DA) from HF, this thing is wonder full $129 i must have used it for 10 hours and its as nice as my Griots DAs, no vibrations or screaming at you and never gets too hot to handle
71483842083_97FFF958-CDC5-4643-8820-62016C6A5991.jpg

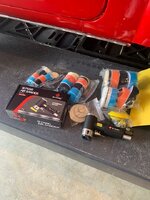
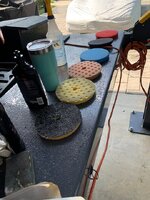
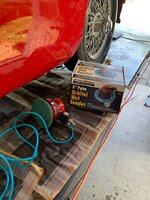
and for those small spots i also used my 3" DA buffer and lots of pads, and a DA random sander

71484592179_774CFF22-7491-4B1D-8AF7-9AD9FE3B5ED4.jpg
71468528288_23F4E528-AD59-45D6-8200-6D64022C229D.jpg
71467040981_DF30478E-0BEB-44DC-A222-82E3D73E9ECF.jpg
71467126461_B8B98B31-E73B-40DB-8C25-110B49354277.jpg
 
Back
Top