1958 MGA Coupe

VetteMod - Corvette Restoration, Modding & Performance Forum

Help Support VetteMod Forum:

thanks guys, I have found the sponsored ads are more representative of what our last searches were then anything else, and it must be tied to an IP address because I get bombarded with female clothing ads courtesy of the Mrs and daughter.

so those relays are more of a look in the mirror .....

I sure would like a 32 roadster like in the movie Iron man. if I could fine one done in the 60s that was unloved for the last 20 years i would seriously think about it.
 
thanks guys, I have found the sponsored ads are more representative of what our last searches were then anything else, and it must be tied to an IP address because I get bombarded with female clothing ads courtesy of the Mrs and daughter.

so those relays are more of a look in the mirror .....

I sure would like a 32 roadster like in the movie Iron man. if I could fine one done in the 60s that was unloved for the last 20 years i would seriously think about it.

On my bucket list of cars to build, also a AC 427 Cobra - but given my utter hatred of all things Ford, a LS 427.
 
time for a new project....yet to be determined, so far under the belt has been
three motorcycles, 74 cj 5, 65 c10 fleet side, 54 mgtf, 53mgtd, 69 tr 6, 3000 healey, 60 mga roadster, 58 coupe, 61 econoline van, 8? 280zx, 69 vette convertible, 77 vette restomod, my slightly customized 04 vette, 37 ford, i can t think of any more at the moment.

I had a 69 TR6 in the 70's when I was in college. Every once in a while I have looked for one in good shape to use as a candidate for a V8 conversion. They were tremendous rust buckets so a good condition resto candidate is rare and too expensive.

I saw one earlier this summer with a supercharged GM V6, 6 speed and custom front and rear suspension. It was probably one of the best packaged resto-mod cars I have ever seen. Wish I had pictures.
 
i think building a cobra or daytona coupe would be alot of fun.....all new parts it would be like christmas morning every day during the build.

the TR6 was a really road worthy car, easy to put the top up and down , right from the seat, decent power ,IRS made bumps easy along with huge wheels .

definitely a fun car,
 
i think building a cobra or daytona coupe would be alot of fun.....all new parts it would be like christmas morning every day during the build.

the TR6 was a really road worthy car, easy to put the top up and down , right from the seat, decent power ,IRS made bumps easy along with huge wheels .

definitely a fun car,

I've already been offered stupid money for the Corvette - and it's exactly that thought that even has me considering it.... but not this year, it's going to run 2022 Optima with me driving it.
I also would love to have a 1968 C3 Convertible....
 
I've already been offered stupid money for the Corvette - and it's exactly that thought that even has me considering it.... but not this year, it's going to run 2022 Optima with me driving it.
I also would love to have a 1968 C3 Convertible....

for me the fun is the project.....nothing wrong with taking the money and running and starting all over again.
 
As an Amazon Associate we earn from qualifying purchases. Product prices and availability are accurate as of the date/time indicated and are subject to change.
I've already been offered stupid money for the Corvette - and it's exactly that thought that even has me considering it.... but not this year, it's going to run 2022 Optima with me driving it.
I also would love to have a 1968 C3 Convertible....
for me the fun is the project.....nothing wrong with taking the money and running and starting all over again.

I completely agree with you... my life mirrors this. The Corvette has 300 miles on it since I got it roadworthy. The FJ40 - 3000 miles - in 6 years... I don't show, the worst part is I really will need to break in the transmission - 500 miles - it took me 6 months to get 300 miles...
 
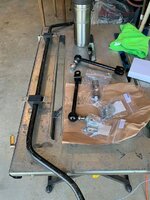
my buddy "Ohmite", Eric looked in his parts Bin and spread the love to me and sent me an original style steering wheel and a 5/8 MGB sway bar. My wood motolita was just a little to small for me to get a comfortable driving position and the bigger MGA wheel just makes the driving easier. Thanks Eric

so today the procrastination has ended....

nothing like a shipment of parts arriving on a sunday!!

IMG_5905.jpg

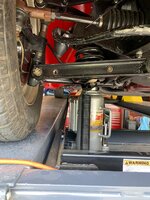
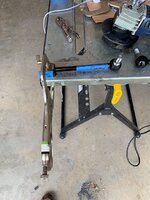
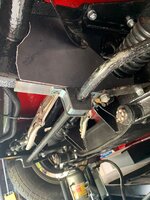
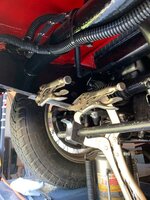
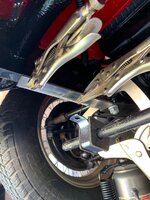
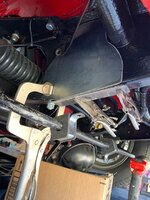
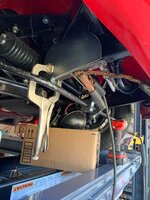
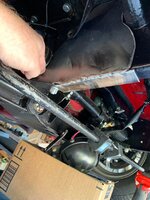
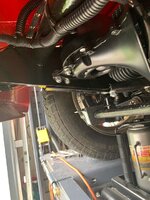
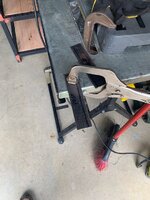
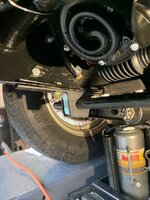
lets clamp it in place and figure this out

IMG_5907.jpg

I conferred with Eric, and Bill Spohn whose installation write up was what i followed. here it is from Barneys site

https://mgaguru.com/mgtech/suspensn/fs103a.htm
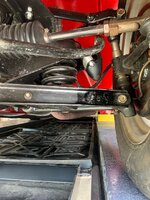
this locates the sway bar on the bottom and uses the factory bolt hole which needs to be drilled out
IMG_5908.jpg


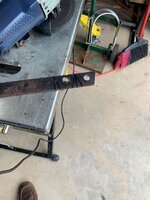
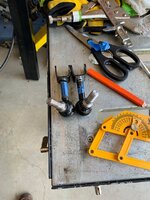
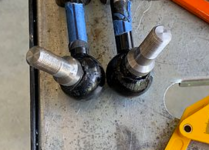
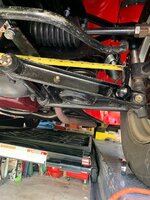
Bills instructions say the 8.5" links need to be cut down to 4.5" and welded back together
IMG_5909.jpg

IMG_5910.jpg
IMG_5911.jpg

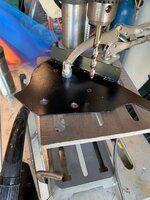
drill out the hole
IMG_5912.jpg

IMG_5914.jpg

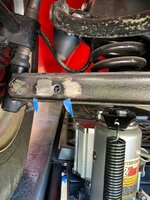
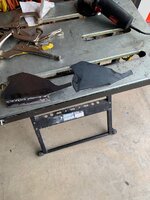
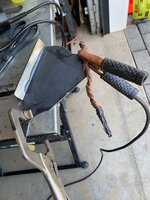
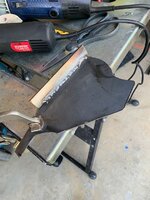
lets make and add some doubling plates to weld on to the lower control arm
IMG_5915.jpg

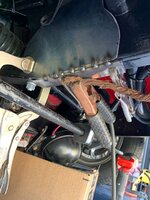
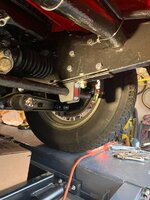
lets do a test fit
IMG_5917.jpg
IMG_5918.jpg


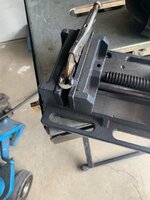
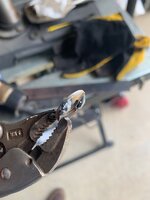
the links are handed and have an off set so lets get a quick measurement and cugt my brand new parts in half.
IMG_5920.jpg
IMG_5920.jpg
IMG_5922.jpg
67554141046_2207793C-B86D-43AE-925B-BCA6EE2020EA.jpg
IMG_5924.jpg

and lets drill some holes for the shortened shaft

67554300626_48BBEB50-692D-44B6-AFF5-D18E228375F0.jpg
IMG_5927.jpg

and the journey continues tomorrow, just like old times.
 
more progress today and a misstep, last week i got bigger 80cf welding tanks for my TIG and my MIG and i had to make a new bracket to hold the two tanks. right away my MIG welds were crap and I suspected i had maybe a tank of poor gas, well my first welds today I really cleaned everything well and i was still getting porosity, good penetration but really ugly welds. turns out when I was making the new bracket for the new sized tanks I had somehow moved the MIG welder and crimped the gas supply line and was getting either minimal or really low gas flow, trouble shooting that sucked up an hour of time. Eric and I worked through trouble shooting it, I never moved the Mig welder and I never expected that problem.
67562177060_8B31348E-9949-491B-8954-1FEED2C49E08.jpg


any way the progress, grind and test fit

IMG_5938.jpg

IMG_5939.jpg

weld
67561623612_7A26C064-B029-4C71-8DB4-C99445EB85BD.jpg

cut and fit
IMG_5954.jpg

test fit both sides
IMG_5955.jpg

IMG_5956.jpg


weld and paint both out side and inside, then grind inside before paint
67563035130_03B0CDC0-38A0-42F1-8B3E-4C913AC1C972.jpg

IMG_5960.jpg

grind and paint arms
IMG_5964.jpg

IMG_5962.jpg

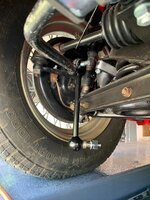
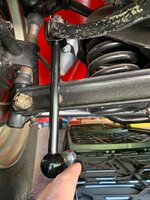
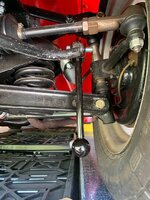
assemble and test fit
67563494585_39DECDBE-D904-49CE-ABEE-01C0D8D5B3B2.jpg
67563495429_BA76FF82-BA60-45EF-A31F-407DA51638D8.jpg

next step locate the sway bar brackets
 
I like those swivel ends. Compact and pretty much sealed up. Is that the stock setup for a MGB?

1653992769132.png
 
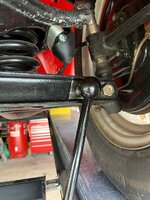
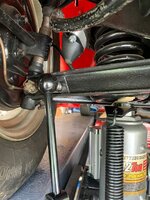
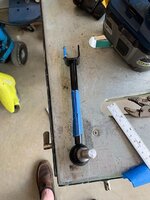
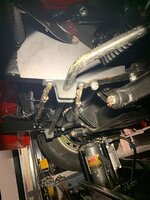
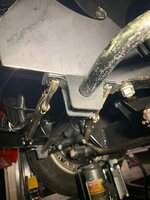
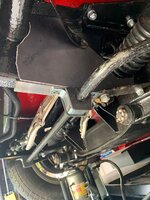
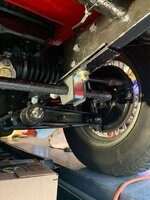
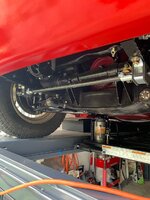
these are stock MGA 8.5"sway bar links, the original sway bars added late in Manufactuing of the MGA had the brackets for them mounted on top of the frame extension almost exactly above the area where I have then clamped on. you can duplicate that with some fabrication when the body is off but would be a nightmare to try and retro fit. and they had the sway bar mounted above the tie rod ends, hence the longer arms. The factory Links are so clean amd functional but they are too long for the under Tie Rod installation. So you cut them down to size. that was a leap of faith cutting up brand new parts. it is so clean and period looking with the clevis in right in the middle of the bracket.
 
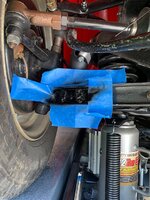
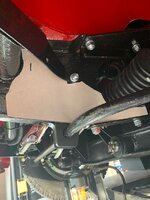
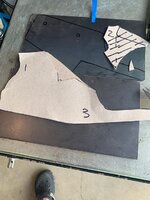
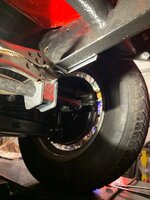
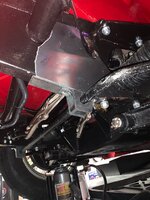
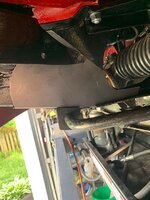
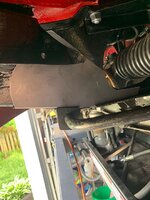
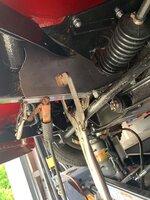
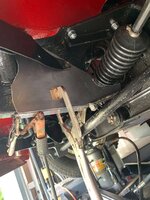
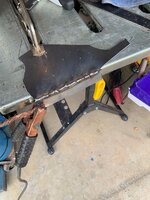
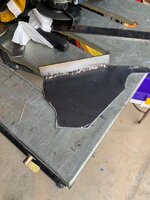
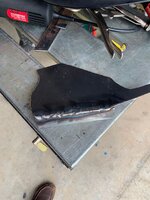
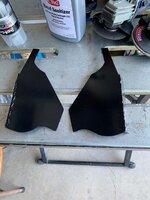
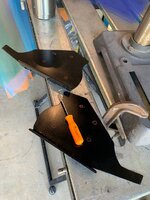
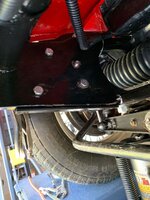
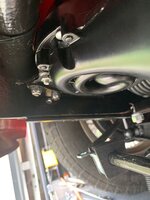
so I have seen several different methods for attaching the bottom sway bar brackets and have decided on an approach that includes a sheer panel and two doubling plates for the bolts. I liked how Eric "Ohmite" did his strengthening panels but that was done when the frame did not have a body on it, and Bill Spohn just used two heavy doubling plates on both sides of the frame extension to bolt the bracket to. so I am going to do both with a modified sheer panel.

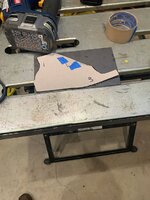
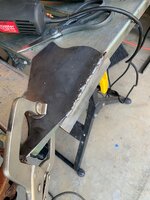
the template, Eric and i played around with this because it had to fit with out taking apart too much stuff

sheer panel is 14 gauge

67590358872_09F17B2D-391F-4F6B-8AD3-C215A6EEC40B.jpg
67590369217_9015697A-8D7A-4E61-A864-03800B421EDA.jpg
IMG_5992.jpg
67591064689_AD12E68F-7F98-4F1C-9EB4-8DB3A89C1896.jpg
67591065719_DBFD3472-D1A0-4A8C-995F-EFE488316E58.jpg

the fitting
67591077766_07E46236-B2F9-4280-9428-4B63843D73B4.jpg
67591120633_359D5FE9-E927-46BC-BD3F-0148C047541C.jpg
IMG_5998.jpg
IMG_5999.jpg

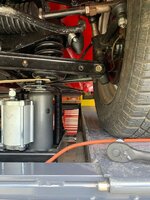
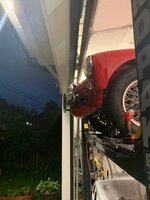
and remember to remember that the car is overhanging the lift when you go inside so dont press the garage door closer.....

67591080693_76C53EE7-D165-49DA-9E64-FC80AFE811E6.jpg

new rule the gargae door gets closed from the outside opener
IMG_5998.jpg
IMG_5999.jpg
IMG_6001.jpg
IMG_6002.jpg
IMG_6003.jpg

and the final welding and making one for the other side
IMG_6004.jpg
IMG_6005.jpg

67595386254_FCFEE68E-6E08-4FFE-846E-A3387225399F.jpg
67595391221_46EA14B5-D72E-4C8C-AEE4-7D9AE5E750DE.jpg
IMG_6011.jpg

will test fit and tack weld the lower metal piece this weekend
 
Last edited:
started early this morning.

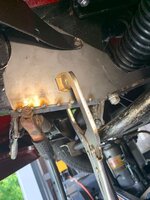
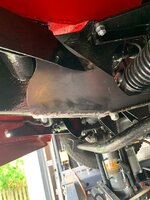
I removed the horn and set up the sheer panel and the lower bracket and tack in place then weld and grind

IMG_6016.jpg
IMG_6017.jpg
IMG_6018.jpg
IMG_6019.jpg
67604893713_3C962CE0-77EE-4629-80B0-441EBE0AC6FC.jpg
67604924562_FD6F5958-6293-4414-B8FF-AE56E828CC8E.jpg
IMG_6029.jpg
67604994452_21CCEA9B-F38F-4B29-9AED-C63E34790CCD.jpg
67605046661_13D1E57B-7E12-42D1-AFE7-4206C7434809.jpg
IMG_6035.jpg

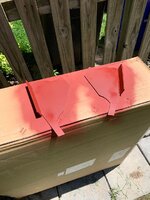
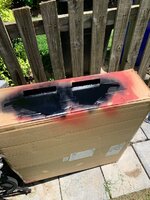
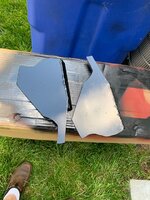
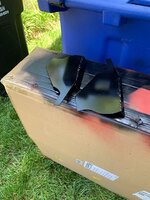
prime and paint

IMG_6036.jpg
IMG_6037.jpg
IMG_6041.jpg
IMG_6042.jpg
IMG_6043.jpg
 
Nice job. I'm guessing the MGA didn't come with a sway bar? Should be a big improvement.
 
the mga was something like a '55 to '62 production years some where in the later model years they added it, mine is a1500cc with drum brakes, then there was a 1600 with front disc brakes. google says april 59 was the year it was added just around the time of the other changes

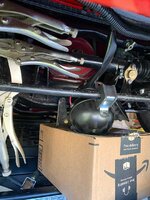
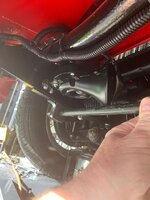
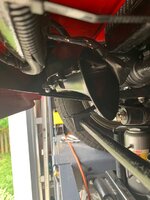
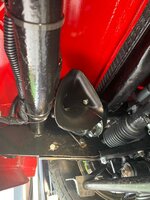
panels bolted up nicely no issues, i need to modify the Horn bracket , it just touches the sway bar but i can see the additional doubler bracket for the inside and the nut or bolt is going to give some interference issues. i think i will weld on a small tab to the horn bracket so i can pivot it up out of the way and use the same bolt hole

I agree the sway bar should help. 30 yrs ago when I had my first MGA it handled like a dream compared to the CJ 5 I was driving at the time, now after driving the c5 with the z06 suspension and wheels, I have been pretty spoiled,


IMG_6092.jpg
 
the mga was something like a '55 to '62 production years some where in the later model years they added it, mine is a1500cc with drum brakes, then there was a 1600 with front disc brakes. google says april 59 was the year it was added just around the time of the other changes

panels bolted up nicely no issues, i need to modify the Horn bracket , it just touches the sway bar but i can see the additional doubler bracket for the inside and the nut or bolt is going to give some interference issues. i think i will weld on a small tab to the horn bracket so i can pivot it up out of the way and use the same bolt hole
 
so I got back out there today, I recalled several of my mentors would always say "do what ever you want but don't drill any new holes"


so I am applying that logic to this application. I do have another hole that has the same spacing as the horn bracket but when I mount it there it just barely touches the front cross member, after contemplating it a bit i decided to make an off set washer and use it to change the final angle of the mounted horn. so I cut a washer and half and welded both half's to a new washer and it worked.
lastly I marked and cut a top side doubling plate for the sway bar bolts. maybe later today i will tackle that

first two pictures show the problem

IMG_6094.jpg
IMG_6095.jpg

even if I make a bracket to weld to the horn mount bracket to use on the same front lower hole it still touches the cross member

IMG_6096.jpg
IMG_6097.jpg

so cut and weld the washer then paint them

IMG_6098.jpg

measure, mark and cut top side doublers
IMG_6100.jpg

final fit using an original hole and does not hit anything
IMG_6099.jpg
 
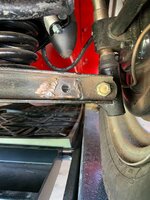
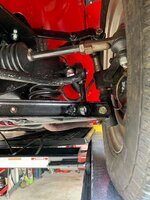
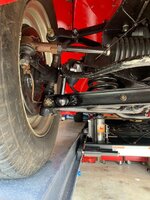
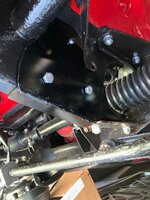
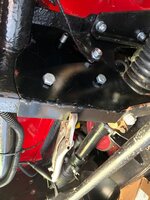
well instead of dinner I finished the mounting of the sway bar brackets,

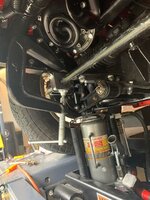
marked and drilled the top bracket , painted and mounted it. I was kind of nervous about the orientation of the brackets but they lined up very nicely, i used grade 8 hardware on them .
IMG_6103.jpg
IMG_6102.jpg
IMG_6104.jpg
IMG_6105.jpg
IMG_6106.jpg
IMG_6107.jpg
IMG_6108.jpg
IMG_6109.jpg
IMG_6112.jpg

next to paint the sway bar, add the limiting couplers and bolt up the sway bar ends. I have decided to leave the original eye bushings that are in good shape in place, and keep my new ones as spares.
 
and lets wrap it up

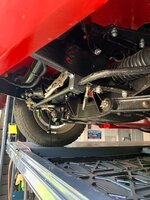
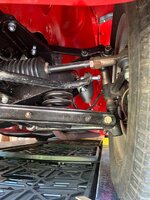
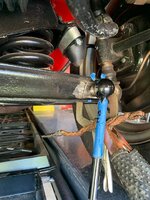
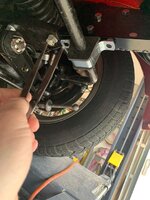
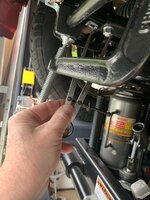
loosen everything one more time and i mean everything so i can get the angle of the drag bar links from the A arm to the eye of the sway bar perfectly lined up on both sides. then tighten down the sway brackets which basically locks the sway bar in place, add the sway bar Eye bolts, and tightenen up the sway bar drag links

IMG_6114.jpg

then add the sway bar limiting couplers
67638813679_E4886F2C-9456-41D4-8379-EBFE2503E8C5.jpg


test drive was amazing. no roll into any turn, its like a totally different car. seriously its fun to drive now. it wasn't so much before. now admittedly I have been spoiled by my daily drivers but this feels now like a normal car by todays stnadards.

thanks again to Eric and Bill for the help
 
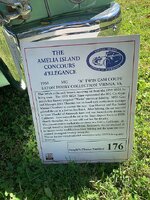
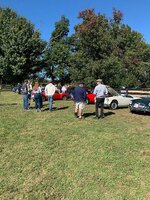
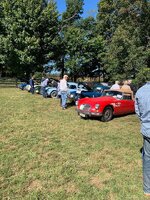
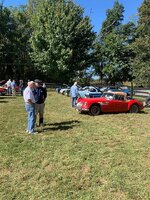
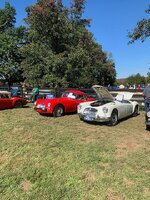
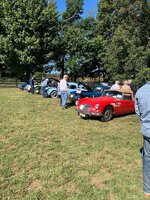
what a great day for a car show today, beautiful weather in the sprawling farms area of Hunt country Virginia.

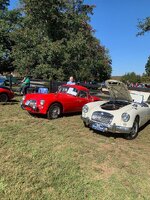
Great cars maybe 250, and my guess 500 spectators the MG club of DC did a great job putting it together. I got to meet and talk with John Twist and he went over my car with me , i got some nice compliments from him on the car and he especially liked how my doors closed, we talked about how I rebuilt the pinions and star wheels. amongst other things

IMG_6700.jpg


We parked next to Barney and had a good time. visiting with him.
IMG_6723.jpg

IMG_6731.jpg

two of my kids enjoyed the day with me
IMG_6720.jpg


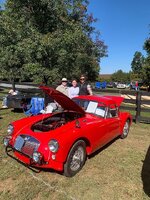
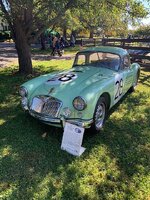
my favorite car

IMG_6701.jpg

IMG_6702.jpg

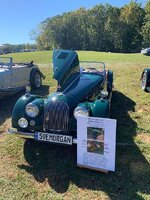
my next favorite car
IMG_6736.jpg

IMG_6703.jpg
IMG_6735.jpg
 
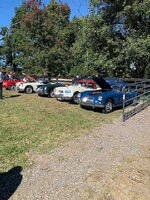
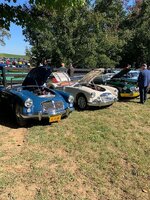
the mgas
IMG_6706.jpg

IMG_6707.jpg
IMG_6708.jpg
IMG_6711.jpg
IMG_6714.jpg

IMG_6728.jpg

white car next to mine Bill Marshall was third place

IMG_6727.jpg

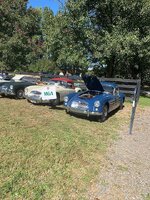
Jim Cheatham was 2nd place the car is blue to the left of Barneys red roadster
IMG_6708.jpg


blue coupe on the right was first place
IMG_6725.jpg


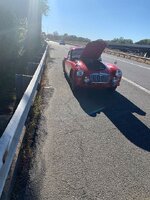
like I said wonderful day, got to visit with my MGA friends , couldnt ask for a better day...... I took a short cut coming home and wound on gravel roads for 20 minutes driving throught horse farms, the only thing that passed me was an F250 pulling a horse trailer we both had to stop and to navigate around each other the roads were so narrow, I was seriously lost but roads have to go some where and i kept preserving and finally hit a black top road, and cell phone coverage was non existent. i was very happy to hit the black top. then on to route 66 for the 45 mile home and after 20 miles i thought my car popped out of gear....and then i realized it was in gear but had turned off, luckily there was an exit ramp at that moment and i was going 70 so had good momentum and wound up here.

IMG_6737.jpg


IMG_6747.jpg

quick check revealed gas was sloshing in tank, all electrical connections were in place, car would crank but not start, so the best tool ever, the cell phone ruled the day.

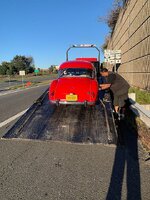
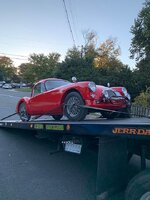
triple A and $60 tow and $30 tip and we are home again

IMG_6752.jpg

a quick survy determined gas in floats and with float top off gas flowed into it, 12 volts to the coil and no spark at the spark plugs....final diagnosing will be tomorrow.

and next modification will be a towing bracket under the car for easy snatching
 
Last edited:
I would have been so screwed if I broke down on the gravel road.

well my buddy Eric O (Ohmite) and I did some easy trouble shooting with a volt meter, test light and spark plug tester, and my coil was the culprit.
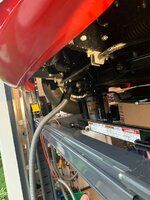

Purchased a new one today at Auto zone and its exactly the same as the Standard one they sell on Amazon for half the price, and the same as the broken one, I took my broken one back to Advance auto with the receipt and showed them the limited life time warranty and after some back and forth discussion they ordered me a replacement free of charge , without a doubt the auto zone warranty is far better. When they said it was 12 yrs old and not covered by warranty I asked what does lifetime warranty refer to ? they said "not that, it means like two years and i should call corporate " I said why am I calling anyone the warranty says lifetime thats what you should be doing. They called their manager on the phone and then ordered me a new one "as a courtesy." Auto zones lifetime warranty says if it fails in your lifetime of owning it they will replace it. Took about 15 minutes to replace the coil.
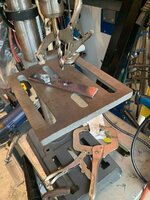
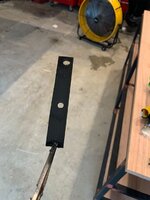

although I will say my purchase of the solar power cell phone external battery saved my ass, when I broke down the phone was on red low battery from driving around in the middle of no where when the phone was looking for service.
 
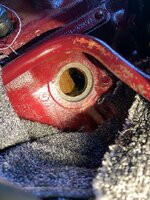
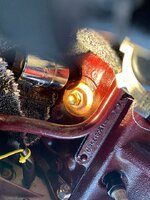
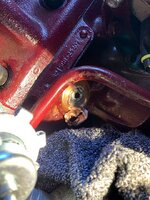
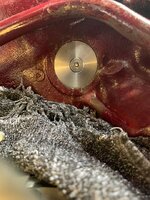
lets just say i found a weeping core plug

IMG_6834.jpg 68781785527_F1B2262C-13BA-4D1B-8DBC-758753AB50D5.jpg 68781804892_38A130B6-EFBE-4FB8-A8AC-1B1D589DCB82.jpg

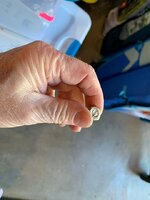
and lets just say someone tightened it up to much

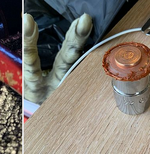
68788555863_05C5C589-F6B1-4B29-B37F-0AC2E818759F.jpg 68788581945_4078D571-EB52-4745-9947-7626743ACB02.jpg 68788721058_D5BDF9EB-E56A-4181-BB47-9F492EF0FB73.jpg 68788797916_D4F14006-B6FA-467F-B047-3CD494931348.jpg IMG_6847.jpg

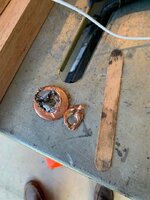
and lets just say the broken stud had to fished out of the water jacket with a welding rod hook

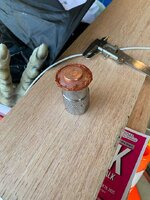
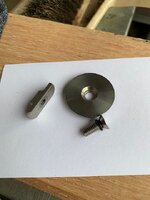
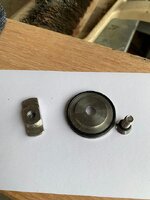
plan B uses Hemi core plugs that are stainless and have some extra maching done to fit the mg B series engine
68824860538_A73A7E76-69EC-4144-B8CB-F1287B433FA5.jpg 68824694932_D2811ABD-B8A1-4E4C-9787-B8BCACA871B0.jpg 68824693669_EAF001A6-98A4-4E5D-85CE-1CDF6AACF619.jpg

this time i used my thumb to tighten it
 
Back
Top