My '76 restoration (long post)

VetteMod - Corvette Restoration, Modding & Performance Forum

Help Support VetteMod Forum:

Hello everyone, finally here's an update.
We had very hot days lately in Montreal, and I did progress slowly. While the garage was too hot to work I spent some time shopping, and I found some pretty good deals.

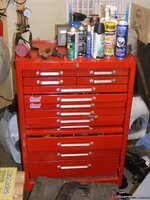
First, I was tired of my ever growing list of tools being stacked in a couple of crappy plastic toolboxes, to I bought a proper metal toolchest
rock.gif

16554e3f12cfd2e32.jpg
at 200$ I can't complain, it's deep and not too large, perfect for my cramped environment.

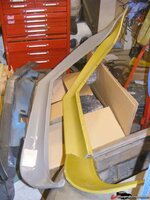
I always wanted to have a front spoiler, and I found two locally
16554e3f12d024162.jpg
One is broken but fixable. 75$ for the pair.
The good point here is that it's local. Those part are almost impossible to ship safely unless you build a crate for it.

And here's my best deal :

16554e3e000b8e8e1.jpg

16554e3e000b49b6f.jpg

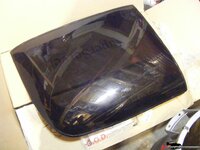
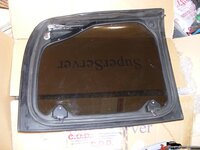
Plexiglass T-top. 250$ shipped, the guy just didn't know what he was selling.
They have very few scratch and the weatherstrip are like new.
Being see-thru is just a plus for me, my main interest is headroom. I'm 6'6" so every headroom gain is welcome. I wanted glass one, but they was out of my budget, and reading horror stories about how people break theirs, I'm glad mine will be much more forgiving when handled. I don't want a fragile garage queen, I want a sturdy machine that beg for yet another ride.
Those are for later C3, I will have to buy an adapter.

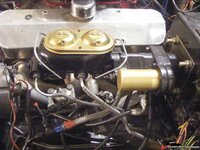
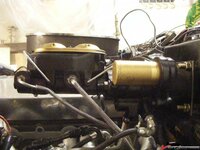
Here is my new master cylinder, a steel one from Summit. I gave up on scrapyard aluminium m/c. The ports were not matching and I couldn't find one with a proper bore diameter. With the hydroboost I was advised to have a bigger bore, 1.125".

16554e3e000ab2b63.jpg

16554e3e000b0559d.jpg

While I was at it, I decided to remove the line lock the PO installed. I'm not a tire burner guy, I don't see the point having one. Even more now I decided to switch to manual .

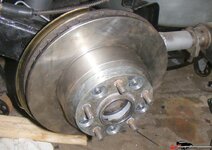
I also received the low profile nut to install the spacer I've been given.

16554e3f12ceec088.jpg

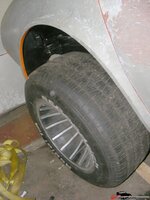
Here's with the wheel on :

16554e3f12cf886bd.jpg

16554e3f12cf3d772.jpg

16554e3f1387aed2e.jpg

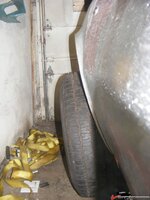
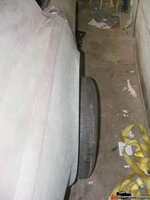
The tire are now really sticking out. I guess I'm good for a flare job.
The tires are 275 on a 10.5" rims, I not sure the weight is correctly balanced for the bearings. As soon as I can open the garage door, I'll have a look at this.

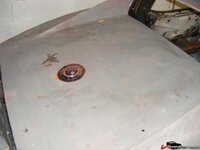
As you could see in the previous picture and the following one, I almost finished stripping the paint :

16554e3f12ce94f50.jpg

I used the razor method. The less chemical I use the best I am. Bought a good razor holder at NAPA and a pack of 100 blades. I used a third of the pack to do the job. It's a little scary at first, but when the use of it, you can strip the whole car in 10 to 15 hours.

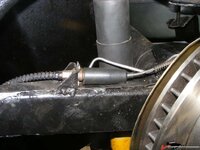
My next step was to finish the brake. This weekend I did the finishing touch like tuning the parking brake drum tension (screw until the wheel is blocked, then back off 8 to 10 notches) and installing new brake boots :

16554e3e0009caa5a.jpg

When I received them I found myself stupid, how am I gonna put them??
The spherical terminator is huge compared to the boot ID.
I tried to spread the boot with a pair of needle nose pliers and to my surprise those rubber things can be stretched a lot without breaking.

The finish touch was putting the caliper bleeder.
Then I spotted something odd. On the driver rear caliper, the outside bleeder and plug wasn't fitting well. I asked for help on the forum and after closer inspection I realized the outer half was a passenger one. Trying to get that fixed with the guy who sold them to me ended up in quiet a bust up.
Hoppefully a local C2 club member could provide me a new caliper.
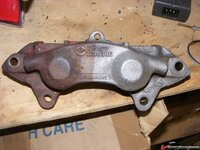
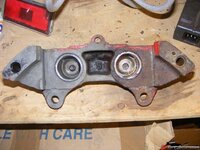
I'm currently cleaning it, and there's one product I want to recommand : Evaporust.
On the bottle sticker, here, there is a picture of a rim, top half is rusted, bottom half is sparklingly clean. Most of the time those pictures scream "Snake oil!".
Look :
16554e3e000a6be91.jpg

I didn't have deep enough container, the caliper spent 12h hour and just did a light hand brush cleaning.
I'm pretty sure it's the same molasses trick the hot rod builder are using, only on steroid. It's definitly sugar based.
It doesn't come cheap here, but it really does the job.
Since it's not acid, I know it won't start etching the SS sleeves.
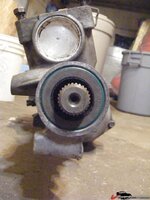
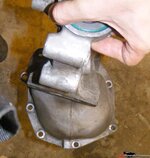
I used it for tolerance sensible parts, like my calipers and my hydroboost,

16554e3e000a24612.jpg

That's it.
Next step is the bleeding of the brake (finally) and them I can put the car on the dollie and move is around so I can properly align the doors.

Stay tuned
cheers2.gif
 
Last edited:
Jesus and I thought my 82 project was rough. Nice work though, keep the progress pics coming.
 
oh boy i did not realize you had 10" rims when i recommended spacers, you're right you're good for a flare job - 2" flares will be plenty and if you like the mudflap design you can only do the rear and leave the front alone. you can see in my 'front flares' thread that it's a lot of work to do the fronts, i think the raer is easier, it will look awesome though, no matter what style you choose.

didn't you get the short style nuts in the box I sent ? the customs ******** really screwed you on this one, i sent everything you needed to get this done right and they had nothing better to do than ripping the box open and only put half of the stuff back :hunter::hunter:
i know one of the local guys here has 325-50-15 tires on 10" rims and only 2" flares so dont buy the 4" unles you want to spend the big bux on rims to fill these masive flares , keep in mind i have 11" wide rims with 315-35-17 completely covered with 2"flares.
that rust stuff seems to be pretty good :thumbs:
 
oh boy i did not realize you had 10" rims when i recommended spacers, you're right you're good for a flare job - 2" flares will be plenty and if you like the mudflap design you can only do the rear and leave the front alone. you can see in my 'front flares' thread that it's a lot of work to do the fronts, i think the raer is easier, it will look awesome though, no matter what style you choose.
Front are 245 on 8" rims, not need for flare and I always wanted to keep the flaring job minimal.
I kinda concerned about the rear wheels balance. If I need a 2" flare job but still run with non-offset TA, doesn't it mean somewhat that my rear wheels are not centered on the hub and thus cause premature bearing aging?

Ok, another one, don't know why but I got the feeling this is a stupid question:
Does having a rear train wider that the front train affect the handling of the car ?

didn't you get the short style nuts in the box I sent ? the customs ******** really screwed you on this one, i sent everything you needed to get this done right and they had nothing better to do than ripping the box open and only put half of the stuff back :hunter::hunter:
No, I decided to stick with my 7/16 stock stud, I don't feel like putting the TA apart once again at this point, I need to move foward, so I needed 7/16 nut as short as yours.
Anyway I'm not done yet, the studs seems short for the rim will probably get longer ones eventually , let's say it's good enough for putting the car back on its tires.

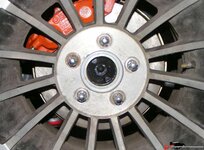
By the way, since it was you who insisted I put hubcentric ring, here's the one I have made by my mechanic

16554e3f4fda900ed.jpg

It's made of some kind of heat resistant, though industrial plastic.


i know one of the local guys here has 325-50-15 tires on 10" rims and only 2" flares so dont buy the 4" unles you want to spend the big bux on rims to fill these masive flares , keep in mind i have 11" wide rims with 315-35-17 completely covered with 2"flares.
I won't, 4" are just too much IMHO.
I kept the two rear wheel arch panels from the previous body, may come handy at some point.
Sometimes I whish I had the skills the time and the resources to do a proper widebody rear, I don't think flares are a good idea to begin with, aesthetically speaking.
 
As an Amazon Associate we earn from qualifying purchases. Product prices and availability are accurate as of the date/time indicated and are subject to change.
It's been a long time since last update.
For some obscure reasons I can't work on the car for the moment, so I switched to my hunt for an affordable manual conversion 'full time'.
I've been searching for months.
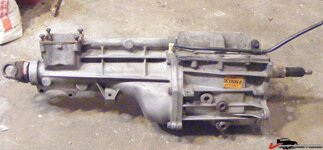
It took me a lot of failed deals and missed opportunities to finally find a decent base for my transmission :

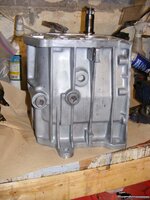
16554e6af9fc51089.jpg

A '90 camaro T5, bought in Montreal (Thanks Mario)

16554e6af9f39fe15.jpg

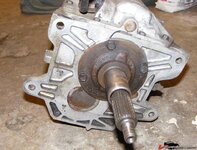
It's a world class, you can tell by the shape of the bearing retainer

Got it for 200$. There's a reason I got it at that price:

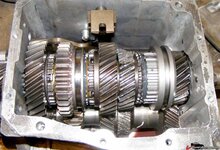
16554e6af9f402275.jpg

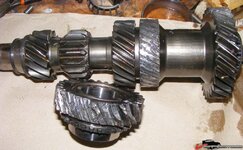
It ate its gears. So I'm now shopping for a 3rd and a cluster gear.
And yes, this is grease you see on the 3rd gear. The guy I bought it got scammed buying it as a good working transmission, the guys before did put grease to camouflage grinding noises.
If someone spots something worth mentioning, well, mention it.
I'm ordering a rebuild kit and start gathering a bunch of instruction on how to do it. It doesn't look that complicated and I got all the needed tools.

This transmission is a 2.95 first. It's not the best ratio for a 3.08 diff, but on the torque rating side, that's the best GM T5 you can find (300 ft/lbs).
I will eventually have to swap for a 3.73 diff.

The input shaft it 26 spline, and the output is 27 spline. I can't verify for now but it looks compatible with the TH350 slip yoke.

16554e6af9f45f2b3.jpg

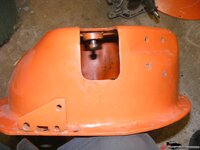
One thing that could be a PITA is the tilted installation angle

16554e6af9f754a67.jpg

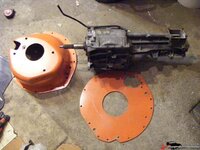
I found a very affordable Chevy lakewood scattershield, if I want to be able to use it I will need to install the transmission straight, I'm not sure what I'm gonna do with the rear mount.
I contacted Fuelie74, I know he already did this.
Bellhousing and clutch pedal are on their way, flywheel way come later.
Now time to find a clutch, a pressure plate and a throw out bearing, I got a couple of option but haven't setup my mind yet.

I also want a short throw shifter, and on Ebay all you could find are Mustang T5 shifter. From what I've read the only difference is the mounting plate, which is longer on the mustang, the camaro one is more square shaped.
It should be possible to modify a Mustang one to fit the Camaro T5. Anyone ever tried this?
 
Well ****, Denis. At least it's good to see someone making progress on their project. Mine has been sitting for months with no progress. :( It's drivable though and now that the heat of summer is receding a bit here I think I'll have to get it out and blow the carbon out!
 
Well ****, Denis. At least it's good to see someone making progress on their project. Mine has been sitting for months with no progress. :( It's drivable though and now that the heat of summer is receding a bit here I think I'll have to get it out and blow the carbon out!

lol, I've slowed down on the project because of the heat...
If I lived in the middle of the desert like you do I'd be dead already.
 
$200 isn't a bad price for the trans, how much are the gear kits ?

heat ??? i sprayed primer and sanded a little today and lost about 2 gallons sweat :smash:
 
I might still have a 153 tooth, 2 piece RMS T-5 flywheel. If it's still in my garage you can have it for shipping.
 
I'm on normal day shift for the first time since the start of Ramadan, which means getting up at 04:45. It feels a little chilly this morning because the temperature's finally starting to drop. It's about 32*C outside (90*F), lol. I should be able to restart work on the BOSS in a weekend or two...
 
$200 isn't a bad price for the trans, how much are the gear kits ?
I wish I could find at least a good used cluster gear, but the ratio I have (2.95 1st) is rather unusual.
New price for the pair starts at 170$, chinese import (allstate gear)
and ends at 350$ from a local company (they better be made in North america).
I'm not too thrilled putting chinese gears in my trans, so I'm giving myself some time to find something in between this price range.
Anyway I still have to studying rebuild instruction, and figure what needs to be actually changed.
I will get a instruction video soon, so I could figure for example if my synchros are still good.
 
The tilted angle is because of how it sits in an body the shifter will have a bend in it too. You can install it straight up, just use the upper fill plug for the level indication instead of the lower one. Might have to drill and tap it though, usually only 1 is threaded.

A 700R4 driveshaft should be a perfect fit for that trany, proper length and all. The slip yoke will fit fine.


The mustang and camaro shifter mount the same way, identical plate. The only difference is that the stangs didn't have the tranny angled and the shifter is straight.

You can also mount the tranny w/ the body hydraulics and bellhousing, it will be angled then but you won't have to modify anything except the clutch master. If you go that route you need an F body shifter
 
The tilted angle is because of how it sits in an body the shifter will have a bend in it too. You can install it straight up, just use the upper fill plug for the level indication instead of the lower one. Might have to drill and tap it though, usually only 1 is threaded.
Thanks for the tip about the filler plug.
What's really worrying me is the tranny mount, looks like if I want the tranny straight up I will have to fab some custom transmission mount with the opposite angle.

A 700R4 driveshaft should be a perfect fit for that trany, proper length and all. The slip yoke will fit fine.
I guess you mean a '82 driveshaft, right?
The mustang and camaro shifter mount the same way, identical plate. The only difference is that the stangs didn't have the tranny angled and the shifter is straight.

You can also mount the tranny w/ the body hydraulics and bellhousing, it will be angled then but you won't have to modify anything except the clutch master. If you go that route you need an F body shifter
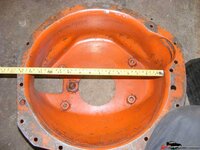
Fuelie reported some clearance issue with the camaro bellhousing and the tilted transmission, something like not enough space to install the slave cylinder. Anyway, I really want to install this scattershield, in a way or another.
 
Talking about scattershield, I finally could go pick it up at the border.

16554e7179b917687.jpg
This thing is huge and heavy, I don't know the brand, all is says is that it's been made in Mexico.
It match the transmission mounts, I will check on Michel BBC this weekend if it fit a chevy engine. It's supposed to, but the number of holes is much smaller than on lakewood's.

16554e7179b8b36c9.jpg

Correct me if I'm wrong, but looks like this beast should not have problem with a 11" clutch. However not sure I can put that with a 153 teeth flywheel, they usually work with 10.5 clutches.


16554e7179b85ef61.jpg


Adjustable pivot ball, holes for hydraulic line on the right, and at the left a mount for some sort of bracket (vendor accessories or stock bracket?)

Yet another sweet deal a 130$ shipped to the border.
On the way back home canadian customs didn't even bother making me pay taxes. I love that.
 
This weekend I could dismantle the T5, it was a 2h job, when you got the correct instruction.
After inspecting the gear I deemed most of the part were good to go.
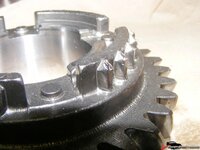
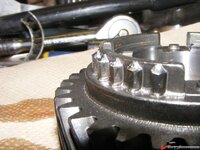
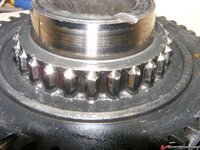
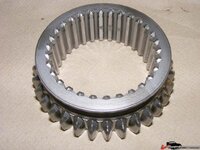
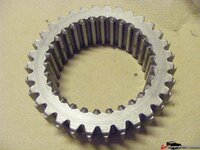
The 2nd and 5th gear synchro teeth show some wear, but it still good to go.
No noticeable wear on gear teeth except the reverse idler gear which is badly worn.
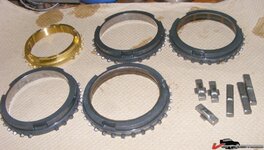
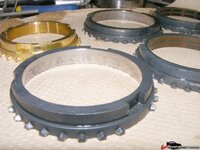
Surprisingly the synchro rings are still peachy, as most of the other small parts.
I will post picture later.

So, all thing considered, I ordered a cluster gear, a 3rd gear, a reverse idler gear and a bearing only rebuilt kit.
Transmission was one of the last "fear frontier", I thought is would be damn rocket science.
How wrong I was, with the instruction video, it's child's play.
 
This weekend I could dismantle the T5, it was a 2h job, when you got the correct instruction.
After inspecting the gear I deemed most of the part were good to go.
The 2nd and 5th gear synchro teeth show some wear, but it still good to go.
No noticeable wear on gear teeth except the reverse idler gear which is badly worn.
Surprisingly the synchro rings are still peachy, as most of the other small parts.
I will post picture later.

So, all thing considered, I ordered a cluster gear, a 3rd gear, a reverse idler gear and a bearing only rebuilt kit.
Transmission was one of the last "fear frontier", I thought is would be damn rocket science.
How wrong I was, with the instruction video, it's child's play.

Next up, let's see you do a 700 r4........:smash::surrender::devil:
 
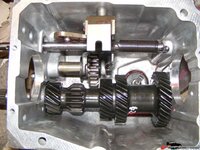
As promised, some picture of my T5's gears.

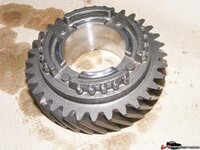
First speed, mint condition, which is not surprising
16554e7e858c4f350.jpg

Second speed, synchro teeth are worn, but still useable
16554e7e858c9583f.jpg

16554e7e858cdf41e.jpg

16554e7e858d2f392.jpg

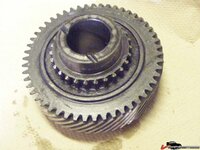
Fith gear, again, the teeth are show some wear, but not too bad
16554e7e858d74d08.jpg

16554e7e858db9e58.jpg

the 1-2-reverse slider, in execellent shape
16554e7e858bb7b13.jpg

16554e7e858c0a9ed.jpg

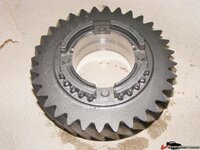
And the cluster gear and the third, just dead.
16554e7e858b2340c.jpg

The rings look like new :
16554e7e85b273b52.jpg

16554e7e85b2ae85f.jpg

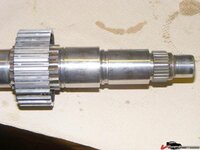
The output shaft is in nice condition, no wear or pitting on the bit.
16554e7e85b22de1a.jpg

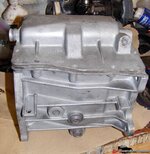
This saturday I could spend some time at Michel's, using his sandblasting both. I glass-blasted my transmission case and protected it with a clear coast.

16554e7e8511ace8d.jpg

16554e7e858b6e786.jpg


I also found time to install my spreader bar
16554e7ec42a44245.jpg

At first I had it installed on directly on the front bolt, just that would have make the alignment process complicated, so I had two pieces of steel welded a the extremities and installed it the way most spreader bar are.
 
Not much time for doing restoration these days, crunch time at work, 6 days a week, but we start to see the light at the end of the tunnel.

Still I could log some progress.
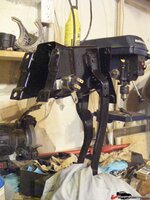
I received my pedals set, amongst other stuff from Ken of Ken's Corvette parts. Cool guy, great prices.
Didn't take long to get then cleaned and painted, they was very clean already.

16554e8a723ca2e54.jpg
Any Star Wars fan around?

Sometimes I wonder if I shouldn't leave a certain part just like it left the factory, bare metal like those pedals. Then I remember why I'm here in this garage, rebuilding a car, and grab the can of POR15.
That car ain't no rust home anymore.:hunter:

And it didn't take long to have them installed

16554e8a723d05285.jpg

Every times a PITA to install.

I also received my parts for the T5 rebuilt, unfortunately the guys at The Gearbox screwed up my order. I received a 2nd speed gear instead of a 3rd. The only thing in common it that they have 30 teeth. Sent a mail today, no answer, will call them tomorrow.
So here I am into the rebuild:

16554e8a723d53098.jpg

Cluster gear installed along with the reverse idler gear and fork.
I need a thicker shim, got play in the cluster gear.
 
Last edited:
Quick update on The Gearbox order screw up.
Got the guys on the phone and they sent me the correct gear right away, without even waiting for me to send the bad one back.
So kudos to the guys at The Gearbox, they know how to turn a bad into an awesome good.
 
Quick update on The Gearbox order screw up.
Got the guys on the phone and they sent me the correct gear right away, without even waiting for me to send the bad one back.
So kudos to the guys at The Gearbox, they know how to turn a bad into an awesome good.

:thumbs:

always good to hear there are still some companies out there who remember what "customer service" is
 
It's been a full month of overtime, but at last I got a real weekend.
Here's one of the stuff I could do.

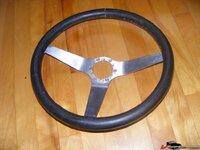
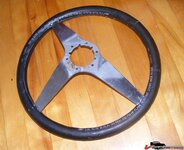
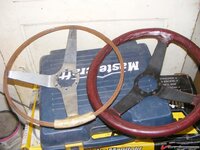
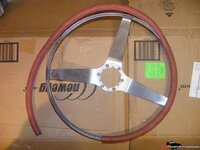
You might remember I've been given two DD quality steering wheel.
16554de2a81b5da11.jpg

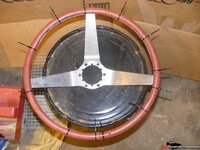
After a good cleaning, I wrapped the metal core with a piece of air hose.
16554ea4f6946271b.jpg

Gluing the hose to the metal frame took some trial and error. I needed a rock solid binding, but there was a lot of space to fill, and some area don't see any air.
What did the job for me was Gorilla glue. It expands a lot when curing and its catalyst is water, so you just have to damp parts a little when putting the glue.

16554ea4f694b8dc2.jpg


On top of this layer I added a piece of 1" hose I have in stock. This time I used regular contact glue, wrap it up with metal wire (you can still see the parten on the picture) and let it cure overnight.
16554ea4f6950cbb7.jpg

16554ea4f69554034.jpg

16554ea4f6959959b.jpg

I have a piece of black moose leather I bought last year from a native trader, I'm gonna try wrapping and stitching it over.
I've found a very neat stitching technique I'm gonna try
[ame]http://www.youtube.com/watch?v=i23RIp2OO9o&feature=related[/ame]
 
Moose leather ??? That's awesome :lol:

Yeah, it's a thick, soft yet very tough leather with a great texture, not too shiny, not to "velvety", should give pleasant and solid grip.

During the summer powwows native tribe are sellling a wide variety of furs and leathers, at relatively good price.

Arctic Fox fur wheel cover anyone?:rolleyes:
 
Back
Top