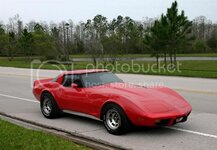
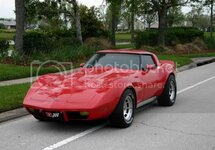
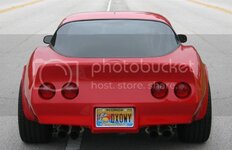
My '76 restoration (long post)

VetteMod - Corvette Restoration, Modding & Performance Forum

Help Support VetteMod Forum:

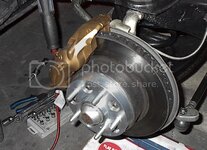
Here's an example of hubcentric adapters, they come as thin as 5/8", I have used 3/4" and 1" on several cars with 300-400 HP and never had a problem.

IM000672zzzzzzzz.jpg

These bolt on to your axle and they fit tight over the axle's hub. On the outboard side there's another hub that centers the rim. Theoretically you can remove all five lugnuts and the hub ring holds the wheel (no load on the studs) - that's IF the rim is hubcentric as well, most wheels are but there are some that are drilled for different bolt pattens and the center is then machined oversize.
What would happen with the brand new studs, cut them to correct lenght of just trash them? One thing I know it that I won't dismantle the spindle assembly again. Not this year :hissyfit:
By the way, does somebody know the recommended space between arm and tire? because I'm tempted to removed the spacing alltogether, the rear tires sticking out, even by a small amount it bugging me.
 
First check if your rims have a "pocket" on the inside between the five holes for the studs - many rims have these pockets so the studs will not interfere IF they're longer than the adapter thickness.

Your studs appear to be stock length, they should only barely protrude if you use a 1" spacer/adapter.

What rims are you using ? Often it's not the tire hitting the trailing arm, people use spacers to make the rim clear the caliper. Clearance to the leaf spring is important too, the bulky 15" tire sidewall flexes a lot and you don't want the spring to slice your tire....
 
First check if your rims have a "pocket" on the inside between the five holes for the studs - many rims have these pockets so the studs will not interfere IF they're longer than the adapter thickness.

Your studs appear to be stock length, they should only barely protrude if you use a 1" spacer/adapter.

What rims are you using ? Often it's not the tire hitting the trailing arm, people use spacers to make the rim clear the caliper. Clearance to the leaf spring is important too, the bulky 15" tire sidewall flexes a lot and you don't want the spring to slice your tire....
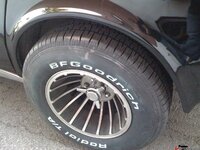
Here's my tires :
16554d4e5dc308eba.jpg
This is PO's setup, I dumped the junk nuts and bought Jeep's long one.
The tires are 275.
 
I like these rims :thumbs:

looks like 15x8. the 275-60 tire will get close to the spring and the trailing arm. measure the backspacing on the rims, if it's 4" like the stock wheels you can fit a 1" spacer without having the tire rub the fender or sticking out.

Here's a few photos of my old setup with 275-60 and a 1" adapter to clear the inside of the wheel (TA and spring):

IMG_6496cccCustom.jpg

.
IMG_6479cccCustom.jpg
.
IMG_6478cccCustom.jpg

The tires seem to be quiet old, if you replace them you could go with 255-60 and you have more room.... find out why the spacer is needed, do the calipers clear the inside of the rim ??
 
Thanks for the pictures Mybad, I'll put the tire back on tonight and take picture of how it look from the inside of the wheel.
 
As an Amazon Associate we earn from qualifying purchases. Product prices and availability are accurate as of the date/time indicated and are subject to change.
First check if your rims have a "pocket" on the inside between the five holes for the studs - many rims have these pockets so the studs will not interfere IF they're longer than the adapter thickness.

Your studs appear to be stock length, they should only barely protrude if you use a 1" spacer/adapter.

What rims are you using ? Often it's not the tire hitting the trailing arm, people use spacers to make the rim clear the caliper. Clearance to the leaf spring is important too, the bulky 15" tire sidewall flexes a lot and you don't want the spring to slice your tire....
First, my wheels are solid.
Second, I found out why PO did put a spacer, it was just to make room for the caliper.
Then a checked the clearance WITH the spacer :
Front is fine, with a inch of clearance :
16554dabc8eb35aad.jpg


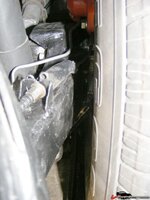
Rear is tighter, but with the current bolt size, all the leaf spring can touch it the rim
16554dabc8e8221d2.jpg
 
Ok, it's been a while since the last update.
I'm been stuck for 2 weeks waiting for my line and fitting order for my fuel lines. The package stayed stuck in the custom for 12 days :bomb::bomb:
I actually had to call them to get it unstuck, they must have forgot it on some shelves.
So, in the meanwhile i decided to do some work I originally planned to be done in the "next winter phase".
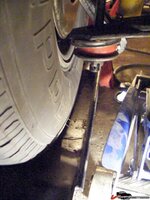
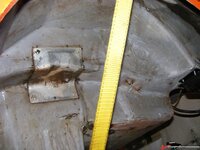
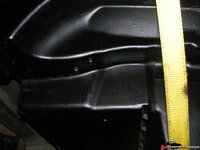
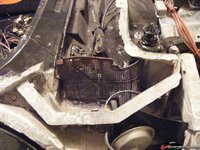
I did shave all the gooey gunk off the rear wheel arches with a chisel.

16554dabd0c2963e8.jpg
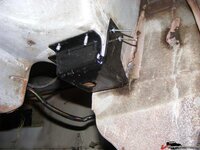
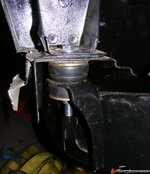
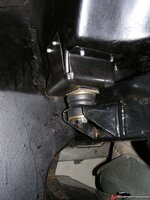
Them I restored my body mount#4 support and secured it with steel pop rivet

16554dabd0c34f895.jpg
Ok, only one rivet so far, the deal is the body is hanging in the air, so I can't really get inside to pop the other ones, I'll get them done as soon as the body is landed.
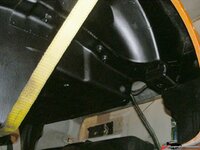
I further cleaned the arches with paint thinner and steel wool, then applied a new asphalt/rubber coating

16554dabd0c414d99.jpg

16554dabd0c50633b.jpg

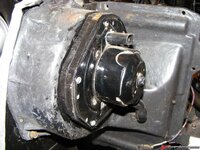
I did finish the spacers for my C4 blower upgrade.
I still have to get the connection sorted out, not the same connector.
16554dabced455477.jpg

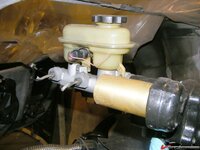
and also found at the scrapyard another master cylinder reservoir, this time with the correct angle.
16554dabce616fe57.jpg

The line finally arrived and I could finish my gas tank overhaul.

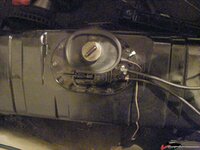
I did open it to assert the its state. It's in absolutely pristine shape, at least something I don't have to try to salvage. I also took time to clean and paint the central area and redo the ground connection.
16554dabcf2c187bc.jpg

And here is it, installed with it's cover :

16554dabcf7fa6527.jpg

It's finally time to put the body back on once for good. I still hope starting the engine next month, as soon as the front clip is glued and all the wires/hoses sorted out. *finger crossed*
 
Looks GOOD, condolences over your late lamented broken ass.....

:clap::friends:
 
Big milestone reached this week, we finally bolted the body.
First, while I still had the body off, I did a crude wheel toe alignement using a technique I read somewhere on the forum.

16554dbe478529509.jpg

Bolted my old rotor above the new ones, and ran a cord from from it. Having the cord just touching the rotor I could measure the distance between the line and the frame. Not remotely precise but enough to drive it to the alignment shop.

16554dbe478604b0c.jpg


Then, this weekend I brought my usual weekend helpers (thanks again and again to Sovan and Jeff), and did drop the body.
16554dbe4786a3626.jpg

It was unexpectedly simple, the frame was leveled, all we had to do it drop it and make sure all the bushing was well pressed. I had some clay prepared, but we didn't use it. It's maybe because I had long and (still) thin programmer's hand, I could touch all the bushing.
We first made sure mount #1 and #4 were put under pression, then we moved to #2 and #3. Took us maybe 4 or 5 drop-lift attempt to have it all good.
16554dbe47818af29.jpg

16554dbe47824426a.jpg

What helped us was to have 3" and 3"1/2 bolts. We first put the 3"1/2 so we could lift the body of 1/2" without removing the bolts. Once all is setup we did put the final 3" bolts. (we actually left 3"1/2 bolts on #1).

We didn't go deep in the door aligment process so far, but so far so good, the doors close nicely and the rear gap is even if still a bit large.
16554dbe478481322.jpg
The reflexion on the door make it look uneven, but this is just a trick of the light.

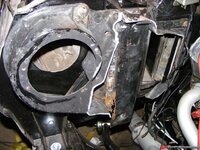
I also started transforming my heater box. No regret cutting it, it was already totally backed anyway.
16554dbe4782d9164.jpg

You can spot the new heater valve at the bottom. PO did remove all of this, so I had to completely rebuild it from scratch.
I was lamenting over the fact I had to fork out 50$ or so for a sheet of metal it make my new heater box when I stumbled upon a nice large piece laying in my street, leftover from a just redone neighbor's roof.
I love that.

I bought from forum member a pair of late C3 cowl screen, I already said that before, the cowl area on stock C3 is sporting a rather pathetic level of quality, with those it gets better.
16554dbe4783b6ea6.jpg


Now with the body it on I can resume a lot of task, already reconnected the parking brake, the grounds and the battery connection.
I'm also moving forward with my power steering / hydroboost hoses, heater system and my pump to carb hoses. As soon as missing parts show up in my mailbox I'll post updates.
 
This week I've been busy plumbing :smash:

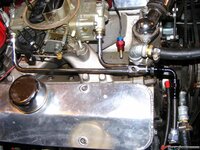
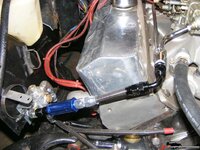
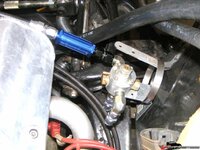
I've started the fuel line :
16554dc5fa5c69dac.jpg

16554dc5fa5bb318c.jpg

16554dc5fa5d2a602.jpg

Still a mockup, nothing is really fasten yet.

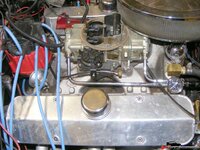
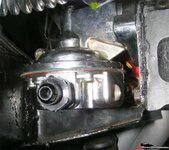
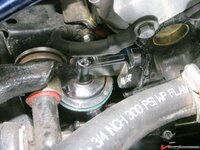
Since the card feed line was doing the job, I cut the nipple and had it tapped to NPT fittings. Still waiting for my fuel pressure gauge (non-filled as I read here is was better)
16554dc5fa5f0d13e.jpg


The new fuel pump is installed.
16554dc5fa5fa9543.jpg

16554dc5fa608243c.jpg

I haven't made up my mind about the orientation of the bowl, right now the -6AN fitting are sticking ou too much, I ordered a pair of those to fix my clearance issue :
16554dc5fcb4afc9d.jpg

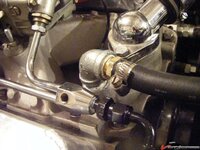
I also started recreating the heater hosing, all had been removed by this ******* of PO.
16554dc5fa612cd39.jpg

16554dc5fa5f0d13e.jpg

I know those are house plumbing item from Home Depot, and so what, a tad heavier, but does the job fine. right?

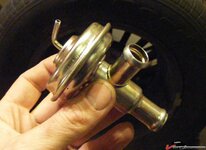
Here's a '80 Oldsmobile heater valve, 3.99$ on ebay.
16554dc5fa61e8d10.jpg
Since nothing is stock in the heater system, all I care is that it works as expected.
 
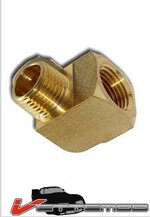
That galvanized 1/2 NPT iron plumbing fittings looks like ass compared to all the other stuff you have dressed up.....your parts house should have some neat brass stuff on the hooks or in the bins in back...make it look much better...including a brass L with hose barb to screw in the manifold....:crutches: I know they got one for the water pump, that's easy....the L for the mani...maybe fish around a junkyard??
 
:lol: if you paint that galvanized stuff flat black it might not be as bad... I think even AutoZone has these NPT connectors, they're not even expensive.
 
That galvanized 1/2 NPT iron plumbing fittings looks like ass compared to all the other stuff you have dressed up.....your parts house should have some neat brass stuff on the hooks or in the bins in back...make it look much better...including a brass L with hose barb to screw in the manifold....:crutches: I know they got one for the water pump, that's easy....the L for the mani...maybe fish around a junkyard??

Well I searched for all brass fitting at several part house with no luck.
Good point about the scrapyard, I will definitely have a look.
:lol: if you paint that galvanized stuff flat black it might not be as bad... I think even AutoZone has these NPT connectors, they're not even expensive.
Thing is those damn AutoZone/CarQuest/Napa open when I go to work and close when leave work, everytime I have to take a day off to go shopping those places.
I'll try to find better parts, at least it's already functional.

What do you guys think about the fuel line? Looks good?
 
You're leaking coolant.
LOL, yeah, I haven't reconnected the Radiator yet. I actually temporary put the front clip in place, just to see how and where I could fasten the fuel pressure regulator.
I wish I could post a picture of the car in seemingly on piece, but my card reader decided to die this morning.
 
Thing is those damn AutoZone/CarQuest/Napa open when I go to work and close when leave work, everytime I have to take a day off to go shopping those places.
I'll try to find better parts, at least it's already functional.

What do you guys think about the fuel line? Looks good?
NAPA has a web site. That should solve the 'taking off from work'
issue... Call them while your at work and get the correct part
numbers. That will save you from searching the site and you will
know what you order is what you want!
 
This week a couple of packages decided to finally arrive!!
I received my heater core from Rock Auto, so I could finally put together the heater system.

16554dd0b6b355ee9.jpg

16554dd0b6b3f2324.jpg

16554dd0b6b497dac.jpg

The "remove ac" box have been made out of a scrapped roofing metal sheet. I made a first cardboard mockup. I assembled the box with rivets and filled all the seams with epoxy resin.
I also changed my mind about the heater valve. This saturday I went to the scrapyard to pick up some hose heat shield, hose clamp and all kind of fasterner. Those cost an arm when bought new.
Then I found what have been searching for month, a useable heater valve.
I decided not to use the one I bought, I do prefer the mechanism of this one, sound more reliable and effective.

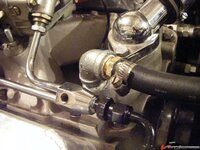
My cast iron fitting having caused some controversy, I found something more fancy.
16554dd0b6b29cbda.jpg


There's now an awfull lot of empty space around the headers, wich is a rather good thing.

I also received two proximity radar kit, one for the front and one for the back, I guess there is a way to get some 12v when and only when the 1st speed is engaged, for the front kit.

I also bought some more reflectix like insulation and redid the firewall. The madvette kit is cool, but is not sufficient for a complete insulation.

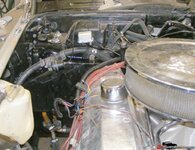
As a bonus, here's a general picture of what the car looks like now:
16554dd0b6b1f22f7.jpg

Today I did remove the paint from the doors (not on picture). I'm still struggling with their adjustment, not an easy task.
 
One question regarding my heater mod, the valve I've put in is directional (like any other heater valve I guess), so my question is, what is the direction of the flow :
16554dd0b6b29cbda.jpg

From which hose does the hot water leave?
It's a pretty stupid question unless like me you just know nothing about water pump.
 
Last edited:
Water leaves the manifold in front there, same passage as the t-stat is in....so the stat sees temps quick enough.....heater is after valve, and returns to suck side of pump, via same passage as return./lower hose from Rad....

:nuts:
 
Water leaves the manifold in front there, same passage as the t-stat is in....so the stat sees temps quick enough.....heater is after valve, and returns to suck side of pump, via same passage as return./lower hose from Rad....

:nuts:
Good, so my valve is in the wrong direction, will get that fixed by tonight.
Thanks
 
Water leaves the manifold in front there, same passage as the t-stat is in....so the stat sees temps quick enough.....heater is after valve, and returns to suck side of pump, via same passage as return./lower hose from Rad....

:nuts:
Good, so my valve is in the wrong direction, will get that fixed by tonight.
Thanks

Long as U R a green weenie, you valve will always be backwards.....:bounce::rolleyes:
 
Water leaves the manifold in front there, same passage as the t-stat is in....so the stat sees temps quick enough.....heater is after valve, and returns to suck side of pump, via same passage as return./lower hose from Rad....

:nuts:
Good, so my valve is in the wrong direction, will get that fixed by tonight.
Thanks

Long as U R a green weenie, you valve will always be backwards.....:bounce::rolleyes:
tumblr_lf89wxB3ja1qe0eclo1_r34_500.gif
 
:shocking: Hey, grumpy olde man here, I reserve the right to harass your ass.....

hippie....

:shocking::beer:

just don't bury my ass in tooooo much engineering....

:drink:
 
That allright mate, I would'nt be sporting this signature if I didn't accept to be you own personal piñata.
However watch out, I'm usually full of ****, this would get ugly eventually :smash::crap::smash:

:shocking: Hey, grumpy olde man here, I reserve the right to harass your ass.....

hippie....

:shocking::beer:

just don't bury my ass in tooooo much engineering....

:drink:
 
Ok, here's some little update.

Bad news :
-The master cylinder I found at the scrapyard is just too much trouble, vettes have 1/4" rear brake like and 3/16 front. Trying to mate those with a 3/16 front 3/16 rear MC is painfull.
And the bore was just too small anyway, 0.94".
From forum member advice I should aim for a 1.125" bore. Added to the shopping list.

-The '80 steering column I bought last year turned out to be bad.
Here's the story, it's pathetic.
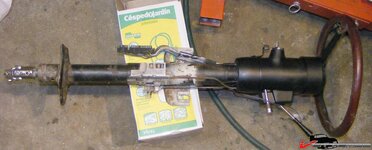
Last weekend I had it cleaned, painted, shroud cut to shea's specification, with a steering wheel a forum member donated. thanks vette81ttop!! (CF) and with the steering U-joint I bought :
16554df842bb24aaf.jpg

Then I proceed to install it in the dash pad (all this was test fit, no final installation)
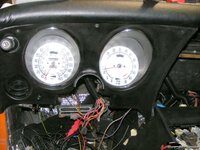
16554df841f38f837.jpg

Everything lined up except the shroud, it was still too deep into the dash.
Ok, maybe Jim Shea's specification aren't that precise (ok, I should have start worrying at that point).
So I try to cut a little more of the shroud. What a mistake, I just destroyed the shroud.
Ok, so where's the problem? Then I remember this picture I posted on another thread.
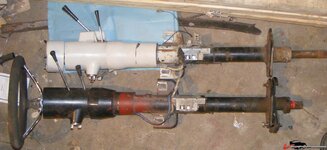
16554dc5ea9bdcdcb.jpg

You see how the mounting ears don't line up ? This difference is exactly what I was missing to get a good fit in the dash.
I then looked closer and found out the column had been collapsed.
Not the shaft at the end, you need to have it collapsed to accommodate a Borgeson, I'm talking about the main body of the column.
Damn!
So back to square one with the column. The old creepy '76 is all I'm gonna use for now. I'll have to reman the whole column to be able to uncollapse it.

-The door
We tried with Sovan two weeks ago to adjust the driver door, without much luck. Even with the 8 bolts loose, the door almost don't move back and forth.
The problem right now is that is doesn't close properly, looks like the weatherstrip is on the way. I compared with the passenger door, this one is closing properly only because the weatherstrip is completely crushed.
Lol, I'm lost at this for now, I'll have to come up with a solution at one point, need to study the subject.

-Cash. Bad season, taxes, insurance renewal, yadada.... by the end of the month not much remains for the project, so things get slower

-Weather. A Canadian who don't make the most out of the summer is a dead Canadian by the next winter. Well, for my wife at least. Rainy weekends are a bless for the project
rofl.gif


The good news

-People have been very generous with me. I've been given a pair of steering wheel and a pair of rear wheel spacer.
Sure the wheel are baked, but one is useable, and the other is a good starting point for some custom job. thanks again vette81ttop (CF)
Sure and the spacer are not aluminum, but there are very sturdy with M12 1.5 studs. Thanks a lot Karsten (VM)
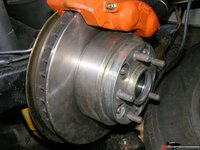
16554df83e3d64f40.jpg


-My fuel line can be considered done
rock.gif


16554df83e3c359a5.jpg

I installed a manual cable choke, on the interior side it fits perfectly in place of the now useless vaccum bypass switch. When cold the engine was tricky to keep at idle, this will help. You can also spot the brand new spark cable with the new heat shield. The old one was totally baked, just holding by the metal core of the cable.
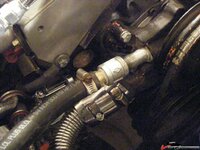
You can also notice I found a more "civilized" fitting for the heater hoses.

On the front, the Mallory pressure regulator
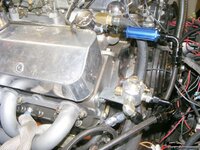
16554df83e3cc94b3.jpg
The tubing may look complicated. Two reasons : I changed my mind midway. The regulator was initially installed in the fenders. I decided to fix it to the engine, so the whole system is moving the same way, no forces on the tube.
So I had some tube already made, I didn't what to "reuse" them, once made it stays that way.
Second reason : the teflon braided tube are really stiff, and you can't bend them much.
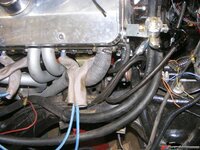
16554df83e3d1cad0.jpg

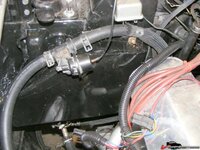
The lines are routed far enough from the header, but for good measure I added some insulation.
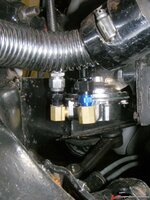
16554df83e3c827cb.jpg
view of the pump while I'm at it.

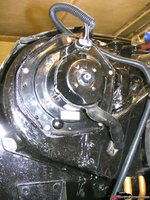
To finish, a picture of the C4 blower, final install, sealed, with the spacers and the ventilation tube.
16554df83e3bd544a.jpg

That all folks. I'm taking some short vacation soon, so next update may be long to come.

 
Back
Top