
You are using an out of date browser. It may not display this or other websites correctly.
You should upgrade or use an alternative browser.
You should upgrade or use an alternative browser.
Another money pit
- Thread starter rtj
- Start date

Help Support VetteMod Forum:

rtj
Well-known member
- Joined
- Nov 5, 2011
- Messages
- 3,598
- Reaction score
- 211
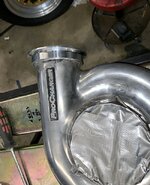
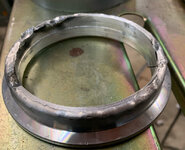
Well, here was my first attempt. Welded 1/8 in thick vband onto adapter, which gave 0.31 in wall thickness. This was taking too much heat, so cut the tacks and will step the adapter so I have roughly 1/8 in thick wall to weld.
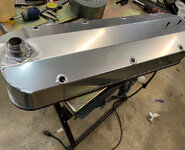
I spent a long time trying to weld these nipples on the valve covers from inside. Pulled the valve covers off and welded them on from the top. Also, threaded some holes for 8-32 so I can make some wire stand-offs.
There is a meme in this: I’ve seen your aluminum welding, you’re getting a polisher for Christmas.
Here is something I’ll share:
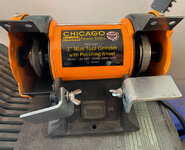
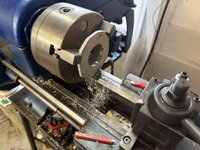
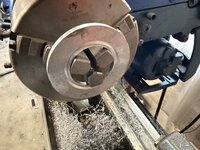
HF sells diamond grinding wheels, so I bored them out on the lathe and mounted them on this mini grinder. Works great for tungsten tig elements. Hit them on the belt sander to remove alum, then point them on here.
I spent a long time trying to weld these nipples on the valve covers from inside. Pulled the valve covers off and welded them on from the top. Also, threaded some holes for 8-32 so I can make some wire stand-offs.
There is a meme in this: I’ve seen your aluminum welding, you’re getting a polisher for Christmas.
Here is something I’ll share:
HF sells diamond grinding wheels, so I bored them out on the lathe and mounted them on this mini grinder. Works great for tungsten tig elements. Hit them on the belt sander to remove alum, then point them on here.
Last edited:

Looks like your getting close to putting it all together.
I hear ya. My wife is a big time gardener and most of the last month has been cleanup and prep work for spring. No time for the car :banghead:
rtj
Well-known member
- Joined
- Nov 5, 2011
- Messages
- 3,598
- Reaction score
- 211
I hear that, I’ve been cutting up dead trees and burning out some old stumps on rainy days.
I’m making progress but was starting to have doubts. Then I saw a couple of YouTube videos on welding. I need to go up to 1/8 tungsten and follow what this guy does.
[ame]https://www.youtube.com/watch?v=OWG1f5e7HEU&t=338s[/ame]
I’m making progress but was starting to have doubts. Then I saw a couple of YouTube videos on welding. I need to go up to 1/8 tungsten and follow what this guy does.
[ame]https://www.youtube.com/watch?v=OWG1f5e7HEU&t=338s[/ame]


![Pampers Sensitive Baby Wipes, Clinically Proven, Fragrance Free, Unscented, Water Based, Hypoallergenic, Multi-Use, Hand Wipes 336 Wipes Total (6X Flip-Top Packs) [Packaging May Vary]](https://m.media-amazon.com/images/I/41KLBHu9CAL._SL500_.jpg)





As an Amazon Associate we earn from qualifying purchases. Product prices and availability are accurate as of the date/time indicated and are subject to change.
rtj
Well-known member
- Joined
- Nov 5, 2011
- Messages
- 3,598
- Reaction score
- 211
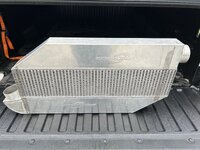
Picked this up off FB for $350. About what a core costs. I think I’ll go from 3” to 3.5” .
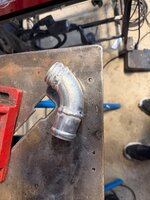
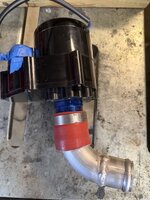
Needed a tight radius after the blower.
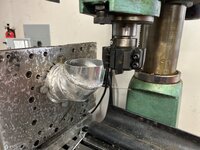
Trimmed it a bit to be 90 degrees.
Finally figured out how to fixture this a trim the ends even. There are studs in the table doing most of the work to hold it.
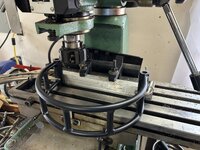
Needed a tight radius after the blower.
Trimmed it a bit to be 90 degrees.
Finally figured out how to fixture this a trim the ends even. There are studs in the table doing most of the work to hold it.
Last edited:
rtj
Well-known member
- Joined
- Nov 5, 2011
- Messages
- 3,598
- Reaction score
- 211
Well, I’d rather do it myself and learn, than pay someone to do it. I’m getting faster as I go along, but need to force myself to get better welding. I realized I was treating it too much like brazing and started watching some of the 6061 channel lately.
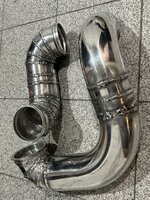
The black stuff is from the polishing compound, I haven’t got it all cleaned up yet.
The black stuff is from the polishing compound, I haven’t got it all cleaned up yet.
That's some pretty tight packaging there. Looks good.
rtj
Well-known member
- Joined
- Nov 5, 2011
- Messages
- 3,598
- Reaction score
- 211
Thanks, but need to improve my alum welding. I’m starting to anticipate how it will behave. I always felt it unpredictable compared to steel.
I’m just going to run a straight pipe for starters, no intercooler. Low boost so it should not matter. Mock up:
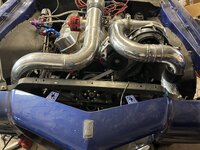
I’m just going to run a straight pipe for starters, no intercooler. Low boost so it should not matter. Mock up:
rtj
Well-known member
- Joined
- Nov 5, 2011
- Messages
- 3,598
- Reaction score
- 211
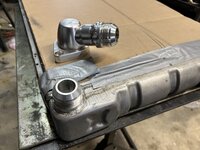
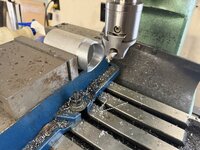
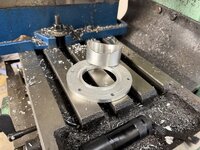
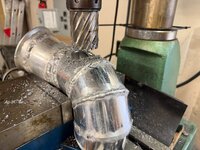
Will try switching to 20AN lines for cooling. The thermostat housing is done, the one on the rad is just sitting there right now. This rad came with the car and was going to replace it, but it didn’t leak so kept it. Perfect candidate for my welding attempt.
rtj
Well-known member
- Joined
- Nov 5, 2011
- Messages
- 3,598
- Reaction score
- 211
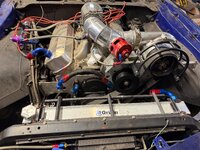
Haven’t tig welded aluminum for a long time so there are some pretty shoddy welds. I should write down settings for stuff, but always have to relearn. Here is the new config. Decided that with such a large drive boost should be 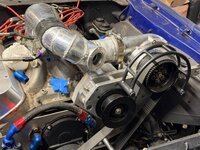 low and no need for an intercooler.
low and no need for an intercooler.
phantomjock
Well-known member
Nice work - A little dremel work coming soon?
Nice belt "cage" too.
Cheers - Jim
Nice belt "cage" too.
Cheers - Jim
rtj
Well-known member
- Joined
- Nov 5, 2011
- Messages
- 3,598
- Reaction score
- 211
Thanks, yeah I’m going to knock down the really bad stuff, especially around that blow off and go over it again. I should have made it 0.25-0.5 inches higher on the stand off. Also, thinner on the cylinder wall.
Good enough for now, can always knock them off on the belt sander and completely redo later.
Got a new miller helmet and is this an improvement!
And, cleaned up the shop.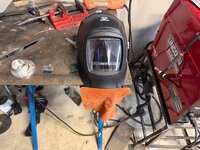
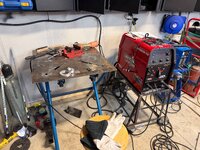
Good enough for now, can always knock them off on the belt sander and completely redo later.
Got a new miller helmet and is this an improvement!
And, cleaned up the shop.
I clean up my shop (garage) about every 2 years. Then I start a new project, fill the place back up with stuff and spend half my time looking for stuff that I just put in a place I would remember.

- Joined
- Mar 4, 2008
- Messages
- 60
- Reaction score
- 16
Sounds familiar, can't even keep the toolbox tidy for a week ...I clean up my shop (garage) about every 2 years. Then I start a new project, fill the place back up with stuff and spend half my time looking for stuff that I just put in a place I would remember.
rtj
Well-known member
- Joined
- Nov 5, 2011
- Messages
- 3,598
- Reaction score
- 211
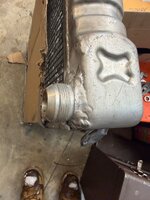
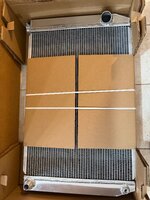
The 20AN top rad fitting was finally finished, and started the bottom fitting relocation. All the crud in the tanks made tacking it on stink. So for safety reasons bought a new rad with 16 AN fitting on top. May swap it out later.
That's a big milestone. Congratulations!
phantomjock
Well-known member
EXCELLENT! 
Cheers - Jim
Cheers - Jim


