Plastic Fantastic 2

VetteMod - Corvette Restoration, Modding & Performance Forum

Help Support VetteMod Forum:

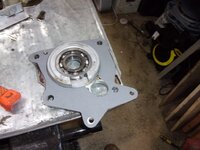
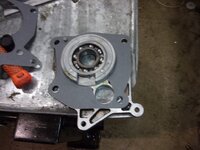
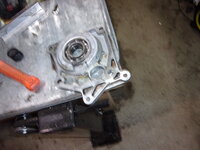
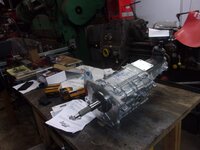
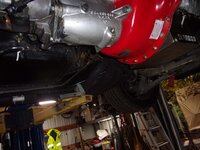
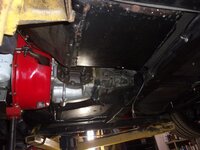
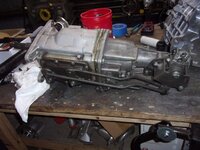
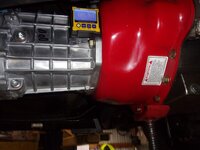
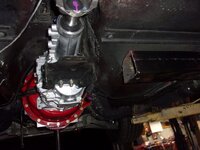
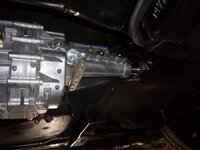
the tl;dr is I think the mid-plate is cracked... but I'm going to run it
so
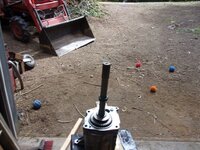
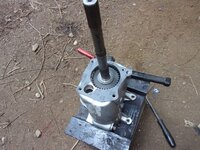
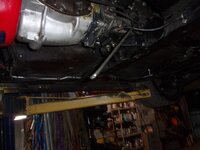
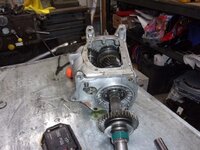
they say you should pull the main shaft out to pull the midplate....
no, you don't
NFftDRkh.jpg
VmeHcxKh.jpg
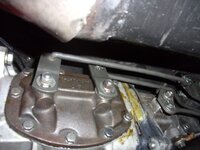
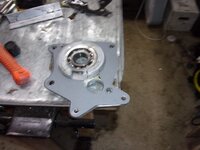
the came a gasket search.edited I'm not convinced the rebuilder made a mistake - granted, the gasket he used was leaking - but still, there's probably a crack here somewhere
bQ5iyAuh.jpg
QE2FWU0h.jpg
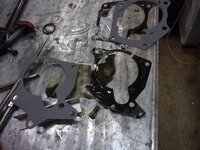
more gasket fun
uwKh2DNh.jpg
YekgFHXh.jpg
7hxhNCFh.jpg
somewhere on here
DbXlh6z.jpg
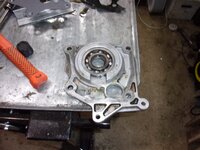
see the dirty blank spaces? those were both sealed and clean 300 miles ago
vb0Pl9Oh.jpg
then there was the moment Luigi was laying at my feet while I dropped a gasket sealant brush on him.... oops
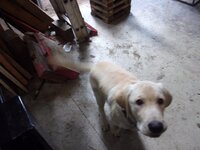
g8fDRyvh.jpg
replaced the bushings while I was at it
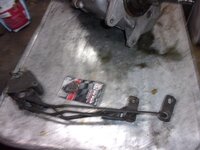
cA6q4bAh.jpg
DkWZc7Dh.jpg
​​​​​​​o9xjcpNh.jpg
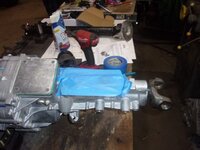
back in and leaking.... we won't talk about how it's sealed now
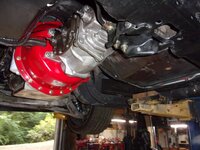
CumSBjUh.jpg
in other news, I can now use my laptop to program the Sniper
PiC9K0Q.jpg
ywPM2e9h.jpg
and in still other news
AwDm9p1h.jpg
tJeotHth.jpg
 
Thinking out loud.

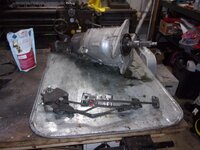
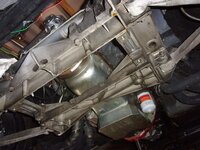
I could replace the midplate, but if you look closely at the case, you'll see the counter-shaft bore is oblong - which means a new case too. Believe it or not, these are very popular and parts are available, new, for them... including upgrades.

I'm pretty sure my Right Stuff tempenant (or permanary?) fix will hold until winter but the writing is on the wall... so what to chose - so far these seem to be the choices.
1) Doug Nash 5 speed ($3600)
2) New Super t-10 with upgrades ($2500)
3) fix and pray ($1000)
4) TKX at $3500
5) T56 - $2500 (found one for that with all the upgrades)

1) - complaints about clunky and a pain when cold
2) - highest rating I've found is 325 ft lbs -though rumor is they can handle more....
3) cheapest - and it leaves me with a spare or sellable trans
4) they can't seem to come up with a price, but I think if I do this one, I'll spend the 'extra' and get the one rated to 900 ft. lbs (stock is 600)
5) requires replacement of my bellhousing so could be the most expensive (and could require hydraulic clutch change)..
 
AGE direct looks like $2240. That is a complete m22 with a super case.

I’ve had one close to 14 years. No issues.

M23 is their new design.

Hopefully their product is still good, but might want to check other forums.
 
As an Amazon Associate we earn from qualifying purchases. Product prices and availability are accurate as of the date/time indicated and are subject to change.
so a bit about P2
Great Stuff has become my go-to stuff for sealing impossible leaks... it's at it again with my trans
o9xjcpNh.jpg
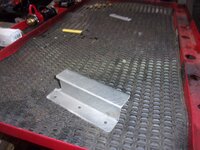
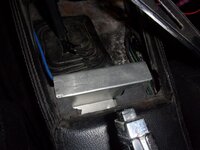
time to attach the console cover plate better
GSw5GITh.jpg
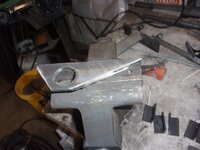
bracket built
HcZPsN2h.jpg
installed
OfU3KzBh.jpg

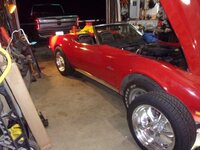
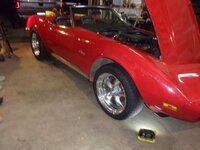
Paul's car is back on the road.... needs an alignment but a bit of muffling for the summer so he can enjoy it until it gets rotten weather.... and now it's safe to drive
the old wheels were held on with the wrong lug nuts so it destroyed all of them
but new wheels :)
pQrVINTh.jpg
need to do some altitude adjustment but they look really good
z9H3Cclh.jpg
Luigi felt his advice was necessary
​​​​​​​RLNeOblh.jpg
 
This had me scratching my head:
Great Stuff has become my go-to stuff for sealing impossible leaks... it's at it again with my trans

Thought that stuff is FOAM. Dropped into the chandelery to get some screws etc - there it was... Permatex Right Stuff.
Does it really go off in a minute? Would it be a suitable replacement for "blue" on the corners of my oil pan gasket on install?

If/When I get this boat sold (tomorrow?) full time on Elvira!

Cheers - Jim
 
This had me scratching my head:
Great Stuff has become my go-to stuff for sealing impossible leaks... it's at it again with my trans

Thought that stuff is FOAM. Dropped into the chandelery to get some screws etc - there it was... Permatex Right Stuff.
Does it really go off in a minute? Would it be a suitable replacement for "blue" on the corners of my oil pan gasket on install?

If/When I get this boat sold (tomorrow?) full time on Elvira!

Cheers - Jim

sorry, this stuff
https://www.permatex.com/products/g...nce-rtv-silicone-gasket-maker-4/?locale=en_us

it doesn't shift well at all if the rods come off
JkxJooQh.jpg
the 2nd lever was backwards (offset out, not in)
GXEtC8hh.jpg

and this hints what's next...
EiF181Zh.jpg
I drove it today and had all sorts of trouble with the fender getting into the tire...since I'm playing with the springs, I'll pull them out and set the camber/castor for racing at ride height.... in other news, I may have new dual adjustable shocks coming...

​​​​​​​
 
centering device engaged
1PIXhLYh.jpg
you knew you saw it somewhere before.... works perfect
gdBEe1Eh.jpg
so it's set with a good baseline

Front -2 degrees, 1/16 toe in
rear -1.1 degrees 1/32 toe inedited
editedit's a good start point, still need to balance the car on scales, but that'll happen later
​​​​​​​
 
drove it today.... I may have to set compression to a stiffer setting. It also can feel loose in the rear (twitchy?) to the point I checked all the mount and adjustment points to see if something came loose...


learnin' any input would be great.
 
Need a little more detail...

Loose [in rear]:
  1. Straight line - Instability
  2. One wheel bump
  3. Hard Braking
  4. Sloppy/slow to take a set in corner
  5. Good turn-In, then washes out
  6. and, more

These are all Problem>Solution based entries in Carroll Smith's Engineer in your Pocket

It's about $20 from A-Z and pdfs can be found online too.
I'll look up a few possible answers while you wait..

It's gonna rain here (Ida)

Cheers - Jim
 
Last edited:
Need a little more detail...

Loose [in rear]:
  1. Straight line - Instability
  2. One wheel bump
  3. Hard Braking
  4. Sloppy/slow to take a set in corner
  5. Good turn-In, then washes out
  6. and, more

These are all Problem>Solution based entries in Carroll Smith's Engineer in your Pocket

It's about $20 from A-Z and pdfs can be found online too.
I'll look up a few possible answers while you wait..

It's gonna rain here (Ida)

Cheers - Jim

*check tightness of all bolts.... also, get full instructions. the QA1 steering adjust rod - it goes to a bolt that threads into the knuckle. They provide 1 washer but don't say which side it belongs - it goes on the inside or, the opposite of the way I'll install it every first time..... :clobbered:

Also need to revisit the spring settings up front, back to a bit of a rub under light, right turn....

and rotated the shock adjust to 9 (out of 11)... seems to handle well, so we will see.... I have Jeep work to do next then I can focus back on this
 
drove it today.... I may have to set compression to a stiffer setting. It also can feel loose in the rear (twitchy?) to the point I checked all the mount and adjustment points to see if something came loose...


learnin' any input would be great.


that sounds like a rear alignment issue. when it travels up and down there is no jerky movements is there? are you using poly bushings in the trailing arms?

I read once that the poly bushings in the trailing arms actually impact the alignment since they dont compress at all during there range of travel
 
drove it today.... I may have to set compression to a stiffer setting. It also can feel loose in the rear (twitchy?) to the point I checked all the mount and adjustment points to see if something came loose...


learnin' any input would be great.


that sounds like a rear alignment issue. when it travels up and down there is no jerky movements is there? are you using poly bushings in the trailing arms?

I read once that the poly bushings in the trailing arms actually impact the alignment since they dont compress at all during there range of travel

washer placed on the wrong side was the issue this time. Drove it yesterday and it handled fine - granted, there was no hooning but no wiggle either.
 
I'll take a stab at it - but this is just cursory. I found a couple of SAE articles - but not a member - so didn't download them.

I have "invested" in a square setup. The wheels are 15x10, the tires are Pirelli P-Zero (275/695/15). I specifically went to a square setup as it will (should) give neutral handle - from a wheel and tire input. All other "habits" (good or bad) will be from the chassis and suspension setup. So, my choice is made. As I have no time in the car yet, I can't comment. I expect I'll keep it square as I can move wheel/tires front to rear and get another session or two out of them. My testing plan is to get the car done and run some sessions without the body, and sort chassis and suspension (Exo-Vette). Then, add the body and aero and see what works/doesn't.

Back to your Question:

Your setup is already staggered. With bigger rear tires than front - you gain traction from the rear - great on corner exit and the rush down the straight. But, you could get loose with too much power. Your alternative retains the stagger setup, so I can imagine (guess) the handling may be similar, barring any change in ride height. I did a quick run of the wheel diameters and found little to no change in the roll center between 18 and 19 inches - note I kept the same tire width 275/45 on each run. I'll send you a copy of the excel spreadsheet I used. You can play with it and see what happens - it just one axle at a time - not a full car analysis.

I wonder if any iRacing gamers might have any inputs - so to speak? Know any?

Cheers - Jim
 
​Well, I did it.edited didn't buy a kit because I don't care about my floor AND the driveshaft wouldn't work anyway....edited

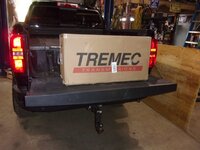
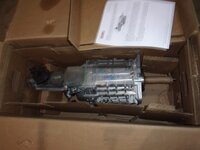
I got the TKX with the 2.87 first gear and .68 overdrive. that does mean I need to do something about the race RedZone lifters - but I think I have a plan - I'll call tomorrow to double check but I think I can get the rebuilt to the street spec (not the race spec which is causing my lower oil pressure at idle). While this won't be a DD it might actually be capable of driving to autox next year.

In that vein, Oct 11 is the last of the season for us, then I'll start getting it ready for Las Vegas Optima next year. Just wheels - and I think I have a pretty good idea of what I can do - C5 Z06 fronts, C6 GS rears.... thus my question about wheels and square, I can only get an 18" wheel - but I'll go ahead and step up to 200 tw tires for next year....

In that vein, I'm driving to SEMA (mostly because I can) this year, so I may try to get there a couple days early and get some track training the day before SEMA starts....
 
Forgestar F14

opinions? watch out for....?

I may have found a reasonable deal on take offs - 18" wheels, which means different rear tires .... but I'll probably simply buy all 4....
 
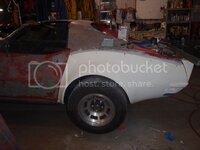
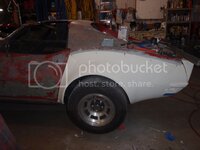
1 'down' 3 to go... one thing I did realize is I'll not be gluing the door post in place... where the skin is level with the flare has quite a gap in the middle of the door/flare.... ah well, fiberglass makes a good gap filler
P1231593_zpsg2dwk92x.jpg

​​​​​​​

I'm at this point with my flares from the same place , I have the same problem with a gap in the middle , by gap I mean its sitting out from the door pillar , about 1/4 of an inch on passenger side and wider on the drivers side . If I push hard it will close in , but it takes too much force and I think there could be problems later . I too have an aftermarket new tail light panel(not CIC) so lining up all 3 to fit well in the back leaves me with this . The top part of my flare panels are just overhanging the door gap as well , but its seems the only way at this point .I haven't glued anything yet.

Just interested in seeing what you ended up doing to get yours on.
 
1 'down' 3 to go... one thing I did realize is I'll not be gluing the door post in place... where the skin is level with the flare has quite a gap in the middle of the door/flare.... ah well, fiberglass makes a good gap filler
P1231593_zpsg2dwk92x.jpg

​​​​​​​

I'm at this point with my flares from the same place , I have the same problem with a gap in the middle , by gap I mean its sitting out from the door pillar , about 1/4 of an inch on passenger side and wider on the drivers side . If I push hard it will close in , but it takes too much force and I think there could be problems later . I too have an aftermarket new tail light panel(not CIC) so lining up all 3 to fit well in the back leaves me with this . The top part of my flare panels are just overhanging the door gap as well , but its seems the only way at this point .I haven't glued anything yet.

Just interested in seeing what you ended up doing to get yours on.

it wasn't easy. Do you have the wheels you plan on running on the car? everything lines up off that - because the flares are pretty thin, you can use heat to get it to relax enough to move. Outside of that, I had to cut the flare from the rest of the fender and move it forward on the front to get everything to line up. If you're having too much trouble getting the curve right, you may have to section the flare to get it right..... also, contacting Josh at CIC for tips is available.... while I have some annoyance at my situation, I think he does his best and is quite helpful
 
it wasn't easy. Do you have the wheels you plan on running on the car? everything lines up off that - because the flares are pretty thin, you can use heat to get it to relax enough to move. Outside of that, I had to cut the flare from the rest of the fender and move it forward on the front to get everything to line up. If you're having too much trouble getting the curve right, you may have to section the flare to get it right..... also, contacting Josh at CIC for tips is available.... while I have some annoyance at my situation, I think he does his best and is quite helpful

Well , I have the rear tyres and a device called a "wheel fit " which is an adjustable bracket which clamps onto the tyre and is bolted to the hub , but is adjustable . (so you can get the right backspace and offset you need ). I haven't got wheels yet as I still have to do this to the front.

Anyway the tyres fit really nice on the back as is. Only worry for me is suspension travel (settle) between now and when its all back together .My suspension is unloaded now so I set it at full low (transverse spring at rear ) I have a heavy rated new one coming from Vansteel soon , I got it shortened and its supposed to be about 480lb . Motor ,g/box ,doors (loaded) , empty fuel tank are on the car now.

I tried a heat gun on the offcuts , but I think I overdone it in a too small an area . It just fractured everything as I tried to bend . I will play around a bit with that again on some wider off cuts . Thanks for the advice .
 
it wasn't easy. Do you have the wheels you plan on running on the car? everything lines up off that - because the flares are pretty thin, you can use heat to get it to relax enough to move. Outside of that, I had to cut the flare from the rest of the fender and move it forward on the front to get everything to line up. If you're having too much trouble getting the curve right, you may have to section the flare to get it right..... also, contacting Josh at CIC for tips is available.... while I have some annoyance at my situation, I think he does his best and is quite helpful

Well , I have the rear tyres and a device called a "wheel fit " which is an adjustable bracket which clamps onto the tyre and is bolted to the hub , but is adjustable . (so you can get the right backspace and offset you need ). I haven't got wheels yet as I still have to do this to the front.

Anyway the tyres fit really nice on the back as is. Only worry for me is suspension travel (settle) between now and when its all back together .My suspension is unloaded now so I set it at full low (transverse spring at rear ) I have a heavy rated new one coming from Vansteel soon , I got it shortened and its supposed to be about 480lb . Motor ,g/box ,doors (loaded) , empty fuel tank are on the car now.

I tried a heat gun on the offcuts , but I think I overdone it in a too small an area . It just fractured everything as I tried to bend . I will play around a bit with that again on some wider off cuts . Thanks for the advice .

Fiberglass (or glass for that matter) never stops moving, granted, it's slow - but heat and time does let gravity affect it. I'm not sure I'd use a heat gun, I used a radiant heat dish and let it 'cook' for awhile.... probably never got above 100* but it did move.

but keep in mind, I didn't have to move it much, I was more concerned that it relaxed into the shape I screwed it into.... I use sheet metal zip screws to hold it in place then aim my radiant heat dishes at them for a day. Once 'done' I could remove the screws and it'd hold its shape.
 
it wasn't easy. Do you have the wheels you plan on running on the car? everything lines up off that - because the flares are pretty thin, you can use heat to get it to relax enough to move. Outside of that, I had to cut the flare from the rest of the fender and move it forward on the front to get everything to line up. If you're having too much trouble getting the curve right, you may have to section the flare to get it right..... also, contacting Josh at CIC for tips is available.... while I have some annoyance at my situation, I think he does his best and is quite helpful

Well , I have the rear tyres and a device called a "wheel fit " which is an adjustable bracket which clamps onto the tyre and is bolted to the hub , but is adjustable . (so you can get the right backspace and offset you need ). I haven't got wheels yet as I still have to do this to the front.

Anyway the tyres fit really nice on the back as is. Only worry for me is suspension travel (settle) between now and when its all back together .My suspension is unloaded now so I set it at full low (transverse spring at rear ) I have a heavy rated new one coming from Vansteel soon , I got it shortened and its supposed to be about 480lb . Motor ,g/box ,doors (loaded) , empty fuel tank are on the car now.

I tried a heat gun on the offcuts , but I think I overdone it in a too small an area . It just fractured everything as I tried to bend . I will play around a bit with that again on some wider off cuts . Thanks for the advice .

Fiberglass (or glass for that matter) never stops moving, granted, it's slow - but heat and time does let gravity affect it. I'm not sure I'd use a heat gun, I used a radiant heat dish and let it 'cook' for awhile.... probably never got above 100* but it did move.

but keep in mind, I didn't have to move it much, I was more concerned that it relaxed into the shape I screwed it into.... I use sheet metal zip screws to hold it in place then aim my radiant heat dishes at them for a day. Once 'done' I could remove the screws and it'd hold its shape.

If the radiant heat dish is like what they use in a paint booth ,I might be able to borrow one and see how I go on some off cuts first . Thanks for the tips .
 
​Finally back on this
fOr6ObSh.jpg
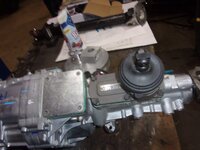
pull the shifter off
Ui9hYQXh.jpg
J5AEyEih.jpg
fluid looks perfect!
l2Fnqd8h.jpg
wonder what I'll do with trans next...
5S4v83nh.jpg
and hooks
OwZbbXUh.jpg
basically they attach to the prior spring mounts....
7YH3iE3h.jpg
CpXGE1Gh.jpg
WtHKuj9h.jpg
wrapped the hook with stainless rod - basically it adds a lot of strength
tvngZuPh.jpg
bit of cleanup tomorrow and paint them "please hook here not on a headlight red"
RCphxH9h.jpg
 
cleaned up
1y4L0s3h.jpg
now with paint
5mIgmA4h.jpg
installed
UTFcdgkh.jpg
rear matching
aKoSJzfh.jpg
for sale ;)
oejUQyZh.jpg
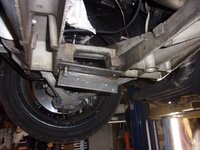
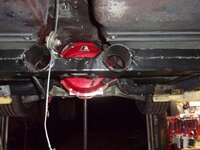
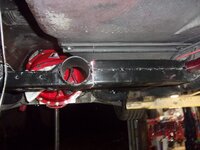
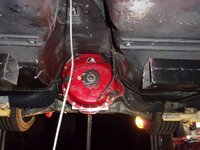
first problem... the cross member is simply in the way
jfwybhlh.jpg
I could have got the trans in/out without removing it but that would be a real problem on race day since it'd mean moving the motor
qBZPGcah.jpg
now it's not a problem
xBMrVCUh.jpg
first issue... a bit of massaging and it's fine now
qRdlcPAh.jpg
time to set angles before building the cross member
VWKmdkZh.jpg
a bit of envisioning going on
Xx0FPvvh.jpg
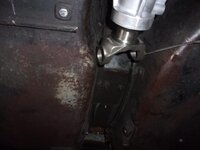
it does fit really well, I have no trouble cutting the floor - which solves the issue of whether or not I need a special shifter
6CSyCCvh.jpg
 
Back
Top