C3/4/5 frankenstein frame

VetteMod - Corvette Restoration, Modding & Performance Forum

Help Support VetteMod Forum:

what flares did you get?

Custom Image 2inch front and an "anti-mudflap" 2inch for the rear

Let me know how they look, a friend of mine has the 2/2 flares. I have 2/4 - what's interesting between him and I is he just told me he wished he went with 4 inch rears but he used the 75 up rear cover and thinks the 4 inch flows better (so it's more a taste thing then anything else). He also doesn't like the CIC tail (which, honestly, was the thing which convinced me to go with them)
 
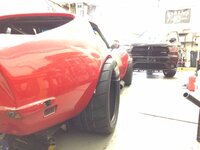
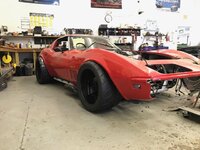
So the flares came in today... Fronts are perfect, I like the way they look and the fitup looks good so far. The rears are... not what I was hoping for. The flare design looks nice, the panel is nice, and my mudflap delete came out great. What kills me is that the wheel opening is almost 2" LOWER than the stock wheel opening. I always thought that all these flared cars that Ive been looking at looked taller than mine even though there is the same wheel gap... now to chop up my $1100 rear quarters... :rain:
 
In other and better news, heres some of the update pics:

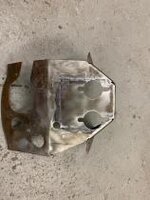
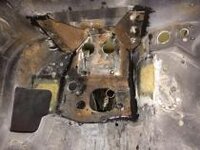
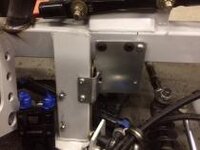
Firewall brace re-worked for the balance bar setup. The cutout for the key lockout lever was filled to strengthen the piece. Im going to bond it to the firewall instead of the factory rivets... I feel like more bonding area will make this section much more rigid. (Anyone know why theres an Omega stamp of this piece? Its never been off the car before...)
thum_6155c1868416f22d.jpg

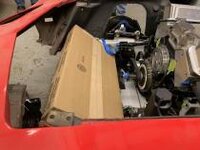
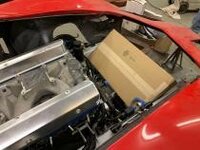
And some radiator mockup... 14" x 27.5" Double pass. Going to toss the hood on to make sure I can still open it all the way, but from the looks of it, this is my size and placement
thum_6155c186841867d8.jpg

thum_6155c1868419aac7.jpg
 
I'll post a link to Regis thread tomorrow - he's my neighbor and bought the 2/2 combination like yours. I don't remember it being 2" lower... I do know that a lot of trimming is required.... I guess my thought is looking at his thread and I can pop over for measurements - because that lower comment doesn't jive with what I've seen.... of course, I was told they 'improved' the design so I dunno....
 
My Christmas present from the family "I hope you never actually use this" :lol: Safecraft 5lb Fire system. It uses 3M Novec 1230 chemical. It really is a no brainer even if I wasnt going to track this car... I was sold on this idea when I was given this scenario:
say youre doing 100mph and you notice the car is on fire. You need to stop the car (assuming all systems are still working properly), un buckle, get out and then fumble for your fire extinguisher. At LEAST a minute, more if the fire extinguisher isnt easily accessible. And thats just to save the car... If all hell breaks loose and the interior (you!) are on fire, a fire system can buy some very valuable time. I was going to put a fire extinguisher in here anyway, so whats the big deal to add 20 ft of aluminum line and a pull cable? Ill step off my soap box now...

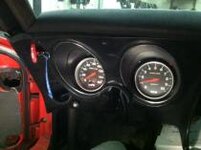
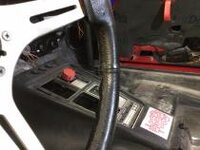
So the A-pillar bar required the relocation of the light switch, leaving an ugly hole that isnt easily fillable... killed two birds with one stone! Easy access for me while strapped in, and for a corner worker to grab through the window


thum_6155c26ca8101554.jpg

Im going to run an under-dash, engine compartment and fuel pump/tank nozzle. Ill likely have the tank in the passenger side storage compartment to keep it low, centrally located, and the head away from anything that could accidentally knock into it
 
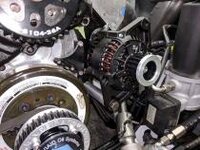
After much mental debate... Ive decided on an alternator. NipponDenso Mini... My worst case scenario amp draw exceeds what these are capable of (90A rebuilt); BUT that scenario is mostly avoidable (parallel parking with headlights on, blower motor on, rad fans on, radio on, the low engine RPM and electric power steering pump at max draw) If its unavoidable, its only for a second or two and the battery can fill in the missing amperage. Ill deal with the lights dimming for a few seconds to gain:
Less weight, lower mounting position, more clearance on other parts, more radiator ducting room.
thum_6155c33fab435f1d.jpg

thum_6155c33fab4282b4.jpg

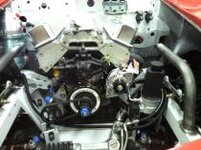
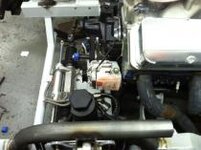
I have also moved the oil cooler thermostat to the right (in these pictures) of the steering rack to lessen the cooler line lengths, and make room for the lower radiator hose. Unfortunately, this means extending the lines for the PS cooler to the passengers side. BUT this gives me more room to play with oil tank position and keeps the oil cooler lines further from the headers. Everything is finally finding its home after months of flip-flop design changes :mobeer:
 
As an Amazon Associate we earn from qualifying purchases. Product prices and availability are accurate as of the date/time indicated and are subject to change.
That is nice and tidy. For most situations, it will probably be adequate as you say. How often would you be at a max load condition for long enough to actually drain the battery? Probably not too often. I think the packaging benefits will far outweigh the potential overload issue.
 
That is nice and tidy. For most situations, it will probably be adequate as you say. How often would you be at a max load condition for long enough to actually drain the battery? Probably not too often. I think the packaging benefits will far outweigh the potential overload issue.

Thanks! While the battery is quite small, I agree... the power steering pump is actually supposed to connect to the charge light terminal on the alternator so it would in theory turn off until the load is lessened but I want everything except the pump to shut off in that scenario. I think too much... back to work so I can drive this thing and prove my theory wrong :flash:
 
After much mental debate...to gain:
Less weight, lower mounting position, more clearance on other parts, more radiator ducting room.

Oh... LESS Weight, Clearance, UMMMM .. . ducting.... Ummm I like!


Pictures please.

Cheers Jim

Hopefully Ill have some pictures really worth posting soon...
Custom lay down/hood exit radiator is in the design phase with Howe Racing, I just got my PS cooler from Improved racing to match the oil cooler (these are kick ass pieces, Ill post a few pics of them with a worthy camera) and my fittings for the anti-cooler (vintage air heater!!) should be here shortly.
 
That is nice and tidy. For most situations, it will probably be adequate as you say. How often would you be at a max load condition for long enough to actually drain the battery? Probably not too often. I think the packaging benefits will far outweigh the potential overload issue.

Thanks! While the battery is quite small, I agree... the power steering pump is actually supposed to connect to the charge light terminal on the alternator so it would in theory turn off until the load is lessened but I want everything except the pump to shut off in that scenario. I think too much... back to work so I can drive this thing and prove my theory wrong :flash:

Did I miss a picture or post of what battery you're planning to use? Please pardon the oversight if I missed it.

I'm using the same design alternator as you. I'm still in the process of trying to find a low cost pulley replacement (ie: larger diameter) for it. Even with my underdrive crank pulley the alternator has got to be turning some serious RPM during track days.
 
Did I miss a picture or post of what battery you're planning to use? Please pardon the oversight if I missed it.

I'm using the same design alternator as you. I'm still in the process of trying to find a low cost pulley replacement (ie: larger diameter) for it. Even with my underdrive crank pulley the alternator has got to be turning some serious RPM during track days.

I was running an odyssey PC680 (15.4lbs) but I think I’m going to try their PC625 (13.2lbs). What is the pulley ratio on your alternator? Mine is 1.45:1 overdrive. I’m thinking I may need to drive it even more but at 6500RPM the alternator is already closing in on 10k rpm. I inquired about the max recommended shaft speed but I’m not holding my breath waiting for a response...
 
Did I miss a picture or post of what battery you're planning to use? Please pardon the oversight if I missed it.

I'm using the same design alternator as you. I'm still in the process of trying to find a low cost pulley replacement (ie: larger diameter) for it. Even with my underdrive crank pulley the alternator has got to be turning some serious RPM during track days.

I was running an odyssey PC680 (15.4lbs) but I think I’m going to try their PC625 (13.2lbs). What is the pulley ratio on your alternator? Mine is 1.45:1 overdrive. I’m thinking I may need to drive it even more but at 6500RPM the alternator is already closing in on 10k rpm. I inquired about the max recommended shaft speed but I’m not holding my breath waiting for a response...

I calculated my pulley ratio to be 2.3:1, so it's turning a bit faster at times on the track than I care for or need.
 
I calculated my pulley ratio to be 2.3:1, so it's turning a bit faster at times on the track than I care for or need.

That’s good to know yours works with rpms like that... I need to get max amperage as soon as possible so I may up my ratio to something close to yours
 
Did I miss a picture or post of what battery you're planning to use? Please pardon the oversight if I missed it.

I'm using the same design alternator as you. I'm still in the process of trying to find a low cost pulley replacement (ie: larger diameter) for it. Even with my underdrive crank pulley the alternator has got to be turning some serious RPM during track days.

I was running an odyssey PC680 (15.4lbs) but I think I’m going to try their PC625 (13.2lbs). What is the pulley ratio on your alternator? Mine is 1.45:1 overdrive. I’m thinking I may need to drive it even more but at 6500RPM the alternator is already closing in on 10k rpm. I inquired about the max recommended shaft speed but I’m not holding my breath waiting for a response...

This thread has a pretty good discussion of light weight batteries.

Pappy

https://www.corvetteforum.com/forum...cing/4229909-lightweight-racing-batterys.html
 
A major milestone tonight! Looking through my photos, it shows I took the body off on November 30th 2014!! Thankfully I didn't hit 4 whole years :3rd:
D7BCC35A-0F0A-4A5B-A576-76DC188F0413_zpsplj8iqli.jpg

................

I've got a few places to trim for 100% fitment but otherwise all went fairly smooth! My goal is to have a car that moves under its own power by New Year's Day... back to work!

Any chance your original fuel tank is available to get an empty weight?

Absolutely no rush, obviously, but thanks for any help.
 
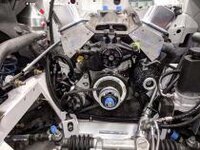
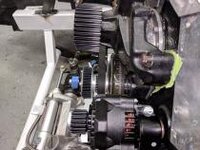
Small, but some progress... TSP Performance 90A alternator came in along with some Jones Racing HTD pullies. The water pump is 1:1 and the alternator is 2:1. I trimmed down the alternator pulley a bit on the lathe to get it closer to the case so I can keep everything as tight as possible to the motor.

thum_6155c44eef4d08e6.jpg

thum_6155c44eef4a176f.jpg

thum_6155c44ee911b92b.jpg

Any chance your original fuel tank is available to get an empty weight?

Absolutely no rush, obviously, but thanks for any help.

22lbs with the cap and sender still installed :drink:
 
Slowly picking away at the ever-growing list of to-do's...

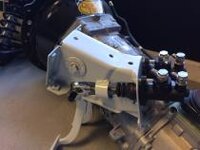
I got the firewall brace bonded to the firewall, finally. I used 3M 08115 Panel bond. My goal was to use the panel bond instead of the rivets to increase rigidity so that I would get less flex, and therefore better pedal response under hard braking.

thum_6155c6982e118f23.jpg

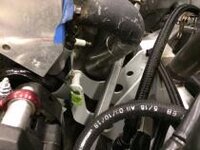
Next on the list is the heater hoses... Intake side is done, I still have to make a 1/2NPT to 45* -10AN for the waterpump side

thum_6155c6982e1406dd.jpg

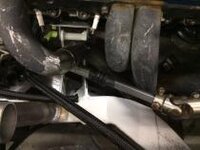
Header mockup is done... had to re-route #1 tube so that I can run a straight shaft with only 2 joints, which also gives me more clearance for the oil cooler lines. Thats two things on my list taken care of with one modification :hunter:

thum_6155c6982e12da43.jpgthum_6155c6982e152497.jpg

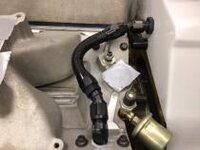
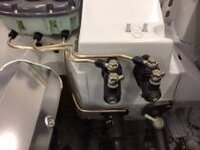
And lastly, the clutch master reservoir line is finished. I tried to figure out how to get an AN fitting on the master, but the inlet is too large to machine and tap for a banjo thread. Keeping it simple for now with a short rubber hose connection.

thum_6155c6982e165413.jpg
 
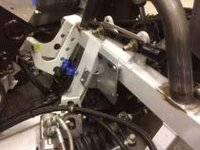
Power steering pump bracket... The pump mounts using the two top rubber isolated bolts, and Ill have to make a piece of poly to secure the bottom of the motor with the bracket with a hose clamp or something similar. The two slots at the bottom are for the hose clamp to pass through.

thum_6155c6ca39b15253.jpg
thum_6155c6ca39b29ab7.jpg
 
Crossed this off of my "list of things to do, that I forgot to write on my list of things to do"

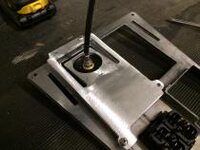
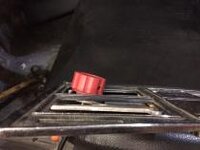
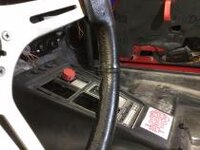
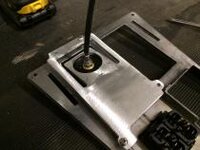
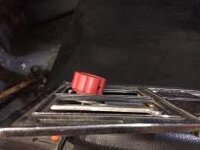
Part of my balance bar project was figuring out where to put the bias adjust... Easy to access, short cable run and make it not look too out of place.
thum_6155c6e0fa848ab0.jpg
thum_6155c6e0fa87e022.jpg
thum_6155c6e0fa8ada37.jpg
 
Crossed this off of my "list of things to do, that I forgot to write on my list of things to do"

Part of my balance bar project was figuring out where to put the bias adjust... Easy to access, short cable run and make it not look too out of place.
thum_6155c6e0fa848ab0.jpg
thum_6155c6e0fa87e022.jpg
thum_6155c6e0fa8ada37.jpg

That should work!
 
A bunch of small projects coming to completion!
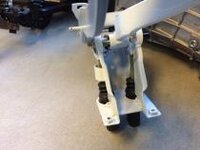
Pedal box back from paint, so the brakes are much closer to putting fluid in!
thum_6155c959f53c1321.jpg
thum_6155c959f53d4499.jpg


The last of the heater hose fabrication is finished, lines tightened and crossed off the list

thum_6155c9ad7b340c23.jpg
thum_6155c9ad7b354647.jpg
 
6155cd1fe8d88677.jpg

6155cd1ff7b0e2f4.jpg

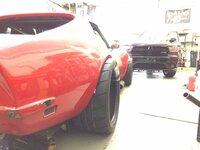
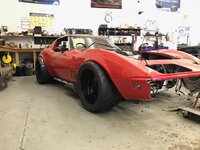
Rear tire showed up for mockup/wheel fitment... 345/30/19 Toyo R888R
a 2.5" flare would give me ample clearance on the frame and wheel tubs, I may run it a bit tighter to the frame once I get the wheel fit tool and see where everything ends up. For now its just thrown in with no account for camber or toe. It sure looks beefy!

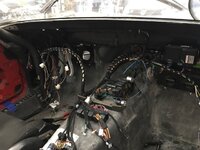
Also been plugging away at the interior wiring harness... Almost done... Enough to get it started with basic function. Keeping homage to the euro details on the car, I used Tessa cloth tape and half-wrapped sections like alot of newer Mercedes and BMW's. Almost everything is connectorized to make servicing or removing the interior quick and easy. A few switches are just regular male spades and in the interest of driving this thing ASAP, I just left them alone for now. In the future they will be properly terminated

6155cd1ff7aeed8f.jpg
 
Flares will be nice. With - or without the "mud-flaps?"

Looks like we've found the same wire-wrap materials (Alex-Tech?). It is the "fabric" that wraps/expands around like a tube? Not cheap - but way better than the old plastic spiral wraps! Understand no melt until about 400F.

Cheers - Jim
 
6155cd1fe8d88677.jpg

6155cd1ff7b0e2f4.jpg

Rear tire showed up for mockup/wheel fitment... 345/30/19 Toyo R888R
a 2.5" flare would give me ample clearance on the frame and wheel tubs, I may run it a bit tighter to the frame once I get the wheel fit tool and see where everything ends up. For now its just thrown in with no account for camber or toe. It sure looks beefy!

looking GOOD! Out of curiosity why did you go with a 19" tire? There are a lot more tire choices, especially in track tires, in the 18" size.
 
A C3 with flares is always a good thing. :clap:
 
Back
Top