My '76 restoration (long post)

VetteMod - Corvette Restoration, Modding & Performance Forum

Help Support VetteMod Forum:

Happy day! Moving under it's own power.

So you drove it sitting on the floor?
 
Hey, Denpo! I have been away for a while and thought I would check in on you guys. Looks like you are making great progress.
I think I may be done driving for the winter here in iowa and will start my winter upgrades soon. They are minor compared to what you are doing.
keep up the good work.
Brent
 
As an Amazon Associate we earn from qualifying purchases. Product prices and availability are accurate as of the date/time indicated and are subject to change.
First of all, sorry everyone who replied to my post, for some reason I didn't receive notifications about those, thanks for for the kind words.
Alas the project went into another speed bump.
Yes I managed to drive it sitting on the floor only to have the engine running very rough. After a tiny round trip limping around the neighborhood I went on to check the engine. Bad news: metal shreds in the driver side head, look like a spring damper broke, even if I couldn't find the culprint yet.
I order a compressor to spark plug adapter and try to remove the springs with the head on, but the retainers seem stuck, no way I could remove the spring without removing the head.
While I have the valve cover off I could see that the part list I've been provided when buying the car is probably mostly BS.
At least springs and lifter arms are not what the seller told me they were.
All that kind of discouraged me to fight for a proper 2017 run and went on to home remodeling/fixing projects that had been waiting for way too long according to SO. There is also this 3D printer that's waiting to be assembled.

With that 5.3 L33 sitting in the garage I don't really see the point pouring more money in the failed SBC.
So the plan for now it having it running next year with the LS engine.
And since the floorpan is still a bit too high for my 6"6' I'm looking forward to install sidepipe to clear the underside and lower the driver seat.

Have you thought about putting the logo on the shifter knob?
No I didn't think about that, but that's a good idea, will think about that.
 
Hello fellow vetteheads. It's been a long time since I've last updated.
Last year's work on the Corvette ended up with an engine failure at the first try.
Turns out I'm probably the one to blame since it appears valves' lash were totally out of wack, to the point the rockers were floating at some point during the cycle. The engine ran at most 4 time during the 8 years of the restoration process, only a couple minutes at a time and yet it seems it was enough to get the lash completely off. Could it be it's a flat tappet engine, you tell me.
So yeah, it pretty much ruined engine right from the start.
Well, maybe no ruined, but it would take to have the engine apart to really tell.
The amount of work to investigate is pretty much equal of an engine removal, so, since I have this 5.3 LS I assembled the year before I decided I'd go straight for the LS conversion that was I end goal.
If all goes well I could inspect clean and fix the SBC later for resell or whatnot.
So here I am with a fresh new plan and energy. Morale was low after the engine when kaboom, but I got over it, took time to work on other non Vette related task that were taking dust in my todo list and now I have needed time (and probably $$$) to make it happen.

This LS engine started with the purchase of an L33 shortblock on the LSTech classified, got it for 700$, I think this was a fair price.
From there I purchased from many sources (ebay, forums, kijiji, scrapyard) the missing parts at the best deal.
Basically what I got now it a 5.3 LS6 engine:

Flat top stock pistons.
used 799 heads ported in-house.
used LS6 stock cam, pushrods, rollers.
new LS6 valve springs.
Double roller timing chain.
Later LS6 valve cover.
Batwing oil pan.
Truck harness I rewired for car use.
Truck cable actuated throttle body.
Truck MAF.

At the time I had the engine put together (but not assembled), just to make sure the big LEGO was completed.
Now it's time to disassemble every again, take the shortblock appart and inspect everything.

Cylinder walls (1 to 8):


80-bmmmjqu_a876e3906ec07db729828d0d51798db7ca6e74fb.jpg

80-3d1d2us_75c844455b65110fbc9e879bc194bc28ac804a5c.jpg

80-vq33nqs_67b30c7868fb1e43d47926b137cd0d8f4f584ccb.jpg

80-klz8pms_85d2ceffc92b1109363020929ad9f3ece9ce2976.jpg

80-lqvnplb_ce462e25634c96b8a195114a299f683fdce78323.jpg

80-ruomshm_11827fba042600edc440f4899065c329c3aef459.jpg

80-ur8wtmu_0a237f3b46edad3ceec115ccdcf20745def9a3b0.jpg

80-2cquwif_6025f4d00f972aa465970130e94c143ef8b47164.jpg


While cylinder wall seem to still sport the honing pattern, you can clearly see cylinder #3 has seen better days.
Scores can catch a finger nail and match small score on the piston between the top and the compression ring.

Is it doomed for reboring or should it be ok to use as is?

Main bearing: (top and bottom, 1 to 5)

80-nrwdebm_2d8cb8f7ba7bb93cea6b9a0b0adcd0d0047c5dec.jpg

80-r8yfbx3_1de8703fc995c559ee27afc9c5d33003f1e339f6.jpg

80-jbevyon_6f5b08e7c24f2a0c8dceabe7a24f268daf43dbd4.jpg

80-c7lyurf_200d72b0c35e0da5e5dfe53ee5f89058f0d95972.jpg

80-yvo1gxs_a9b513ac522097596c6ba780de0a31ca53ed6294.jpg

80-5olz6ke_fae8dfb7f69bc653058de5690001ddd19e313488.jpg

80-jnajoep_d0a7c7373de6698374fbd6487be0d9b770f00670.jpg

80-updc870_477aeb739f0ac4b711dcc0768a7ba90dedcbd6f3.jpg

80-5a7hyzx_47b40bbb7374b5b1fa130940f4569b75320f6976.jpg

80-lqsyhcq_71b47f03179ba919d1314ca8b3eb379fa4954a2e.jpg


I'm no expert in mail bearing, I just found that bottom bearing looks nicer than top bearing, but that's all. I'd love you guys tell me what you think of those.

Since I'm right at the start, if you guys got suggestion on what I should upgrade/replace, I'm listening with both ears.

Thanks for reading me.
 
I did a little 'resurfacing' of the block. A thick piece of glass and some sanding paper can do wonder.


80-4yojkmz_a4693a182b48b748e473f2169a4b8de68d97758b.jpg


The horizontal line is a camera artefact, because the surface was too shiny.


80-mcjpnhx_f4eeae44a0c50fd8eb7812aad64313ee4c297e9c.jpg


80-dpihhj2_f2ed5eae412064a8fd1b65192e454cc74206ac24.jpg

I went 120 - 320 - 600 - 1200 grit on them.

I also received my bearing removal tool, so now the block is absolutely bare, reading to get bored and cleaned.

80-coovuga_5a1ea0a6eb8daf4eaa6874d2d6c772d3cd209c6a.jpg

All my orders should be delivered at my border PO box by tuesday. Maybe I can get it bored before next weekend. *finger crossed*
 
well too bad on the old engine but who can argue with an LS...looks good
Well, the SBC may not be that damaged, maybe after inspection it will find another life in some drag racing setup. It's supposed to be forget all the way down afterall. I'll wait until disassembly to confirm this, looking back it's clear previous owner's best quality wasn't honesty.
LS looks rather since (I will miss my gilmer belt setup tho) but more importantly (to my eyes) it's modern, and should provide a more balanced delivery of power. It's gonna be a 5.4 LS6 basically.
 
Tonight I upgraded my rocker arm.


Pressing off the stock setup


80-vmq6fbt_ff052c4104df171dde12ba4e52fd849d43980dd6.jpg


Pressing in the new stuff
80-begh1q2_5f2f6365cc9d1ca7d600b93fbf8328c34f500855.jpg


And done!

80-idihz6o_f7e991e06d5d8ea4af60dc1642486c073e59f1fe.jpg


80-ovjtec3_57a2cf1adc1730c728cbefe87b5985920d12137d.jpg


Not much of a performance issue, rather a insurance I won't get the engine stuffed with bearing needles in case of catastrophic rocket arm failure.
 
those certainly look beefy, nice work
You betcha, thanks.

Sorry for reply late all the time, I don't receive post notification anymore, gonna have to check my thread setting.


Just got the block back from the shop. They were awesome, for the price of the boring, they've thrown in the honing and the washing.
Now it's a 5.4L.


80-9mccyls_af5e22cb45764f938f42c99ca3508fa95e2005d0.jpg


80-eaj7bzc_7d4db43107d88ae95bcf849be390e5d6b83586bb.jpg
 
Crank clearance checked, 0.002 all around, calling it good.
Crank is in :


80-aauudxe_3a9b597c1169cb5edcebab091fdf77877de5cdd2.jpg


80-eqhlvul_4d2c0be0fa7098ce34ef6e8c131c4f888c8060d6.jpg


Piston rings have been gapped, I opted for 0.021 top, 0.023 bottom.
Next step it to check crank runout and rods bearing clearances.
 
Clearance on connecting rod is 0.002 +/- 0.00025
Crankshaft play is 0.0025, we're all good.


New pistons are in.


80-8lw5gir_d5d014ff02a86f34c0ad2a9ca8485cc7379bc04c.jpg


80-ukptvac_c45dccaa8d5c563dbbc8d37e46d955fb2eb603f5.jpg


80-3ghbczr_c1dc87490c53cb47b6e534cff2f05bf1de48e16a.jpg


It all went butter smooth with the tool my machinist made me out of bronze.

When I saw how easy it was with this kind of fixed diameter tool, I had to try. And since those tool don't come in 3.820" size I had to have it made.


80-ztp96cu_35cc5e4f560c94533da0ebe4077a9a9ffe54f9b1.jpg
 
there is something beautiful in looking at machined metal, that looks very nice

And worked beautifully, a couple of wack with the palm of the hand was all what piston needed to slide in the cylinder.
My late father was a machinist, I actually grew in a valley were almost everybody lives from machining, every summer jobs I had were spend attending a CNC or a Lathe.

Damn, I wish I had space to host a lathe and a mill.
 
Ok, took longer that planned, but the engine is finally done.
After receiving my LS7 cam (thank you mggray87 !), I tried install it only to discover I borked the cam bearing install. So I caved in, took everything apart again and let the work to competent people, namely the shop that did the boring. Once again big thank to Moteur Ultra for the cheap and good work.


Among the update, there is the double cam chain, the LS2 chain damper and the cam bolt lock plate. The one I don't have picture of is the LS6 valley cover, with integrated PCV oil baffles.
git4czb_571fb69c6cdf81b3a33ccc4091fedaa4f10112d7.jpg


Here is it. I'm not sure this accessories setup will fit....
Notice the fitting tapped into the water pump for the vapor line.
Crank pulley installation was no joke, torquing a sacrificial bolt to 240lbs to make it seat was quiet a workout.

r4jpp1w_38a7a9c55f85ffeaec7c20d1b2100fd506e74382.jpg


All I need now (beside sorting out the wiring harness grounds and VCC) it to find hose for the vapor line and the PCV.
rpsvftg_0980fa164be67dc52e7c1cf4fe39e353afae11df.jpg


Exhaust collector studs were all bent and stuck. Since GM canada want 20$ for a single of those studs, I made up a mine.
Mini cat are fitting in nicely, which is normal since the pan and the exhaust are coming for the same car.
One concern tho, I tested where my clutch Zbar stud adaptor is supposed to land and this does not bode well. Look like the manifold are right in the way. *sigh*, what will this mean? headers or hydraulic clutch?
xpcktuh_9eb4a2cf46c2117c7e49a37cc0c687789e027562.jpg


One note : I had problems with my cometic head gasket, one of the low rivet that keeps the layers together was interfering, I had to drill it out. According to the internet I'm definitely not the first one to experience this.
So this time every bolt got the proper torque/grease/rtv/whatnot.
Next step is finishing the harness and preparing the removal of the SBC.
 
Is the vapor line on the water pump something you added? What is it's function?
 
Is the vapor line on the water pump something you added? What is it's function?
Yes, I did drill and tap the hole. LS block have vapor lines that you're supposed to connect to the top of the radiator. Since I don't have this connection the simplest way to eject those water vapor is to route them to a high point in the water pump. It's a rather common mod for LS swaps. I should post a picture once it's connected.
 
Here I thought the top of my SBC with LT1 injection and HEI up top, looked like a mess.....that LS blows my mess away.....:clap:
 
Here I thought the top of my SBC with LT1 injection and HEI up top, looked like a mess.....that LS blows my mess away.....:clap:


Well, they put a plastic cover on them for a reason.
It will eventually be dressed up a little, but motor beauty contest is not my game.
 
Good progress were made this week.
I"ve cut the MAF sensor wire to length and wrapped it.
Also got the little plug on the back of the passenger valve cover, one of the last piece of the PCV crank upgrade.

eleqycr_159a0b7d5c40159611a52d0c9c6c8073f32d688f.jpg


In the back I've got the oil pressure sensor in, I'm also done with the wrapping of the wires. All the corrugated tube is the actual stuff, straight from the scrapyard, It's cheaper, it much better quality than the flimsy cheap auto store stuff.
Problem is it comes dirty, and the camera flash tells me some haven't been properly washed, if any. I'll probably give the whole engine a good cleanup once it's all plugged air tight.
Now I realize I'm king of concerned about wrapping up the loom with some cheap electrical tape. It doesn't stand the heat and get slimy/goo-y/sticky as it ages, I think I'm gonna try to find better adhesive for that job. I really like the fabric style I've found in scrapped cars loom.

eecjd6e_9307a4aecc20e646c6e23d0bebe0ef0264cfcace.jpg


Now the meat of this week job, wrapping up the loom. Not entirely done yet, I still have the ODBII port to plug, along with the clutch switch, the tach signal, the engine check lite and the oil pressure signal.
xj3jn6d_b5f4c5b3e648bda4ecddf3d844cd66531347097f.jpg


I bought a 'cripple-it-yourself' fuse-relay box.

5x3omds_ab9805477dd59fca677776616c7ddcc165820f72.jpg


And finally found a double fan setup that's just the size of my radiator, comes from a Sebring.
vqrihp2_5d3d1936763485f95a990a4868d810870d5b1872.jpg


I went ahead of tubing problem and installed a straight water neck.

rr4tuxj_b8c8ae15fc798f43138543faada18f7be09a8ed5.jpg


I revised the plumbing of the vapor lines as they were rubbing the throttle cable arm. Also installed the just received tube you can see in the back, which is the last piece of the PCV puzzle.
I'll clean those hose clamp from the scrapyard someday, no much time for it right now.
tkz3f0c_fbeffea60f7b79277a1fbf27cd776eb95482b221.jpg


Not comes the 'fun' part, wiring the OBDII port, hook up the PCM programmer and see if those two are willing to talk.
 
Your making quick progress. All that wiring would make my head explode!

Where did you find the fuse/relay box?
 
Your making quick progress. All that wiring would make my head explode!

Where did you find the fuse/relay box?
Thanks, I have to admit I wouldn't have gone anywhere without all the precious information on lt1swap.com, this website is amazing for LS swaps.
Here is the fusebox, I don't buy much on Amazon but I didn't want to wait for months to get the part. The part is very well made, only 'downside' is that the main relay is a RTT7121a, a dedicated power relay that is pretty hard to find.
 
I use a bunch of different tapes by Tesa... They make the cloth-like tape, but I wouldnt recommend it for engine compartment stuff... They have all different types, but I dont know any stores that will carry it in stock. Mostly an online order type deal. I have used 3M super 33+ for engine looming before, as long as its not near any major heat sources like headers its fine. Some heat shrink or even a zip tie at the end of your loom will prevent it from unraveling.

http://www.tesatape.com/industry/automotive

Looking great! :beer:
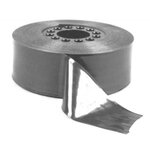
 
I use a bunch of different tapes by Tesa... They make the cloth-like tape, but I wouldnt recommend it for engine compartment stuff... They have all different types, but I dont know any stores that will carry it in stock. Mostly an online order type deal. I have used 3M super 33+ for engine looming before, as long as its not near any major heat sources like headers its fine. Some heat shrink or even a zip tie at the end of your loom will prevent it from unraveling.

http://www.tesatape.com/industry/automotive

Looking great! :beer:
Thanks!

Again a reply I didn't get the notification of, but this time I took the time

to fix my thread subscription settings, shouldn't happen anymore.
Well, as I type the tape haven't showed up yet, not I moved a bit forward with 3M super 88, which, to my understanding, is a thicker version of the 33+, good stuff.
 
Paragon sells a wiring tape that is not sticky but it clings to itself like Saran wrap. It's made by Plymouth Rubber Company.

Paragon Number: 587
GM Part Number:
O.E.M. wiring harness tape, nonstick 1 1/4x108" roll.

Years: 1953 - 1982
Condition: New
Packaging: Each
Type: Stock

Price: $8.00

https://www.paragoncorvette.com/p-359311-oem-wiring-harness-tape.aspx

587.jpg
 
Back
Top