Rookie's First Restoration Attempt...

VetteMod - Corvette Restoration, Modding & Performance Forum

Help Support VetteMod Forum:

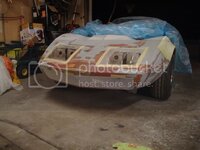
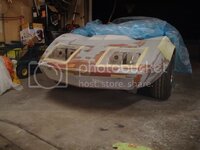
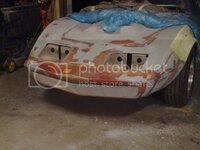
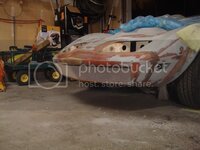
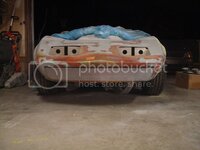
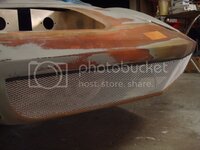
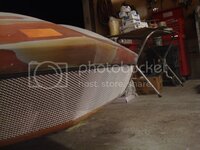
The front grille is almost complete. I have a set of aftermarket running lights coming in the mail, which will mount in the top right and top left corners of the grille (they are 1"X5.5" in size). I just need to mount the sheet metal screw "tangs" which the grill will fasten too.

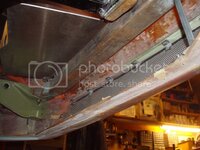
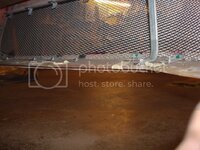
Fixed in place with a fabricated bar bolted to the custom crash bar down to the front point of the valance.

DSC09320.jpg

Edges all squared up.

DSC09321.jpg

The car will probably be painted a dark blue like Rick's car. The grille will be painted flat black.

DSC09324.jpg

Alot of work went into making this happen. I've seen a few vettes with custom grilles, but the work wasn't put into making them look like they belong there, so they looked odd. I'm happy with the end result.

DSC09325.jpg

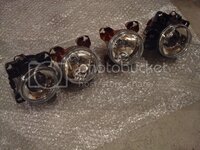
My hella headlight projectors also arrived last week. Everything is finally coming together.
 
It is coming together very well. I like the grill and the choice of blue paint. Back in the late 70's (maybe early 80's as well), Pontiac put a blue paint on Trans Ams they called Nightwatch Blue. I painted a '68 Chevy pickup that color and loved it. It looks black at night until you park by a vehicle that really is black. It looks even better in the sun. You might check it out.

On the road by next summer?

DC
 
[I'm partial on the aethetic of the front grill.
Oh well, everybody it's own, not my taste but still a very neat work, keep it up!

I think that's going to look cleaner. Blacked out it'll look like an air intake on a jet fighter. I assume the directional will be behind the screen?
 
[I'm partial on the aethetic of the front grill.
Oh well, everybody it's own, not my taste but still a very neat work, keep it up!

I think that's going to look cleaner. Blacked out it'll look like an air intake on a jet fighter. I assume the directional will be behind the screen?

I last passed any inspection when I bought my shark in '95, and since my directionals are behind the grill now, I wonder if they are legal for any inspections.....maybe a good point to consider.....

but MY directionals will be no sweat to move forward and cut some steel support out, just mount to the grill as it is....
 
As an Amazon Associate we earn from qualifying purchases. Product prices and availability are accurate as of the date/time indicated and are subject to change.
[I'm partial on the aethetic of the front grill.
Oh well, everybody it's own, not my taste but still a very neat work, keep it up!

I think that's going to look cleaner. Blacked out it'll look like an air intake on a jet fighter. I assume the directional will be behind the screen?
It's the fact they're flush to the body, having them recessed would add relief to the front.
 
The running lights will most likely be mounted behind the corners of the grille. Denpo, trust me, once this is blacked out, and I have dark blue paint on this thing, it will look very nice.
 
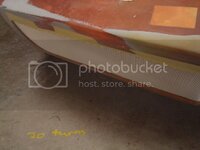
Almost done - just a few last details and the grille is finished. This was a lot of work, but it was worth it in the end. I purposely made the bumper extra thick so I could screw brackets on the inside to hold the grille, without the screws coming out to the front side of the panel. Next is to install my running lights.

DSC09328.jpg

DSC09329.jpg

DSC09330.jpg

DSC09331.jpg

DSC09332.jpg

DSC09333.jpg

DSC09334.jpg

Hella projectors.

DSC09340.jpg
 
Looking very good Jeremy! That grill will give a kind os sleek, aerodynamic look to the front end of the car!

Can't wait to see it in paint!!!!!
 
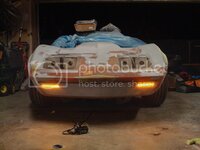
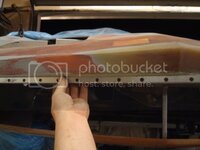
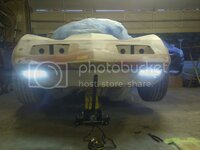
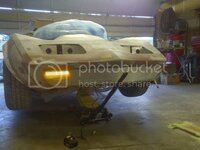
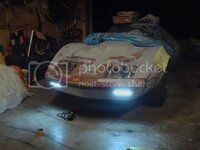
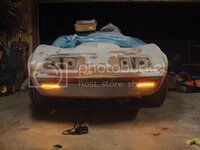
Mocked up my running lights and built mounts for them. I bought lights which integrated signal lights and running lights all in one unit. It flashes amber when you turn on the indicators, and is bright white while running. They are mounted behind the grille and, because they are LEDs, they are very bright.

IMG-20120828-00239-1.jpg

IMG-20120828-00237.jpg
 
Last edited:
I'd be curious to know the model of let light you're using. I've been a lot into led lately...

By the way, isn't lifting a Vette by the front cross member a big no no? I can't remember if yours have been reinforced.
 
I'd be curious to know the model of let light you're using. I've been a lot into led lately...

By the way, isn't lifting a Vette by the front cross member a big no no? I can't remember if yours have been reinforced.

Its only a bad idea if you have all the weight in it, and you are using a straight jack on it. I have a piece of wood on top of my jack which distributes the load...no damage over 4 years. I don't recommend it if you have a fully assembled car with the engine and interior in.
 
Last edited:
I'd be curious to know the model of let light you're using. I've been a lot into led lately...

By the way, isn't lifting a Vette by the front cross member a big no no? I can't remember if yours have been reinforced.

Its only a bad idea if you have all the weight in it, and you are using a straight jack on it. I have a piece of wood on top of my jack which distributes the load...no damage over 4 years. I don't recommend it if you have a fully assembled car with the engine and interior in.

The crossmember on my car came pre bent/modified by former owner.....I use a piece of wood on my jack but not concerned about it being bent since '95 now....

:harhar:
 
Built permanent mounts for the running lights. The passenger one still needs to be adjusted.

DSC09344.jpg

DSC09345.jpg
 
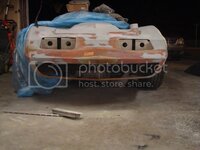
As of 2 hours ago: headlights are finished. Grille is finished. Front bumper is finished.

I will be doing a writeup on the headlight installation. Stay tuned.
 
Last edited:
After years of saving, I finally bought my first daily driver. I am very excited.

270759_10151215238621350_1380391827_n.jpg
 
I've been promising you guys a write up on the L88 headlights from Vintage Exotics.

I contacted James Cantrell about a year ago regarding my project, and he has been a great help installing these headlights. James, thanks for all of the help - I have a lot of respect for the work you have put into your product, and without a doubt I will be using you in the future.

Jim purchased the rights to the headlight lense molds a while back. He has invested over $10 000 putting these into production, along with the aluminum buckets. They are exceptional.

The first thing I have to mention is how well these came boxed up. Packed with care and by a professional to say the least. Yeah, I know...who cares...get on with the good stuff...I care. It shows effort by the seller, and care for the product they are selling me. These could not have been packaged more professionally, and I applaud them for that.

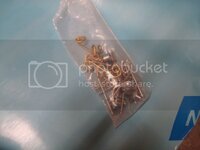
What you receive in the kit:
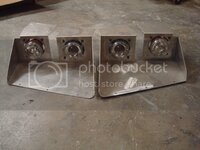
-2 headlight buckets
-2 headlight lenses
-2 headlight retainer moldings
-dzus fasteners
-aircraft grade aluminum rivets
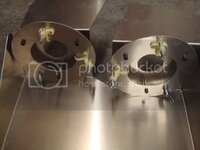
-machined backing plates for use with original headlights
DSC09357_zps2abbcc49.jpg

DSC09353_zpse73434da.jpg

DSC09352_zps148492a9.jpg

DSC09351_zps1fd5cd75.jpg

DSC09355_zps5bc7713e.jpg

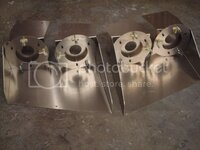
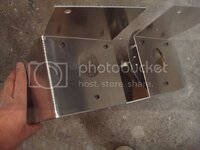
And obviously the lenses which you will see in upcoming pictures. In the pictures above, you'll notice the individual backing plates which are an improvement over previous setups. It looks cleaner, and it is a lot easier to install original style bulbs using these improvements. Everything is CNC punched, and the buckets are hand tig welded.

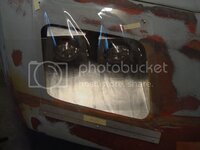
The setup above accomodates the original bulbs from your stock headlight buckets. If you are looking for an improvement in lighting however, there is a second option. I talked to Jim about improvements in lighting, and he suggested I purchase Hella 90mm halogen projectors if I wanted more of an intense beam. They are adjusted from the backside using a socket on the adjusters. He currently uses them on one of his Porsche's, and swears by them for the price and the quality of light. The best deal on the net is through Amazon. Make sure you order both the high and low beams.

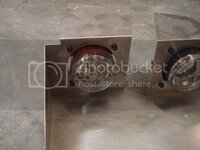
The holes on the backing plates will need to be opened up and three holes drilled to accomodate the adjusters which come with the projectors. Since I am all about things being symettrical, I did this once the buckets were physically mounted in the openings. I stood back and eyeballed where each bulb should be mounted, then marked the circles on the backing plates.
DSC09363_zps45ffe379.jpg

DSC09364_zps98e08429.jpg

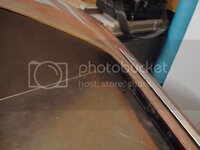
For those of you with aftermarket front ends, or surrounds which have been replaced. These buckets were modelled after original front ends. As you can see, my entire car has been modified, including me originally having to remove the header bar out of the car, cutting it in half, welding it back up, and pushing the surround down to match the point of the hood during fitment. This changed the contour of the glass on everthing in front of the header bar so I needed to carefully trim away material from the buckets edge to make them fit snug. Almost all of you shouldn't have this problem, but if you do, look towards it being a case in which your front end has had major work done to it, because chances are that is why it doesn't fit without trimming.

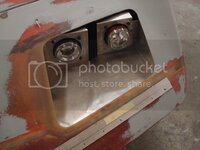
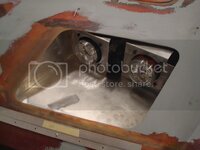
Another thing to consider is the hole openings on aftermarket front ends. I can tell you right now that the holes on my front end were way too wide for the bucket, which was a case of the original manufacturer of my front end cutting the holes too large. However, the first thing to do when installing these buckets is to get it in place, secured in its final position. Make sure everything is symetrical when you stand back and look at it. Its takes a little more time, but the result in the end is worth it in my opinion.
DSC09359_zps26011c56.jpg

DSC09358_zps507b1675.jpg

DSC09362_zps808abae5.jpg

DSC09361_zps3b4851d1.jpg

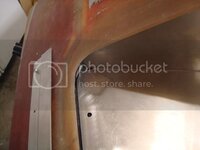
Once you get the buckets in their final positions, next is to square up your headlight openings. If your oppenings are too wide for the bucket, you will need to do some glass work and close up the openings so they cover up the edges of the buckets. Once that is complete, make sure to square up the sides of the openings using a block. Radius each corner so they are symmetrical to each other...it takes time, but its worth it in the end.

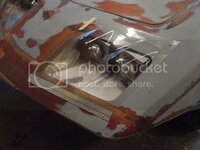
The lenses have a lot of material on them which allows you to place them exactly where you want them. Install them and trim them to your taste...I purposely squared the lenses to the headlight openings, as I thought it looked better. The front of the lense is held down with the supplied aluminum plates (which are cnc punched). They are held down with rivets. The rear corners of the lenses are held down with dzus fasteners, which I have yet to install.
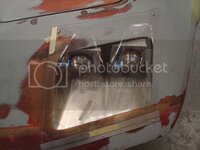
DSC09346_zpse2249dae.jpg

DSC09347_zps66d76dc9.jpg

DSC09348_zps9a1ce91f.jpg

DSC09345.jpg

I'm extremely impressed with the fit and quality of these...they are incredible.

 
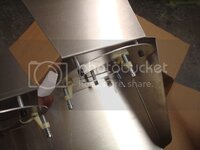
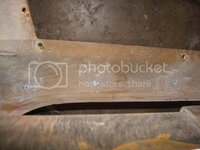
Now that the grille was finished, the grille retaining brackets needed to be made more permanent for future removal and installation. Most of you know that when you use self tapping screws, the more you remove and install them, the looser they become...and over time they will no longer bite. I planned for this ahead of time. I made the bottom part of the bumper 3/8'' thick to allow for me to inset machine nuts for really tiny machine screws into the fiberglass. I glued each nut into a ground out hole, then put a screw in each one. I then laid one layer of glass on top of each nut while the screw was still threaded into the nut...once the resin dried, I removed the screw and the result was permanent machined threads for my retainers. All you need is enough screw to bite the threads...you don't want to have a 1/2'' long screw going into the fiberglass.

DSC09366.jpg

DSC09369.jpg

DSC09368.jpg
 
It has begun. Byron's 409 Pontiac Pariesienne frame has been pulled out from underneath the snow, and finally put into the shop. Tomorrow the teardown begins. A super rare car.
 
Last edited:
Ronak? Not sure who that is. What I do know is Byron has been collecting Pontiac parts for the past 12 years now, and it is finally time to start building his project. Byron is known across Canada for being the "Pontiac guy". I am more excited for his project than I am for mine. Its going to be a fun build.
 
Ronak? Not sure who that is. What I do know is Byron has been collecting Pontiac parts for the past 12 years now, and it is finally time to start building his project. Byron is known across Canada for being the "Pontiac guy". I am more excited for his project than I am for mine. Its going to be a fun build.

In the DC region, from years ago, there is a old friend of mine, Ron Johnson, of Potomac Pontiac he is on the net I bought many a old Poncho part from him, and so if you all need parts, you have another source now....

I must admit I never heard of a 409 in a Poncho, must be a Canadian thing, the old Chevy engine from the 60's????
 
Back
Top