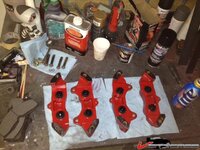
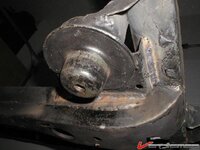
Rear suspension overhaul....

VetteMod - Corvette Restoration, Modding & Performance Forum

Help Support VetteMod Forum:

I have a fixed tip 90* snap ring plier I got 35 years ago as a kid rebuilding Bridgeport mills. It works perfect and I have not seen them for sale new anyplace. I did find a 2nd plier at a swap meet for a $1 so I keep one in the shop tool box and one in the home tool box. Sears sells a decent replacement tip snap ring plier that should work.

I just took a quick look and recommend the following. 78-79 differentials were the end of the run and it shows, the QC on them was poor.

1- Replace the bearing cap hex bolts with socket heads. cheap mod that helps.
2- Replace those flanged head RG bolts with ARP bolts or at least remove them and use #271 loctite with them. Many of the 78-79 RG bolts backed out because they were not loctited and the lockwasher/shoulder bolts were replaced with those flange heads.
3-As long as the seal had support in the housing you don't need to dress it up with JB Weld. In theroy the housing could be setup on the mill, bored and sleeved to correct dimension but the cost isn't worth it- now. As parts become harder to get this will change. I'm seeing it more and more now with what used to be common parts.
4- measure your new yokes, with them out install the snap ring and measure from the face to ring it should be in the .180.185 range. If they are under .180 I wouldn't use them. QC on rebuilt yokes does vary from what I've seen. To compare, I have measure several original yokes with up to 100k miles and they were in the .195-.200 range and were certainly better then replacement yokes.

If you want to get into it and make a better diff then you will have to pull the posi case, replace the clutches with solid steels, polish and tune it, and replace the cross shaft. Check the cross shaft bolt for depth into the case hole,and check the fit on the bearing caps. To go further would be to replace the bearings,crush sleeve,and lash& pattern. You have to make the call, if it ok otherwise check the endplay and reseal it.

Yoke endplay comes from worn yoke, lousy posi setup, or worn cross shaft holes. All this can be addressed unless the case is cracked.
 
As always, great advice Gary :thumbs:

I'll definitely remove the RG bolts, never heard they can back out but it's a scary thought.....

What's the advantage of using socket head bolts on the bearing caps ?

I'll have to read the rebuild papers again, I can swap the clutches without having to mess with anything else I assume? I might do that although this diff works perfectly fine, I'll have to see what's actually installed...
 
ok, the RG bolts were installed with Locktite,,,, no doubt,,,,, I cannot get them loose without excessive force and increased risk of personal injury :crutches:

since I can't get them loose I am convinced they won't come loose under operating condition...

Upon further closer inspection I noticed these fancy clutches hat Gary doen't like .... at this point I believe that the previous owner bought a assembled posi case to drop in the old case after that was cleaned (remember the worn yokes) ... so for now I am leaving good enough alone..... at some point I'll build a diff acc to Gary's advice including different gears, steel clutches and solid pinion sleeve.... and a steel cap as well.... then again, this diff was working fine..
... I might try to find a old cheap diff on Ebay ,.........

I drilled the cover and tapped for a drain plug today :D
 
Last edited:
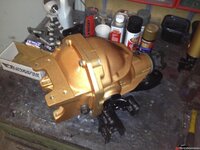
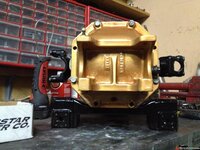
looks like new now .... :D

214f2b54644e904.jpg
.

Clearance on the side yokes to the center pin is about .020" ... more than I like but the center pin doesn't show any wear so I doubt a new pin is thicker. Since i cannot make the yokes longer it will have to be "good enough"

here's the drain plug and my modified strut rod bracket

214f2b54638b9b3.jpg
.
 
As an Amazon Associate we earn from qualifying purchases. Product prices and availability are accurate as of the date/time indicated and are subject to change.
If you tune the posi you'll get it down to under 005" most times, all depending on where the yokes were rebuilt to. 020 will be fine though, not what I would use in a rebuilt unit but better then a lot out there in cars now.
 
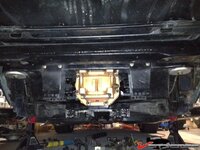
Ever thought about welding the crossmember on there? All you need is a little access hatch/cover in the rear for the diff bolts
 
Ever thought about welding the crossmember on there? All you need is a little access hatch/cover in the rear for the diff bolts

HAHAH...funny you say that, first time I dropped that cross support otta there I swore it was welded in there, :rofl::sweat::crutches::mad:
 
Ever thought about welding the crossmember on there? All you need is a little access hatch/cover in the rear for the diff bolts

I thought about welding it but isn't this allowing the diff to pivot ? I mean allowing it to pivot so that the driveline angle can be adjusted by changing the angle of the diff ?
Then again.... once the angle is adjusted and the front diff mount is tightened - why not weld the whole thing ???
 
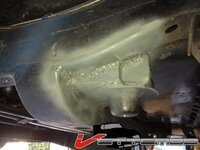
Made some progress... I cleaned and welded the passenger side of the crossmember attachment bracket, should be a lot stronger now (still have to do the driver side)

214f369c0ece064.jpg
.

made a small filler piece:

214f369c0ef1e9b.jpg
.
214f369c0f24d56.jpg
.
I hate welding overhead.... :smash:
.

214f369c0f11311.jpg
.
ground the uglyness a little smoother:

214f369c0f381eb.jpg
.
and primered:
.
214f369c0f49742.jpg
.

.

I drilled the holes in the frame for 9/16 bolts. I'm attaching the crossmember with4" long 9/16" grade 8 bolts.... overkill for sure but the 3/8" studs seemed a little flimsy....

.
214f369c0f5c7f5.jpg
.
 
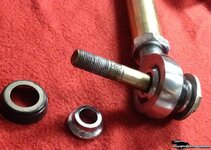
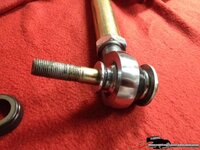
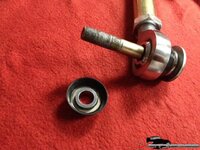
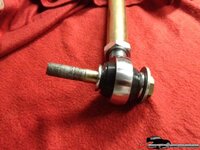
Got the tapered spacers today, looks like these fit with the seals for the rod ends

214f3db0087bb6c.jpg


.
 
Last edited:
some more pics: the seal fits against the larger diameter of the tapered spacer. I'm planning to fill the cavity between seal and rod end with sticky grease.

214f3db007ec41f.jpg
.
214f3db0082f0df.jpg
.
214f3db00854e77.jpg
.
 
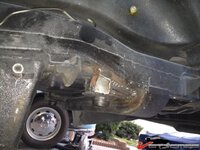
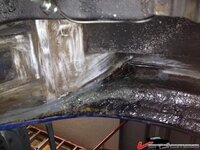
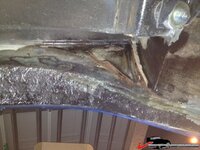
This is a very good example of "while I'm at it"...... I decided that while the trailing arm is not in my way I'm grinding the transition between the flare and the original fender smooth.... i also ground off excessive glue that was used by the factory, re-glued the panel behind the wheel and did a few other purely "cosmetic" improvements inside the fender where nobody is ever going to see it anyways.... :blush::pprrtt::D
.

I removed some 2 lbs of undercoating that somebody sprayed in there in adesperate attempt to prevent the fiberglass from rusting (I guess)....

I used Evercoat SMC resin to make sure it adheres properly to the fender (factory SMC) ..... here we go:

214f41be6f994da.jpg
.

214f41be6f63d34.jpg

.
 
Karsten -

That's lookin' good!

If you'd like - I have the 2 Aluminum Plates I built to "sandwich" between the strut carrier and the diff. They're 1/4 inch each and will be good spacers IAW a John Greenwood VIP recommendation. PM if interested. (For - you - no worries.) Just let me know if you'd like to give 'em a try. They're in the garage so I'd have to dig 'em out.

Cheers - Jim
 
Hey Jim,
Thanks for the offer :thumbs:
I lowered the strut rod bracket already. I cut and re-welded so now the strut rods are almost parallel with the halfshafts. I'll give this setup a try. I have another strut rod bracket so if this is not working out I can go back to stock height....
 
Seeing your cross member re inforcemrnt MYBAD79...

Seeing your cross member re inforcemrnt MYBAD79 I thought I would show what I went with ..................... Over the forums...I have seen many post on the subject of raising the differential on C2 & C3 's. The Idea is to keep the 1/2 shafts level and lower the body 3/4" . And is discussed in VIP Artical here (http://www.corvettefaq.com/c3/vip.pdf) But to start with some new ideas . First is the Differential mount to the X member.
A company sell's Re-forcing Tabs to keep the differential mounting bolts from pulling through the crossmember


.
DV_web_CROSSMEBER_TABS_2.jpg


So............ ever striving for OVERKILL.... 2 2" channel ....a little trimming to fit through the hole ....

P1000444.jpg
P1000452.jpg


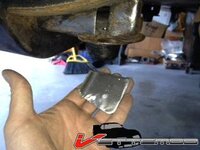
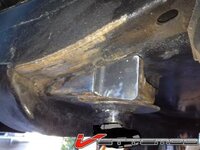
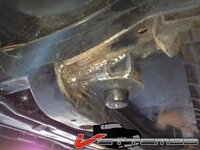
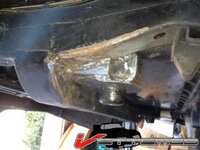
Now another company sells pre cut gussets to weld and reinforce the frame at the "Sombrero " Mounts. Well More Over kill. I designed a bracket that slips right inside the frame mount. This would obviously require the body lifted. So placing 5 tack welds from bracket to the frame ..... and its done. Originally intended to avoid messing up the powder coated frame. But ... turned out pretty good. Por -15 gloss black matches PCoat nicely.


P1000501.jpg
P1000500.jpg
P1000510.jpg
7.jpg
 
I saw the reinforcement plates for the crossmember mounts online, with shipping it's like $50 and change for 4 pieces of mild steel that anybody can buy at HomeDepot for $3 a foot.... took maybe 20 minutes to cut and fit....

I used washers under the bolt head inside the crossmember - I figure that the cast differential cracks before the bolts get pulled thru the crossmember but I added washers to spread the load anyways... overkill for sure, the crossmember is quiet thick in this area.

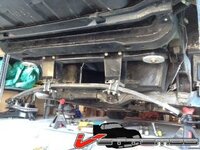
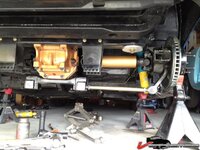
ok, my fiberglass work on the fenders is done, next item on the list is to install the driver side trailing arm and then figure out where the upper strut rods go... I'll have to lower the diff and the crossmember one more time to finish the welding for the upper bracket as well as the half shaft loop brackets....
 
the Johnny Joints are narrower than the stock style bushings so now I need additional alignment shims... I have a set of the slotted stainless shims and need about 4-5 more ... anybody have any leftover ??? I'd hate having to buy a full set for $30 and only use 4 shims... my plan B is to place a washer left/right of the Johnny Joint...
 
Now another company sells pre cut gussets to weld and reinforce the frame at the "Sombrero " Mounts. Well More Over kill. I designed a bracket that slips right inside the frame mount. This would obviously require the body lifted. So placing 5 tack welds from bracket to the frame ..... and its done. Originally intended to avoid messing up the powder coated frame. But ... turned out pretty good. Por -15 gloss black matches PCoat nicely.

Ok tell me, I did reinforce the welds on the sombrero thing,
1804f43be07f1754.jpg

The factory welds were horrible, I couldnt believe how bad this was.
Not rusted, just not welded"
Anyway, is the reinforcment welds I did enough???

Oh yeah, by the way , nice work sir!
 
Back
Top