Plastic Fantastic 2

VetteMod - Corvette Restoration, Modding & Performance Forum

Help Support VetteMod Forum:

did 2 things today... first, I fixed the horn
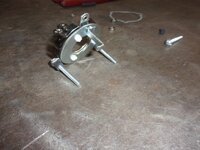
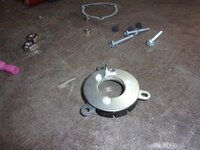
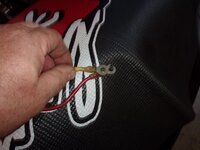
I bought a pigtail for a regular GM column.edited the system in the C3 is maddening because it relies on a pedestal to maintain contact - downside is putting it together, you're more likely to cause the push bit to come apart then you are to actually get it together.... this solves that problem
xesgBYFh.jpg
left is the stock set up, right is the replacing wire
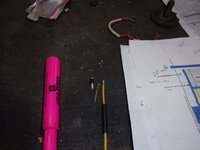
xkEiQeah.jpg
use the spring from the stock set up and lock on the new wire (cut the spade end off to assemble)
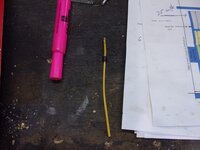
rkid3QVh.jpg
I'm too cheap to buy spacers so some 1/4" vacuum hose became a spacer
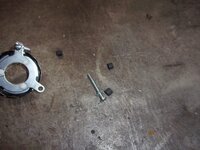
Sfo1hMMh.jpg
the offending stand
PrEmfYPh.jpg
now a spade male end
cDYyeezh.jpg

on to alternators.....
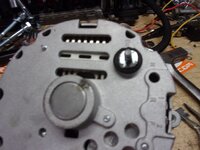
key off, voltage present
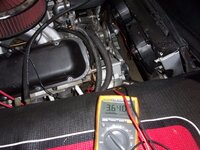
Nb1zXUbh.jpg
key on, full 12v (the brown wire - which should have a resistor in line)
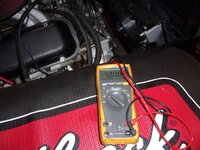
67pSe0zh.jpg
the fix is simple, a one-wire alternator.... and now we know why I kept losing alternators.
 
well, the results but still no idea why.editededited
kWjIWH8h.jpg
burn marks
cGPHlYvh.jpg
so it goes like this... did the shielding melt, causing the short or did the load create the heat that melted the wires?edited I'm going with the 2nd because both were melted but who knows....edited

as far as the noise, it's not from the rotor, nor from the lifters.... with that said, there are some really odd marks on the roller tip but it seems all are basically at the same adjustment...

I dunno, initially I thought it was the alternator and I might loosen the belt tomorrow to just be sure it's not.edited What it does seem is it's dropping a cylinder on the driver's side. the noise isn't really rpm related but rather seems like dropped cylinder related...
 

At first I thought exhaust leak. Sort or random isn’t it.

Good luck finding it.

Maybe buy one of those cheap car stethoscopes. They actually work pretty good :)

I'm leaning towards that - I'll check tonight, I've had trouble with the driver's side sealing (and replaced that gasket with a percy's)... who knows, maybe percy's failed me? I about had a heart attack when I first heard that noise, though...
 
kind of sounds like a belt noise, are there any idler pulleys in there? i find exhaust leaks once they get hot to be very regular and consistent and more of a ticking.....what else is turning on the top end the distributor? any wiggly ,wires, cables or brackets, that are hitting the valve covers?
 
As an Amazon Associate we earn from qualifying purchases. Product prices and availability are accurate as of the date/time indicated and are subject to change.
kind of sounds like a belt noise, are there any idler pulleys in there? i find exhaust leaks once they get hot to be very regular and consistent and more of a ticking.....what else is turning on the top end the distributor? any wiggly ,wires, cables or brackets, that are hitting the valve covers?

tonight I'll look... what may or may not be related is that slight exhaust dip on the driver's side is immediately after the noise
 
Exhaust
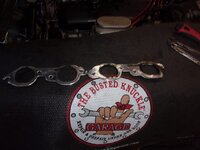
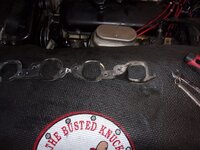
maybe #7 is leaking...
qRju01oh.jpg
xawTLiZh.jpg

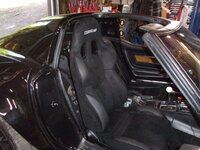
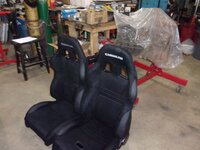
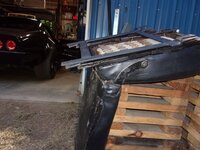
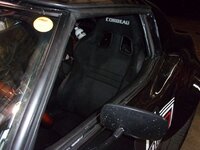
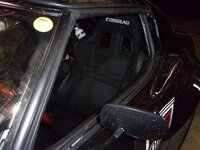
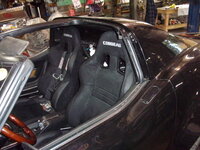
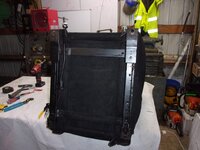
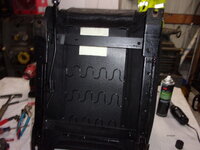
finally, and I mean finally, my Corbeau seats arrived.... and as seems to be normal, their brackets are useless - way too tall
yB4sh1Hh.jpg
so started the rest of my evening....edited
n2mnTBAh.jpg
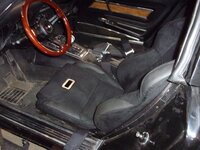
they look nice
K2h9iGEh.jpg
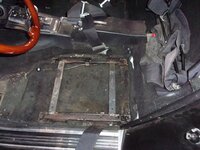
so I started decreasing the stack under the seat
kkc9DSBh.jpg
this is as low as you can get (by bolting the seats straight to the floor)
GwnVCrvh.jpg
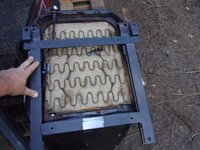
I mentioned the brackets were wrong (again)? they're also incorrect for the C3 (despite claiming to be)
Sbk7hs3h.jpg
thought maybe they were backwards... nope... note that they also lift the back of the seat? good lord why?editededited
YRISDOUh.jpg
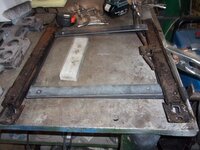
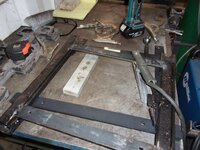
however, solution.... use the GM sliders with adapters to the new seats (bonus is if I put race shells in the car, this is a standard bolt pattern)
AYvdW3qh.jpg
​​​​​​​GlJzjD5h.jpg
Ge6B8qWh.jpg
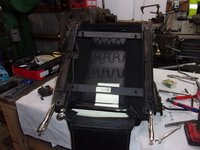
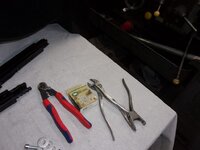
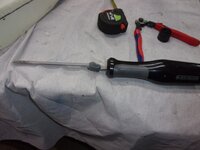
as with all things, it took some special toolsedited
m9Mw2Ech.jpg
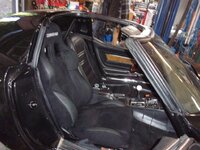
this is much better, I still wish I'd had it shaved 1" but I have the hog ring pliers and I know how to use them...edited
ZHvaUN7h.jpg
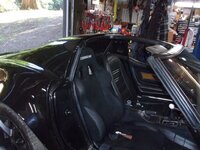
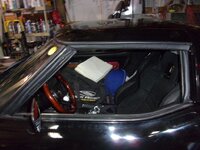
snug fit
s3pnq8Uh.jpg
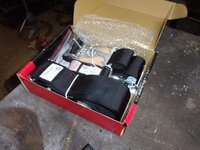
eventually, new harness (in date) for the driver
QZc6ebQh.jpg
gratuitous puppy shot
s3pnq8Uh.jpg
 
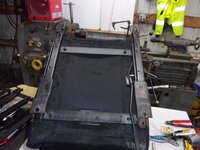
time to make the seat, shorter
first, will I get the seat out with the top on?
revohKvh.jpg
yep
A12HpcBh.jpg
first seat, I did more work then I needed... it doesn't need to come apart
FUqTG06h.jpg
IUlrh1yh.jpg
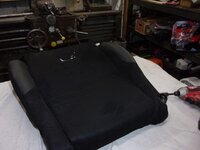
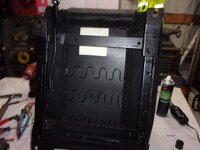
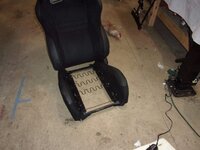
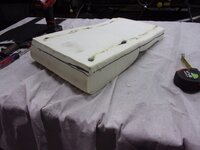
simply take the hog rings off the front and back - and the pad just comes right out
wXg6kpah.jpg
lT9JiPSh.jpg
chop chop
iv2NX4rh.jpg
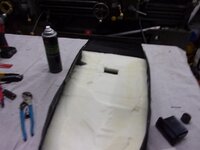
gently take the cover off - it's glued to the foam but comes apart fairly easily
nwYqoKph.jpg
and mark 1" all around
handy tool for shaping foam
MxAktoAh.jpg
slide the foam back in (this is the driver's seat)
SLSJakah.jpg
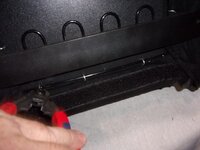
clip back into place with hog rings then close the bottom cover
K8ww414h.jpg

and voila, you have another 1". If you don't use the Corbeau brackets and simply weld in 1" 1/8" strips between the rails - you can save both money and gain another 1/2"
tip is pay attention to what you're welding to
wXg6kpa.jpg

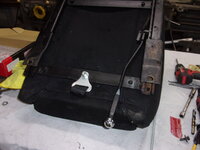
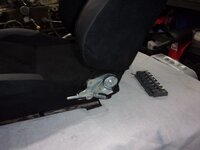
you may want to eliminate the bolt where the lever is - otherwise it holds the lever over and the seat won't lock.... and the best of all, is I now fit with my helmet (though in most cases, I'll leave the top off and run it without the rear window like a targa.... cooler and I'm not hitting the roof.... but if I have to, I can fit with the top on.

In other news, the heater line mods (changed the block to vacuum to open rather then open unless vacuum) has done wonders about keeping the interior more comfortable...
 
I'ts weird how a C3 has no headroom with aftermarket seats. I couldn't even use low profile seat adjusters with my C5 seats. Its bolted to the floor in the back with risers in the front.
 
I'ts weird how a C3 has no headroom with aftermarket seats. I couldn't even use low profile seat adjusters with my C5 seats. Its bolted to the floor in the back with risers in the front.

if I ever build another C3, I'm lowering the floor (but to be clear, that will be after the 2 Buicks, a Blazer build, a motorhome build, and the Fiat build)

With that said, if you do everything I did - use the stock sliders, shave 1" - you'll be sitting in the same level as the stock seat, only now you won't slide about. I cannot comment about height, though, because I removed the rear firewall (moved it back), I can lean the seat further back and gain a bit of space above my head. I drove the car tonight, and it felt good - so I'll check the angle, normal is 22* - I'm going to guess that it's a bit back from that but I don't know how much (not a lot) and the top of the seat is against the belt bar.

For those following along, you need these dimensions. I'm 6-1, 225 lbs, 38" waist (which means I barely fit in these seats - I feel like the Al Bundy customer who swears they will fit in the shoe size)... my inseam is 31", so if you're doing the math, my torso is roughly 42" from seat to head.... as I said, my biggest problem isn't leg room but torso room. With my helmet on, I'm at the Astro top (which is the final cheat so that I can actually fit)
 
next problem to solve. Not sure I have my head wrapped around the how/why... so here it goes.

The problem is tight-turn understeer. (on the entry). Slalom, the car is quite nimble; but if I have to go around the end of the slalom and head the other direction, understeer city.. tires are a Toyo, 320 tread wear (though the magazines put them with 200 tread wear tires).... I run 32 psi (have changed up and down to no real change). I can resolve 50% of the issue by a tap of the brakes....

thoughts? suggestions? things to look at?


I'm adding this for my reference - but criticism of it is welcome

Corner Entry
The first question to ask now you have identified the understeer as occurring in corner entry is, are you entering the corner after being hard on the brakes? If the answer is yes then you have two options to solve the understeer:
1) Increase front damper rebound stiffness. If you have high or low speed damper adjustment then increase the low speed rebound stiffness only.
2) Reduce the front brake bias.

If the answer is no then you must ask yourself another question, are you entering the corner at high speed or mid to low speed? If the answer is high speed then one of the following options can be used to solve the understeer:
1) Reduce front ride height
2) Increase front aerodynamic downforce. If only the rear is adjustable then reduce rear downforce.
3) Check tyre pressures with a gauge to ensure that the tyres are operating within recommended hot temperatures. Increase or decrease pressures accordingly.
4) Check tyre temperatures with a tyre pyrometer and make sure that the temperatures are distributed by between 10 and 15 degrees Celsius between edges with the inside being the hottest. If the inside is too hot then increase positive camber. If the outside is too hot then increase negative camber.

If the answer was mid to low speed then one of the following options can be used to solve the understeer:
1) Increase caster angle
2) Increase front toe out
3) Reduce front ride height
4) Check tyre pressures with a gauge to ensure that the tyres are operating within recommended hot temperatures. Increase or decrease pressures accordingly.
5) Check tyre temperatures with a tyre pyrometer and make sure that the temperatures are distributed by between 10 and 15 degrees Celsius between edges with the inside being the hottest. If the inside is too hot then increase positive camber. If the outside is too hot then increase negative camber.

Mid Corner
The first question to ask now that you have identified the understeer as occurring at the mid corner section is, does the car bottom out? If the answer is yes then the below answers can solve the understeer:
1) Increase front coil spring rate. This can be achieved by installing stiffer springs or increasing pre-load.
If the answer is no then the next question to ask yourself is, does the front of the car roll excessively? If the answer is no then the following solutions can be applied:
1) Soften front coil spring rate
2) Increase front damper rebound stiffness. Front compression stiffness can also be reduced slightly.
3) Reduce front ride height.
4) Soften front anti-roll bar stiffness.
5) Increase negative camber on the front wheels.
6) Lower front roll centre or raise the rear roll centre.
7) Check tyre pressures with a gauge to ensure that the tyres are operating within recommended hot temperatures. Increase or decrease pressures accordingly.
8) Check tyre temperatures with a tyre pyrometer and make sure that the temperatures are distributed by between 10 and 15 degrees Celsius between edges with the inside being the hottest. If the inside is too hot then increase positive camber. If the outside is too hot then increase negative camber.

If the answer was yes then the following solutions can be applied:
1) Soften front anti-roll bar stiffness
2) Increase front damper compression stiffness. Increase low speed if you have a high or low speed option.
3) Increase front coil spring rate.
4) Make sure there is no excessive droop in the front suspension causing the inside front to lose traction.
5) Raise the front roll centre.

Corner Exit
For corner exit understeer there are no more questions to ask. One of the following solutions can be applied:
1) Increase front damper rebound stiffness
2) Check tyre pressures with a gauge to ensure that the tyres are operating within recommended hot temperatures. Increase or decrease pressures accordingly.
3) Check tyre temperatures with a tyre pyrometer and make sure that the temperatures are distributed by between 10 and 15 degrees Celsius between edges with the inside being the hottest. If the inside is too hot then increase positive camber. If the outside is too hot then increase negative camber.
 
Last edited:
This is the answer I like best:

If the answer was mid to low speed then one of the following options can be used to solve the understeer:
1) Increase caster angle
2) Increase front toe out
3) Reduce front ride height
4) Check tyre pressures with a gauge to ensure that the tyres are operating within recommended hot temperatures. Increase or decrease pressures accordingly.
5) Check tyre temperatures with a tyre pyrometer and make sure that the temperatures are distributed by between 10 and 15 degrees Celsius between edges with the inside being the hottest. If the inside is too hot then increase positive camber. If the outside is too hot then increase negative camber.

From your description, it sounds like the problem is more acute when the wheels are turned fairly sharply (low speed 180 at the end of a slalom) which would cause me to look at Ackermann. Do you have a situation where you have drastically increasing or decreasing Ackermann as the wheels are turned? This can be partially solved by increasing or decreasing static toe, but may hurt in other areas. I would try to duplicate the turn-in (set the wheel turn angle and ride compression/height) and check the total toe between the front wheels.

Pappy
 
This is the answer I like best:

If the answer was mid to low speed then one of the following options can be used to solve the understeer:
1) Increase caster angle
2) Increase front toe out
3) Reduce front ride height
4) Check tyre pressures with a gauge to ensure that the tyres are operating within recommended hot temperatures. Increase or decrease pressures accordingly.
5) Check tyre temperatures with a tyre pyrometer and make sure that the temperatures are distributed by between 10 and 15 degrees Celsius between edges with the inside being the hottest. If the inside is too hot then increase positive camber. If the outside is too hot then increase negative camber.

From your description, it sounds like the problem is more acute when the wheels are turned fairly sharply (low speed 180 at the end of a slalom) which would cause me to look at Ackermann. Do you have a situation where you have drastically increasing or decreasing Ackermann as the wheels are turned? This can be partially solved by increasing or decreasing static toe, but may hurt in other areas. I would try to duplicate the turn-in (set the wheel turn angle and ride compression/height) and check the total toe between the front wheels.

Pappy

I'll check all of these ... a couple questions. 1) what does resetting to toe out do in this situations? and 2) would increasing the weight-shift to the front tires help? I can adjust the shocks and also put the 450 lb springs back in the front.... (IIRC, it's set to stock, C5 specs)
 
ackerman is whatever GM put into the C5 Corvette... after much googling, I still have no idea what it is.... time for tape measures, I guess...
 
This is the answer I like best:

If the answer was mid to low speed then one of the following options can be used to solve the understeer:
1) Increase caster angle
2) Increase front toe out
3) Reduce front ride height
4) Check tyre pressures with a gauge to ensure that the tyres are operating within recommended hot temperatures. Increase or decrease pressures accordingly.
5) Check tyre temperatures with a tyre pyrometer and make sure that the temperatures are distributed by between 10 and 15 degrees Celsius between edges with the inside being the hottest. If the inside is too hot then increase positive camber. If the outside is too hot then increase negative camber.

From your description, it sounds like the problem is more acute when the wheels are turned fairly sharply (low speed 180 at the end of a slalom) which would cause me to look at Ackermann. Do you have a situation where you have drastically increasing or decreasing Ackermann as the wheels are turned? This can be partially solved by increasing or decreasing static toe, but may hurt in other areas. I would try to duplicate the turn-in (set the wheel turn angle and ride compression/height) and check the total toe between the front wheels.

Pappy

I agree with your comments. When I first put the C4 suspension under my '69 I had a helluva bad understeer in the tight corners. After a lot of head scratching I relocated the steering rack to increase the Ackerman, and also got rid of the toe-in, and occasionally play with a touch of toe-out.
 
Following Pappy's lead -- but I like simple first:
1. Reduce Front Ride height. Not only will it help, overall it will benefit on any long straight. One less thing to change track side.
2. Set more Caster. If need be, go to the max and then back off. Not always an easy adjustment, but will improve tracking. Don't go so far the steering gets too heavy at parking lot speed.
3. You've got to use a pyrometer. Most important thing a crew can do for you is check the tires (right after checking your belts)!​

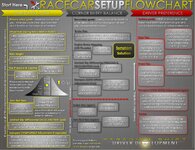
Ive attached 2 images. I hope all can find them useful. (I claim no credit - just always on the hunt.)
This one (Alignment specs) won't "fit" a C4/C5+ front dimensions:

126961012c7e12255.jpg
But, note the variation between street/ax/race, front/rear, and the several sources. What it really shows is the integration of the various parameters that is required. Unfortunately, they all lack some important details; track width F/R, spring rates, cross weight, F/R weight, and rake. Change one, means change another.

The fancy graphic 126961012c7e2a400.jpg
is one that you can walk through and see where you want to go.

F/R balance/bias is important as it sets the potential for rotation (yaw) up to be stable, consistent - or not. Conservation of momentum and yaw rates. Not just weight, but tire profile, springs, ARB, etc., and what you do with the "stick and rudder!"

Cheers - Jim
 
Last edited:
very helpful.

I've struggled with what alignment specs to use. I need to spend more time here considering what differences (if any) there are between the C3 recommendations and the C5 (which is what the front suspension is)..... so much to learn.

From the Z06 Forum
Here are my recommendations:
Objectives:
- Reduce factory understeer AMAP and get car as neutral as possible.
- Better, later and shorter Braking
- More front grip
- Better Turn IN
- Better Steering Response
- Better Steering Modulation
- Better Rear grip and Acceleration
- Better handling
- Increase corner entry speed, mid-corner speed and higher corner exit speed.
Retain some power oversteer.

ORDER: Lower AMAP, Corner weigh, Corner weight, set Ride Height and Rake (1/2" - 3/4"), Get F/R weight ratio as close to 50/50 as Possible (=< 2%).
MOST IMPORTANT SPEC: Cross Corner Weight % Difference as close to 50/50as possible (=< 1%). Set Camber, then Caster, then Toe.

AutoX Alignment:

FRONT:
Camber = -2.4*
Caster = As much positive as possible without sacrificing Camber
Toe = Toe OUT, 1/16" - 1/8" Each, !/4" Total Toe OUT Max.

REAR:
Camber = -1.5*
Toe = Toe IN, 1.8" - 1/4" Each, 1/2" Total Toe IN Max.

The alignment specs are only a starting point and should be adjusted after proper tire inflation pressures air selected and the tires are "read" using a probe type Pyrometer.
 
Last edited:
then there's this advice.... what kills me is I'm so inexperienced that I've no context to judge.... ah well, it's also fascinating so into the deep end I dive

1. For AutoX you should corner weigh, corner weight, Check the Cross Corner weight % Difference and align the car
- After all mods possible have been done
- after lowering
- with the driver or an equilivant driver weight in the drivers seat
- 1/8 tank of gas, 1/4 max load
-Initially with both the front and rear swaybars disconnected
- and if using adjustable shocks; with the Bump setting set on the next to last SOFT setting and just after the car was driven or 'bounced".
- Align & set ride height with the race wheels and tires on the car
- remove all unnecessary weight from the car, this includes:
- empty the windshield washer tank
- run a minimum level in the coolant overflow tank and run a 70/30 water coolant ratio
- with 1 qt additional oil added for C5 Z06's
- remove everything from the glove box and center console
- remove the floor mats
- remove the tire inflation kit
- remove the OEM Ti exhaust and install a Corsa "Z Series" Titanium Race Exhaust WITHOUT the optional mufflers
- remove the plastic coil covers.

2. When installing allowable mods such as a hand held Fire Extinguisher or Fire Suppression System mount them on the RIGHT side of the car as LOW and as far REARWARD as practicle.
- when installing a 6 point drivers restraint belt such as "clip-in" Hardbar or Brey Krause mounts, install the right side passenger mounts as well but remove passenger belts for AutoX competition.

3. Attatch the sway bars and recheck the Cross Corner Weight % Difference
- Minimally adjust the ride height at each corner to bring the CCW%D as close to 50/50 and within 1%. Should be like 50.5%F/49.5%R
The F/R ratio should be within 2%, say 51.2%F/48.8%R max.
- If you have installed an allowable front sway bar you should have also installed adjustable sway bar end links. These initially should be installed at their shortest adjustment. If you need more rear corner weight to bring the F/R ratio and the CCW%D into spec then you can minimally lengthen each front end link. This effectively preloads the bar and shifts weight to the rear. BE SURE TO INITIALLY ADJUST BOTH SIDES EQUALLY.

4. You could also install a higher rate or higher recurved front spring or a low rate or lower recurved rear spring but this would be disallowed and cheating in SS. It also shows the limitations of the transverse spring .....you can not independantly change a corner's spring rate.

As you can see there are some very limited things you can do in SS to lighten the car and shift weight around.
After all the static weight is shifted as much as possible the left front will still be the heviest corner and the right rear the lightest.
Unfortunetly on the Z06 the only other way in SS to adjust corner weights is by tweaking the ride heights and or adjusting the front sway bar end links if you have installed them.

NOTE: as from the factory the Z06 is pretty close to a 50/50 F/R ratio and a 50/50 CCW%D as possible...but it is possible to get it dead on with a little tweaking.

ABOVE ALL, THE CROSS CORNER WEIGHT % DIFFERENCE IS THE MOST IMPORTANT SPEC.

The advantage of a coil over system is that you CAN adjust individual corner weight INDEPENDANT of Static Ride Height. By simply adjusting the spring collar thus adjusting the ride height on a coil over spring perch you are essentially doing the same thing as you are on an OEM Z06 when you adjust ride height using the spring perch bolts. You are taking the easy way out and in effect defeating the advantage.

The proper way to adjust corner weights in a coil over system is to:
1. Set the Static Ride Height and Rake
2. Corner Weigh the car
3. Corner Weight the car by physically moveing things around to effect the corner weight(s), CCW%D
4. Change each individual corner spring as to appropriate Spring RATE to match each individual Corner Weight*

* NOTE: EACH car is different and actually each corner is different...that is why I do not recommend the purchase of a generic coil over system and especially one built on non-adjustable shocks. You are using someone elses spring setting(s) , which while being close, may not be right for your car ...AND as each coil spring should be tailored to each individual corner; each shock needs to be adjusted to each individual spring (rate) to properly dampen the spring harmonics. Non revalvable shocks can not do this and non adjustablke shocks can't do it properly.
Each coil spring needs to be tuned to the individual corner and each shock needs to be tuned to each individual spring at least in Compression and Rebound (each individually). Shock selection is another topic.
 
Today, you should see numbers from Ackerman. I lost my slide plates, so I have to make due with what's coming today.... don't laugh too hard :crutches:


I'm using 2004 Z06 specs as my search criteria. My wheelbase is 7" shorter (which is why the Ackerman measurement), but the width and range of adjustment are basically Z06 stock ....

for the rear, Camaro suspension, -1.5 camber, zero toe (which is close to stock specs)....

also, I'd love to go to a 295 front tire, but pretty sure I'll rub pretty hard when the suspension is under compression.
 
Last edited:
Today, you should see numbers from Ackerman. I lost my slide plates, so I have to make due with what's coming today.... don't laugh too hard :crutches:


I'm using 2004 Z06 specs as my search criteria. My wheelbase is 7" shorter (which is why the Ackerman measurement), but the width and range of adjustment are basically Z06 stock ....

for the rear, Camaro suspension, -1.5 camber, zero toe (which is close to stock specs)....

also, I'd love to go to a 295 front tire, but pretty sure I'll rub pretty hard when the suspension is under compression.

One question - I know you used C5 front suspension, but when you did the install did you use the "stock" dimensions for all of the suspension pick-up points, especially the rack location (height and fore-aft placement with respect to ends of the steering arms)? As you pointed out, the difference in wheelbase will change Ackermann, and as 69427 points out, moving the rack fore or aft will also allow you to increase or decrease Ackermann. If you put a C5 in a parking lot and turn very sharply at low speed, you will feel the front tires "chatter" on the pavement. This is caused, generally, by incorrect Ackermann with the short turn radius. Basically, the front tires are turned a different amount (dynamic toe caused by the car's Ackermann geometry) and each tire is not turning in an optimum turn radius. By dynamic toe, I mean Ackermann adds or subtracts toe from the static toe-in/out setting as the wheels are turned, depending on the built in or adjusted Ackermann geometry. In your case, you need to turn the wheels as far as you think you are turning on the tight autocross turn and measure the toe. It will be different than the static toe you set. Also effecting the situation is ride height - if you are compressed from braking, you add caster and any bump steer the suspension might have, which will affect the dynamic toe measurement. Sometimes this whole Ackermann thing is a compromise. If you are doing more high speed road course events where the turn angle is not great, then you might accept a little more understeer in the "one" tight corner on the autocross. I would just check your Ackermann (toe with wheels turned) to make sure you are not off the charts. If I can find it, one of the best descriptions of Ackermann effects and adjustment was in the technical section of Tony Woodward's catalog. A word of caution - dirt track guys have a different view of Ackermann requirements than asphalt road course guys. LOL

Edit: Here is the Woodward link. See page 72: http://www.woodwardsteering.com/PDF/tech section guide.pdf
 
Last edited:
Today, you should see numbers from Ackerman. I lost my slide plates, so I have to make due with what's coming today.... don't laugh too hard :crutches:


I'm using 2004 Z06 specs as my search criteria. My wheelbase is 7" shorter (which is why the Ackerman measurement), but the width and range of adjustment are basically Z06 stock ....

for the rear, Camaro suspension, -1.5 camber, zero toe (which is close to stock specs)....

also, I'd love to go to a 295 front tire, but pretty sure I'll rub pretty hard when the suspension is under compression.

One question - I know you used C5 front suspension, but when you did the install did you use the "stock" dimensions for all of the suspension pick-up points, especially the rack location (height and fore-aft placement with respect to ends of the steering arms)? As you pointed out, the difference in wheelbase will change Ackermann, and as 69427 points out, moving the rack fore or aft will also allow you to increase or decrease Ackermann. If you put a C5 in a parking lot and turn very sharply at low speed, you will feel the front tires "chatter" on the pavement. This is caused, generally, by incorrect Ackermann with the short turn radius. Basically, the front tires are turned a different amount (dynamic toe caused by the car's Ackermann geometry) and each tire is not turning in an optimum turn radius. By dynamic toe, I mean Ackermann adds or subtracts toe from the static toe-in/out setting as the wheels are turned, depending on the built in or adjusted Ackermann geometry. In your case, you need to turn the wheels as far as you think you are turning on the tight autocross turn and measure the toe. It will be different than the static toe you set. Also effecting the situation is ride height - if you are compressed from braking, you add caster and any bump steer the suspension might have, which will affect the dynamic toe measurement. Sometimes this whole Ackermann thing is a compromise. If you are doing more high speed road course events where the turn angle is not great, then you might accept a little more understeer in the "one" tight corner on the autocross. I would just check your Ackermann (toe with wheels turned) to make sure you are not off the charts. If I can find it, one of the best descriptions of Ackermann effects and adjustment was in the technical section of Tony Woodward's catalog. A word of caution - dirt track guys have a different view of Ackermann requirements than asphalt road course guys. LOL

Edit: Here is the Woodward link. See page 72: http://www.woodwardsteering.com/PDF/tech section guide.pdf

I used to stock dimensions - I can't remember who sent it, but someone sent me the blueprints of the C5 chassis. I also used the stock, C5 cradle - so all the attachment points: the rack, the lower control arms, the sway bar, are all fixed from where GM put them on the C5. I did build the upper mounts, but I had the blueprint and a friend's C5 to use as reference.... I make mistakes, but I'm fairly confident at where things are in relation to each other on the front (and back too since the only thing fabricated is the upper, coil-over mount).

It doesn't chatter at lock

What did I read when I saw I should turn the left tire 10 degrees and the right tire should be 3 degrees less (or 7 degrees)?
 
What did I read when I saw I should turn the left tire 10 degrees and the right tire should be 3 degrees less (or 7 degrees)?

3 degrees is a lot, but is typical for short track circle racers. Good turn in on tight tracks. That much Ackermann will slow you down on a faster, longer turn radius track. Did you get any measurements yet?
 
What did I read when I saw I should turn the left tire 10 degrees and the right tire should be 3 degrees less (or 7 degrees)?

3 degrees is a lot, but is typical for short track circle racers. Good turn in on tight tracks. That much Ackermann will slow you down on a faster, longer turn radius track. Did you get any measurements yet?

yes, but not the ones we need
ZHyd8gc.jpg
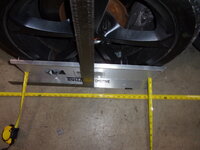
First step... measure
for those with my eyesight...
​​​​​​​1/8" toe in, 98" wheelbase


there was a puppy play time.... sorry?

Luigi's brother came for a visit/wrestle, then there was the creek, then a round of baths for all participants
LrOGPFx.jpg
 
any favorites for race software/gps? I suspect I'm going a lot faster then I perceive I am - which, for testing purposes might be good to know...

also, I'll change the toe to out 1/8 and just see what happens.... from what I'm reading, that seems like I might get pretty solid improvement.... I'm waiting on something to check the degree (though at the moment, I may temp something just to get an idea)....
 
Back
Top