My '76 restoration (long post)

VetteMod - Corvette Restoration, Modding & Performance Forum

Help Support VetteMod Forum:

Must do shopping... ouch

Not much accomplished on the car itself this week, it was time for finding a bunch of missing/broken parts.
Hoppefully I found someone who go to Summit Racing quiet often. Those guys have choice and decent price, but each time the shipping (to Canada) cost was killing the deal.
Not anymore!
So I spent quiet a lot of time making my shopping list.
Heater core, rear rotors, a steering U-joint to replace the archaic ragjoint, and all it take to redo my fuel and steering lines.
All teflon stainless braided and -6AN fitting.
All fuel lines were rotten, the pump to carb line was rubber
ack2.gif
, the fuel return line was not even connected, nor the vapor line *facepalm*
Turned out that for the price of regular stainless fuel line set, you can have something that will last forever and get rid of ALL rubbers.
For the steering the question was to connect the hydroboost to the existing setup, this week's thread contains a good summary of the needed plumbing:
http://forums.corvetteforum.com/c3-t...ro-brakes.html

Some my have noticed in my previous post than the nut on the rear shock mount was not there. I installed it soon afterward, and torque a 70ft/lbs as says the AIM. The threads died at maybe 50. Damn.
Hopefully a forum member was selling a pair at good price... never say is done for good....

Still I could spend few hour in the garage, preparing the hydroboost.

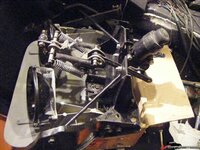
Cut the existing connection to install the new clevis. Made sure it has the same overall lenght than the vacuum booster.
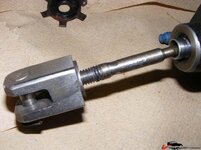
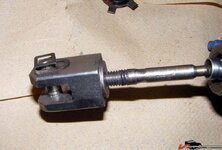
16554d4f3e1cf3afb.jpg

16554d4f3e1dbb8a0.jpg

This one won't break for sure
smash.gif


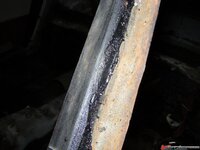
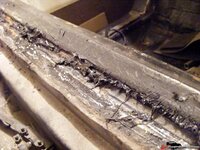
Made an adapter plate, put a small bead of weld
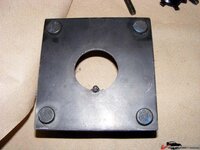
16554d4f3e1e63a6f.jpg

Grinded it....
16554d4f3e1f2b821.jpg

Painted the hydroboost after sandblast (at michel's), gutted it (so simple inside), the rebuilt kit is on its way.
16554d4f3e2043ed1.jpg
 
Hydrodone

I received my hydroboost rebuild kit.

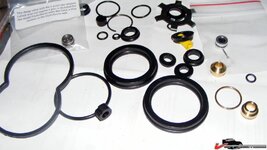
Here's what went in:
16554d5f90b48cde9.jpg

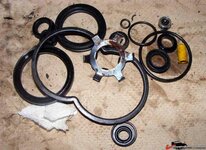
And that's what went out:
16554d5f90b53c4ff.jpg

I would have love to make picture of the rebuilt, but I just don't have the time. One word of caution: the yellow reservoir (a pressure backup) can potentially be under pressure, make sure to clamp it with a wise before you attempt to remove the retaining clip. Mine was not, didn't prevent me for stressing.

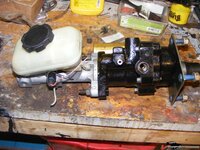
Here the hydrobeast rebuilt, matted to the replacement mc I found at the scrapyard. It fit well, but the reservoir is designed with and angle. As advised on this forum I'll got look for a replacement reservoir.
16554d5f90b5d3ad3.jpg
 
Last edited:
Ok, now I'm downright insane

Allrigth, I think I'm all set.
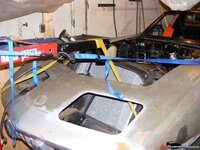
Today Sovan and I went to a truck company terminal pick my new front clip.
I bought the part from Ken's Corvette Part, front the Toronto area.
He made me a really cool price, and took great care to make sure the part arrive in good shape.

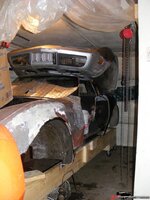
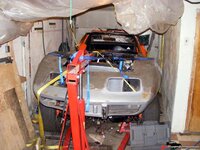
Only one problem..... I'm reaaalllly running out of space :
16554d5f90b894353.jpg

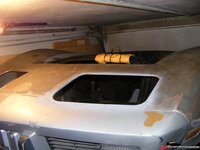
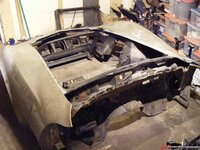
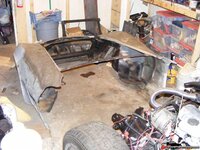
I went one step further into space compression insanity. The former body have to go, really quick.

It's in really good shape, and it's already stripped, so no hidden surprise.
16554d5f90b6a0697.jpg

I only asked for only the front clip and the rad support, and Ken priced it accordingly, still, since he wanted to piece to stay in good shape, he left the front bumper
16554d5f90b7ee8b9.jpg

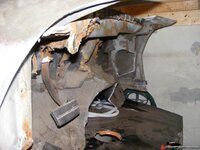
AND the firewall, with the pedals!!
16554d5f90b7572b6.jpg
So big
thumbsup.gif
to Ken.
Here's his website: http://www.corvetteparts.ca/

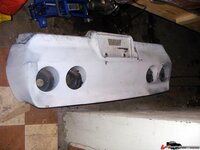
I also received the lastest body part I need for my resto.
16554d5f90b934ff2.jpg

The '80 fiberglass rear bumper, that cause a fair amount of trouble, we already talked about this.
I'm not fan of the '76 bumper, like lot of people actually.

Ok, I hope I found someone to take the body quick, I priced it "just above free". It's because I've been given a pristine body I'm "dumping" it, because it's still a good piece.
 
Achievement unlocked!

Yeah, after all the horror stories I heard, I though I won't not make it.
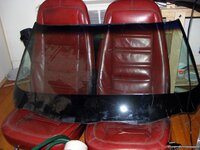
Wrong! Tonight I'm been able to remove my windshield without damaging it.
biggrin5.gif


16554d5f90e8aa4d3.jpg

Well, thing is the windshield was actually already cracked, but the crack starts at the top and make half a circle back to the edge so it couldn't grow any anymore.
Sovan suggested we could fix it with resine injection, we gonna give it a shoot, I have nothing to loose anyway.
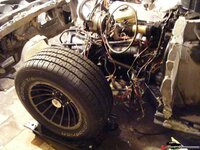
16554d5f90e996c55.jpg

So let's say I didn't aggravate the situation

After cutting the rubber spacer away from the pillars I could just pull it almost entirely, then with a thin steel wire I cut the lower part, where the spacer is much wider.
All along the operation I make sure I never ever touch the edges of the windshield.

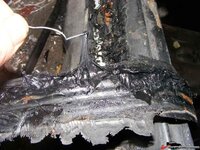
It's my first windshield, but I found suspicious that the bonding was still all sticky and gooy. Is that normal?
16554d5f90ed12f19.jpg

I expected something more solid, like a glue that would have cured.

I wonder if it's not another "Bubba was here" moment when I see so little surface contact

16554d5f90ebc0475.jpg

16554d5f90ea7bea9.jpg

You tell me.
 
On that HB setup, one thing that really struck me over the pix was you having the studs in the plate, when if you can see your way, you should put the studs to the body, reverse them, maybe tak weld in place, this makes future removal a snap instead of a royal PIA......I can see the GM way because of the vac boosters, but that's another advantage to HB, that I think you should do....

:trumpet::bounce:
 
Holy crap, D! That is one serious project you have going on in that little garage. I had no idea you were that deep into your car. It is all looking good from what I can see. As for the windshield though, I think that glue does stay soft. The windshield needs to have a little "float" in the frame so it doesn't crack (easily). Keep posting as you go. I haven't figured out if it's inspiring me to tear mine apart, or a warning against it.
 
As an Amazon Associate we earn from qualifying purchases. Product prices and availability are accurate as of the date/time indicated and are subject to change.
On that HB setup, one thing that really struck me over the pix was you having the studs in the plate, when if you can see your way, you should put the studs to the body, reverse them, maybe tak weld in place, this makes future removal a snap instead of a royal PIA......I can see the GM way because of the vac boosters, but that's another advantage to HB, that I think you should do....

:trumpet::bounce:
Yeah Gene, we talked about that with Michel last weekend. I'll have a look at that. On the other inside, there is the brake petal setup, woudn't welding the stud make the pedal ass'y impossible to remove? I'm considering putting a sitck in my Vette is a medium term goal, so I don't want to get into unreversible mod.

Holy crap, D! That is one serious project you have going on in that little garage. I had no idea you were that deep into your car. It is all looking good from what I can see. As for the windshield though, I think that glue does stay soft. The windshield needs to have a little "float" in the frame so it doesn't crack (easily). Keep posting as you go. I haven't figured out if it's inspiring me to tear mine apart, or a warning against it.
Thanks CD, I recently realized not much people on Vettemod was aware of my bold endeavour.
You are surprised, then imagine the face of my work collegue, mostly game programming geeks, kind of guys afraid by the mere shadow of a wrench
:huh::huh::huh:

My goal is to transform my overpriced downright scary rust bucket into a sound and safe budget restomod under a 12 month time frame. All really started with the purchase of my replacement frame from Tom, end of August last year, so I'm still on track.
 
Not that big a deal, when you got the car apart, I just took some Grade 8 3/8-16 bolts from the steering mount inside, faced the ends forward.....and stuck nutz on the outside through the HB plate...no biggie....in fact, because I have NO welding capability I decided to just use some home construction type paneling adhesive to hold the bolt heads in place....some time later I put the HB on, and the lazy trick worked.....

obviously needed to see the threads clean so to not break that cheep convenient 'solution'......


:harhar:;)
 
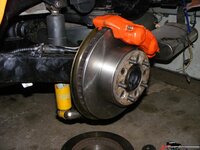
Tonight I could finish the front wheels.
smash.gif


16554d60de17238c8.jpg

Cleaned the rotors and put some hi temp paint.
Shimmed the rotors down to .002 runout with calibrated .001 bronze foil.
That's overkill with the o-ring piston but won't hurt.
I just need to tight the bleeder and I can put the wheel back on.

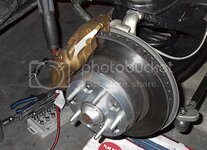
By the way, does someone knows about bleeders/plug position for each caliper? Could find it in the AIM nor Haynes'.
 
I was lucky and got my rotors under .004" runout by simply cleaning the mating surfaces and trying different clock positions. Moving the rotor one hole over will change the runout, try it... maybe you can do it without shims.
Your rotors don't have the holes for the rivets ? I drilled mine and cut 3/8" threads into the spindle flange - I use countersunk bolts instead of the rivets.
 
I was lucky and got my rotors under .004" runout by simply cleaning the mating surfaces and trying different clock positions. Moving the rotor one hole over will change the runout, try it... maybe you can do it without shims.
Your rotors don't have the holes for the rivets ? I drilled mine and cut 3/8" threads into the spindle flange - I use countersunk bolts instead of the rivets.
.004, that what I got with the right position, two shims a the two lowest bolt, and I was within .002
Yeah, those holes, are they really needed?
I'm not sure I can do it properly with my hobby column drill, and if I ask my mechanist it won't be free. Don't you need some kind of flat top drill bit to make the hole for the countersunk bolt?
 
I was lucky and got my rotors under .004" runout by simply cleaning the mating surfaces and trying different clock positions. Moving the rotor one hole over will change the runout, try it... maybe you can do it without shims.
Your rotors don't have the holes for the rivets ? I drilled mine and cut 3/8" threads into the spindle flange - I use countersunk bolts instead of the rivets.
.004, that what I got with the right position, two shims a the two lowest bolt, and I was within .002
Yeah, those holes, are they really needed?
I'm not sure I can do it properly with my hobby column drill, and if I ask my mechanist it won't be free. Don't you need some kind of flat top drill bit to make the hole for the countersunk bolt?

The only types that bother with replacing those rivets are NCRS types....they were part of some assy process GM used....50's technology....

I always put a thin film of wheel bearing grease on the flange surface to stop rust, and for that matter I grease the wheel studs also...makes the lug nutz easy to get on/off.....some guys cringe at the thought, but I been doing it for decades on all my vehicles...never a issue....

:harhar:;)
 
I'm not sure I can do it properly with my hobby column drill, and if I ask my mechanist it won't be free. Don't you need some kind of flat top drill bit to make the hole for the countersunk bolt?

You can use a 82° countersinking bit with these decent quality cap screws.
A single flute bit at low rpm on a home drill press works well to prevent chattering.
http://www.mjvail.com/holokrome/dd_fhcs.html
A local industrial, not automotive machine shop will tell you where the bits are available locally.
The screws, any decent bolt supply.
I don't know why anyone jacks with the shims, especially on their own cars. Having the rotors turned properly, mounted on the front hubs will give you almost perfect runout without the need for shims.
Back can be done that way too as an assembly before the axle is assembled.
 
MYBAD79 posted more detailed info on replacing the rivets with bolts, I remember his thread had many photos. Try a search.
 
MYBAD79 posted more detailed info on replacing the rivets with bolts, I remember his thread had many photos. Try a search.
Damn, you're right. The search led me to idea I was missing : reusing my rear rotor as pattern for drilling. I'm gonna bolt them together and drill baby drill.
Thanks Arthur.
 
Ok, done refreshing the headlights

16554d65b66069aa1.jpg

Took all the part in a CLR bath, then evaporust, then phosphoric acid.
Painted some, covered the other with WD40.
Lithium white grease in all axes and antiseize wherever steal meets aluminum.
I could not remove the long fine thread ajusting bolt, I had to drill and retap it 3/8-24.

Nobody showed up to pick up the body, so this weekend we gonna cut it in pieces and store whatever can be saved.
Finally I'm gonna reclaim some of my precious space
woohoo.gif
woohoo.gif
woohoo.gif
 
more room.... finally

Yesterday I brought Jeff and Sovan home and we did a body cutting party.
No picture of during the cutting, sorry but we were all way too busy to take pictures. We had to move fast before the night comes down.
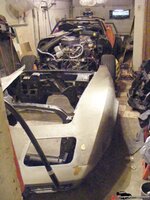
We took the new front clip out of the garage, cut the body in three, the rear clip, the windshield/pillar/firewall part and the front clip.
Here's the result :
16554d6a97a979181.jpg

I was right thinking bad thing happened to the old front clip before because it just felt into part as soon as we start separating it.
Here is one side of the front clip with the center piece :
16554d6a97b623b1a.jpg

Then we dismantled the body dolly and reclaimed the frame dolly it was sitting on.
Put the tires back on the new frame, and for the first time take the new version of my vette off the jackstands.
16554d6a97ae5bcfa.jpg

I was worried the frame dolly couldn't support the body of the car, turned out I was wrong, with those you can really move the whole car easily.

We move the front clip back in front of the new car, and I still have plenty of room to walk around.
16554d6a97b4743fa.jpg
Well, plenty if you've been like me climbing and crouching for months.
 
I didn't post update for two week. Not meaning I wasn't working in the garage, but what I did was long and not very spectacular.
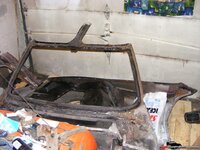
I could remove the firewall from the new front clip, it came out nicely.

16554d7daf9c4bdde.jpg

I could even keep the fragile center piece. Sure it helps to have the part out of the car.

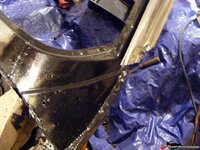
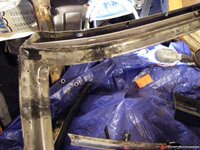
Since corvette's windshield frame seems very prone to rust I took special care of it.
It cleaned it to bare metal, hunting down rust in every crack.

16554d7db01f7cb1d.jpg

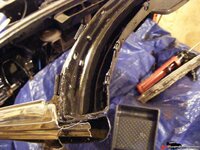
Then filled all those gap and seams with welder's caulking.
Then painted and top coated it

16554d7db00558130.jpg

I might have to grind some area back to metal to give windshield glue a good grip, I'm prepared, I don't mind

I also cleaned and painted all the small fasteners
16554d7db012ab151.jpg
16554d7db053e0ca3.jpg
The ttop can leak, the windshield frame won't give a damn.

This weekend I brough some help home, and we pushed the car back to the entrance of the garage, for a final separation.
I leveled the frame, with the help of this homemade ghetto tool:
16554d7dafb0f1e18.jpg
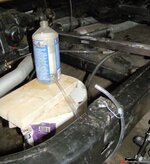
I had four tubes going from the bottle to the #2 and #3 body mount.
A regular level was also used, but this tools was save me a lot time.

Now the frame is leveled.
16554d7dafa7ecff4.jpg
We drop back it gently with some playdoo wrapped in plastic film at each body mount. We let it sit for a couple of minute then lifted it again.
I'm not sure the operation went right, when reading how playdoo have been pressed, the amount of bushing I would need seemed ridiculously low (a couple at most). I think I gonna try again, with some thicker material, like clay, and will let it sit for a shorter amount of time.

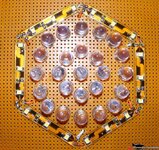
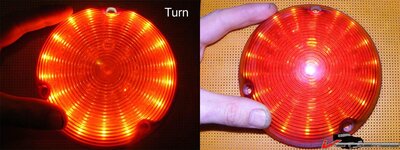
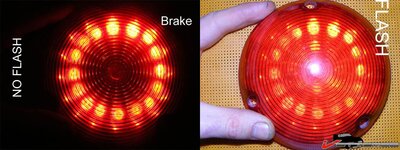
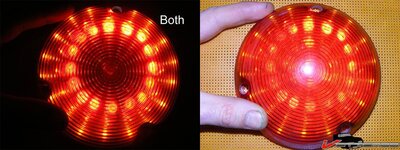
Then, here is a sneak peek of my LED taillight project.
16554d7da7014b3e2.jpg
 
:)

I love when things go as planned.
Tonight I finished welding the turn and brake light and juice it up.
The circuit is designed for 14v but only got 12v for test, it should be brighter in real life.
I tried to take picture, but it's almost impossible to get the real picture.

16554d7eeeb15a372.jpg
16554d7eeeb1f1998.jpg
16554d7eeeb2c0c74.jpg

The very good news, it that white led and red led don't look the same through the red bubble lens. The outer ring is white smd led and they look orange through the lens. Orange turn signal with all red lens, I love that.
The high brightness red led look just red. I usually prefer smd led, but I gave those focuses allegedly 40000 mcd led a try.
They are extremely focused, 15° view angle. On the pictures, the red dot are not the led itself, it's the projection of it's beam on the lens.
I'm not sure it's the right choice, I'll have to try with bright ambient light. After that if I'm not convinced I'll get back to smd led for the brake and drive light also.
 
Ok guys, that will be a boring weekly update.
I'm kind of sick, maybe some half-ass flu virus.
No really knocked down, but a lot of energy drained down the fever, so I didn't feel like taking pictures, those would have been boring anyway.
This week I rebuilt my vapor canister, repacked with activated charcoal from the aquarium shop.
I've put the windshield washer and the overflow bottle back in.

I did clean and paint the inside of the front clip, what will soon be my engine bay.
I also dealt with the laborious task of cleaning all my door, hood, TA and body shims. Grind, evaporust, acid then metalized POR15.
One good news, we did test the led taillight in ambient light, and they do shine bright enough, the pattern of the flashers is just beautiful.

I'm hitting a speed bump on the body now, some parts are missing to finish the fuel line. I want the line installed before I drop the body for good. I think I'm gonna focus on the doors restoration in the meanwhile. I hope there's not ugly bad surprise awaiting in them.
hide.gif


All I know it that the passenger side motor was having such a hard time lifting the glass it was constantly blowing the fuse.
 
P/W assy's require the removal of 50 thousand 7/16 hex bolts, like every one of them in site, remove window glass first....just two bolts gets that for you, make damn sure you don't drop it....

then soak the guide/operating rails in a pan of gasoline over night to degrease them after 40 years they get a tad sticky/dry on the white lube the factory used.....honestly, do NOT replace the lube with anything...I didn't and 16 years later mine still go up/down nicely.....I did loose a counter spring though, looks like a car rod on a electric range...tough little bastard there.....
they tend to snap....I junkyarded mine two for 5 bux, damn I paying new prices for dubious crap....

:shocking::beer:
 
P/W assy's require the removal of 50 thousand 7/16 hex bolts, like every one of them in site, remove window glass first....just two bolts gets that for you, make damn sure you don't drop it....

then soak the guide/operating rails in a pan of gasoline over night to degrease them after 40 years they get a tad sticky/dry on the white lube the factory used.....honestly, do NOT replace the lube with anything...I didn't and 16 years later mine still go up/down nicely.....I did loose a counter spring though, looks like a car rod on a electric range...tough little bastard there.....
they tend to snap....I junkyarded mine two for 5 bux, damn I paying new prices for dubious crap....

:shocking::beer:
Roger comrade Gene :thumbs:
keep up the good work :thumbs:
I wish I had the skills to do all this.
Thank Arthur.
Frankly, no skills required here. Just time time time and time.:smash:
Front clip gluing will be another story :confused2:, and there won't be any Control+Z to the rescue.
 
Spaaaaaaccccceeeee!!!!

Michel came to the the rescue last week, bringing his engine hoist.
So I could put my front clip in the air, and while I was at it, I put it beside the lifted body.
I could for the first time envision what it will be once finished, and most important I'm reclaiming a fistful of square feet, I can know walk freely around my car yeah!!!! :bounce::yahoo:

16554d9017301fd52.jpg

The front clip being now virtually weightless I could put the radiator back in place, that will be one less thing off my overpopulated shelves.


16554d90173130e9a.jpg
 
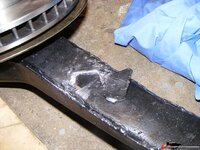
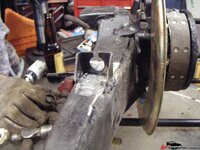
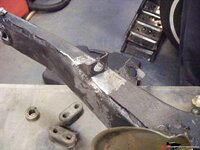
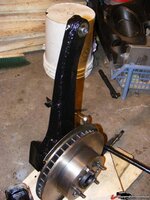
This weekend I've removed my trailing arm to put the final mod.
When installing the tires I noticed how close the parking brake bracket was from the tire. To I decided to move them.
Michel was kind enough to some MIG welding from me.

16554d901a7855d61.jpg

16554d901a7a424b4.jpg

16554d901a7b7f574.jpg

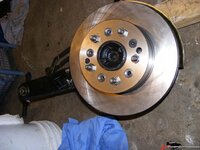
Then installed and shimmed my new rotors
16554d901a7c9a317.jpg

One final paint job
16554d901a7e73209.jpg

And back in place, this time for good I hope
16554d901a80165ad.jpg
 
Looking good, you made progress :thumbs:

I hope you're not planning on using that MrGasket wheel spacer that you show on the last photo :sweat:
 
Looking good, you made progress :thumbs:

I hope you're not planning on using that MrGasket wheel spacer that you show on the last photo :sweat:
huh... I mean... well .... no of course :sweat:
Seriously, if they are that bad what should I put instead?
 
Here's an example of hubcentric adapters, they come as thin as 5/8", I have used 3/4" and 1" on several cars with 300-400 HP and never had a problem.

IM000672zzzzzzzz.jpg

These bolt on to your axle and they fit tight over the axle's hub. On the outboard side there's another hub that centers the rim. Theoretically you can remove all five lugnuts and the hub ring holds the wheel (no load on the studs) - that's IF the rim is hubcentric as well, most wheels are but there are some that are drilled for different bolt pattens and the center is then machined oversize.
 
Back
Top