1978 Darth Vader Vette

I'm glad to see this project going again!! Can't wait to see how it turns out!!

So much has happened over the course of the past 9 months Darren. Good to be back working on the car.

I did purchased the PS & DS C6 door latch units. In fact, I think they are scheduled for delivery today - if they can get through the snow!! LOL

Did you have PIX of you installation???

Good fun!!

John
 
cant wait to see more pictures!!!

Hi Bob, once the snow gets out of here I should be able to get some garage time in. I have everything out of the way to drop the differential. I may pull the trailing arms too in order to black out all the under body. I want it all black!!
 
It seems like forever since I have been able to work on the Darth Vader Vette. I got some time in Saturday and today. Unfortunately, I did not take many pictures and most was nothing new - basically some mechanical stuff.

I dropped the rebuilt 3:36 last Thursday and on Friday, swapped it out for the 3:73 a friend had. After cleaning and a nice coat of gloss black POR 15 (everywhere except the bottom side LOL) I also applied a coat of the POR15 on the crossmember.
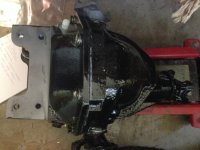
373 Diff R.jpg

Sunday morning I mated the 3:73 to the crossmember and raised it up into place. I'll grab a picture later. I still have to paint the bottom and I want to powder coat the snubber bracket before I bolt that on.

Here is a picture of the TKO600
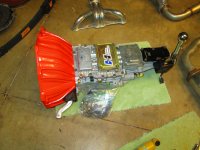
TKO600-3R.JPG

This unit comes with the bell housing, a new flywheel and a new clutch assembly. All I will need to purchase would be a new pilot bearing.

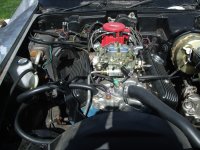
I also got the radiator and radiator shroud out tonight. I pulled the spark plugs out and rotated the balancer to get the distributor rotor pointing straight toward the rear of the car. The intake will be coming off and a shiny gloss black powder coated intake will be going back on in its place.

I ordered some POR15 gloss black engine paint yesterday - never used their engine paint before so this should be interesting. Not sure if I should remove the blue engine paint first or just clean and paint. Any thoughts on this???

One of the problems I have to work around - I had a small one car garage and the C6 rear clip will have to come off, massaged and replaced a few times. I have come up with a plan to use box rail - like they use of barn doors and make a monorail mounted down the center of my garage ceiling. I will post pictures when I do this. My thought is to raise the clip a tad, pull it toward the garage door until it clear, then raise it and move the clip forward.

Unfortunately, the only store that has it close by is almost an hour down the road - well worth it but getting the time!!!

That's it for tonight! I will do better with PIX next post.

John
 
A little progress

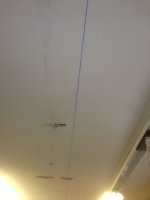
Got some time in the garage this past week and was able to get my idea of a monorail hoist installed. First, I measured and marked the center of the garage, then struck a chalk line to establish a center line for the box rail.

Center line.jpg

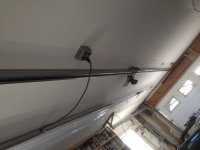
Next, I figured where the best place was for the 2 - 10 foot box rails to meet. I then marked each box rail 16" on center from that meeting point and drilled 5/16" holes in each box rail. I then installed the box rails using lag screws. Small ⅜" Impact wrench came in handy for this!!

View from front.jpg

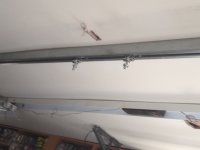
Next I slid the two trolleys into the box rail and added bolts on each end so the trolleys do not escape!!

Close up of Rollers.jpg

Now I am working on the clip. Where the the best lifting points are for the clip. I have to lift the clip straight up to separate from the from the car then back about 16" before I can raise the clip to the ceiling.

I also got all original steering removed except the steering box. I plan on getting the steering box out this weekend and then I want to clean and paint the areas where the Rack Attack goes. Nice thing about the Rack Attack install is - when I removed it from my buddies rolling chassis, I only disconnected what I had to disconnect to separate it from his chassis. Once I get my frame painted, the unit will be installed very quickly! Raise it up, put the bolts in all the factory holes! Main install DONE.

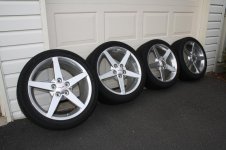
I got a great deal on a complete set of C6 wheels and tires this morning.

IMG_1273.jpg

Complete set for $150!! I rolled one of the 10 X 19 wheels under the rear clip to see how it looked - I know they won't fit without spacer - and I like the look. Once I feel I have the right wheel adapters, I will have the tires removes, sensors removed and have the wheels powder coated.

That's all for now. I am heading out to the garage now to clean up a bit and remove the door windows. They are getting into the way!!

Have a great weekend!

John
 
Last edited:
Got a little time this week to move forward on Darth! It is amazing how far back we have to go in order to go forward. Yes, this is the path we must follow to get to where we want to go BUT, I am anxious to be puttin' together and not disassemblin'!!!

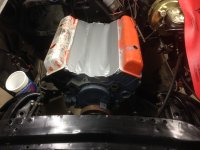
I want the the engine to be all black - currently the 78 GM blue. So I got busy getting the block stripped down.

First pic is the before

DSCF2339.JPG

Here is the after!

Block.jpg

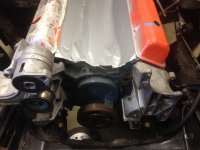
I played with the serpentine parts I had - attached the 2 main parts. I still have to powder coated these but had to see what it looked like.

Serp.jpg

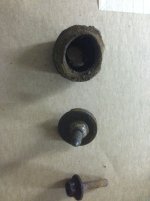
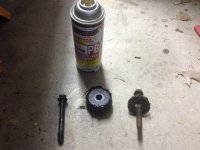
Thursday, I decided to see if the body mount bolts were "free" yet. I started on good old number one. It didn't turn ⅛" before "snap"!!! Here you go!

Number 1.jpg

Not a happy camper! At least #1 is accessible. I stop here and spray #s 2 & 3 with more PB Blaster. And Wait. There is a phrase used in NASCAR that they use all the time "you gotta slow down to go faster". So I slowed down and waited!!!

This morning I decided to try again on #3 body mount bolt! Aside from the fact that it takes FOREVER to unscrew, it came out in one piece - YEEHA!!! On to #2. Like #3, it came out all nice and easy. If I had the room, I would have jumped for joy but when you only have a foot or so around the car, just smile!!

Number 2 and 3.jpg

That's all for today!
 
I got to spend some time in the garage over the weekend - warmer weather didn't hurt any!!

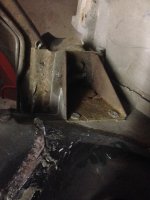
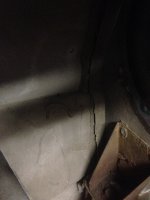
My first goal was to get the #1 passenger side body mount reinforcement bracket installed. Here is what it looked like from above:
PS #1 Top.jpg

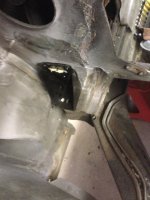
From the engine compartment
PS #1 Side.jpg

About ½ of the back of the bracket was rotted away. It is really difficult to get to the backing plate so I looked for another solution. I found a thread where one poster suggested using polyurethane structural adhesive. SO I said - WHY NOT!!!

I sanded the powder coating on the back of the bracket, sanded the area where the bracket went and used Norton structural adhesive to bond the bracket to the fiberglass. I used a couple pieces of wood jammed between the inside fender well and the bracket for "clamping" pressure. Then waited!

Here is what it looks like now.
New PS #1.jpg

This adhesive is so strong, some adhesive that squeezed out of the center hole decided to make part of the plywood clamp a permanent part of the car!!!

I plan on drilling 4 small pilot holes in the bracket once it is fully cured then installing 4 self tapping screws for a little added holding power. Probably don't need them but its something to fill the pre-drilled holes in the bracket.

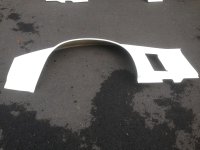
While waiting for the bracket to cure, I moved to the driver side and started sanding off the primer where the bonding strip is between the hood surround and the front quarter panel. The quarter panel is coming off to install this:
DS Flared.jpg

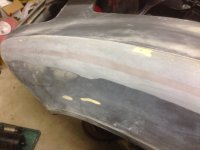
This is the bonding seam exposed after a bit of sanding with the random orbital sander.

DS-2.jpg

The next step will be to cut a ⅛" deep groove in the middle of the seam with a circular saw. This will give me a better separation between the bonding strip and quarter panel.
 
Last edited:
Woohoo!!

FINALLY - with the use of 2 small heaters, i got the garage warm enough to lay on the floor and got all the new passenger side mounts installed.

My methodology for this task is to do one side at a time. I got this from an article in an old Vette or Corvette Fever Magazine. I have used this process on 3 post 1973 Corvettes with great success. I had removed the bolts a week ago.

I placed a piece of plywood on an adapter I made for my floor jack and raised the body off the frame enough to get the old body mounts out and the new ones in.

Floor Jack 1.jpg

Floor Jack 2.jpg

The number 3 bushing is a PITA - tight quarters but doable.

I put anti-seize on all the bolt threads and ran them in finger tight. I want the body weight on the bushing for a couple days before I torque the bolts down.

As I said, I have done this a couple time and the only thing I have disconnected was the battery There is no battery in Darth so I just hopped to it. This method will work for the 1973 thru 1982 models - not sure about the bumper cars. I will know that when I do my 69.

If anyone would like a copy of this article, I have it scanned into a PDF. Send me a PM with your email address and I will get it to you!

Now I can start putting things back on!!!! :beer::beer: :beer:
 
Last edited:
You might add the article to the downloads section...

Now I can start putting things back on!!!! :beer::beer: :beer:
COngradulations! GovetteGo!
:drink::drink: Jim

Jim - the article was scanned from a 2001 edition of Vette. Before I do upload it (great idea!!) I would like to make sure somehow that this wouldn't create an issue for VetteMOD!!!

I think we would need their permission.

Any input here?????

John
 
Now that all the new body mounts are in and torqued to spec - I can start working on getting the C6 rear clip prepared for permanent install.

I am working in a small, one car garage (but not as small as Denpo's)!!!!! I will need to remove and install the clip a couple times in this process so, as shown in a prior post, I installed a Box rail in my garage ceiling to act as a monorail.

Today, I worked out a base on the clip in which I can hoist the clip up, pull back then off the skeleton.

Here is a picture of one of the pockets in the rear window on the passenger side.

[URL=http://s99.photobucket.com/user/GovetteGo/media/1PSRearSlot-1.jpg.html][/URL]

There are 3 pockets on each side of the window for the interior window trim.

I scavenged a bed frame and cut the rails to length. Then I modified the ends to fit into the pockets. Here is one end marked:
[URL=http://s99.photobucket.com/user/GovetteGo/media/3ExcesstobeRemoved.jpg.html][/URL]

Here is the rough cut out:
[URL=http://s99.photobucket.com/user/GovetteGo/media/4RoughCut.jpg.html][/URL]

Once I got all 4 ends cut down, I did several trial fits until the sections linked together without stress on the fiberglass. Here is where they join:
[URL=http://s99.photobucket.com/user/GovetteGo/media/5BedFrameSlots.jpg.html][/URL]

Here is the end of the modified bed frame inserted into the pocket on the passenger side:
[URL=http://s99.photobucket.com/user/GovetteGo/media/9PSInSlot.jpg.html][/URL]

I inserted the other piece into the driver side pocket:
[URL=http://s99.photobucket.com/user/GovetteGo/media/8DSInSlot.jpg.html][/URL]

Next, I joined the left and right pieces and extended the angle iron as far as it would go. Drilled a hole where they joined and installed a 5/16" bolt, lock washer and nut to hold the two pieces together.
[URL=http://s99.photobucket.com/user/GovetteGo/media/11Bolted.jpg.html][/URL]

I followed the same process for the pockets near the top of the window opening.

Here are the front and rear rails installed:

[URL=http://s99.photobucket.com/user/GovetteGo/media/2014-02-09200545.jpg.html][/URL]

There is just enough pressure on each rail at the pockets to keep the rails from moving. I will add eye hooks 3" in from each end, then rig a pulley system on the monorail.

Now to come up with a pulley system to raise the clip and move it up over the front of the car.


WOOHOO - Progress!!
 
Last edited:
I got some time today to address the winch and monorail. Getting close to being able to lift the C6 clip off the body.

First, I cut a piece of angle iron 12" longer than the distance between the 2 lift points. Then drilled ½" holes 6" from each end and bolted the angle iron to the trolleys in the box rail.
[URL=http://s99.photobucket.com/user/GovetteGo/media/AngleIron.jpg.html][/URL]

Next step was to attach a couple pulleys to the angle iron.

[URL=http://s99.photobucket.com/user/GovetteGo/media/PulleysInstalled1.jpg.html][/URL]

Now - How do I lift the Clip? I can't mount the winch on the wall - the clip has to move along the monorail to the front of the car so I can work on the back end - so the winch has to be "portable".

I got a scrap piece of ¾" plywood and bolted it to the rails mounted in the rear clip and mounted the winch on to the plywood.

[URL=http://s99.photobucket.com/user/GovetteGo/media/WinchMount1.jpg.html][/URL]

I did test the capacity of the monorail by connecting a nylon rope to the rear eye hook. I lifted the clip about 4" off the body.

[URL=http://s99.photobucket.com/user/GovetteGo/media/WinchMount2.jpg.html][/URL]

Next - I have to get a couple pulleys that I can feed the winch cable through.

Now, my next priority is to get prepared for the next winter blast to head our way tomorrow night.

Come on SPRING!!!
 
Last edited:
Keep the winch and mount! Never know what you may need to drag along...Seriously, some real thinking there.
Good idea on the upload - the MODs handle all the details.
Nice progress, makes me wish I was in my garage. Just spent 10 days building and wiring an electrical panel in a space about the size of a Rottweiler's kennel. Oh yeah, 90+F.

Cheers - Jim
 
excellent work....now i can tell my wife that in my next garage there is a need for a gantry crane to be installed in the cieling.

now i am thinking i wasnt creative enough on this ...

IMG01365-20130308-1041_zps8a4cce69.jpg
 
Top