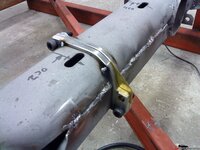
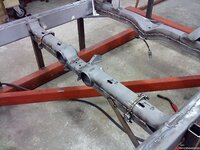
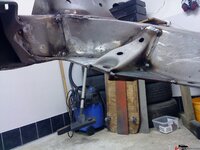
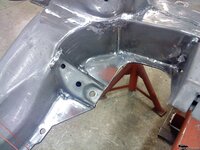
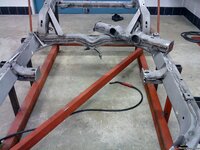
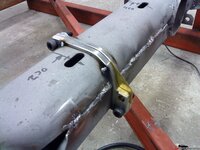
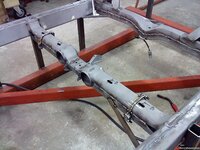
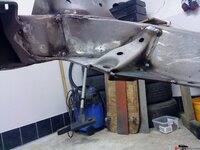
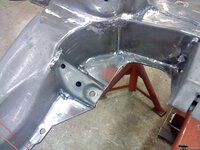
While I have the frame off...

VetteMod - Corvette Restoration, Modding & Performance Forum

Help Support VetteMod Forum:

elevatordude

Well-known member
Joined
Dec 29, 2008
Messages
325
Reaction score
0
City & State/Province
Palmer, Ma.
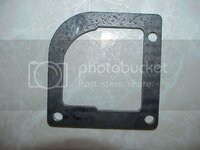
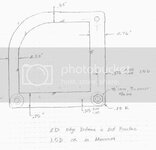
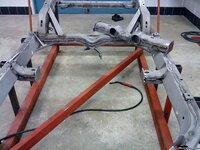
Should I cut the crossmember and make it removable and if I do end up cutting it would anyone have a template for the plates?

Thanks Ray
 
Wasn't it bullshark that had the templates? That was the only nice solution I saw, I cringe when I see cut crossmember with big through bolts and pieces of angle iron. When using through bolts the crossmember should be reinforced by welding a tube inside it (or drill a large hole and weld a tube flush with the outside)
 
Why not buy the correct brackets and x-member for the auto's and weld them in?
 
Why not buy the correct brackets and x-member for the auto's and weld them in?

Are they available outside of a junk yard? Also, why go stock if you can build better :beer:

With that being said, I am interested in these so called brackets. *Cough* I planned on...um...using angle iron and thru bolts...:o
 
Angle iron and thru bolts been on my car for some years now....~4-5?....

works fine....I even cut the bottom of the double loops outta there, angled back on the bottom of the channels pretty good, and then welded in a bridge/lattice work for strength....

:shocking:
 
I have one of the Bowtie crossmembers and it fit great. It's probably the only thing they do right!
 
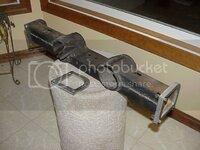
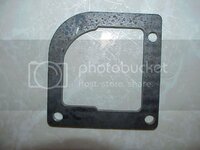
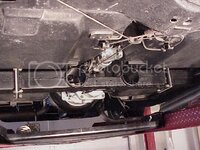
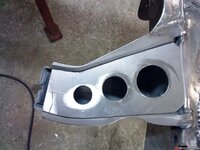
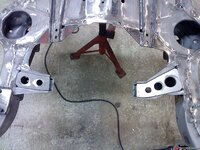
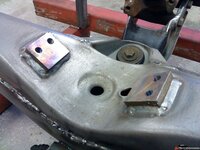
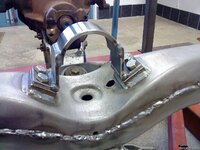
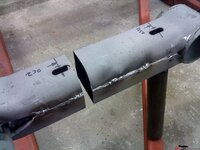
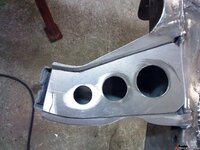
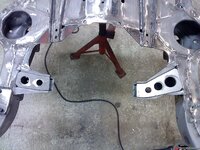
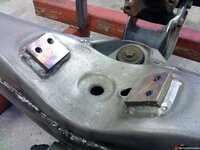
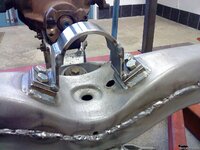
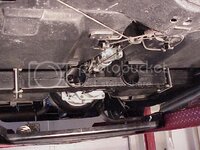
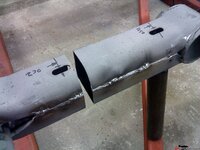
Well it looks like I'm going to cut and weld paltes on like bullshark did on one of his projects.
I pmed him and he told me it was ok to use his pics here.

crossmember1.jpg

crossmember2.jpg

crossmember4.jpg

crossmember3.jpg
 
I love that idea, but I wonder what something like that would run :( I couldn't make that with the tools I have and I cant weld... Maybe I'll just hot glue them on :idea:
 
NOOOOOOOO not hot glue ....JB weld:lol::lol:

I guess I'm lucky in this area I have 5 brothers and 6 sisters and we all have different jobs auto mech, engineer/draftsmen, a machine shop owner operator,home builder, oh yeah elevator repair, etc. Also our dad from a young age started showing that most jobs could be done with out farming them out. (Thanks Dad)
 
Last edited:
JB weld! But that's too expensive....:eek:

My dad was a do it yourselfer, but not when it came to cars. That's my niche. However, I lack fabrication skills. I can fix things and think of solutions, but can't always build it from scratch. Maybe I can make up those brackets (or something very close) and then I'll have my local shop weld them in. I always seem to have a supply of card board for brackets :D
 
I love that idea, but I wonder what something like that would run :( I couldn't make that with the tools I have and I cant weld... Maybe I'll just hot glue them on :idea:

Neither can I Greg. :cussing:
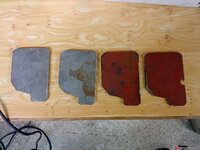
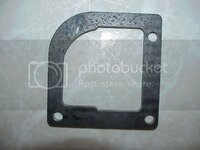
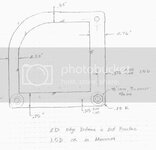
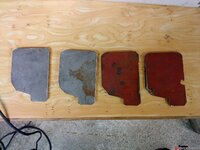
I cut the center section out using a sawzall then took it up to a friend of mines machine shop. They used the center section to define the inside cutout on the plate. Real easy when you have a water jet cutting tool. :amazed: They then cut out the outer profile per the drawing.
They real benefit of having the center of the plate cut out is that it makes the alignment a no brainer. I had them weld on the two inner plates. I then took the center section and bolted it up, tack welding the outer plates. Removed the center section and finished the outer plate weld around the inside cutout profile and as much of the outside as I could get to with the body still on the car. Welding was fairly easy but I had a lift and avoided the hot metal falling. That water jet cutting tool made the job a relatively easy. Worth every penny the shop would charge. Should be around $100 a set of four according to my friend. I have seen where a guy now out of odessa Texas Vettesbydesign (kevin gilliam) sells the plates, but without the center section cutout. I would think trying to align and fit welding just the flat plate would be a real challenge at least for me.

Bullshark
 
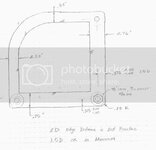
I agree with you Bullshark. If you did not remove the center section of the plates then you would have to remove material from the removable part of the xmember. I can see that being more tricky. Your approach seems rather sound as well. However, I may try to make my brackets with what I have and then have my shop weld them in. Should be cheaper and just as effective. I'm just not sure how I'll cut that inside curve. But even if I approximate the curve with short straight sections, I should still be ok as long as the gap doesn't become too large for a weld bead. But that may be just as difficult. I'll think of something.
 
Any updates on the removable crossmember question. I've got a TKO-600 tranny on order from Kreisler. I'm going to put in in the 68. Right now with the stock Muncie, its 3000 rpm at 70 mph...arghhh. Really sucks gas and also I hate to think of the engine wear and tear.

A previous posting has a sketch of some plates. I don't know where, as of yet, to have them fabricated here in LA. I also have an auto tranny crossmember. Part of the frame attachment brackets are included with the auto tranny crossmember...but not all of the brackets...someone cut off the attachment brackets with a cutoff wheel and a portion of the brackets were left behind on the frame! I worry about trying to use the auto crossmember since if I have it welded back on (i.e. weld what's left of the frame attachment brackets) and it's off a little in elevation, I could have driveshaft problems. I think I like the plates better.

Maybe 10 years ago, Guldstrand Motorsports in Glendale, Ca wanted $1500 to build a removable crossmember for the 68. I'll probably give him a call, but I bet the price is more now. Even 10 years ago, or so, $1500 seemed really pricey.
Thanks
 
Last edited:
Heres a few While I'm at it...


Plates
18774ecc15d5d9ea2.jpg

Cutting
18774ecc15d681887.jpg

Spot welding of plates in position.
18774ecc15d7c71f2.jpg

Everything in place
18774ecc15d86ff1a.jpg


Frame gussets

18774ec837923ecc2.jpg

18774ec83794d1731.jpg

Box the engine support
18774ec8379430d31.jpg

18774ec83793858f6.jpg

Rear safety loop connections.

18774ecc1d83de099.jpg

Safety loop

18774ecd6327662d8.jpg

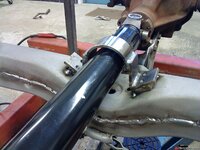
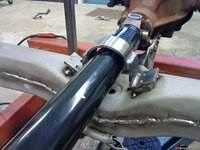
Cardan shaft and loop. The distance around the shaft to the loop is 8mm (5/16"). It should be enough to allow movement of the driveline during driving. If not, I will make a new loop.

18774ecd6328295d7.jpg

Ready!
18774ecc15d919c5f.jpg

Anyway theres more on this on this thread from 427suede,
http://www.vettemod.com/forum/showthread.php?t=7724
 
Any updates on the removable crossmember question. I've got a TKO-600 tranny on order from Kreisler. I'm going to put in in the 68. Right now with the stock Muncie, its 3000 rpm at 70 mph...arghhh. Really sucks gas and also I hate to think of the engine wear and tear.

A previous posting has a sketch of some plates. I don't know where, as of yet, to have them fabricated here in LA. I also have an auto tranny crossmember. Part of the frame attachment brackets are included with the auto tranny crossmember...but not all of the brackets...someone cut off the attachment brackets with a cutoff wheel and a portion of the brackets were left behind on the frame! I worry about trying to use the auto crossmember since if I have it welded back on (i.e. weld what's left of the frame attachment brackets) and it's off a little in elevation, I could have driveshaft problems. I think I like the plates better.

Maybe 10 years ago, Guldstrand Motorsports in Glendale, Ca wanted $1500 to build a removable crossmember for the 68. I'll probably give him a call, but I bet the price is more now. Even 10 years ago, or so, $1500 seemed really pricey.
Thanks

Marck made a trick crossmember once. PM him.
 
Heres a few While I'm at it...


Plates
18774ecc15d5d9ea2.jpg

Cutting
18774ecc15d681887.jpg

Spot welding of plates in position.
18774ecc15d7c71f2.jpg

Everything in place
18774ecc15d86ff1a.jpg


Frame gussets

18774ec837923ecc2.jpg

18774ec83794d1731.jpg

Box the engine support
18774ec8379430d31.jpg

18774ec83793858f6.jpg

Rear safety loop connections.

18774ecc1d83de099.jpg

Safety loop

18774ecd6327662d8.jpg

Cardan shaft and loop. The distance around the shaft to the loop is 8mm (5/16"). It should be enough to allow movement of the driveline during driving. If not, I will make a new loop.

18774ecd6328295d7.jpg

Ready!
18774ecc15d919c5f.jpg

Anyway theres more on this on this thread from 427suede,
http://www.vettemod.com/forum/showthread.php?t=7724

First cabin work going on here. Kudos.
 
I like that jig, would make a good foundation to adapt C4 suspension. Do you have more pictures of it?
 
Well it looks like I'm going to cut and weld paltes on like bullshark did on one of his projects.
I pmed him and he told me it was ok to use his pics here.
crossmember2.jpg

crossmember4.jpg

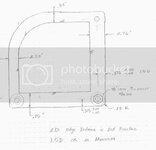
Could some dimensions be added to the hand sketch, for instance height and width? The interior opening of the hand sketch looks different than the actual cut metal. I assume the interior opening is different because it's a cut made by using the outline of the cross section of the cut off crossmember.

Thanks
 

Could some dimensions be added to the hand sketch, for instance height and width? The interior opening of the hand sketch looks different than the actual cut metal. I assume the interior opening is different because it's a cut made by using the outline of the cross section of the cut off crossmember.

Thanks

I took printouts from this thread to J&D Corvette in Bellflower, California. J&D has a lot of salvage parts, they do crash repairs, body work and painting, and also will do custom work. They also ship salvage parts internationally. They agreed to build me a removable crossmember that will be their version of duplicating the crossmember in this thread. This is in preparation for installing a TKO-600 in my 68. They gave me a quote for building the removable crossmember and TKO-600 installation and I took the car in for the work. I've done a lot of business with them before.

I need to have a removable crossmember for my 70 also, so I'll have two sets of brackets made!!
 
Last edited:
I like that jig, would make a good foundation to adapt C4 suspension. Do you have more pictures of it?

Take a look at my thread, I think there are a few good photos of it there.

//Daniel

Maybe I'm missing something. How do I look at your thread? Thanks. BTW, I once walked into J&D Corvette and they had several very large boxes going to England and Belgium on Federal Express. They make a lot of repro fiberglass panels and also just have a lot of salvage parts. Being a Southern California facility, there's less chance that a salvage part will be damaged by salt corrosion. I've ordered salvage parts from the US northern east coast and northern midwestern states and learned that salt corrosion can be problem.
And of course, a Corvette could have spent it's lifetime on salted winter roads, only to be driven to Southern California, and junked. So buying salvage parts in So Cal is not a guarantee of being salt free rust problems.
 
Here's what we did on the 71. Just a thought for those of wanting to modify your crossmembers...

Originally 4-spd car with non-removable crossmember. Purchased a used auto tranny crossmember, cut out the 4spd crossmember, leaving the welded tabs in place on both sides of the frame with enough metal left to be able to massage the metal a bit to adapt to the auto tranny crossmember. All mounting bolt holes were created as well to basically make it look like it was an original automatic car. To a trained eye though, you can see where the metal work was done. Took a bit of work to do this and some of you may question why? My sole purpose for doing this was because I will be installing a Tremec TKO-600. Having the removable crossmember will definitely help if I ever need to pull the tranny or replace the clutch. The 71 was not a numbers matching car anyway, so I was not too concerned about originality. I'm sure the Corvette Forum Purists would die if they saw this! Anyway, below are some before/after photos...

Before: - Kinda hard to see 4-spd crossmember still welded in. Apparently, I did not take any close-ups before the mods were made.

IMG_4326.jpg


During: Frame sandblasted and 4-spd crossmember cut out.

IMG_4749.jpg


During: Close-up of remainder of crossmeber left in place. Right and Left sides.

IMG_4751.jpg


IMG_4750.jpg


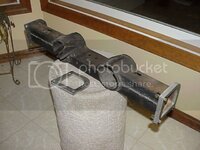
Donor Crossmember:

IMG_6098.jpg


After: Finished! Auto tranny crossmember bolted in and frame painted.

IMG_6137.jpg


After: Right and Left side close-ups of modified crossmember.

IMG_6138.jpg


IMG_6140.jpg


IMG_6148.jpg
 
It always annoyed my why Chevrolet didn't commonize the frame for both trans options during production. IIRC wasn't the service frame (from the dealer) compatible with both transmissions (having a removable crossmember and the Z-link bracket)?
 
I like that jig, would make a good foundation to adapt C4 suspension. Do you have more pictures of it?

Take a look at my thread, I think there are a few good photos of it there.

//Daniel

Maybe I'm missing something. How do I look at your thread? Thanks. BTW, I once walked into J&D Corvette and they had several very large boxes going to England and Belgium on Federal Express. They make a lot of repro fiberglass panels and also just have a lot of salvage parts. Being a Southern California facility, there's less chance that a salvage part will be damaged by salt corrosion. I've ordered salvage parts from the US northern east coast and northern midwestern states and learned that salt corrosion can be problem.
And of course, a Corvette could have spent it's lifetime on salted winter roads, only to be driven to Southern California, and junked. So buying salvage parts in So Cal is not a guarantee of being salt free rust problems.

I always chuckle at this opinion - for some reason people think California is Arizona when it comes to rust free. This idea seems to fly contrary what a map tells us.... that there's this large body of salty water next to the entire state, and next to that salty brine is a thing called "sand" which has quite a bit of salt in it as well.

This idea was recently driven (pun intended) home for me - I was looking at a 65 Buick wagon, and (shocking?) it was full of rust. After talking to the original owner, he mentioned an affinity for surfing and opined that no greater surf rig was built (perhaps he'd never heard of a VW bus?) :lol:
Needless to say, I passed and bought one in my own home state of Washington. :D (far fewer surfers here because 9 in 10 sharks agree that they're as tasty as seals)
 
Here's what we did on the 71. Just a thought for those of wanting to modify your crossmembers...

IMG_6148.jpg

I cut out my stickshift cross member also, with body on, and had welded on 2" channel on top/bottom rear of the cut section, the tabs rest on the left over cut outs, a very similar bolt holding it in place fore/aft.....

A suggestion I have would be to cut out the lower sections of the exhaust loops, and make the cut through the support itself very much wider than the loop, through the bottom, sort of a wide /\ wedge.....leaving a weak section up top of the loop, so to weld in the frame edges with plate, and then build a bridge/lattice one cross piece across the top of the main support, then measure to top of the arch, fill in one vertical, and it's strong as dirt....

What that did for ME, is enable the entire cross support to come out with ease, and I don't have to mess with exhaust pipes, unless I want to, after it's gone.....

:D GOD I"m a cheeeeeeeeep lazy bastard.....

:devil:
 
Back
Top