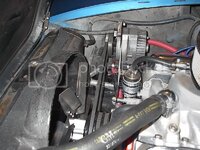
Power steering pump swap.

VetteMod - Corvette Restoration, Modding & Performance Forum

Help Support VetteMod Forum:

69427

The Artist formerly known as Turbo84
Joined
Mar 30, 2008
Messages
3,080
Reaction score
42
City & State/Province
Clinging to my guns and religion in KCMO.
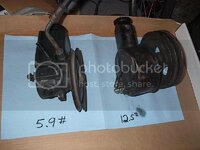
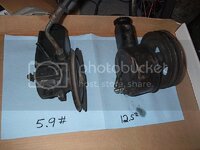
Well, I kinda hijacked my own thread earlier (the aluminum radiator support drifted into the alternator swap and the p/s pump discussion), so I decided to do a p/s pump specific thread. As you know, I pulled a pump off of a late '80's GM FWD car (with the requisite r&p steering) as it looked like it would be lighter than the beefy antique stock pump.
I put the FWD pump on my HF digital scale and it reads 5.9 pounds (less bracket and fluid). I then pulled the stock '69 pump off (with that big old cast iron pulley) and put it on the scale. It over did the weighing limit (11 pounds) so I put it on my bathroom scale. It read 12.5 to 13 pounds, depending on how often I set it on there. So, it looks like I can get a decent 6 pounds off the left front corner of the car with this swap.
Right now I'm working on some bracket/adjustment ideas.
 
Type II pump?? If so, std. mounting pattern, anything but KRC bracket will work, jones, sweet...blablabla... all the same Type II pattern. KRC brackets are commonly drilled for both, KRC iron pumps are same as type IIs. ONly alu ones are different.
 
Type II pump?? If so, std. mounting pattern, anything but KRC bracket will work, jones, sweet...blablabla... all the same Type II pattern. KRC brackets are commonly drilled for both, KRC iron pumps are same as type IIs. ONly alu ones are different.

I'm unfamiliar with the designation types. I'll post a picture to show the "new" pump.

Edit: Picture.

IM001525.jpg
 
Last edited:
Mike, thing I don't understand is, on my '72 I had the pump on the right, the heavy one, with a single stamped pulley like the one on the left....gotta be several lbs difference right there.....and I don't understand why a '69 would have a heavy double cast pulley on it, when my '72 did not, just a single belt to a add on single groove crank pulley....double groove behind that...

I think I would have remembered seeing a shark with that double cast pulley....

:drink::gurney:
 
Mike, thing I don't understand is, on my '72 I had the pump on the right, the heavy one, with a single stamped pulley like the one on the left....gotta be several lbs difference right there.....and I don't understand why a '69 would have a heavy double cast pulley on it, when my '72 did not, just a single belt to a add on single groove crank pulley....double groove behind that...

I think I would have remembered seeing a shark with that double cast pulley....

:drink::gurney:

The second groove drives the alternator on big blocks. What is the arrangement for driving your alternator?
 
As an Amazon Associate we earn from qualifying purchases. Product prices and availability are accurate as of the date/time indicated and are subject to change.
Mike, thing I don't understand is, on my '72 I had the pump on the right, the heavy one, with a single stamped pulley like the one on the left....gotta be several lbs difference right there.....and I don't understand why a '69 would have a heavy double cast pulley on it, when my '72 did not, just a single belt to a add on single groove crank pulley....double groove behind that...

I think I would have remembered seeing a shark with that double cast pulley....

:drink::gurney:

The second groove drives the alternator on big blocks. What is the arrangement for driving your alternator?

A/c wraps around water pump and crank, alt wraps around pump and crank, and steering is on his own with a small belt....and my memory not worth 2 craps on other folks cars, not that I have messed with that many BB sharks, but really now, ....:gurney::ill:
 
Oh I see yours has 2 bolts on the sides slid in from the back, they are a couple mm out in your pic. The aftermarkets are drilled all the way through the pump and the bolt goes in from the front and directly threads into the bracket. The pulleys are either easily removable (splined shaft + nut) or are machined w/ spokes so you can access the bolts through there, they are needed for adjustment.

24c4b45ba74749.jpg

If you can't/won't drill the housing all the way through and run a different pulley then you can not use that bracket. KRC does make a pulley for a stock GM pump:

http://www.krcpower.com/catalog_i6511662.html?catId=353645
 
I'll have to spend some time figuring out my options here. If I could get an inexpensive "off the shelf" bracket it would be worth the savings in my time that I would've spent fabricating a new bracket. The stock bracket for the new pump is sort of a curved channel arrangement where short bolts screw in from the front and back. There's just enough room between the bracket and the pulley to install/remove the bolts.
Regarding the reservoir, I'd sure like to find one that had the low pressure return port either in the back or on the (vehicle) left side to clean up the plumbing. Right now that port is aimed right at the timing cover and I'd probably have to do a hard line to get the bend sharp enough to clear the cover and water pump. I'm hoping that it's a simple matter of popping off the old one and slipping on the new one.

IM001525.jpg
 
I think I still have my SB PS mounts, if they help, you welcome to them....

:drink:
 
search ebay for type ii bracket, there are tons on there.

The port you mean can be drilled from both sides, so yes there are pumps out there w/ the other side open. I'd seriously look into a cheap aluminum type II pump, they are on ebay, set up for AN lines.
 
Regarding the reservoir, I'd sure like to find one that had the low pressure return port either in the back or on the (vehicle) left side to clean up the plumbing. Right now that port is aimed right at the timing cover and I'd probably have to do a hard line to get the bend sharp enough to clear the cover and water pump. I'm hoping that it's a simple matter of popping off the old one and slipping on the new one.

Isn't the return molded into the reservoir? Couldn't you block that one off and add another (or how about a remote reservoir)?

I'm kind of surprised you haven't switched to manual steering. Seems like the PS ram setup is a big weight penalty.
 
Isn't the return molded into the reservoir? Couldn't you block that one off and add another (or how about a remote reservoir)?

I'm kind of surprised you haven't switched to manual steering. Seems like the PS ram setup is a big weight penalty.

The reservoir has a port drilled into each side, with the nipple (glued?) in one side, and a plug in the other. I'll probably just look around in the junkyards and see if I see a similar design reservoir with the return on the other side. (I'm concerned about leaks if I try to put a fitting into the plastic there.)

Can't economically do manual steering. The rack is custom, and wasn't cheap. I can't justify the cost of another rack.
 
Here's a Type II set up for remote resevior with AN connections. I plumbed the return thru a fluid cooler as the C5 crowd report track day pump failures due to excess heat. Z06s get a cooler. Obviously this is on a small block but I used a commercial bracket for the low mount.

Grampy
 

Attachments

  • IMG_0932 (Large).JPG
    IMG_0932 (Large).JPG
    101.6 KB
Here's a Type II set up for remote resevior with AN connections. I plumbed the return thru a fluid cooler as the C5 crowd report track day pump failures due to excess heat. Z06s get a cooler. Obviously this is on a small block but I used a commercial bracket for the low mount.

Grampy

Nice looking setup!

I've got a C5 cooler sitting on the shelf that's going on the car when I get the pump bracket finished.
 
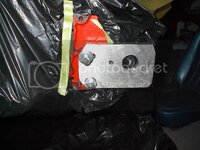
Got the first iteration of the pump bracket cut out of some 3/4" aluminum, and will eventually remove a bit more of the excess material as the process goes forward. Just eyeballing the placement of the pump led me to try this thickness of material. I've also been using the old engine to help mock-up some aspects of the pump placement.

IM001536.jpg

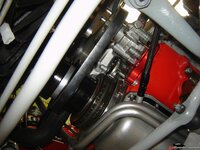
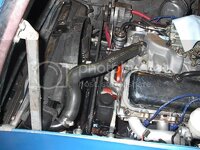
I bolted the pump up to the bracket and the in-car engine, and things look reasonable at the moment.

IM001540.jpg

The pump looks to be about an eighth inch too far forward with this thickness bracket from the looks of the belt connecting the pulleys. The next move is to either plane an eighth inch of thickness off the bracket, or see if aluminum plate comes in 5/8" thickness (all I had on the shelf in the garage was 1/2 and 3/4 inch material).
I still need to see what I need to do to hook up the lines. I'd sure like to just adapt the high pressure output port threads to the AN size that fits the line I made for the other pump.
 
I used the 3/4" bracket as a pattern and cut/drilled a duplicate out of 1/2" aluminum, and damn, the new setup lines up. Now to just trim away the excess, and get the new lines to hook up.
The new bracket is about a half pound lighter than the steel bracket, making the pump/bracket swap weight reduction at about 7 pounds.
 
I swapped the reservoir from another pump I have/had on my street rod. The "new" reservoir is very similar other than the return port points down (instead of up) and allows easier routing of the return line from the rack.
I'm also trying to see if I can put an AN adaptor in the pump output, and reuse the pressure line I made for the other pump. Anyone know what the thread size is? The pump is off a late 80's GM car, and I'm suspecting metric as some similar size English thread pipe fittings only engage about a half turn.

Thanks for any help.
Mike
 
I swapped the reservoir from another pump I have/had on my street rod. The "new" reservoir is very similar other than the return port points down (instead of up) and allows easier routing of the return line from the rack.
I'm also trying to see if I can put an AN adaptor in the pump output, and reuse the pressure line I made for the other pump. Anyone know what the thread size is? The pump is off a late 80's GM car, and I'm suspecting metric as some similar size English thread pipe fittings only engage about a half turn.

Thanks for any help.
Mike

Same issue I had with my '87 vette pump....but you probably not do my down and dirty solution....I used the '72 valving and cut the output pipe and used a 3/8 brass hardware store compression fitting....been there since '02 now....I did expect it to give troubles....but it sets there happy as a clam....


:smash::smash::quote:

edit....one thing I gotta add, one day, that car going to float away .....you gotta be into lead weight to hold it down by now.....serious efforts on your part there, interesting reading....:-)))
 
Well, got on Speedway Motors' website and looked around. They've got a lot of odd stuff for street rod usage, and I believe I found a fitting to adapt the pump to my AN hose. The fitting was inexpensive, so hopefully it will save me the time and money to build another pressure hose.
 
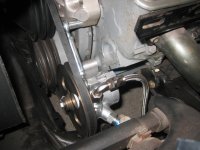
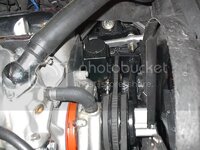
Got the new AN adapter installed in the pump and got everything bolted up to the engine. Everything fits pretty well other than I'll have to semi-disassemble one end of the high pressure line to get it to connect to the rack at a slightly different angle.

IM001543.jpg

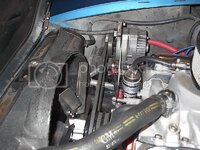
With the p/s pump belt tighted up I could then finish the alternator bracket adjustment. After a slight forward shim of the alternator placement the belt looks straight.

IM001542.jpg

I now just need to finish the extension harness to connect the alternator to the original harness on the driver's side. I'm also hoping to find one of those bolt/stud fasteners (3/8") at the upcoming swap meet to use on the upper-right w/p position where the alternator adjustment rod fastens to. I think that will make for a more stock/original appearance to the setup.

These two changes pull 21# off the left front (Seven pounds off the pump and 14 pounds consisting of the alternator and original bracket) while moving 13 pounds to the right front. I've got a couple other items in progress to further lighten up the left side by weight reduction and moving items to the right side.
 
With the p/s pump belt tighted up I could then finish the alternator bracket adjustment. After a slight forward shim of the alternator placement the belt looks straight.

IM001542.jpg

.

This could be MY perspective on the above pix.....but have you taken a straight edge off those pulley faces from one to the other, I swear that alt looks like it's pulley is not riding totally parallel to the belt....

like it's twisted.....alt mount twisted/shifted....:twitch::eek:
 
Looks straight by my eyes, but I'll take another look at it when I finish up TIG'ing the brackets for the seats I got from Karsten. So far it looks like I can take another 12-13 pounds off each side of the car with the seat/bracket swap.
 
Back
Top