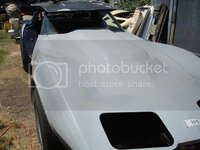
Rookie's First Restoration Attempt...

VetteMod - Corvette Restoration, Modding & Performance Forum

Help Support VetteMod Forum:

You did all the other work by yourself but your farming out the engine? There's nothing to rebuilding one if you have a decent machine shop local.

I just don't have the time to research how to build one, what to ask a machinist, what to do, what not to do...you get the idea. I drove myself crazy when it came to rebuilding my differential and trailing arms - and that was dealing with a few thousandths. I don't trust any machine shops up here to do the work for me...I'm paranoid when it comes to stuff like this. I can't build the short block anyways - most of it requires machining by a shop. I thought about this long and hard before I made the decision, and I am glad I am doing it this way. This will be the one project that will be out of my hands and in someone elses. Mike does incredible work, and has built a ton of these things. I am redoing absolutely everything else on the car - even my own bodywork and paint. The one thing I won't be doing is the engine...which is no big deal to me. I have the rest of my life to build one, and one day this one will be needing another rebuild as well.

I also don't have the money to fix my mistakes on an engine build. If there is one thing I have learned from the rear suspension rebuild is that mistakes will happen, and they will cost you money if you have nevver rebuilt it before. I can't risk that with the powerplant.
 
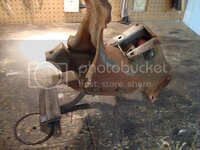
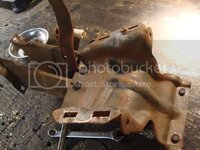
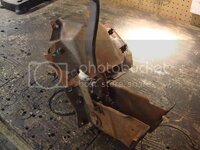
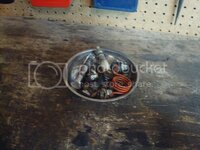
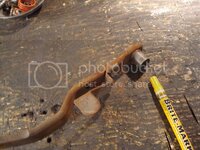
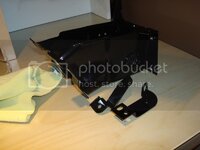
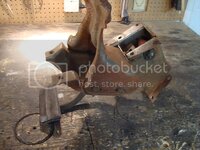
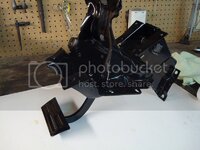
I got some work done on the vette today. Specifically the brake pedal assembly. Here is what It looked like before I tore it apart...

DSC04060.jpg

DSC04070.jpg

DSC04068.jpg

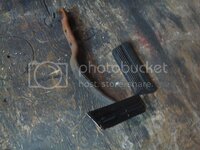
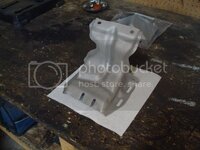
Just light surface rust as you can see in the pics...nothing major. I will need to replace the plastic bushings and pedal return spring to prevent premature failure once I get this car on the road. I've heard it is a pain to get to once the dash is in place...I'm gonna replace them while everything is apart.

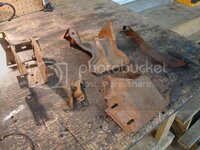
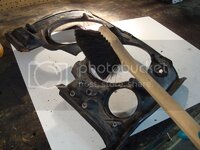
Here are all the parts disassembled and ready to be sandblasted...

DSC04078.jpg

DSC04072.jpg

DSC04073.jpg

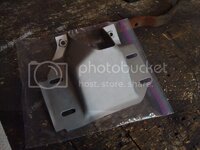
Here you can see that I removed the rubber brake pedal cover. I never liked the old look of it, so I've decided to fab up a cool looking functional brake pedal plate out of some steel or aluminum. I think I have some nice checkered plate at work that I could use for this project:eek: This is going to be a fun little project, I like doing small custom stuff like this:smash:
DSC04074.jpg

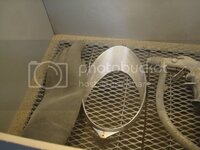
I started sandblasting the metal parts late this evening, so I didn't get a chance to get everything blasted. Hopefully I will be ready to powdercoat everything in the next couple of days, then I''ll need to reassemble everything and place this piece back in storage till who knows when. Used the blast cabinet for these parts of course...

DSC04075.jpg

DSC04076.jpg
 
looks very familiar. Replacing the pedal assembly was one of the worst jobs on my '79.... what a pain .... it seems a lot easier when most of the other stuff is out of the way :D
 
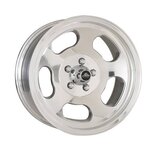
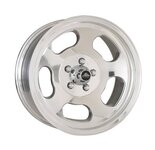
Awesome, I just bought a set of rear us indy rims for the rear of the car. I've looked everywhere for a set of ansen sprints, and these are almost identical to the ansens...if not the same. I bought them from forum member AzMotorhead - real nice guy. Awesome price too. Now I have to find a pair for the front of the car...I can't wait to get these mounted, they are gonna look sick!

ry%3D400.jpg

ry%3D400.jpg

ry%3D400.jpg

Will need to polish these bad boys up once I get them - another project to add to the list:eek:
 
First batch is done. The finish turned out great...no contamination in the powder. Its all in the prep work:D

DSC04081.jpg
 
As an Amazon Associate we earn from qualifying purchases. Product prices and availability are accurate as of the date/time indicated and are subject to change.
These rims are one of my favorites, 15x10 is hard to find.... the 15x8 for the front are $141 at Summit but the holes look a little different than yours (I think)...

are-a69_w.jpg

I wish they made these in 17x10 :search:
 
These rims are one of my favorites, 15x10 is hard to find.... the 15x8 for the front are $141 at Summit but the holes look a little different than yours (I think)...

are-a69_w.jpg

I wish they made these in 17x10 :search:

I don't like the reproduction american racing ones...they don't have that 3D look to them like the old ones do.
 
The holes are slightly different but other than that what's the difference ? The ones you bought are 10" wide and have a much deeper dish than the 8" wide rims .. do you have a pic of the originals in 8" width ?

BTW, just read that you flares are 4" wide, the 10" rim with for example a 295-50 tire is about just right for my 2" flares. Right now I'm using the stock rims with 295-50 tires and a 2" spacer - with the stock rim and 4" backspacing and the 2" spacer it's still not enough to really fill the fender with the flare..... you have room for 18x12 with something like a 345-35 tire....:sweat:

Have a look at V-twin's car, those are huge tires and I think 12" wide rims... still lots of room....
 
The holes are slightly different but other than that what's the difference ? The ones you bought are 10" wide and have a much deeper dish than the 8" wide rims .. do you have a pic of the originals in 8" width ?

BTW, just read that you flares are 4" wide, the 10" rim with for example a 295-50 tire is about just right for my 2" flares. Right now I'm using the stock rims with 295-50 tires and a 2" spacer - with the stock rim and 4" backspacing and the 2" spacer it's still not enough to really fill the fender with the flare..... you have room for 18x12 with something like a 345-35 tire....:sweat:

Have a look at V-twin's car, those are huge tires and I think 12" wide rims... still lots of room....

I already talked to Stan, who I bought my flares from. He said these wheels I got will fill up the flares nicely. In fact, he said that he used the same sized rim on the rear of his red/white road race vette.
 
Maybe it's just personal preference ? There might be some guys who think that if the wheel is 2" inside the fender it's a perfect fit. I do not like the tires to stick out past the fender lip but I do like them almost flush with the body.

Your 10" has what 3.5" BS ?? That's pretty close to my 8" rim with the 2" spacer, maybe 1/2" difference.

I'm not trying to rain on the parade but do some more research before you spend money on tires for these.

Look at Panic's '77 for example, he's using 12x15" rims as far as I remember and with the huge tires he's got it fits just right....

The 10x15 might fit the front with L88 flares ??
 
I am going to stick to my original plan and use the 10'' rims in the rear. Same size and backspace which Stan is running on his red/white road race vette. He has some pretty big meats on there and they take up a lot of room...I'm sure you've seen the pics. They fit the flares perfectly.

I finished the brake pedal assembly earlier today. Turned out pretty sweet.

Before...

DSC04060.jpg

After...

DSC04089.jpg
 
That brake pedal assembly looks nice, sad that it's hidden under the dash...
I agree, nice pc work, shame no one else is going to be all bent out of shape about it. I'll prolly pc mine when I get to that stage but I won't bother posting pics cos I don't rekcon anyone'll give a **** about something you'll never see again...

...unless you're NCRS
 
Started restoring the gauges for the interior today...went smoothly.

Here is a pic of the lower dash pad - I used a dry brush to get as much crud off of it that I could. I'll finish cleaning it up tomorrow with some cleaners, then I need to fix some of the seams.

DSC04112.jpg

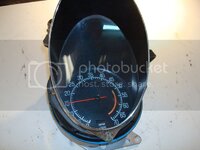
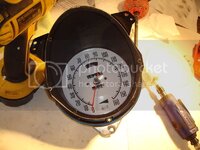
Here is the tach ready to be taken apart...

DSC04114.jpg

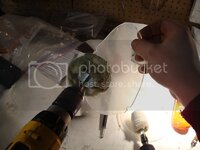
I disassembled both the tach and the speed, and sandblasted a few of the parts which I will powdercoat gloss black tomorrow evening...

DSC04117.jpg

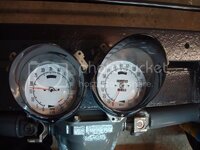
Next step was to install my white face gauges and polish the plastic lenses for the gauges. Will finish tomorrow and assemble the rest of the items.

DSC04125.jpg

Looks brand new!

DSC04127.jpg
 
They were quite easy to install. I highly recommend them...just make sure to follow the instructions that come with the gauges. Use soap and water on the back of the gauges, then push the solution out with a bondo spreader and your fingers - a needle to let the solution out works great.
 
Stinger I got to tell you
You impress me.
Keep it up

You right, the kid is good......Question, I note from the site those overlays come from, that they dont seem to differentiate from the mechanical to the electronic tachs....

the speedo is the same, not a issue, all tat 160, and I maybe well going for the MPH/Klicks version just to help me learn a automatic translationship feel for it....
point of knowledge without some calculator....

BUT, the tach faces are in fact different from the mechanical tachs to the same bolt in tach, that comes from 75,6,7 they have the two mounting screws further apart than the mechanical tachs.....so that means the overlay pieces would be different, but I only spotted one for the 68-77 tachs.....which one do you have....?? electronic or mechanical???

:gurney::hissyfit:
 
BUT, the tach faces are in fact different from the mechanical tachs to the same bolt in tach, that comes from 75,6,7 they have the two mounting screws further apart than the mechanical tachs.....so that means the overlay pieces would be different, but I only spotted one for the 68-77 tachs.....which one do you have....?? electronic or mechanical???

:gurney::hissyfit:

I don't know the difference between an electronic or mechanical tach, I've never rebuilt these before two days ago. I think they are both mechanical, could be wrong. I did realize that the tach's white gauge did not fit perfectly over the two "rivets" in the center of the gauge...the two rivets were a bit too narrow for the holes in the decals...but it isn't that noticeable, so I just went ahead with the installation. My vette seems to be a mix of car parts from various years...its kind of odd actually.
 
Last edited:
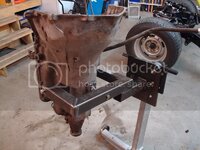
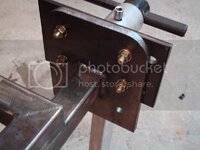
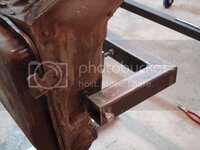
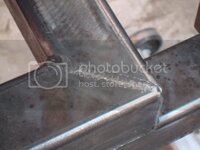
Built myself a transmission attachment for my engine stand. Works pretty good - now I can start rebuilding the TH350.

DSC04140.jpg

DSC04142.jpg

DSC04143.jpg

DSC04141.jpg
 
I HOPE THAT IS NOT A 3 WHEEL stand there, that tranny out to one side like that WILL make very tippy if so.......better stick a cross bar on it and TWO wheels up front, before you wind up wearing that tranny on your toes....

:flash::cry:
 
Back
Top