Old Project Revitalized - 56 Track Car

VetteMod - Corvette Restoration, Modding & Performance Forum

Help Support VetteMod Forum:

Look at posts 176, 180, and 184. I build a buck out of wood, cardboard, tape, foam, and whatever, then cover that with fiberglass and sand smooth. Then I pull molds off of the buck, cutting them apart where necessary to get them off the buck. Finally I pull the CF parts out of the molds and bond them together where necessary. Not a hard process, but a little time consuming. Hope this helps.
this is akin to Michael Jordon saying "well, I just play basketball"... you are way too modest, that looks amazing.
 
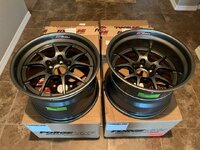
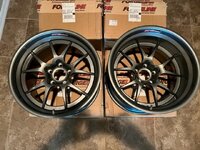
Just received a second set of Forgeline GA3R track wheels. 18X12 front, 18X13 rear. Same style as the first set.Forgeline 3.jpgForgeline 2.jpg
 
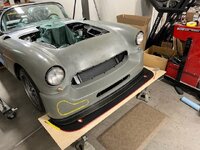
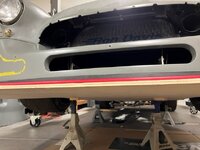
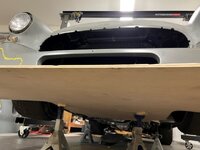
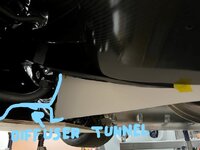
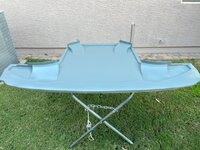
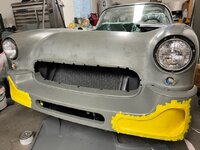
Reference the questions above. I will weight the wheels more accurately, but it looks like almost 23# for the 13X18 and 21+# for the 12X18. I currently have Michelin slicks - 30/65 front and 31/71 rear. That is about the same as 335f/345r. Here are some really early mock-up photos for you engineers to ponder. I am building the front undertray to accommodate a large Viper ACR splitter (TKO Motorsports). The undertray will have 4 tunnels, two of which dump behind the front tire ahead of "barge boards" that will help direct the airflow to the outer diffuser tunnels that run inside the outer rocker panel/side skirt and outboard of the frame rail. The undertray will be Kevlar (on the bottom for scuff protection) and carbon fiber with a foam core.Splitter 1.jpgSplitter 2.jpgSplitter 3.jpgSplitter 4 (2).jpg
 
As an Amazon Associate we earn from qualifying purchases. Product prices and availability are accurate as of the date/time indicated and are subject to change.
Pappy -
I like it a lot! {You've heard that before...}
Is the red tube an add-on or part of the Viper Splitter?
I like the use of Kevlar on the bottom side. I've used some in my fender build. I am saving the rest for work like yours.
PVC scuff pads maybe? (I hate them for aero reasons if just screwed on - but they can be used to "shape air.")

Cheers - Jim
 
Pappy -
I like it a lot! {You've heard that before...}
Is the red tube an add-on or part of the Viper Splitter?
I like the use of Kevlar on the bottom side. I've used some in my fender build. I am saving the rest for work like yours.
PVC scuff pads maybe? (I hate them for aero reasons if just screwed on - but they can be used to "shape air.")

Cheers - Jim
Thanks! The splitter is a laminated hard, dense plastic - red in the middle with a 1/8" black upper and lower surface. So, when you shape it, the red will always be visible in the center. We'll see how it holds up. I can always go back to the factory ACR splitter which I know through experience will take quite a beating.
 
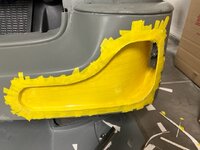
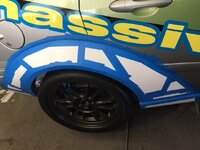
Preparing molds for aero "side curtains" to direct airflow outside of the front wheels - creates a low pressure outside the wheel which helps pull brake cooling air from inside the wheel. Also helps smooth airflow down the side of the car.Aero - Curtain 3.jpgAero - Curtain 2.jpg
 
What is the next step? Fiberglass the taped surface?

I'm really interested in what you are doing. I will have some similar things to do with my car.
 
What is the next step? Fiberglass the taped surface?

I'm really interested in what you are doing. I will have some similar things to do with my car.
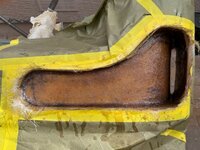
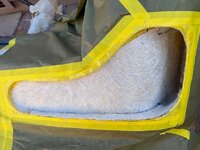
Yes, I will fiberglass the taped areas. That then becomes a male mold which I will finish sand, wax, coat with mold release, and pull a finished fiberglass part off of the outside. That gives me a smooth finish for the exposed surface of the duct which I will then glass in place in the air dam. I'll take a couple of photos as I go.
 
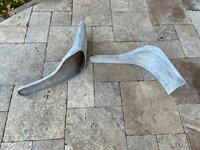
Okay, as promised. Here I glassed the inside of the poster board and tape soft molds, then peeled off the paper mold (previously waxed and covered with PVA. The difficult part is achieving symmetry. Since the soft molds are not super precise, it takes some grinding and filling on the resulting fiberglass molds to make them exactly the same. Now I will finish sand the molds, wax and PVA them, and pull the final parts off the outside of the molds. This will give me a smooth exposed surface of the parts that I will then glass into the air dam. The smoother the mold, the less finish work you have to do once the parts are installed.

Aero - Curtain 4.jpgAero - Curtain 5.jpgAero - Curtain 6.jpg
 
Is the poster board under the fiberglass mat?
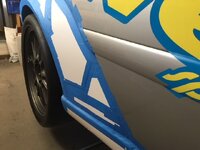
The poster board is under the yellow tape. I just formed the scoop out of taped together pieces of poster board, then covered the whole thing in tape to give it some rigidity. Then I covered the yellow tape with clear plastic boxing tape which releases the fiberglass resin much easier than the masking tape. Finally, I waxed the clear tape and put on a final coat of PVA as a mold release agent. Once the fiberglass cured, all of the tape and poster board just pealed off the back side with no effort . The tape does leave some lines in the fiberglass, but they are shallow and easy to sand out. Here is a photo of a poster board and tape buck I used when I built the fender flares for my Focus track car, to give you and idea of the build-up.

Focus FF 4.jpg
 

Attachments

  • Focus FF 1.jpg
    Focus FF 1.jpg
    67.6 KB
Pappy - I "shoot" my PVA using a Prevailer setup. It is small and usually just the right size and one less gun to clean.
For the big parts I do use the compressor and guns.
Using a spray application for the PVA keeps from lifting the wax. You knew that, but others here ready to practice might not.
Tips as we go. Nice work on the fender flare setup.

Cheers - Jim
 
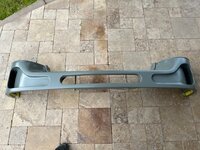
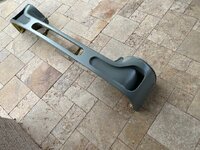
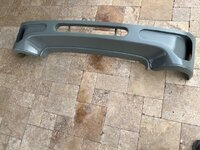
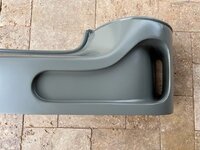
Finally got around to putting the first coat of primer on the modified air dam. It looks very functional - ducts for air curtains and a small vertical Gurney lip in front of each tire to help create a low pressure outside the wheel.Air Dam 1.jpgAir Dam 2.jpgAir Dam 3.jpgAir Dam 4.jpg
 
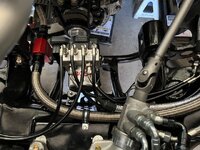
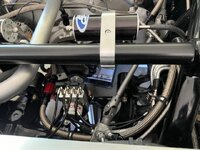
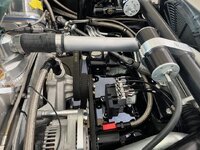
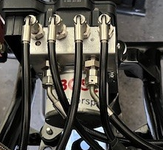
Short update. I installed a Bosch M5 stand-alone ABS system. Highlights include pump mounted on isolators; short flex lines built by BMRS from the pump to bulkhead fittings to pick up the hard lines (flex lines to isolate vibration and prevent cracked lines); 1/4" SS lines to MCs and 3/16" SS lines to individual wheels; C6 active (2010 and later) wheel speed sensors; yaw sensor mounted on transmission tunnel; pressure sensors installed in lines from MC to pump. Now time for lots of wiring.

ABS 1.jpgABS 2.jpgABS 3.jpg
 
That is interesting. I assume the two lines going into the distribution block are F/R brake lines from the master and the 4 lines on the top are to the 4 calipers? Does the yaw sensor and wheel speed sensor data go to a separate control module? Does it control all 4 wheels?

1712308221291.png
 
That is interesting. I assume the two lines going into the distribution block are F/R brake lines from the master and the 4 lines on the top are to the 4 calipers? Does the yaw sensor and wheel speed sensor data go to a separate control module? Does it control all 4 wheels?

View attachment 56830
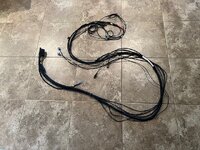
Correct on the lines. The yaw sensor and wheel speed sensors are electrical connections, and the electrical input block on the control module can be seen on the far left in the photo. The connector is not plugged in in the photo, but it is pretty massive with leads to not only the yaw and wheel speed sensors, but also to the power switch, ground, performance warning light, an adjustable function switch, a CAN bus connection for the ECU, and a connector for a cable that is used to hook up the laptop. You program the control module for all kinds of variables like wheel diameters, corner weights, track widths, etc. Yes, it controls all four wheels. I had to switch out master cylinders from Tilton series-78 to series-79 to get MCs that are ABS compatible.

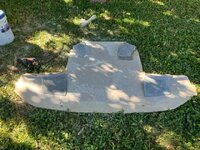
Here is the wiring harness. (Those are 18" tiles)
ABS 4.jpg
 
Last edited:
very impressive, what type of connector does it use to program it? usb, OBD? and i am guessing the programming is a proprietary app of some sort?
 
Back
Top