phantomjock
Well-known member
vette427 wrote in his post: Yikes! Time flies… I hope everyone is well…
I’m back on the corvette with a vengeance. I need to drive this car. I’ve moved to final assembly on most of the critical components. Happy to be back as always
I wrote; “I too am going "Hammers and Tongs" on Elvira. Will start a post on my "restart".
Pics won't be as nice as yours - my Garage is a Disaster area!”
All of you with Active Projects provide me the inspiration to get my ass in gear.
So here is an update on Project XC-3 RR, Code Name: Elvira
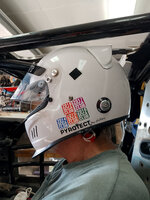
Felt like I was moving along pretty good. Then, had a flash of brilliance. Better check the seating before I mount the floors and belly pans. Good Idea. Now I have to drop the floor 2" for seat/head height. As is it would meet the 2 inch space between top of helmet (expired helmet) and TOP of Roll Bar – but my helmet was in the cage-contact area. Don’t like that. Also, the slots in the seat for the harness are too low, so will need to fab a harness bar below the cage cross-member. This pic is where I bash my skull:

I sourced and acquired the additional materials. And again, pressing on. The new Ground Clearance will be at 3.5".
The SCCA limit is; no parts may hit pavement with 2 flats on same side (paraphrased). Should just make it. (But, it could move me off 15” wheels…)
I have been worrying over Bump Steer. Think that's solved. But, I need to do some milling on the uprights to fit the steering arm. So, I have to pull the whole wheel assembly appart; brake rotors, calipers, etc.. Also, the rack to tie rods need fixin'... Should get me to zero – in theory and CAD. Will require an inch longer arms, however. Getting quite a collection now.
Headers are coated and back. I need to finish milling and tap the adapter plates. And, naturally check fit with the bellypan. (There is always a chance to go sideways here too...)
Got the Wilwood firewall mount dual MC bit in the post. I plan on doing a “draft” or prototype of the firewall for that space. Need to fit in steering shaft, throttle and my size 12’s on one side and headers and dry sump hoses etc on the other.
I see the process for the firewall install:
1. After belly Pan
2. After floors
3. Then Firewall, brake, drill steering shaft, etc
4. Throttle mounted on the floor Cable initially - then Drive By Wire
I'm looking at various materials for heat/noise. Has anyone fond "goodness" in the adhesive materials? I saw some perforated aluminum sheet that looked interesting and high heat reflectivity. Any thought here would be good. I seem to recall pappy using some gold foil. Wonder how that's working out?
Then, work the Dry Sump. I’ll have to fit hoses and headers in same relative space. I'd like to place the Dry Sump reservoir where vette427 has, but my cage is right through that location. It may wind up in the "trunk" or Passengers space. With the floors in – and seat sorted, I plan to get onto the wiring and fuel lines. Then start building out the interior prepping an engine that has never been run. (Could go way sideways here…)
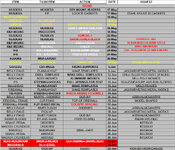
A couple of friends (also former engineers) asked if I had a PERT Chart or timeline to get the car “Done.” The best I could come up with is an Excel Spreadsheet. It helps keep me “on pace” and organized, sequenced, and get the support and parts to help avoid any delays. Can’t say it stops the rain or honey-dos -- but keeps me aware.
Here is a shot of Done So Far since my Official Restart (still been a bit slow – but moving along). I realize posting it more-or-less commits me, but you’ll note there are no dates assigned for completion. {No schedule over-runs please.} I MUST race NLT 30 Nov, including Testing and Track Time:

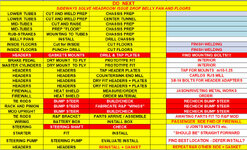
The What Happens Next List:

Cheers - Jim
NOTE: The original start on this project is found here: https://www.vettemod.com/threads/project-elvira-–-intro-and-update.10667/ 11 years ago!
