Rear suspension overhaul....

VetteMod - Corvette Restoration, Modding & Performance Forum

Help Support VetteMod Forum:

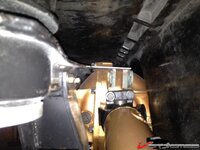
The factory welds were horrible, I couldnt believe how bad this was.
Not rusted, just not welded"
Anyway, is the reinforcment welds I did enough???

Oh yeah, by the way , nice work sir!

looks good but making that little plate to fill in between the two factory supports is quick and easy.... overkill for sure but while you can get to it, why not ?
 
P1000444.jpg
P1000452.jpg

Is this part of the suspension designed by Mr Lucaroni?
 
Update:

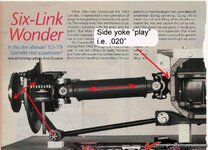
I had the passenger side pretty much done, I added trailing arm shims from the driver side to get the trailing arm somewhat centered in the pocket and tight.... now, then I tightened the strut rod and when moving the brake rotor in/out I could feel the end play of the yokes (roughly .020").
The Johnny Joints allow almost unrestricted pivoting of the trailing arm (unlike the stock bushings)... the rod ends on the strut rod are less restrictive than a rubber or poly bushing, therefore the entire arm pivots and twists a lot easier and this is now much more noticeable than with bushings.
Long story short: I don't like it and I decided to install the upper strut rods and use telescopic halfshafts from Tatton instead...... soon I'll have some nice 3" half shafts with solid spicers for sale :trumpet:

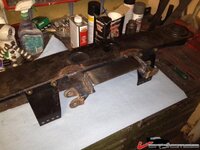
Anyways.... I tack welded the inner supports for the upper strut rods in place, next step is to remove the crossmember once again and weld it for good, I'll connect the two supports as well.....

214f6148c4991f4.jpg

.
 
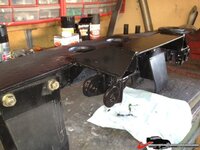
ok, took the diffy down once again to weld the upper strut rod bracket in place....


214f668b99dfedf.jpg


maybe one or two more gussets and it's ready for blasting and paint.....

214f668b9a25a22.jpg

.
 
As an Amazon Associate we earn from qualifying purchases. Product prices and availability are accurate as of the date/time indicated and are subject to change.
Karsten -
I certain with Germanic Precision - you'll have a complete set of dimensions to post on the downloads and driver's comments when you're done?

Would be great for anyone to follow up and do a DIY. Nice support on the bracket too!
Cheers - Jim
 
Karsten,

As usual, very nice work sir! What kind of benefits do you expect from the changes your making? Since we live here in sunny Florida, the land of straight roads, where the heck are you going to see how it handles in turns??? LOL

BTW, finally got the brakes done on my car, added Hawk perf street pads, things stops rock solid, great pedal...don't think I need the hydroboost, can't see how that could improve things.
 
The biggest benefit is that the wheel won't move in/out anymore. Ill add a diagram of what the problem was later...

Did you use DOT3 fluid or silicone ?
 
What kind of benefits do you expect from the changes your making? .

I noticed that the wheel can move in/out because of the slop in the side yokes, even though mine are new there's .020" clearance to the center pin. While this is not great it's probably better than most other C3s out there... the trailing arm bushings can "mask" this issue - with my JohnnyJoints the trailing arm can move almost unrestricted so i can feel this slop much easier than if I was using bushings.... I could have pulled the posi unit and tuned it but I really didn't feel like messing with that thing, especially because it has these coated clutches....

214f68b31d8abbd.jpg
 
Okay, so the mods aren't really for a performance increase, more to take up the excessive end play. I used Valvoline Synthetic DOT 3 & 4 (that's what the bottle says) brake fluid with a boiling point of 480 degrees F.
 
Well, I am hoping that the reduced sloppyness is increasing performance :D

I'm probably going with DOT3 as well and get rid of the DOT5....
 
Yeah, I'd imagine tightening it up should improve performance. I thought the DOT 3 & 4 fluid was a good choice, better than straight 3 but without the drawbacks of the silicone stuff. When you get back together we'll have to get a few guys together for a run somewhere!
 
got the 10" upper rods today:

214f6a6ddde7720.jpg

.

tack welded the upper outer bracket in place, seems to line up very nicely....

214f6a6dddc38cb.jpg

.

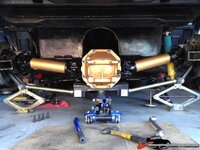
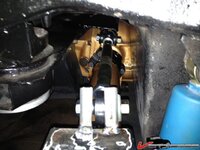
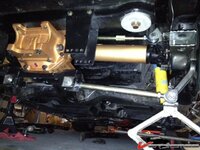
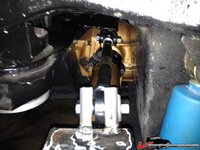
here's what I got so far, driver side is almost done (waiting for the telescopic half shafts) .... so far the suspension travels without any binding, it's actually quiet nice seeing something finally coming together....
.

214f6a6ddd8685d.jpg
 
got the 10" upper rods today:

tack welded the upper outer bracket in place, seems to line up very nicely....

here's what I got so far, driver side is almost done (waiting for the telescopic half shafts) .... so far the suspension travels without any binding, it's actually quiet nice seeing something finally coming together....

Looks like a pretty straight forward concept.
Did you determine the outboard mounting point to simply be parallel to the half shafts? Same mounting point lengths?
 
Looks like a pretty straight forward concept.
Did you determine the outboard mounting point to simply be parallel to the half shafts? Same mounting point lengths?

the upper rod is parallel with the half shaft, the lower rod is almost parallel. This should reduce the camber change but not eliminate it.

The upper outer mounting point is determined by a straight line from the lower outer mount thru the U-joint.
 
got the 10" upper rods today:

214f6a6ddde7720.jpg

.

tack welded the upper outer bracket in place, seems to line up very nicely....

214f6a6dddc38cb.jpg

Excellent work!

Where did you get those spacers for the rod ends? Did you make the "L" tabs, or did you buy them pre-made? An upper link is on my short list of modifications still to do.

I'm surprised that I've never seen an Oldsmobile Toronado-style CV joint system for the back end of the C2/C3 cars. It seems like it should be more than strong enough if it can stand up to a 455 Olds engine.
 
thanks :D

the spacers are from Summit or Jegs, I usually buy from one of the two, whoever has the parts in stock... search their website for "tapered spacer" or "rod end spacer"
The bracket is a modified coilover mount, these are $6.99 ... can't cut and fabricte for that low price :)
 
Same as the lowers, 3/4 threads if i remember right, holes are 5/8 with reducer sleeve to 1/2. Same rod end with 1/2" hole is way more expensive .
 
Karsten -
Were you able to find some bolts that fit "tight?" I was very disappointed with many of the bolts, pins etc I tried and still had slop in the bolt to sleeve interface.
Now have gone over to spherical joints instead.
That's coming together nicely BTW.

Cheers - Jim
 
When I did my lower links, I had very good luck with 5/8" grade 8 hardware bolts from the local ACE store. They fit fine with no discernible slop.
 
The lower inner bolts are the ones that came with my MidAmerica poly junk strut rods..... the bolts are useable, there's just enough clearance to get anti seize compound in between the bolt and sleeve.
The upper inner and outer bolts are the ones that came with the coil over brackets, they have a shank that is not threaded (just like the other bolts) and they fit fine.

Slop: without the upper rods in place I was able to push/pull the top of the wheel .020" - that's the end play on the side yokes. I highly doubt this is noticeable when using rubber or poly trailing arm bushings. Withe the JohnnyJoints it is very noticeable.
Now, what does this do to the strut rod bushings if it's left at that ?? Probably one reason these things wear like crazy, most guys have no idea how much the wheel can move or tilt in/out....

btw, I am still waiting for the new slip/spline half shafts... they had to order parts and that delayed the whole job a few days.... oh well, what is a few more days? :shocking: ....
 
Finally another update:

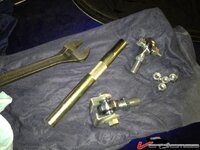
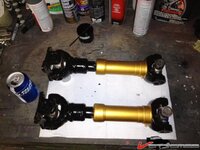
I received the slip shafts from Curtis Tatton in Utah.... true pieces of art.... I painted them black/gold

214f84e82e3d89d.jpg

.

although it was late tonight, I had to get at least one half shaft in there to see how it fits....

214f84e82e6e1d0.jpg

awesome stuff..... :D :D :D
 
Back
Top