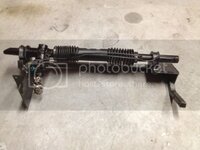
Rack and pinion - homemade Steeroids with GrandAm rack

VetteMod - Corvette Restoration, Modding & Performance Forum

Help Support VetteMod Forum:

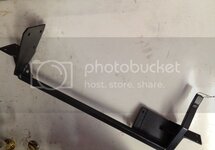
Ok, little more progress: sanded the epoxy, sprayed a second coat, sprayed gunmetal grey metallic basecoat.... More base and then clear tomorrow, got kinda rainy and dark today.....

photo_zps3b1a050d.jpg
.
 
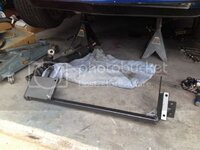
Haha.... This thing is going to hold the steeing rack so it won't hurt if it's a little stronger than it needs to be, better safe than sorry.... And it is really not that much work or money to add some gussets and the crossmember :)

Without the crossmember all the side-loads (left and right) are trasferred into the driver side bracket, when connected to the passenger side via a crossmember the driver side bracket is supported both ways.....

When this is done I am really tempted to intall my GoPro under the car and record the action 'down there' during hard cornering......
 
As an Amazon Associate we earn from qualifying purchases. Product prices and availability are accurate as of the date/time indicated and are subject to change.
Haha.... This thing is going to hold the steeing rack so it won't hurt if it's a little stronger than it needs to be, better safe than sorry.... And it is really not that much work or money to add some gussets and the crossmember :)

Without the crossmember all the side-loads (left and right) are trasferred into the driver side bracket, when connected to the passenger side via a crossmember the driver side bracket is supported both ways.....

When this is done I am really tempted to intall my GoPro under the car and record the action 'down there' during hard cornering......

PLEASE DO, I am very interested in what happens there under severe/racing? loading.....MY only comment is that the rack lateral loading is only on the driver/left side, not possible to affect the right/pass side because there is nothing for that bushing to grab on the rack tube....

so just what is the accomplishment by joining the two supports???

especially when having a cross support on the upper A arms???


:beer:
 
PLEASE DO, I am very interested in what happens there under severe/racing? loading.....MY only comment is that the rack lateral loading is only on the driver/left side, not possible to affect the right/pass side because there is nothing for that bushing to grab on the rack tube....

so just what is the accomplishment by joining the two supports???


:beer:

Correct, the side to side loading is only on the driver side bracket - until you connect that to the passenger side..... In other words: the lowest point of the driver side bracket is now supported sideways by connecting it to the passenger side frame... Forget about the passnger side rack bushing, just imagine what happens when you push/pull that rack left/right.... That force/load is taken by the driver side bracket and frame, the crossmember helps support the bracket, it's not only holding the rack.... Hope this makes sense, not easy to explain I guess.....
 
the cradle is not overkill. This will spread the loading over both frame members instead of mostly on the drivers side because of how the bushings clamp the rack. That's the reason I added a removable bar to the modified steeroids I did. I like this a LOT better, andd anyone who says the rack on the steeroids and similar stuff doesn't move under hard cornering hasn;t had the car up on the lift while violently turning the steering wheel
 
Man that sure is beefy. Looks great. I like the GoPro idea as well. Just make sure you safety tether it to something just in case it gets knocked. I simple zip tie should do it.
 
Man that sure is beefy. Looks great. I like the GoPro idea as well. Just make sure you safety tether it to something just in case it gets knocked. I simple zip tie should do it.

Yes..... I got the GoPro for my birthday last year, I would hate having to explain how it got crushed by a 315/35 tire ... :lol::suicide::mobeer::harhar:
 
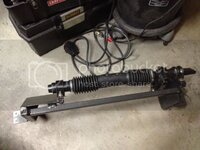
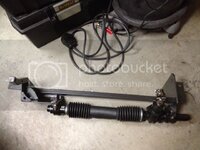
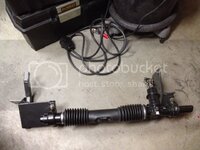
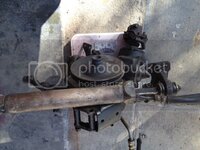
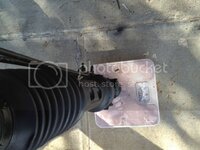
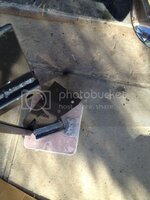
Today's progress: finally I got the rack bolted to the 'homemade' cradle.... I did a few test fittings today, just wanted to make sure it's all good before I call it "final"

photo_zps9f7fb626.jpg
.
photo_zpsa92918ad.jpg
.
photo_zpsbbac71ff.jpg
.

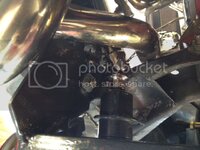
I have to weld a brace into the driver side engine mount before I can install this baby..... I want to brace the section where I cut out a section to make room for the steering shaft....

And here's another teaser: i fab'd a crossmember for a power steering rack as well ... Going to paint tomorrow..... :D
 
I have to weld a brace into the driver side engine mount before I can install this baby..... I want to brace the section where I cut out a section to make room for the steering shaft....

And here's another teaser: i fab'd a crossmember for a power steering rack as well ... Going to paint tomorrow..... :D

Which one will you use, the power or the manual.

Also, when you swap these on and out, how are you doing you alignment? Nice work BTW.
 
Which one will you use, the power or the manual.

Also, when you swap these on and out, how are you doing you alignment? Nice work BTW.

The driver side attachment point is in the same spot so I believe that if I keep the center link the alignment will not change...

The steering effort with the manual rack is really not all that bad, turns rather easy.... So far I really like it. I'll have to see how it feels driving it, it's 3.7 turns lock to lock and the power rack is 2.5 so there's a chance I might use the power rack but I would hate having to use a pump. I really like the clutter free look without the pump and the hoses....
 
3.7 turns is same as stock, which was why I loved my power rack, the car handles like the Miata used to....not a Silverado.....

:hunter::club:
 
Done ...... :lol::lol::lol::lol:


Going to take it out for a test drive tomorrow. Drove it only a few yards back and forth tonight, steering effort is perfect, not to hard, not too easy.....

Here's the power steering rack and the other cradle :

photo_zps1bb1583b.jpg
.
photo_zpsf12258b2.jpg
.
 
Test drive went well..... Increased tire pressure from 25 to 34 psi, made a difference :D

It'svactually as easy to turn the wheel as it was with the stock powercsetup, maybeca little harder but not much. I don't think I'm going to bother with that power rack at all, it's about perfect right now: reasonably easy to turn the wheel, no more clutte, no more leaks, no more play in the steering ....

Did I mention "no more play in the steering" ???? :trumpet::trumpet:

Now I need an alignment and then put some miles on this car :)
 
Almost identical to the cut I made on mine, but I didn't bother adding/welding in any additional steel....

:D

Welding overhead sucks big time !!!!!

I dunno how my welder buddy does what he does on jobsites....pipe/steam/boilermaker union....crawl into a pipe about a inch wider than he is, and set there ALL DAY making many passes on the inside of a pipe, to fill what he calls a root, then weld all day long filling in on that, and then pass a X ray test....

gotta be freeking kidding me....NFW....easier to remodel a kitchen or solder a wire, or fix even a C6 vette...for an electronic problem....:harhar::crutches:
 
Put all that stuff that i removed on my scale: a whoopping 50lbs ....

photo_zps12cf1d58.jpg

Now the power steering rack is 14lbs, the manual rack is less, probably around 12 lbs

photo_zps74530f3b.jpg

The bracket I built for the rack is 11 lbs ....

photo_zps03e0471c.jpg

So afterall a good weight saving even if you add the ps pump for the power setup
 
I'm really going to need dimensions on that thing...

I'll post the templates and dimensions once I'm sure it all fits and works .... The most important one is the driver side bracket, it dictates the position of the rack.

I would be interested in these too. I've been buying parts that I find good deals on. I like the idea of the cross bar and that you can put a lot of it together before you put in the car. It might make a good spring project. Thanks for the thread. Very informative!!
 
I'm really going to need dimensions on that thing...
I'll post the templates and dimensions once I'm sure it all fits and works .... The most important one is the driver side bracket, it dictates the position of the rack.

I would be interested in these too. I've been buying parts that I find good deals on. I like the idea of the cross bar and that you can put a lot of it together before you put in the car. It might make a good spring project. Thanks for the thread. Very informative!!


I'm going to post the dimensions and photos of the cardboard templates - stay tuned :D

A word of caution though: I believe I understand why Steeroids is using 3 U-joints..... It is masking variances in manufacturing their brackets and the frame .... with 3 joints the position of the rack isn't all THAT critical - if you want to get away with only two U-joints then it has to be spot on....

If you want it perfect then the final fit and weld has to be done with the stuff bolted to your specific frame.....

I can make another bracket - somebody willing to test fit it on his/her C3 ???

Another word of caution: this setup requires cutting the driver side engine mount.... this is to allow the steering shaft angle to be as smooth as possible and eliminate binding of the U-joints.....
 
I'm really going to need dimensions on that thing...
I'll post the templates and dimensions once I'm sure it all fits and works .... The most important one is the driver side bracket, it dictates the position of the rack.

I would be interested in these too. I've been buying parts that I find good deals on. I like the idea of the cross bar and that you can put a lot of it together before you put in the car. It might make a good spring project. Thanks for the thread. Very informative!!


I'm going to post the dimensions and photos of the cardboard templates - stay tuned :D

A word of caution though: I believe I understand why Steeroids is using 3 U-joints..... It is masking variances in manufacturing their brackets and the frame .... with 3 joints the position of the rack isn't all THAT critical - if you want to get away with only two U-joints then it has to be spot on....

If you want it perfect then the final fit and weld has to be done with the stuff bolted to your specific frame.....

I can make another bracket - somebody willing to test fit it on his/her C3 ???

Another word of caution: this setup requires cutting the driver side engine mount.... this is to allow the steering shaft angle to be as smooth as possible and eliminate binding of the U-joints.....


Beat you by some 12 years.......:lol::crutches::2nd:
 
I'm really going to need dimensions on that thing...

I'll post the templates and dimensions once I'm sure it all fits and works .... The most important one is the driver side bracket, it dictates the position of the rack.

I would be interested in these too. I've been buying parts that I find good deals on. I like the idea of the cross bar and that you can put a lot of it together before you put in the car. It might make a good spring project. Thanks for the thread. Very informative!!


I'm going to post the dimensions and photos of the cardboard templates - stay tuned :D

A word of caution though: I believe I understand why Steeroids is using 3 U-joints..... It is masking variances in manufacturing their brackets and the frame .... with 3 joints the position of the rack isn't all THAT critical - if you want to get away with only two U-joints then it has to be spot on....

If you want it perfect then the final fit and weld has to be done with the stuff bolted to your specific frame.....

I can make another bracket - somebody willing to test fit it on his/her C3 ???

Another word of caution: this setup requires cutting the driver side engine mount.... this is to allow the steering shaft angle to be as smooth as possible and eliminate binding of the U-joints.....

I would be willing to test fit it!!!! Let me know what you need from me.
 
I'll make one more driver side bracket from the templates that I have, without using my frame for fitting it..... then I'll make a pass side bracket from my templates....
I am convinced these two parts will fit ant frame - the bolts on the driver side are 7/16 UNF, the holes in the bracket are 1/2" so that allows for some differences between the production frames.... on the pass side the bolts are 3/8" and I drill my holes 7/16" so that's plenty of clearance too....
Problem is the center brace - I weld it between the two brackets when they're bolted to the frame - that way it's a perfect fit ( at least to my frame) .... now if there was somebody local who's willing to remove the entire stock steering system just to see how these parts fit that would be great....LOL...shipping this stuff is not cheap (due to size, not weight)
 
Back
Top