Near future project: Aluminum radiator support

VetteMod - Corvette Restoration, Modding & Performance Forum

Help Support VetteMod Forum:

Nine mm difference isn't much when eyeballing the alternator. Is the number (121) stamped into the housing anywhere?

Thanks again.

I tried looking at mine. I don't see any numbers. Take a ruler with.

The disadvantage of the 121 is it doesn't produce as much current at idle. I doubt you care about that.

That's correct. I'm not losing much sleep worrying about if this alternator is going to be able to operate the electric seat warmers while I'm waiting for the stoplight to turn green.

Hopefully Delco Remy/Delphi had the good manners to keep the same shaft diameter so I can swap pulleys.
 
Nine mm difference isn't much when eyeballing the alternator. Is the number (121) stamped into the housing anywhere?

Thanks again.

I tried looking at mine. I don't see any numbers. Take a ruler with.

The disadvantage of the 121 is it doesn't produce as much current at idle. I doubt you care about that.

That's correct. I'm not losing much sleep worrying about if this alternator is going to be able to operate the electric seat warmers while I'm waiting for the stoplight to turn green.

Hopefully Delco Remy/Delphi had the good manners to keep the same shaft diameter so I can swap pulleys.

All I can say is that the CS144 fits the early V belt pulleys, and I have a serp drive pulley on a earlier 17SI series alt...like off a '79 Seville...108 amp rating...
 
Getting the stock pulley off of a CS144 can be interesting, though.

Finally got my 144 rebuilt and I think I solved the battery drain...bad diode in the bridge rectifier. The voltage displayed on my voltmeter is a bit more sane than before, too. Those stupid things are like a jigsaw puzzle, though. Normally I'm good at putting things back together just the way they came apart. This time I had to watch the AlternatorParts.com videos on YouTube twice and take it apart about 8 times, along with a long road trip to pick up a voltage regulator that it turned out wasn't the problem. Now I could probably rebuild on in about 20 minutes... :lol:
 
Getting the stock pulley off of a CS144 can be interesting, though.

Finally got my 144 rebuilt and I think I solved the battery drain...bad diode in the bridge rectifier. The voltage displayed on my voltmeter is a bit more sane than before, too. Those stupid things are like a jigsaw puzzle, though. Normally I'm good at putting things back together just the way they came apart. This time I had to watch the AlternatorParts.com videos on YouTube twice and take it apart about 8 times, along with a long road trip to pick up a voltage regulator that it turned out wasn't the problem. Now I could probably rebuild on in about 20 minutes... :lol:

Take a good size rag on the fan, stick a 1/2" impact on the nut....off she comes....no impact you are SAOL......:suicide:

edit, bad diodes are easy, anything suspect, stick an oscilloscope on the output stud....you see that waveform is screwed because the parade is gone....
 
Last edited:
One of these days I need to learn to use the o-scope I have in the garage. I have some electronics projects that need serious troubleshooting.

I think I might have had to pull the fan and pulley from a dead CS130. All I remember is that one of them had a split-cone bushing inside the pulley that absolutely would not let go. Took me several hours to find a way to coax it loose, any attempts to use a puller on the pulley just made the cone tighter. :cussing:

If memory serves I ended up using a 2lb. drill hammer with a bearing driver and socking the ever-loving **** out of the pulley, which pushed it down enough to free that cone. It didn't do any favors for the rear bearing, but as the alternator was dead I really didn't care.
 
Last edited:
Finally got my 144 rebuilt and I think I solved the battery drain...bad diode in the bridge rectifier. :

I tracked down the same thing on my old suburban. It was only 15 milliamps drain which i throught was normal. But that's enough to drain a battery over a weeks time.
 
As an Amazon Associate we earn from qualifying purchases. Product prices and availability are accurate as of the date/time indicated and are subject to change.
I just googled the number off a spare alternator that I got at my favorite junkyard years ago. (It looked small and light so I took a chance for ten bucks.) It's a CS130, which is the same weight as my stock alternator (which is why I didn't replace it). So, at least I have a CS130 size and weight reference next time I'm at the junkyard looking for a CS121.

I'll probably use this on my street rod truck so my ten dollars doesn't go to waste.

Edit: I just looked up the part number for the CS121. It appears to be 10463135. The picture on the website makes the 121 look visually identical to the 130 except for the front frame tab that is used to adjust tension on the belt (on Vee belt applications) is clocked at a different location.
 
Last edited:
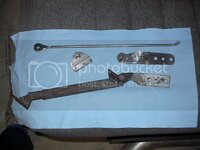
Got tired of breathing fiberglass dust while cutting clearance notches in the underside of the Toledo-Pro hood I put on the '84 so I took a break and did a quick simple project on the '69. I took the hood support mechanism off and weighed it, and thought about trying to do something a bit simpler and lighter. Here's what I came up with.

IM002172.jpg

The stock part is 14 and a half ounces, and the new stuff is 6 and a half ounces. A half a pound reduction, but it's up front, up high, and ahead of the wheelbase.
A coat of paint to make it less obvious:

IM002177.jpg

And in the stored away position:

IM002178.jpg

I have some aluminum rod that I would have liked to have used for the support rod, but while pretty decent in tension, it wouldn't work out worth a crap in this compression task.
As I've mentioned before, it ain't much weight reduction, but I'm running out of ideas.
Now back to the '84.
 
The stock hood support looks like some 50's screen door technology. Also kinda dangerous. You know how you release the latch pawl by lifting the hood a little? I remember someone describing how the wind lifted the hood, released the latch and the hood slammed down. I guess thats why they put those sqiggly ends ot the prop rods in modern cars.
 
After all you weight reduction ideas how much does the 69 weigh now?

It's about 2900 pounds. It was at 2910 (1/8-3/16 tank of fuel, no driver) the last time I had it on a scale. I've since taken out about 35 pounds with several items (the majority being the '79 seats that I got from Karsten). I then added about 25 pounds of aluminum sheet in the bellypan.

I'd like to take out more weight, but I'm running out of ideas to reduce weight while still keeping the car looking like a street car, not a stripped down race car.

I'm always open to legitimate suggestions if anyone has some.
 
After all you weight reduction ideas how much does the 69 weigh now?

It's about 2900 pounds. It was at 2910 (1/8-3/16 tank of fuel, no driver) the last time I had it on a scale. I've since taken out about 35 pounds with several items (the majority being the '79 seats that I got from Karsten). I then added about 25 pounds of aluminum sheet in the bellypan.

I'd like to take out more weight, but I'm running out of ideas to reduce weight while still keeping the car looking like a street car, not a stripped down race car.

I'm always open to legitimate suggestions if anyone has some.

What about making fiberglass molds of the bumpers then chrome wrapping them?
 
What about making fiberglass molds of the bumpers then chrome wrapping them?

That's a bit too faux for me. I have kicked around trying to duplicate the front bumper in aluminum, and then polishing it to look like a chrome bumper.

Don't know if I've got the skills to do it, though.
 
What about making fiberglass molds of the bumpers then chrome wrapping them?

That's a bit too faux for me. I have kicked around trying to duplicate the front bumper in aluminum, and then polishing it to look like a chrome bumper.

Don't know if I've got the skills to do it, though.

The polishing part easy

my parts I have just done 120grit and aluminum polish

knuckle4005.jpg
 
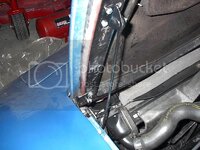
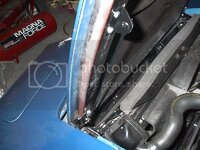
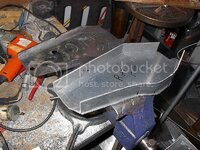
Had one of my many ADD moments while working on the '84, and felt like doing something more interesting on the '69. Gonna take a short break and do some aluminum fabrication on the radiator crossmember brackets.

IM002191.jpg

These things are pretty simple in shape, and the material thickness makes it easy to TIG. The weight difference won't be great, but it will still be a few less pounds in front of the wheelbase.
 
how about making the seat frames out of aluminum? lose the springs and replace with webbing...

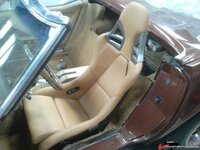
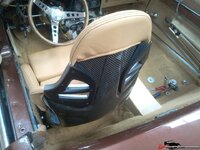
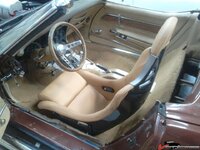
We think alike. I was in the process of drawing up some framework sketches when I got a good deal on some '79 seats from Karsten. The later seats are about 10-15# lighter (each), and I made some aluminum brackets which were about 3# lighter (each), for about 30# off the car.

The interior would certainly look a bit more original with the stock seats, but the later seats do have a bit more side support which is a big improvement over the flat as a board originals.
 
I thought I'd be clever and lose weight with some aftermarket seats.... which I'm sure they would save weight since they don't fit....

next on my agenda is re-engineering my seats for side support and for the harnesses
 
how about making the seat frames out of aluminum? lose the springs and replace with webbing...

We think alike. I was in the process of drawing up some framework sketches when I got a good deal on some '79 seats from Karsten. The later seats are about 10-15# lighter (each), and I made some aluminum brackets which were about 3# lighter (each), for about 30# off the car.

The interior would certainly look a bit more original with the stock seats, but the later seats do have a bit more side support which is a big improvement over the flat as a board originals.


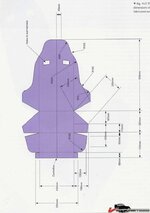
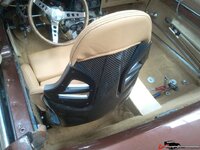
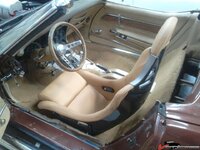
Want lightweight seats?? These weigh next to nothing and have awesome support

250eedec5c69de.jpg

250eedec620201.jpg

250eedec6662ef.jpg
 
DIY?
Here's a pic:

126950ef0250ee3ff.jpg

There is a whole thread there on covering etc. http://www.locostusa.com/forums/viewtopic.php?t=3214

Also, Rorty has a PDF of his seat.
http://www.rorty-design.com/files/Rorty Basic Aluminium Seat Pattern.pdf But, pdf is big to post - so just a link for you...
He has brackets there too - which I may use for my Kirkey.

You could make the "bucket" then bead-foam that and then cover. Perfect custom fit. Until you start celebrating with the beers! :drink:
Link to the DIY follow on for the pouring foam trick!: http://www.locostbuilders.co.uk/viewthread.php?tid=152517


Cheers - Jim
 
Last edited:
how about making the seat frames out of aluminum? lose the springs and replace with webbing...

We think alike. I was in the process of drawing up some framework sketches when I got a good deal on some '79 seats from Karsten. The later seats are about 10-15# lighter (each), and I made some aluminum brackets which were about 3# lighter (each), for about 30# off the car.

The interior would certainly look a bit more original with the stock seats, but the later seats do have a bit more side support which is a big improvement over the flat as a board originals.


Want lightweight seats?? These weigh next to nothing and have awesome support

250eedec5c69de.jpg

250eedec620201.jpg

250eedec6662ef.jpg


those are really cool, but have 2 problems
1) they're more valuable than my entire Corvette, and
2) if they're not made in China, I can't own them
 
Lovely seats, trouble is, they remind my of my '87 vette, and the problems with them being much tooooooo narrow with them side bolsters, and so after a couple hours drive, my hips would hurt like mad friggin arthritis....

:gurney:
 
Lovely seats, trouble is, they remind my of my '87 vette, and the problems with them being much tooooooo narrow with them side bolsters, and so after a couple hours drive, my hips would hurt like mad friggin arthritis....

:gurney:

ummm.. how to delicately say this.... maybe cut down to one Big Mac a week and they'll fit fine? :tomato:
 
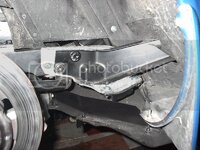
Got one of the brackets done. Just need to put some semigloss black paint on it to blend in (and stop the glare). Test-fit crappy picture:

IM002194.jpg

The bracket weighs 1.1#, and the original weighs 2.7#, so for the pair about 3# off ahead of the front axle.
 
Getting down to the details LOL

I see more

chromed steel water neck? ->alu! See below.
Pig heavy alternator,get a mini denso Working on the Denso.
alterantor bracket, canton has a replacement in alu. Fabricated one.

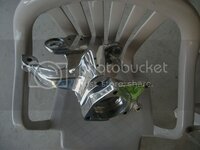
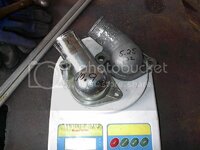
After a lot of searching I finally found an aluminum water neck the other week at my favorite junkyard. It's damn hard to find these anymore that don't have the threaded areas for extra temp sensors. Cleaned it up and put it on the scale with the potmetal water neck I've been using for years.

IM002239_zps36741398.jpg

The potmetal aftermarket neck was 10.9 ounces, while the aluminum one was 5.25 ounces. The aftermarket neck also needed longer bolts (.3 oz difference), making the conversion 6 ounces lighter (up front and up high).

I was sure the aftermarket part wasn't steel, but I was amazed at the weight difference.

Thanks for making me rethink the waterneck issue Marck.
 
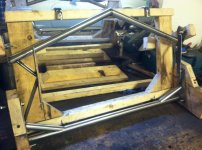
Tube Style

Not sure what this weighs as it was stainless tubing but should be strong enough. I didn't make it or use it as I saw it on the LS1techforum.
 

Attachments

  • Corvette LS Radiator Support tubing.JPG
    Corvette LS Radiator Support tubing.JPG
    100.5 KB
  • Corvette LS Radiator Support 2 tubing.JPG
    Corvette LS Radiator Support 2 tubing.JPG
    144 KB
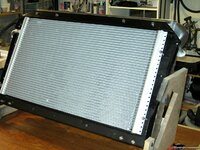
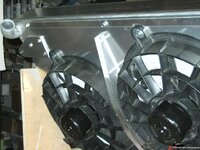
I made a new radiator support starting with a cut up 1968 support. It's probably lighter than the later supports. The aluminum plate that the fans mount onto is structuraly coupled to the support so it should be much stiffer than the original.

44f356d0fc4f0c.jpg

44f356d106125e.jpg

44f356d10d3155.jpg
 
that sure is sweet looking, is the black part also aluminum?

nice rad also, brand?

Those fans, are they 4th Gen f body fans?
 
that sure is sweet looking, is the black part also aluminum?

nice rad also, brand?

Those fans, are they 4th Gen f body fans?

No, the black part is 16ga steel with the perimiter boxed. Then the aluminum sheet (with the fans on it) are attached to that by upper and lower C channels. The radiator is a Dewits and the fans are ~mid 90's Camaro.
 
Back
Top