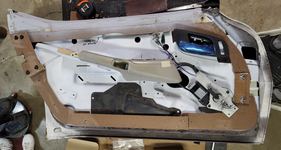
Long Overdue Progress! Doors Finished 3/17/26

VetteMod - Corvette Restoration, Modding & Performance Forum

Help Support VetteMod Forum:

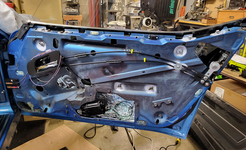
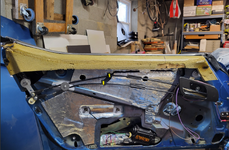
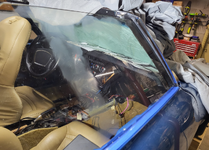
Yesterday I partially re-installed the window in the door. 1968 is a 1 year only setup so the sequence is different but I think its in. The most difficult thing was trying to bolt the window channel to the window while its inside the door. Next is the regulator.
 
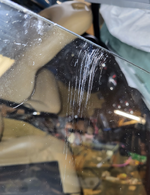
Both windows are in and working well. After cleaning all the lithium grease off the windows (from greasing the tracks), I noticed some pretty severe scratches on the inside of the glass. I took a look at some of the YT videos on polishing the scratches but there were no videos on polishing the inside concave surface, only the outside.

Anyone here ever done that?
 
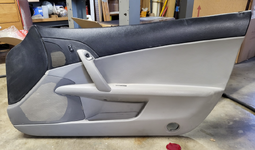
Still working on the electric unlatching. Turning my attention to door panels. I am thinking I could use C6 panels to at least complete the center of the panel (including the handles. And fabricate/use the C3 panel perimeter, then "morphing" the two together.

1730562035683.png
 
I took a look at some of the YT videos on polishing the scratches but there were no videos on polishing the inside concave surface, only the outside.

Anyone here ever done that?
Looks like guys use a foam pad with some kind of polishing compound. Seems to me for a concave side just use a smaller diameter pad.

Good idea on repurposing c6 door panels. Be interesting to see how that turns out.
 
I found a 3" pad that I think will work.

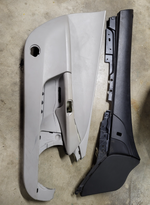
The C6 panels are similar size to the C3 door. And made in two pieces (black part on top is attached). That will work well so I can get to the latch without taking the entire panel off.

1730805522701.png

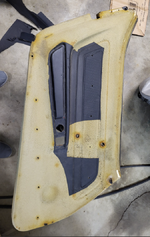
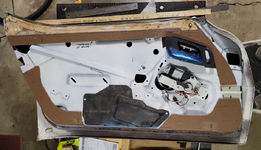
C3 Panel Stripped:
1730926236914.png
 
As an Amazon Associate we earn from qualifying purchases. Product prices and availability are accurate as of the date/time indicated and are subject to change.
Both windows are in and working well. After cleaning all the lithium grease off the windows (from greasing the tracks), I noticed some pretty severe scratches on the inside of the glass. I took a look at some of the YT videos on polishing the scratches but there were no videos on polishing the inside concave surface, only the outside.

Anyone here ever done that?
I have polished lots of glass , you want to use the firmest pad, my firm ones are "yellow" and I use the Griots fine glass polish, its not a fast process and use meduim speed 3 on a 5 speed dial and just keep repeating the process. it doesnt remove the scratch put polishes the inside of the scratch so you dont really see it as much. on out side windshiled glass that is really badly road oil and wiper blade contaminated i use a commerical degreaser, then glass cleaner then several applications of the polish then a final glass cleaning. you know you are done when you spray the glass cleaner on and you cant see the wiper tell tale radius.

I dont think the maker of the polish matters much but you want the heavy of the solutions if you have a choice.


interesting door soloution! i like it

 
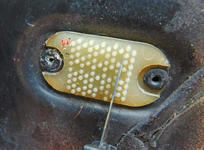
I cut the center away on the C3 panel and test fitted it to the door panel. Found a couple problems.

The panel is made out of paper pulp like an old fashioned egg carton only thicker. The fit with the door is awful and it needs lots of work to make it work. Also, the original panel and door have these goofy retainers that don't work well at all. I think I might be better off fabricating a perimeter for the panel.

1731073704707.png

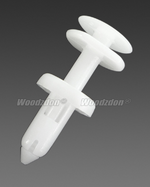
I would like to use the pins like the C6 panels use.

1731073925379.png

The downside of this is that they are not very durable but a lifetime supply of them is maybe $10.
 

Attachments

  • 1731073574360.png
    1731073574360.png
    52.8 KB
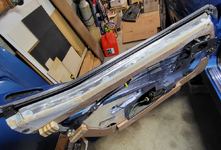
The top of the C3 door panel has a formed metal strip that is embedded in the foam a pulp board backing. The top of the door panel looks like the only thing I might be able to re-use.

1731266336879.png
 
I have polished lots of glass , you want to use the firmest pad, my firm ones are "yellow" and I use the Griots fine glass polish, its not a fast process and use meduim speed 3 on a 5 speed dial and just keep repeating the process. it doesnt remove the scratch put polishes the inside of the scratch so you dont really see it as much. on out side windshiled glass that is really badly road oil and wiper blade contaminated i use a commerical degreaser, then glass cleaner then several applications of the polish then a final glass cleaning. you know you are done when you spray the glass cleaner on and you cant see the wiper tell tale radius.

I dont think the maker of the polish matters much but you want the heavy of the solutions if you have a choice.


interesting door soloution! i like it

Door glass scratches. I got all the materials that (I thought) needed. It was a complete waste of time and a giant mess. No joy with removing scratches from the glass.

The cerium oxide I ordered was really diluted with water. It is supposed to be mixed to peanut butter consistency. Also, you cant remove scratches without sanding. Waiting for my sanding disks and cerium oxide powder to show up.

The door panels are not a priority at this point but I think I have a plan.
 
Door glass scratches. I got all the materials that (I thought) needed. It was a complete waste of time and a giant mess. No joy with removing scratches from the glass.

The cerium oxide I ordered was really diluted with water. It is supposed to be mixed to peanut butter consistency. Also, you cant remove scratches without sanding. Waiting for my sanding disks and cerium oxide powder to show up.

The door panels are not a priority at this point but I think I have a plan.
it will be interesting to see if you can remove the scratch with your products , or if you are just polishing the inside of the scratch. i never had any luck removing the scratch just in the polishing of the inside of the scratch to make it less noticeable.
 
I have the stuff to do this on hand, I might start the sanding today. The only concern I have right now is a warning from people who have done this is: Don't do this if the scratches are within 2 inches of the edge. Mine are all the way to the edge and are worse there than anywhere. The thinking is that one side of the laminated glass will get hotter than the other side and delaminate. So I am going to take my time. I have one year only convertible glass and if I have to replace it, that will suck a lot.

Getting these doors working has been way more work than I thought it would be. Anxious to get this behind me. After polishing the windows I need to install the hardtop, put in new seals and adjust the glass.

Here is a picture of the scratches (made a lot more visible because they are filled with polishing compound):
1732387687390.png
 
First sanding with 240 grit and 3" sander. I got most of the scratches out, maybe 90-95%. Took an hour but I went slow. Picture is not great. Looks like taking a picture of a ghost.

240 grit
1732399258559.png
 
Went to 400 grit next and that worked so well, I couldn't get a picture of it. I went all the way up to 2000 and ready for polish. First I have to do the other side.
 
I did the drivers side this week. It was in much worse shape with pretty deep marks at the edge of the window. I started with 120 grit and that got most of it out.

Yesterday I polished both sides. The drivers side at the top (where I had deep scratches), is polished now but I sanded enough that there are 2 areas that have optical distortions. But they are clear, so I'm going to call that good enough.

On to installing the latch actuators.
 
I did the drivers side this week. It was in much worse shape with pretty deep marks at the edge of the window. I started with 120 grit and that got most of it out.

Yesterday I polished both sides. The drivers side at the top (where I had deep scratches), is polished now but I sanded enough that there are 2 areas that have optical distortions. But they are clear, so I'm going to call that good enough.

On to installing the latch actuators.

outstanding!!!
 
Been distracted with stuff around the house, fall cleanup, prepping for freezing weather, moving stuff into storage, etc. But, I'm ready to install the door latch actuators and start on the perimeter of the door panels.

25 degrees for a high today. I'm too old for this!
 
Door Panels
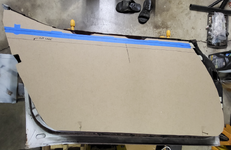
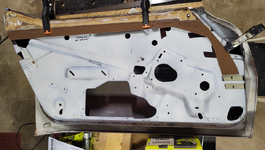
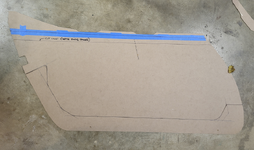
Starting planning the door panels. I had an extra door that I could use as a buck to build off of. First thing to do is make a template from the door:

1733854928332.png

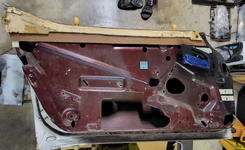
The only part of the original panel I can reuse is the top of the door. There is a formed metal piece that also serves as the mounting surface for the inside seal for the glass.

1733855207040.png

Upper panel perimeter complete
1734128542545.png

Template for lower panel
1734128589884.png
1734128679467.png

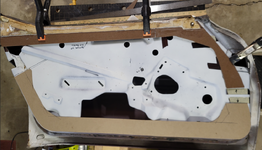
First layer bottom panel

1734128720981.png
 
Last edited:
I'm taking pictures as I go along so that I can reproduce this on the other side. Making templates and NOT relying on my memory.

I have to bridge these perimeter pieces where the latch mechanism, window motor cover and door power connector is.

1734279059989.png
 
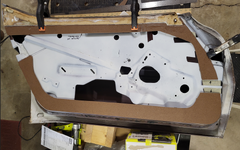
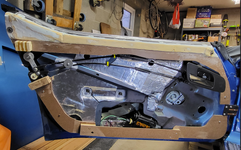
First test fit to the actual door. Some things to clean up and covers to bridge the latch and the power connector block, but very close:
1734560688006.png

1734560881147.png

Frame completed with component placement:
1735671726280.png
 
Last edited:
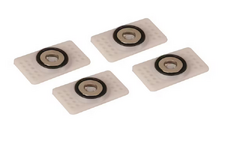
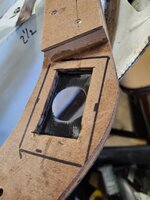
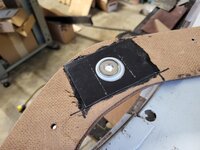
Installing Mag daddy door "clips". This is going to work out well since I have to take the panels on and off multiple times. I cut a rectangular pocket first, and glued a thin ABS sheet with a hole in it:

Magnet 1.jpg

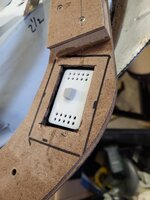
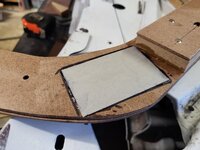
Then I covered the back with a fiber sheet that loosely captured the magnet. Fom pad on the back to push the magnet out.

Magnet 2.jpg
Magnet Covered.jpg

Done:
Magnet 3.jpg
 
thats really clever, will there be any mechanical attachments or just the magnets?


Installing Mag daddy door "clips". This is going to work out well since I have to take the panels on and off multiple times. I cut a rectangular pocket first, and glued a thin ABS sheet with a hole in it:

View attachment 57341

Then I covered the back with a fiber sheet that loosely captured the magnet. Fom pad on the back to push the magnet out.

View attachment 57342
View attachment 57343

Done:
View attachment 57344
 
thats really clever, will there be any mechanical attachments or just the magnets?
I am going to have two hidden screws at the front and back plus the magnets. The magnets hold really well, you have to pry them up to release. Also, I reused the top part of the C3 panel that has a metal channel that hooks onto the top of the door.
 
Glad it worked for you!!!

The other thing I would do- is coat the wood with some fiberglass resin. Just brush it on.
It'll waterproof the wood and strengthen it up a bit.
 
Glad it worked for you!!!

The other thing I would do- is coat the wood with some fiberglass resin. Just brush it on.
It'll waterproof the wood and strengthen it up a bit.

I will do that once I'm finished with the frame. It has to be better than the original that was made out of compressed pulp!

Thanks for the heads up on the magnets.
 
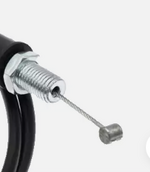
Does anyone make a cable barrel that uses a set screw to crimp on (like this throttle cable)? I think I have seen them with a set screw in the end. I need to change the length.

1737759628069.png
 
Last edited:
Does anyone make a cable barrel that uses a set screw to crimp on (like this throttle cable)? I think I have seen them with a set screw in the end. I need to change the length.

View attachment 57350
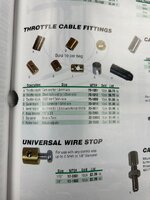
A good motorcycle shop that knows anything about custom cables can get them for you. Motion Pro is one of the better brands. This is a small selection from the Western Powersports catalog. They are one of the bigger distributors of Motorcycle parts.
 

Attachments

  • IMG_9930.jpg
    IMG_9930.jpg
    59 KB
Back
Top