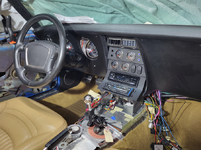
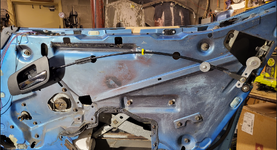
Long Overdue Progress! Doors Finished 3/17/26

VetteMod - Corvette Restoration, Modding & Performance Forum

Help Support VetteMod Forum:

Off hand - what software did you use to do the 3d priniting of the duct for the air filter?
And, did you use your own machine - of hire out?
Recommendations, please.

TIA - Cheers - Jim
 
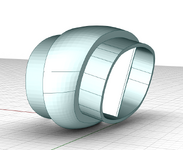
I use Rhino for everything. This part was sent out to a place that does SLS nylon. It's really the only printing material I trust for underhood parts.

1709377027355.png
 
Sweet. DId they do the "slicing" (forgive if I choose wrong term) or did you?
Extra charges for level of "precision"? I'll have to give them a look-see.
The part looks just like your file.
heers - Jim
 
SLS is laser sintering so the parts end up looking like a permanent mold casting and they are as tough as a molded Nylon part. The resolution is basically the particle size of the Nylon. I used ProtoLabs.

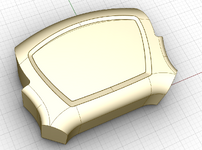
I also made some electrical connectors (on my project list). Today I'm making a casting for the "retro" airbag.

  • I'm going to cast a replacement for the airbag, 1990 was the early days of airbags an it looks like a pillow. Going to try something that looks more retro.
  • Start working on the gauge/console
  • Electrical connection for the doors with contacts instead of wired. Door latches and electric windows.
  • 3D print a duct for the air filter
  • Probably a ton of other stuff
 
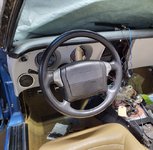
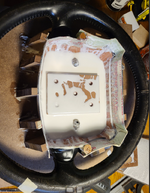
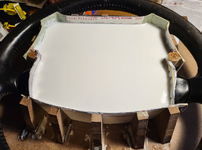
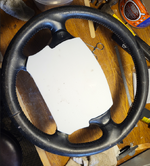
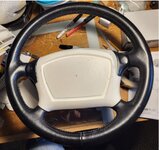
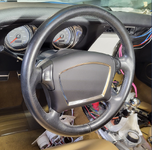
I have a column from a 96 Corvette in my car with a 1991 wheel. This was the first generation of airbags so it kind of looks like a pillow. I am going to remove the pillow and put somethging in its place that looks maybe a little more retro. To do that I had to make a urethane cast "billet" in order to CNC the shape.

The wheel with an airbag:

1709489354597.png

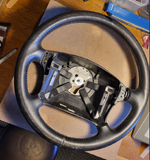
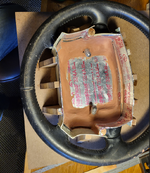
Making the casting using a $30 wheel from the junkyard

1709489441281.png

1709489486301.png

Starting to fill
1709489665065.png

Filled
1709489714795.png

Demolded and fit into wheel

1709489803020.png
 
As an Amazon Associate we earn from qualifying purchases. Product prices and availability are accurate as of the date/time indicated and are subject to change.
i like it!!! that OEM cover your are replacing is sticky on my 04 C5 and i need to figure out how to make it not sticky. its like the paint or plastic is degrading
 
Bob, it's probably "soft touch" paint popular on late C4's and C5's and a ton of other products. There isn't much you can do. The only thing I have found is semi flat or flat Krylon clear over it.

Edit: I looked on Youtube and some people say isopropyl alcohol will get it off. I thought I tried that but maybe not.
 
Last edited:
Bob, it's probably "soft touch" paint popular on late C4's and C5's and a ton of other products. There isn't much you can do. The only thing I have found is semi flat or flat Krylon clear over it.

Edit: I looked on Youtube and some people say isopropyl alcohol will get it off. I thought I tried that but maybe not.
it also could be the same issue that many Ferrari owners have with sticky knobs. (umm, yeah, knobs).... the plastic starts to degrade - and thus you get a sticky feel. For the Ferrari folks, they replace those bits. For GM guys, paint it to seal the pores.
 
it also could be the same issue that many Ferrari owners have with sticky knobs. (umm, yeah, knobs).... the plastic starts to degrade - and thus you get a sticky feel. For the Ferrari folks, they replace those bits. For GM guys, paint it to seal the pores.
thanks , i tired the solvent route and nothing worked, maybe treat like asbestos and lead , seal it and contain it. SEM has some interior plastic abrasive cleaner before you use before the primer then paint it. maybe thats the route.
 
So I got the perimeter of the casting fitted to the wheel. A couple more finishing details and I will be ready for paint.

Airbag Fitted.jpg
 
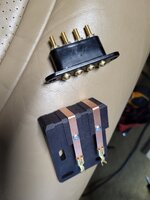
Been working in running electric to the doors. My car is an early 68 (Nov 67) so there were no cutouts for the conduit as with later cars. I thought I would use contacts instead of conduit. What is available in basically Dakota Digital Magnum Shooters (OK they do look like bullets). Most people seem to hate these things and I think the problem might be the rounded nose mates with the other rounded nose. My 97 Tahoe rear doors have these kind of spring loaded contacts but with a flat contact on the other side. They work great even after 27 years.

So naturally, I made my own connector (bottom of picture).
20240410_160317.jpg

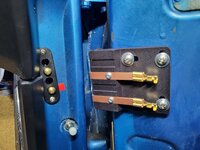
Installed:
20240410_160141.jpg
 
Holy crap! While I was working on the doors in the hinge area, I realized I still needed to install the spring in the upper hinge that provides the detents so the door won't close on you. I hade the springs (for a decade) and looked at a Youtube video of how to do this. Piece of cake. However the Youtube guy was not doing it on a car with the door on. I finally got one door done, and I have no idea how. I should have known it would be difficult when, while bending the spring with the installation tool (with one hand) and banging on the bottom of the spring with my other hand, the tool slipped off and went flying towards my face.

The guy in the Youtube video is going to get a "thumbs down".
 
Whew - That sounded CLOSE!
That's a reminder to me - one more time --- safety glasses around flying objects.
Your story is more effective that "her" nagging.

Rule Number One - Don't Die.
Lifestyle and good genes have gotten me this far - now I just gotta' be more lucky than dumb!
(Or, pay attention!) Thanks for the reminder.

Cheers - Jim
 
Last edited:
I am scared of garage door springs.....you gotta bring your A game to that one too. I do like full face shields these days for grinding stuff maybe add working with springs to that list too.
 
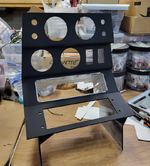
Ready to fit the console gauge panel w/ gauges. Need to make sure I can get it in and out with all the wiring connected.

1716751729447.png
 
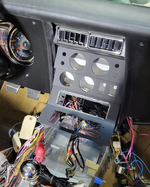
Kind of dead in the water on this. The harnesses for the console gauges were not long enough, bought new ones but they have to be unpinned to "trans" female to male. The shells are on a slow boat from China. So I have been working on the door latching.

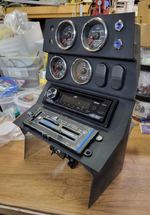
Console so far:

1717966446024.png

1718227219047.png
 
Last edited:
Right below the latch handle will be a popper solenoid. The car is a 68 so the latch/lock cylinder was a mechanical push button. I'm going to replace that with a push button (switch) to unlatch the door. It works but makes a sound like hitting a railroad spike with a sledge hammer. I am looking at ways to quiet that down. I received the new connector shells and replaced so I can continue with the gauge console.
 
Right below the latch handle will be a popper solenoid. The car is a 68 so the latch/lock cylinder was a mechanical push button. I'm going to replace that with a push button (switch) to unlatch the door. It works but makes a sound like hitting a railroad spike with a sledge hammer. I am looking at ways to quiet that down. I received the new connector shells and replaced so I can continue with the gauge console.

in theatre rooms they want the walls to be separate or isolated from the joists. i guess the theory is the noise transmits through the hard surface connection. you almost need to follow the same guidelines and have an isolated mounting then stick the solenoid in some sort of sound absorbing envelope. I wonder if you could use Audio Visual (AV) mounting pads to isolate it
 
I am planning on isolation mounts but the solenoid is 40w, although its duty cycle is very low. So, that means heat (in theory). I might be able to acoustically insulate the door panel and the inside surface of the door?

Edit: I'm not so sure how much I can improve the hammer noise. When I tested the solenoid was attached to a wood block. I'm going to try putting a felt pad on the tip of plunger.
 
Last edited:
Back
Top