Adjusting t-arms and rear wheel alignment?

gbak

Well-known member
Joined
Mar 24, 2008
Messages
89
Ok!
At last after 3 month (can't beleve it took so long time) my t-arms are back in the frame pockets again.
Just took one hour to get the left t-arm pivot bolt in place last night :evil:

New bearings, polybushings, shocks.... everything have been replaced/renovated, shimed and painted.

But one thing is not in place......the wheel adjustment.

Is it possible to adjust/shim the t-arms without any expensive tools, or do I have to take the car to a specialist to do the adjustment?
 
Many alignment shops quote $150 or more because they either don't know how to align an old Chevy or they know and expect the shims to be rusted solid... once you found a shop who knows how to work on old cars (which is a challenge around here) explain that everything has been replaced/cleaned and it's all greased and movable... shouldn't be much more than a standard 4 wheel alignment for any other car.

You can get it close with a water level, string and a tape measure.... good enough to drive it to the shop without ruining the tires ... didn't you say you need new tires anyway ??
 
I used the fastcorvette link and if was good, but........

When measuring the dim between the string and the front hub, I got a differance of more then 2" between the two sides, which was quite more than I expected, as I shimed the t-arms exactly like before my rebuild.
Ok, I have new fresh bushings, new bearings, no play anywhere, but the alignment shouldn't have changed so much??

I also saw that my rear wheels are not in center of the body.
On the right side the tire is sticking out 3/4" outside the fender (when using the 1-1/4" spacer) , on the other side its flush to the fender!
Is this normal?
 
2" is a lot :twitch:

Do you have the trailing arms located relatively centered in the pockets ? If one arm has all the shims inboard (towards the driveshaft) and no shims outboard this could be a sign of a bent arm. I remember pics you posted with lots of welds on the arms.... that was you, right ??

If the alignment turns out ok, re-center the body on the frame by loosening the body mount bolts and shifting the body. That should fix the 3/4" difference in the rear - if the alignment doesn't fix it.
 
Yes!
Trailing arms are almost in center of the pocket and one arm is welded on the inside.
I was an idiot that didn't measure the straitness of the t-arms when they was of the car :lol:

Is it just to losen the body mount screws and push the body sideways to correct the body misalignment , could it be so simple??
 
Is it just to losen the body mount screws and push the body sideways to correct the body misalignment , could it be so simple??

No of course it's not that simple... the bolts will be stuck, the heads will break off and you'll find yourself drilling #3 (which is the worst)... #2 isn't much better.....

But if you're lucky the bolts come loose and then yes, you can simply shift the body sideways.

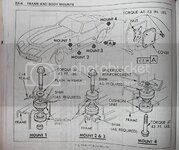
Penetrating oil: use Ferex or Kroil, the best you can find. Drill the washer on top of the rubber body mount right next to the bolt head. Now you can inject the penetrating oil and let it run down the shank of the bolt to the threads. Simply spraying the entire body mont won't help you much. The oil has to get to the threads.

bodymounts.jpg

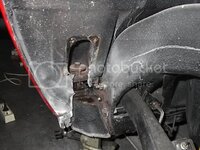
This is #3 - I cut and removed some fiberglass for better access. The only other option is lifting the body (which I tried to avoid):

IM000006.jpg
.
 
Now I'm finished with the rear tracking and toe-in.

Tracking is nearly zero so there I'm right on spot.
And toe-in is 1/4" instead of 1/8", which was the goal.
Is that good enough, or will the tire wear out to quickly?
Any other disadvantages with a to large toe-in?

BTW: I also checked the body misalignment after the rear alignment and it wasn't more than 1/4".
 
Last edited:
gbak,

Glad ya got that straightened out. When I read your first post after you aligned it, and it was off center, I was stumped. I'm wondering when you do the front, it'll take that last "1/4 outta the rear. I also did my front, and the site I was using, used the rear to take measuerments for the front alignment. So I hope that quarter inch in back won't mess up your front alignment. I'll find that link I used, and post when I find it.
 
So to align the rear all we do is adjust the shims on the TA

I've never taken them out before, how do you get them out and what holds them in?
 
I've never taken them out before, how do you get them out and what holds them in?

"in a perfect world" you loosen the bolt and the shims are free to move....

here's reality: you have to soak the bolts in Kroil for days and maybe you don't have to cut thru the whole mess with a sawzall.....maybe.... based on experience and feedback from forum members you WILL use the sawzall....

Just buy new bolts and stainless shims... it'll be all right.... :hi:

edit: this one of those jobs when "no fear" turns into "oh shit"....
 
Last edited:
Camber adjustment

Have I done this right?
Havn't done something like this before, so I need your opinions!

I jacked up the car, rear spring isn't installed yet.
Strapped up the trailing arm in the position where it will be when driving the car.
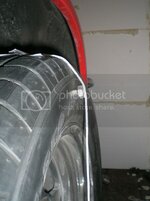
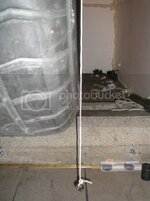
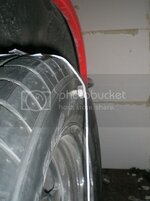
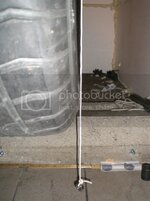
Then I and put a nut 5/16 thick between the tire and string at the top.
I adjusted the strut rod's so the string just touched the tire at the bottom.

According to the paper tonyv123 linked to, the top of the tire should be tilted in 1/8-3/16".

CIMG1999.jpg

CIMG2000.jpg
 
gbak, Here's another for ya.

http://www.corvette-restoration.com/Tech_Papers/Set_Rear_Wheel_Camber.pdf

In your photo, see your nut on the top? It's looks to be sitting on some of the raised white lettering on the tire, that will change your measurement. I actually used the lip of my rim. I cut a piece of plexiglass, 3" wide that was as tall as my tire, notched it around the tire bulge on each end, to rest aginst the rim lip. Then took my angle measurements off the plexiglass.
 
Last edited:
Have I done this right?
Havn't done something like this before, so I need your opinions!

I jacked up the car, rear spring isn't installed yet.
Strapped up the trailing arm in the position where it will be when driving the car.
Then I and put a nut 5/16 thick between the tire and string at the top.
I adjusted the strut rod's so the string just touched the tire at the bottom.

According to the paper tonyv123 linked to, the top of the tire should be tilted in 1/8-3/16".

CIMG1999.jpg

CIMG2000.jpg

I just use a level with the car settled, and go for plumb in the rear.0*
 
Measure to the rim, it's more accurate especially when the car is on the ground as radial tires will bulge significantly.
 
Measure to the rim, it's more accurate especially when the car is on the ground as radial tires will bulge significantly.

OK, I was forced to learn how to do home alignments....and found out how from links from over on CF some years ago....and did my own alignments....

guess what??? perfect uniform tire wear, no pulling, tracks well, brakes fine....handles nice....WTF else do I want???

also it took me a bit to get repeatable results.....

but it was in my technique, not the car....

first off is you drive the car into your concrete garage so you can work on it....mark off the tire patches on the concrete with majic marker....

obtain a nice say 10' long piece of square steel stock.... and a nice accurate carpenters level....

square off the garage, mark each pad as to height differances.....side to side in front is important for CAMBER, and rear is only important for CASTER, in front....rear is important side/side for CAMBER, obviously, and so when entire car is leveled out and tires on greased slick boards....metal whatever...so you can move it all around easily...

then align with a 2' carpenter's level against the rim with screws shimmed out so you don't touch the tires....look up the degrees converted to inches in the tables....measure off jack stands with monofillament fishing line stretched tight....note that on a C3 the rear is 3/8 inch wider than front on each side....
and twist away.....

mucho simpler than you know....takes about 1/2 a day to get it right....so takes your time, and i'ts right....that's it...no shortcuts....

:stirpot::ghost::2nd:
 
TT, you like to use 2 in. Johnny joints at the ends of the t-arms.
does the same shims aligments apply with Johnny joints?
Seen a couples if instaallation but the alingment thing, not sure.
 
Yes, the same shimming method. The JJ just replaces the normal rubber bushing.

84rvz500r has JJs on his trailing arms.
 
Top