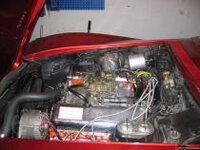
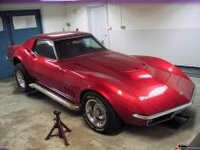
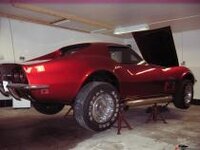
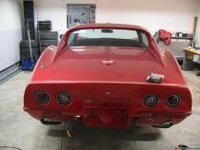
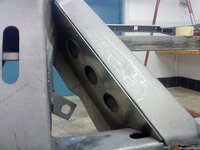
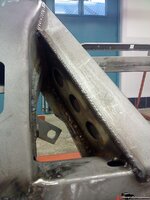
1969 427 restoration from Sweden

VetteMod - Corvette Restoration, Modding & Performance Forum

Help Support VetteMod Forum:

427Swede

Well-known member
Joined
Jan 6, 2011
Messages
369
Reaction score
0
City & State/Province
East coast of Sweden
Hi,

Thought I would share some of my work on my Corvette that I have now owned for 3 years.
I hope my English will be possible to understand but if something seems unclear or strange, don´t hesitate to correct me!

I have always dreamed of owning a Corvette C3 but it was only after selling my Camaro -76 and my Volvo P1800 -66 that I had the possibility to start chasing my dream car.
The cars had been in my posession for something like 25 years and both were renovated completely by me. It was quite difficult to see the cars drive down the road with new owners after all those years. (I was around 17 when I bought them...)

I was in a desperate state to get hold of a Corvette and after going through car ads on the net without results I decided to make some calls. I finally got hold of a guy in a town 200km from me that new of a Corvette that might be for sale. I chased down the owner and asked if I could buy the car and he actually said yes. What a luck :bounce::bounce:
After looking on the car once I was sold. The price was settled and I was the owner of my dream car!

So, the car is a 1969 427 with a matching numbers 390Hp. Originally it was sold with a manual gearbox. Unfortunately someone had put in an old TH350:smash:
Sold with Black Vinyl interior and Fathom Green 983 paint and as seen on the photos, it has been repainted some 25 years ago.
It was imported to Sweden in 1985. I have no clue to where in the States it came from. Would be nice to know. The bulid sheet is missing.

The car is in nice shape but of course in need of some work. The engine has been restored and is working fine. The side pipes is welded by a friend of mine in stainless steel and polished by me. 4" with special inserts that gives a low but powerful sound. I am very pleased with theese pipes.

After driving the car for two summers I decided to start my restoration. I will not restore it to complete originality. I want to build a car that handles well with enough power but basically looks original on the outside.
So, here we go then...

A photo from a local cruise last summer
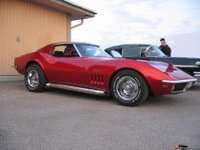
thum_18774eb859150a872.jpg

Engine, matching numbers
thum_18774eb8596822347.jpg
 
Last edited:
The car was rolled into my workshop and I started to disassemble parts from the body. I decided early to do a body off restoration. Did not seem too difficult to do this after my previos restorations.

I see now that my photos are quite small??? The size is 1600x1200 when I upload them from my computer, should I make them larger or what is going on here?
Pls. help someone...

thum_18774eb85caf2d749.jpg

thum_18774eb85cf5f040f.jpg
 
Last edited:
Nice looking 69!

If you click on your pictures, they open up to a full size. :photo:

Keep us posted with your progress, or if you run into a problem, post that as well.:nuts:
 
I"m jealous as hell over your paint color, gotta LOVE it@!!!!!

I dunno what your driving circumstances are, but if lots of freeway use, maybe a overdrive is in order....

:nuts:
 
I see now that my photos are quite small??? The size is 1600x1200 when I upload them from my computer, should I make them larger or what is going on here?
Pls. help someone...
1024x768 is more than enough for posting, to have them displayed at their actual size use the tag, not the [url] one.
Me too I really like the color, red with some [I]je ne sais quoi[/I] :mime:
 
As an Amazon Associate we earn from qualifying purchases. Product prices and availability are accurate as of the date/time indicated and are subject to change.
I see now that my photos are quite small??? The size is 1600x1200 when I upload them from my computer, should I make them larger or what is going on here?
Pls. help someone...
1024x768 is more than enough for posting, to have them displayed at their actual size use the tag, not the [url] one.
Me too I really like the color, red with some [I]je ne sais quoi[/I] :mime:[/QUOTE]

You know what really pisses me off is all these cameras that take 15 meg pictures, when 256k is all that's really necessary, so I have to go to some stupid photo edit to publish to the web......

cameras need be able to adjust to whatever your suggestion above is about, and get OVER it already....

wife took a shot of the San Antonio Riverwalk in Texas only 4.1 megs....and so it's like 32" wide and 24" high without a pix showing on the print....so just HOW many folks really need 12+ megs on a shot, what in hell doing? BILLBOARDS??

:hissyfit:
 
Thank´s for your tips. I will give the photos a new try tonight after work:thumbs:

I have a new Tremec TKO 600 waiting to be finally assembled. Actually it is already test fitted and lined up (alot of work , had to modify rear axle bracket and so on to get it properly lined). I will keep adding pictures and text about my bulid.

/Daniel
 
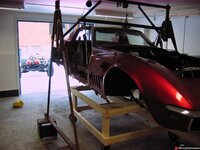
A few photos from my work with the body lift. I was a little bit hesitant about the body lift at first after reading about all problems experienced by people. Stuck bolts, rusted bird cages and front ends breaking loose...
Anyway, I removed the steering column, brakelines, cables to the engine, a few vacuum hoses, wires and hand brake wires. I also removed the cooler but left the cooling frame in the car for support.
Then all bumper brackets and some other parts were removed and finally all the body connections. Suprisingly not one bolt that I removed was stuck:yahoo:
I was taking notes and alot of photos the whole time during the disassembly since I know by experience that I forget very quickly where all bolts and parts go...
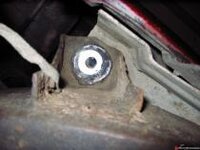
As seen below the zinc plating was still intact on the washers for the body connections.
thum_18774eb98d83d3528.jpgthum_18774eb98d848a0f7.jpg
 
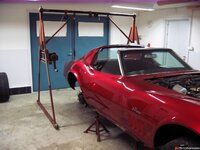
Looked at different solutions for lifting the body but I ended up using my old home made engine hoist. Alot of thick iron bars and a modifed Volvo gearbox from 1962 should be able to lift some fibreglass from 69.

18774eb98d852ad3d.jpg
 
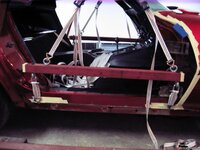
Fabricated two beams with adjustable lifting eyes that I attached to the underside of the door openings using lifting straps. I have seen that it is possible to lift the body with the doors assembled but I did not want to put that strain on the doors.

18774eb98d85bd0f2.jpg
 
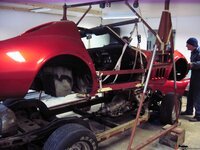
Some updates on the project. Lifted the body until it cleared the chassie. No big problems here, had forgotten the shift wire for the old TH350.
I had two people helping me, my father, 75 years old and my son, 15 years old. 3 generations working together, a great memory to keep from this project!

The front was supported during the lift but since all equipment was removed it was actually not nose heavy at all.
18774eb98d86f2f85.jpg

18774eb98d879051a.jpg
 
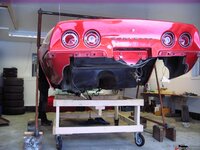
Rolled in my home made body dolly under the body. I was rather happy at this point since it was a bit nervous to perform this operation.

18774eb98d883a5cd.jpg

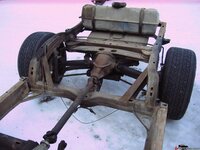
The chassie rolled out for a pressure wash. The first impression was that it was completely free of heavy rust. Not one single rust flake or pitting damage from rust could bee seen at this stage. Only light surface rust.
However, only sandblasting the frame can reveal the ugly thruth:suspicious:

18774eb98d88d6267.jpg

18774eb98d897e70e.jpg
 
awesome project, frame seems to be in good shape :thubs:

are you planning on welding the frame? The factory welds are usually ugly ...
 
awesome project, frame seems to be in good shape :thubs:

are you planning on welding the frame? The factory welds are usually ugly ...

Thanks, well, the project has actually come quite a bit since these pictures were taken. I hope it´s OK if I show my project as a small "story" in a correct time sequence until I catch up with the present state of it (body still not assembled to the chassie).
This means that all tips I get from you guys on how I should have done things will have to be applied on my next project... But I really appreciate all comments, no matter what as long as they are valid:thumbs:

And yes, the frame is now completely welded and reinforced.
 
Last edited:
awesome project, frame seems to be in good shape :thubs:

are you planning on welding the frame? The factory welds are usually ugly ...

Thanks, well, the project has actually come quite a bit since these pictures were taken. I hope it´s OK if I show my project as a small "story" in a correct time sequence until I catch up with the present state of it (body still not assembled to the chassie).
This means that all tips I get from you guys on how I should have done things will have to be applied on my next project... But I really appreciate all comments, no matter what as long as they are valid:thumbs:

And yes, the frame is now completely welded and reinforced.

When you day reinforced, what do you mean, and in what areas........

:huh:
 
Hi, all seams are fully welded, the front part of the frame where the roll bar is fixed is boxed, I have welded reinforcements at different locations in the front part. Some areas in the rear is also boxed and so on.
I will post more detailed descriptions about this and alot of photos from the work done. It is not anything special and a lot of people has done this. Basically I have followed Chevy´s manual on how to modify the frame for racing.

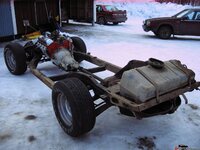
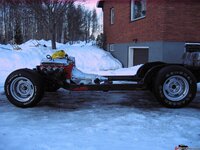
A photo of the bare chassi out in the snow.

18774ebd7bbabd833.jpg

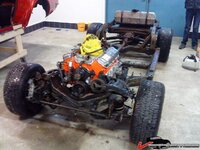
Rolled in to the garage for some dismantling after pressure washing.

18774ebd7bba8368c.jpg
 
I hope those are last winter's pictures! I'd hate to think you already have that much snow!

Nice work!
 
I hope those are last winter's pictures! I'd hate to think you already have that much snow!

Nice work!

Thanks! Yes, January 2011. We have had two terrible winters now. I was forced to remove snow from the roofs of my house and garage. I measured the snow on my garage roof and it was 4,7 feet high at it´s most:huh::huh:

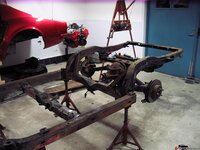
A few photos from the disassembly. This car was one of the nicest cars I have ever come across to work on! There were not one single bolt that was stuck. It all went very smooth.
However I found several bolts that were not correctly tightened and a few that were broken in two. several of them in the driveline:crap: I´m very glad that nothing happened during the two summers I used it...

18774ebd7bbb63a81.jpg

18774ebd7bbca0708.jpg

18774ebd7bbde8f46.jpg
 
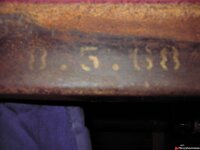
I found this date on the frame. If the date means that the frame was assembled August 5:th 1968 it means the frame is 2 days younger than me! quite a coincidence.

18774ec037df19971.jpg
 
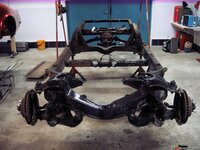
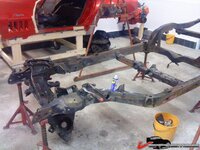
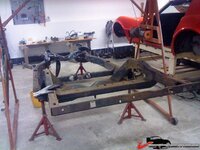
Wanted to share some photos of the frame after blasting. It was in a perfect shape. Not one rust hole to be found. It looked like it could have been manufactured yesterday.

But the welds, what did they do in 1968???? I was quite shocked by the poor quality. However, they did something correct back then since the frame still was in good shape after more than 40 years.

18774ec037de75a4a.jpg

18774ec037ddd3212.jpg

18774ec037dd3eb00.jpg

18774ec037dc9fda2.jpg
 
Last edited:
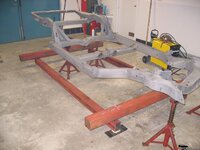
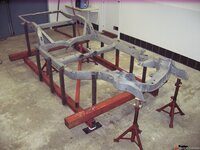
I decided to manufacture a jig for the frame to keep it fixed during the welding.
I had a few beams that I thought would be strong enough. I aligned the beams to be completely horizontal in all directions and then they were welded together keeping track of the alignment the whole time. It turned out pretty ok (within 2mm).

The Jerry cans and the welding machine is not a good combination I think:lol:
18774ec037d846f92.jpg
 
The frame was positioned 500mm above the jig. This gave good acess to all areas of the frame.
Aligned the frame to be level with the jig to give a fixed surface to measure everything from, before, during and after.
Welded the frame to the jig using 50x50mm beams (2"x2").
This work took me a few evenings to finish but I think it was well worth it.

(Jerry cans now removed...)

18774ec037daaa97f.jpg
 
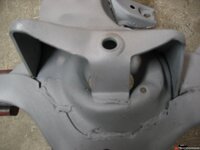
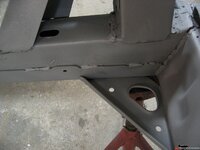
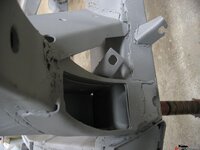
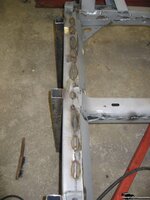
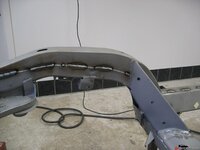
Some photos of the frame welding. I started by grinding all starts and stops of the old welds to smooth them out as well as remowing all sections of bad quality welds. Most of them looks to be of bad quality but evidently the frame is ok.
I measured the frame thoroughly according to the C3 frame drawings, taking notes on all measurements before I started welding. By this I had good reference measurements to compare with after the frame was finished.

Shifted the weld sequence from underside of the frame to the upside the whole time and also welding on many different locations to avoid warping and heat build up. This took several evenings to complete for me.

18774ec42ae0bac59.jpg

18774ec42ae15f1a4.jpg

18774ec42ae1f20ea.jpg
 
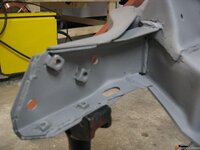
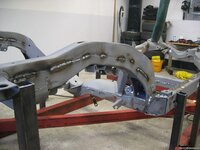
The rear kick up reinforcement beam was boxed. I have not seen this done before but it felt like a good idea.
I was really surprised by the soft steel in the frame. It was also quite difficult to avoid alot of weld spray. Tried to change the weld parameters as well as protective gas flow. No success:skeptic: Perhaps a different gas would have been better but my guess is that the steel used for theese frames are full of contaminations.

18774ec42ae47fca9.jpg

18774ec42ae527a43.jpg
 
Back
Top