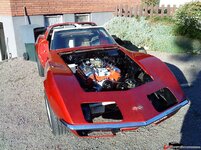
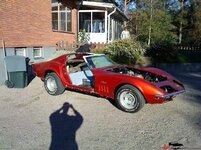
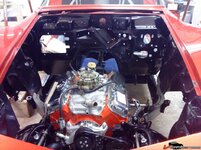
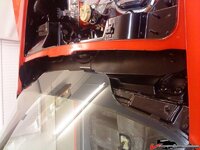
1969 427 restoration from Sweden

VetteMod - Corvette Restoration, Modding & Performance Forum

Help Support VetteMod Forum:

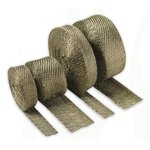
I used this stuff

e3185252-6b4e-4173-9387-ec72302f53bf-420.jpg

I think I got it off Amazon.com, but it's been awhile
But here it is elsewhere.
http://thmotorsports.com/i-248013.aspx
With that said, I bought this for a turbo install, and it was laying around when I needed something to wrap and quiet my exhaust.... so I'm sure there's cheaper/better ways of doing that

My headers/side pipes have ceramic coating that was just put on - it looks nice, but it's yet to be seen how well it handles wet.
What I did learn, was insist on the coater making the parts fit after the coating.... I was really lucky to remember to insist - when I got there the parts didn't fit, and required a tubing expander to get them to fit. To me that was impressive because the coating didn't crack or abraid when they expanded it one scotch (slightly less then a bit, slightly more than an umph)
 
Very interesting to see actual readings of temperature drop! Nice

I know through pain and screaming that my pipes are hot:banghead:
However, the insulation does a very good job of keeping it down. I have no measurements but I can almost put my hand on them for a half to one second and that normally means around 140-160°F.

The insulation is designed for tempering ovens that work in the 1700-1800°F area. So, I know it will do a good job on my inserts.
It is not fiberglass and not asbestos. Do not know what it is actually...

And again, thanks everyone for all nice comments!

Best regards, Daniel
 
Very interesting to see actual readings of temperature drop! Nice

I know through pain and screaming that my pipes are hot:banghead:
However, the insulation does a very good job of keeping it down. I have no measurements but I can almost put my hand on them for a half to one second and that normally means around 140-160°F.

The insulation is designed for tempering ovens that work in the 1700-1800°F area. So, I know it will do a good job on my inserts.
It is not fiberglass and not asbestos. Do not know what it is actually...

And again, thanks everyone for all nice comments!

Best regards, Daniel

I also, as a standby, have some wrap normally used to keep a grease fire inside a metal duct from burning anything with 1" of the duct. Problem is, I hate working with the stuff because it gives me zits for days (and we all know, that you can't drive a corvette with zits for days)
 
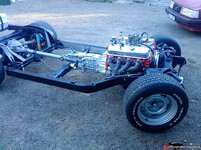
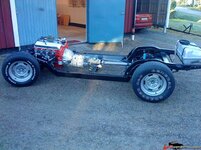
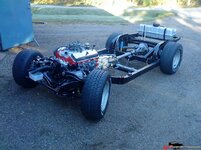
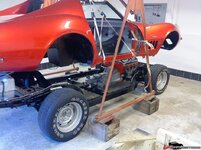
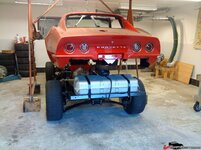
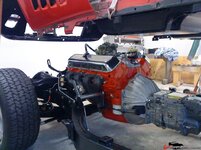
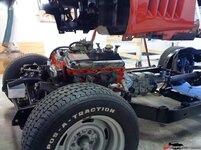
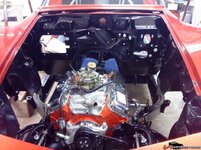
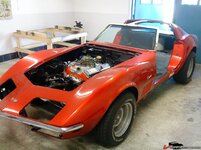
A few weeks ago I could finally assemble the Corvette body back on the totally restored chassie.

A few photos from this event. I started the work on this car 13:th of january 2011. I have now been working intensly on the car for 1 year and 8 months.
So far, the chassie is modified and restored, the complete driveline including engine rebuilt with new /modified parts and the body restored inside and under. Paint will be done later and also chrome and parts of the interior.

18775081c0dd7aee3.jpg

18775081c0dd26b52.jpg

18775081c0dcbddd1.jpg
 
Body fixed correctly above chassie.
Then it was a simple operation to lower the body on to the frame. Put all shims back in correct positions and used my alignment measures taken during disassembly to get everything in position.
Did not encounter any problems with this.

18775081c0ddd92c0.jpg

18775081c0de374ab.jpg

18775081c0de8bc23.jpg
 
As an Amazon Associate we earn from qualifying purchases. Product prices and availability are accurate as of the date/time indicated and are subject to change.
Beautiful
looking at your picture
18775081c0dfba5ec.jpg

it looks like where I put the hydraulic master cylinder is where the rod went through for the clutch linkage. On my car, that hole was blocked.
 
awesome progress !!!!!

I bet you spent quiet some time out there staring at it and taking photos :thumbs:
 
awesome progress !!!!!

I bet you spent quiet some time out there staring at it and taking photos :thumbs:

Yeah, I did!
A few neighbours came over to have a look too. They are used to see different vehicles parked outside my house (boats, cars, motorcycles and snowmobiles:bounce:) most of them are interested and have a nice attitude about it.
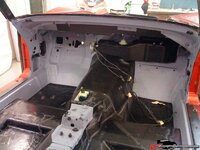
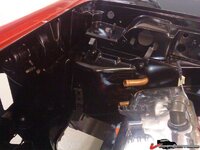
It was actually kind of an anticlimax when the body went on back on the frame. All the nice, painted, detailed parts just disappeared under the body :confused2:
Maybee I should have assembled the complete frame on to my bedroom wall for me and my wife to enjoy:lol:
 
awesome progress !!!!!

I bet you spent quiet some time out there staring at it and taking photos :thumbs:

Yeah, I did!
A few neighbours came over to have a look too. They are used to see different vehicles parked outside my house (boats, cars, motorcycles and snowmobiles:bounce:) most of them are interested and have a nice attitude about it.
It was actually kind of an anticlimax when the body went on back on the frame. All the nice, painted, detailed parts just disappeared under the body :confused2:
Maybee I should have assembled the complete frame on to my bedroom wall for me and my wife to enjoy:lol:

I've suggested things like that to my wife.... she's suggested things that, (I'm pretty sure) even with her Phd in Mechanical engineering, are completely impossible.

That said, she is the one that told me to put an engine block under the coffee table (ala Top Gear UK)
 
awesome progress !!!!!

I bet you spent quiet some time out there staring at it and taking photos :thumbs:

Yeah, I did!
A few neighbours came over to have a look too. They are used to see different vehicles parked outside my house (boats, cars, motorcycles and snowmobiles:bounce:) most of them are interested and have a nice attitude about it.
It was actually kind of an anticlimax when the body went on back on the frame. All the nice, painted, detailed parts just disappeared under the body :confused2:
Maybee I should have assembled the complete frame on to my bedroom wall for me and my wife to enjoy:lol:

I've suggested things like that to my wife.... she's suggested things that, (I'm pretty sure) even with her Phd in Mechanical engineering, are completely impossible.

That said, she is the one that told me to put an engine block under the coffee table (ala Top Gear UK)

:thumbs::thumbs::thumbs:
 
Work on the old Vette is continuing. It´s a very slow process right now. Many, many parts to be fixed and assembled.

Put the fully restored heater/vent assembly back in the car. Took me more than one evening to do this simple job:banghead:
New heater element, all seals and so on.

1877509eb10fafde7.jpg

The outside:

1877509eb10f529cf.jpg
 
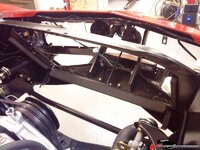
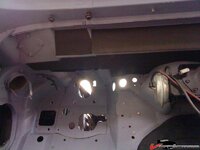
Added some dampening material to the top of the firewall. I also have a new firewall insulation carpet that will be assembled
This photo also shows all the holes in the firewall... They wil be filled with screws, cables and plugs.

1877509eb10fe16cf.jpg

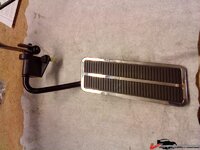
Restored the Fast Forward pedal.
New plastic and chrome and fixed a new spring by bending a piece of piano wire:thumbs:

1877509eb1101a344.jpg
 
Spent 3 evenings re-reviting all the cable holders. They were removed before I painted the "inside" of the car.
Just a few random photos.
Let me know if I should skip this type of photos, I do not know how interesting this really is:skeptic:

1877509eb10ee619a.jpg
1877509eb10f21c9d.jpg
1877509eb10eb6fbb.jpg
 
Let me know if I should skip this type of photos, I do not know how interesting this really is:skeptic:
You mean you want to deprive us from our car porn fixes?
Don't be silly.:rolleyes:

Okay, some more of the porno stuff then :devil:

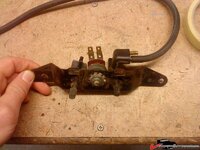
The override switch panel in need of some TLC.
As can bee seen, the electrical switch is broken and the vacuum swithes were leaking... It seem like everything I am touching on this car is non working or broke. Well, it is 40 years old so, it´s probably normal.

1877509eb1988e225.jpg
 
Last edited:
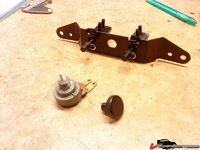
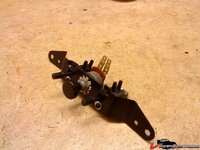
Sandblasted and painted the panel. opened the electrical switch and modified it by threading the plastic switch with a small M4 thread. Screwed a small M4 screw in to it and put it all together. Machined a new turning nob from aluminium and put a female M4 thread in to the underside of the knob. Simple fix! A new switch is around 25$...

The Vacuum swithes were possible to disassemble and then new O-rings was put in. Worked perfectly!


1877509eb198bcfc2.jpg

1877509eb198ed526.jpg
 
I was having a hard time deciding if I should buy an aluminium radiator for the Corvette. At this stage it is too expensive for me and since the original brass radiator was in really nice condition I finally settled for it. I think the over heating problem that is often experienced on older corvettes is caused by non exsisting seals around the radiator and clogged tubes inside the radiator.

New seals beeing assembled to the radiator frame. The top seal is assembled after the installation of the rad. There is also a seal between the top frame and the hood.

1877509eb197dac8e.jpg

Also put in new seals in front of the rad. Very important to keep everything tight and sealed here to get all air flow through the rad! After all, these cars were designed and engineered to function in very hot conditions so, I see no need to add a big radiator with this mild engine. Just build everything right and it should work!

18775081c1df7c09c.jpg

A bad photo of the electrical fans. A de Witt dual Spal set. Over all good quality but, I actually had to machine the underside of the plastic fan housing where it attaches to the radiator! It was not straight and was bending the tubes on the rad. Not a good thing...

1877509eb220a30ec.jpg
 
Hi, I made a bracket that is bolted just below the upper A-arm screw. It can easily be removed. I did look at the connections you can buy and bolt to the A-arm screws but at that point it looked a bit flimsy to me. I know that my design will give a little bit less leverage in comparison to that solution but this looks cleaner and more "factory" from my point of view.

There are some photos of the bracket fabrication in the middle of page five in this thread. Hope it can share some light to your question SBG.

And by the way, I´m going to Seattle Washington, at the end of this month on a business trip! I saw that you are living in that city SBG!!!
I am really looking forward to this trip since it will be my first visit in the USA.

I also have two colleagues from work that are spending a 3 week vacation in the USA right now, looking at old american cars. The interest for US cars is really, really big here in Sweden and one of the largest car meetings in the world is held here every year, the Power Big Meet in the city of vasteras. Around 17.000 !!! cars, mainly us, comes to this meeting.
 
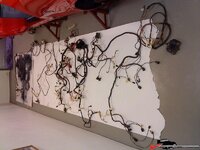
Some more progress has been acomplished. The Electrical system needs to be completely changed. When I disassembled it from the car I found several cables that was completely stripped of isolation:huh:
I get really afraid when I think of what might have happened if the cabels would have come in contact with the frame or with each other...

This is the complete old system including all Bubba fixes:lol::crap:

1877509eb11048d4f.jpg
 
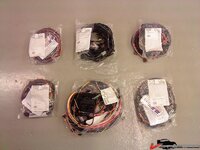
The only option was to buy a completely new system. The one I bought was US made by M&H Electrical Fabricators. I have assembled the engine and rear system and I am really impressed by the quality of this system! Each connector is exactly as the original and so far everyting has had a perfect fit!
You as Americans should be proud to have this type of quality still beeing produced in your country :1st:

1877509eb10e7d9b5.jpg
 
Back
Top