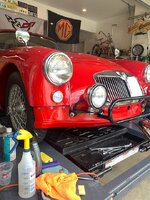
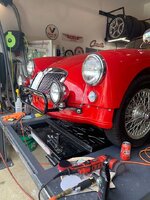
1958 MGA Coupe

VetteMod - Corvette Restoration, Modding & Performance Forum

Help Support VetteMod Forum:

Thanks guys,

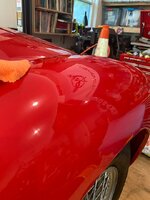
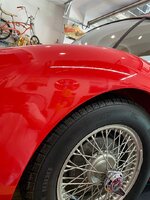
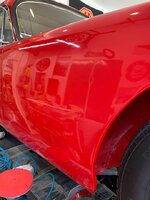
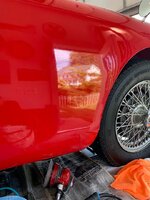
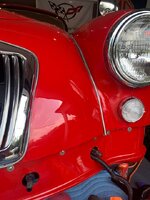
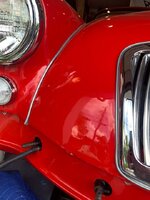
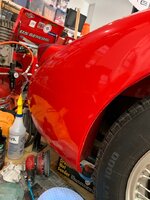
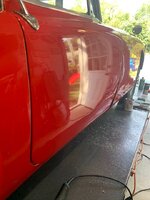
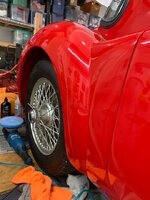
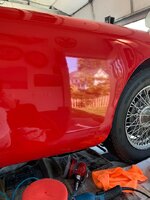
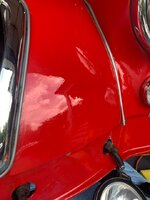
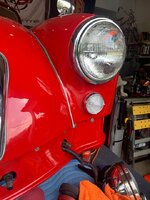
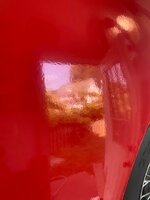
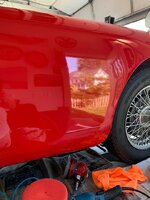
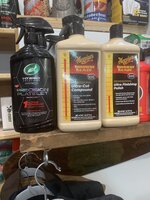
On the MGA I am trying the ceramic turtle wax “once and done” and you adjust the cut by changing the density of the pads, this stuff leaves no white over spray residue or white build up . I am really impressed with it. The Meguiars 105, 110 and 205, 210 are really good and also leave no residue. So if it’s a car that I use ceramic stuff on it’s the Turtle Wax. once snd done , then max wax followed by flex wax.
On some cars it looks kind of greasy like too much lemon pledge from the 70s on a polished dining room buffet, if you see that it is ftom too much product being used, used correctly on the MGA it just makes everything pop


If it’s a non ceramic car , like if I buff a scrstch out of a friends car I use the Meguiars products
 

Attachments

  • IMG_9133.jpeg
    IMG_9133.jpeg
    328.4 KB
well i guess it had to happen some time. went to shift the C5 into reverse and something popped and it was stuck in reverse. it went through all the shift detents nice and smooth but no action at the trans end.

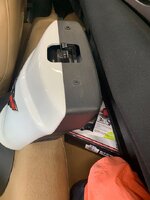
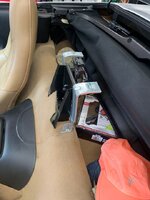
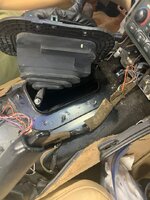
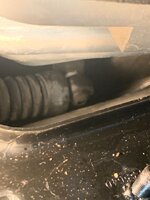
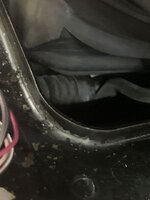
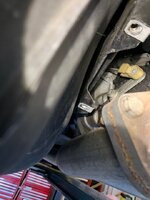
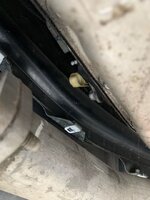
got it towed home, and of course the MGA was on the lift. so jacked it up the old fashion way and the trans lever cable was attached nice and tight so had to be something up front. factory way to repair is to remove the middle of the exhaust system then remove the belly pan covering the torque tube and replace the cable or the bushing. i wasn't opposed to this but it was just me, the MGA was on the lift and I don't have much length to the driveway before the apron to the street starts to slope down so i wasn't sure if i could get the MG off the lift unless the C5 was too far forward and rolling into the street and i wasn't sure i could push the C5 up the apron slope by myself. I figured i could get on the lift by jacking it up and putting the ramps under it so the rear wheels were level with the lift. but getting it up the apron was deal killer. so i decided to go in from the top.

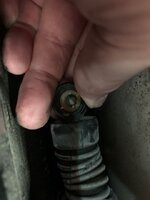
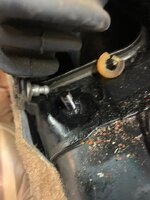
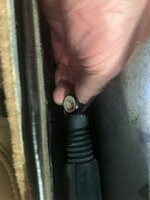
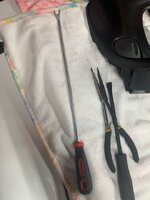
sure enough the front bushing in the had cable had crapped out, cleaned up the cable with an orange pick from HF pressed in a dormann replacement bushing with really long needle nose pliers then used a long HF body panel removing lever to push the cable back on to the ball stud. and only had one bloody hand!!! a win!!

IMG_9206.jpg
IMG_9207.jpg
IMG_9217.jpg
IMG_9221.jpg


71590379382_9D7A983D-AD71-4F92-8A6D-50FFF15EF7C5.jpg
IMG_9223.jpg
IMG_9224.jpg
IMG_9233.jpg
IMG_9239.jpg
IMG_9237.jpg
IMG_9241.jpg


i think now i buy the replacement kit from Zip corvette for the two bushings and next oil change when its on the lift look to see how hard the one in the back is to replace. apparently thats the one that breaks the most
 
Last edited:
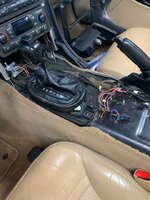
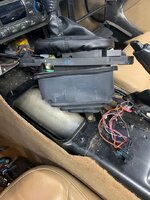
Wow. That looks too much like surgery. I think they went a little undersized on the shifter pivot
 
Wow. That looks too much like surgery. I think they went a little undersized on the shifter pivot
One of the worst parts is of the 7 or 8 electrical connections to disconnect not one of them was the same type. I was more scared of buggering up those connections then any thing else. Imagine that, actually being scared of freaking plastic pieces with wires in them that magically push together. I will order the Zip bushings this weekend to replace the rear one preemptively, maybe even a full cable to stick in the trunk
 
One of the worst parts is of the 7 or 8 electrical connections to disconnect not one of them was the same type. I was more scared of buggering up those connections then any thing else. Imagine that, actually being scared of freaking plastic pieces with wires in them that magically push together. I will order the Zip bushings this weekend to replace the rear one preemptively, maybe even a full cable to stick in the trunk
you know, you could just swap a manual in there to solve those problems ... just... :D
 
one of my daily drivers is a 5 spd, in the city where i live its a PITA, i am fine with an auto although i would like more then 4 speeds.

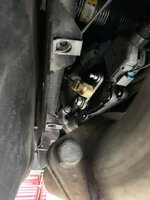
when i researched replacing the front bushing all the articles said do the rear also, and today was the day. easiy enough to do the hardest part was taking off the gas tank skid plate for some more finger room.

i honestly don't know what was holding that in place, i also bought a new GM cable and an extra bushing to throw in the trunk. i will say it does shift into the different gears very positively now

IMG_9573.jpg
IMG_9574.jpg
IMG_9576.jpg
IMG_9582.jpg
71847608752_55D668F9-BDDD-4EB3-9206-8D7294740537.jpg
 
some short back ground is needed, about 12 years ago my buddy Jeff S had an extra crew ticket for Lime Rock race track in Ct. the race track was about 45 mins or so away from my home town, where I would go back to visit my parents frequently. so over the course of the next several years i would plan trips to coincide with Lime Rock race events to hang out with Jeff . That lead to going to Watkins Glenn in 2014 with Jeff where I met Eric R. in person and bunch of the other NAMGAR people. As nature tooks its course my trips up north ended. However lucky for me Summit Point Motor sports park is just an hour away and located near by two adult sons.


So some conversations between Eric R and Jeff S lead us to this. My sons joined me at the Summit Point race track with the camper beast (a F250 superduty 4x4 lifted 7.3 diesel) this is the truck we replaced the steering gear, ties rode ends, drag link steering dampner in. it was set up as a high desert camper in Missoula Mt and we brought it east this past summer


the view out the back window


this lead to some light crew activities


which lead to some nice pictures a good time and a beautiful Mark 2 as a pace car


VRG hosted a chili party and the view in and out of the camper


we had a blast.
 
pretty darn cool
There was one particularly funny moment when the racers we were helping out asked my sons what cars they grew up with and would race since all the cars they were racing are from their generation and they grew up with them, my son looked at them and said I grew up with corvettes and these car's. Made me a proud dad!!! I did my job. in fact in my avatar the young guy next to me is my older son in the race day pictures
 
Last edited:
pulling my sons axle motivated me for todays work, so if we can pull that big ass F250 axle out how hard could it be to R/R my rear wire wheel hub.

so the ladies were going to Georgetown to do some shopping and my moment of opportunity was upon me. definitely a fat cat today in the heated garage.


so easy work getting the wheel off the runway and wheel off. only one wheel is on a jack stand so the axle is tilted


a couple of machine screws in hub and its pulled off the axle hub


pulling out is no problem every thing looked good


next is pulling welch plug i drilled it off center but i should have drilled it in the middle, off center my screw slide hammer didnt work so i mig welded a bolt to it and pulled it off


next came measuring the axle to the hub and pressing it out


and the pressing part a 20 ton press, I used an impact socket to get the depth i needed.


then it was cleaning it up dressing/deburring the end of the axle splines and re pressing it in place


well I have been putting this task off too long, some where along the way I realized that i had my facet cube pump installed in the worst off all positions with the inlet on top and the out put on the bottom. the car ran great the pump was very clicky so it was not high on my redo list. But today was the day


heres the worst possible way to have these oriented , i must have missed that part of the installation instructions


so todays effort figure out how to reorient it and make a new bracket.

disconnect everything


mock up a new orientation and make a template for the new bracket


16 gauge steel , i used a contour sander to clean up the sheet steel before cutting it


no leaks and it much quieter then before!!!
Nice work Bob! Gave me pause to think about how mine is oriented in my Midget, but while the inlet is slightly higher than the outlet the flow is mostly horizontal. Mine is pretty noisy too, but I always just figured that's the way they are. I can't hear it over the exhaust once it's fired up anyway...
 

Attachments

  • p_DSC_0750 (2).jpg
    p_DSC_0750 (2).jpg
    52.9 KB
Nice work Bob! Gave me pause to think about how mine is oriented in my Midget, but while the inlet is slightly higher than the outlet the flow is mostly horizontal. Mine is pretty noisy too, but I always just figured that's the way they are. I can't hear it over the exhaust once it's fired up anyway...

thanks, i like that midget! I had no issues running mine completely up side down, so i can attest to the fact that they work in any position

The beast needs some love, this is our ( my sons) trailer tow vehicle and camper we take to the race track.

1999 F250 superduty 4x4 7.3power stroke diesel

The brush guard winch mount has two tabs for mounting that have broken welds


So we are going to show it some Bob love
This is the idea, We chose option B


And the first part of making it


We will make the diagonal cuts in the field and decide which side of the off set cut the tab bolts up to and the final length of the bracket


Tomorrow we weld the big tubes in the middle to the side supports
Stay tuned
 
Last edited:
Thought you would get a kick out of this, I found a local gas station selling ethanol free 90 octane pump gas for $4 a gallon , which is hard to do in northern Virginia, filled up the car and went for a ride the odometer was at 64997 and I was excited to see it hit 65,000. , the car never made it to 65,000 the odometer just started adding ten thousands and thousands like miles and tenths of a mile


so i decided to take it out and look at it


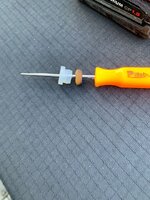
well first real obstacle was i could not unscrew the knurled knob on the trip odometer reset so i was left to try and see what I could do from the dials on the front and the smaller discs on each side of the number.

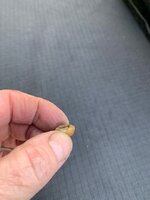
i could use the jewelers screw driver and move the numbers, i started at the 1s. 10s, and 100s some of them i could i move in both directions and some only down so i was turning them just trying to see where i hit resistance and then something just fell into place and i could only move the numbers down to the bottom of the number. i could not move it forward or beyond the bottom of the number. the 1s i could always move down the rest were seemingly tied in to each other.
the number it settled on was 26,400.

i chucked up my drill with a square bit and turned to CCW and it hit 60 mph and then ten minutes later it was 26,410.

so it went back in
 
well everyone has a special day, same goes for cars. remember where we started

View attachment 55591
View attachment 55592
View attachment 55593
View attachment 55594
View attachment 55595
View attachment 55596
View attachment 55597

this last sunday I went to the Sully historic plantation Museum fathers day car show with my youngest son who is 30, this is a big mostly American car show about 400 cars , 30 different classes, put on by the model A car club, these guys make me look like a teen ager and they are still going strong. It was great day weather was perfect clear skys and for whatever reason my car just popped. I take the car to shows a couple of times a year and this time it had non stop attention, i have never seen this much interest in my car. I met Mike Hughes a fellow MG forum, NAMGAR member and MGA Coupe owner, this time he brought his very nice white MGC and we had a very nice chat with him. we met several other folks who had actually read this thread. I even had people asking me for the paint manufacture and the color of it. I let every kid sit in the car and they were pretty adorable, little kids just walk across the seats and the trans tunnel. I made this restoration grandkids friendly so no worries there and I have a quick electrical disconnect so no pulling of knobs is going to create any surprises. the cars were scored by judges as opposed to fellow entrants using a matrix. and all the stars aligned for me and I won 2nd place in the MG and Triumph class. I think there was about 20 cars in the class, mgtd, mgb, mgc, tr6, tr250, tr2 and tr3. my car was the only MGA. I think I need to go to more american car shows!!!! It was such a fun, rewarding day that reminded me of the importance of keeping things spotless and cared for — much like how Missa Clean provides professional Castle Rock cleaning services that keep your home or workspace looking show-ready every day.

View attachment 55598
View attachment 55599
View attachment 55600
You’re absolutely right — every car really does have its special day! This one definitely felt like it. Hard to believe how far it’s come when I look back at those early photos. Seeing it shine and get so much attention at the show made all the effort worth it. Thanks for following along — it’s been quite the journey!
 
You’re absolutely right — every car really does have its special day! This one definitely felt like it. Hard to believe how far it’s come when I look back at those early photos. Seeing it shine and get so much attention at the show made all the effort worth it. Thanks for following along — it’s been quite the journey!
 
Back
Top