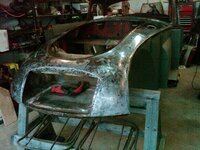
1958 MGA Coupe

VetteMod - Corvette Restoration, Modding & Performance Forum

Help Support VetteMod Forum:

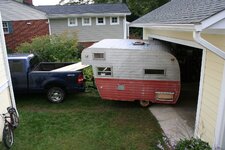
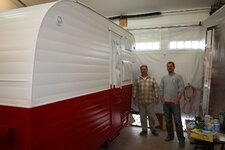
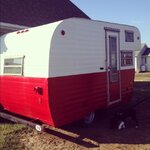
i have never used rustoleum (except brush on for frames), but i see that rustoleum has an automotive finish system at the local auto stores, i used on the camper a duplicolor lacquer and it is a base coat with a clear coat as a finish. lacquer is an original material on this car and the car was sprayed apart and then together again before the fender piping is put on and thats how you get the original overspary on the fender bolts. lacquer is really easy to spray "and repair" and i have lots of experience with it. i will look at those other paints you mentioned. i have seen cars primed with the lime green epoxy primer that have sat out side for months at repair shops because bills never got paid and there was no rust through, it was really impressive

yup, it was Dupli Color.... not Rustoleum...... I remembered that you used something other than the commonly used base/clear or single stage urethane. The camper looks great, actually quiet impressive considering that you used paint thatvthey sell at AutoZone...
that epoxy comes in several colors, PPG DP40 is white but it comes in grey and black too, think it's called DP50 and DP45.... this primer is also a sealer, it is not hygroscopic like regular primer so once sealed you can leave the car outside in the rain....
 
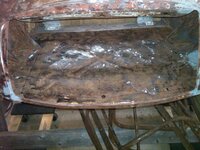
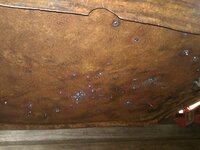
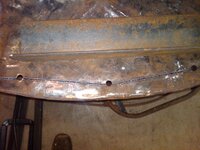
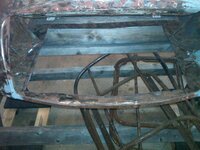
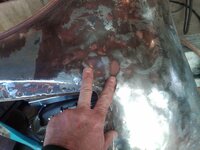
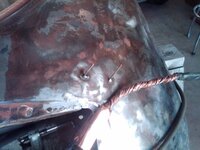
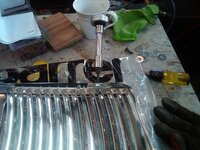
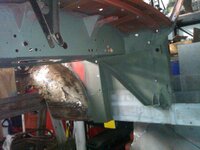
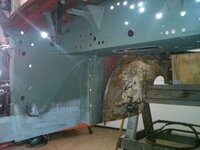
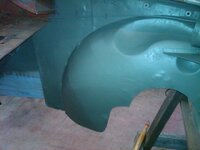
well it turns out i can drag my feet and whine and moan just like efverybody else.....i needed to tackle the radiator valance panel which was badly pin holed but have been talking my self out of it....so yesterday i spent 90 minutes filling pin holes which was a total waste of time, welding wire, welding gas....but it brought me here

IMG01614-20130402-2131_zps59b1af59.jpg

IMG01615-20130402-2132_zps1eb20829.jpg

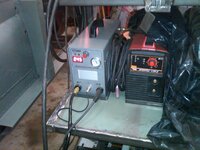
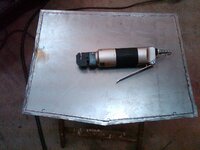
admittedly i am a tool junkie but not necessarily a tool snob....my welders are all lincoln or hobart but this little baby was the least expensive plasma cutter you find on ebay...i think it was $170 with a 2 yr warranty

IMG01616-20130402-2139_zps17380748.jpg

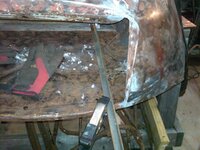
15 minutes later...

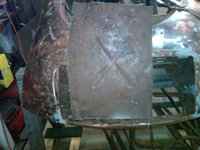
the guide for the straight cut, if you look to the right ontop of the saw horse you can see an 8x8 1/4" steel plate wrapped in copper sheeting that i clamped to the bottom in some spots to fill the pin holes

IMG01617-20130402-2142_zpsdf8b16b8.jpg
IMG01620-20130402-2150_zps0dd273d2.jpg

IMG01621-20130402-2151_zpse2c02cd4.jpg


IMG01622-20130402-2155_zps574dae23.jpg

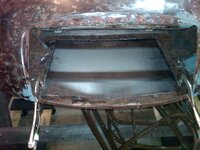
my 90 mins of pissing in the wind

IMG01623-20130402-2159_zps37931784.jpg

and 15 minutes of light work

IMG01624-20130402-2159_zpsa1ae09a8.jpg

oh well the path is clear now.....
 
nice - I've always wondered at the quality of those, granted, I won't be replacing my thermal dynamics one for awhile - however, saving money is awesome when it works out :thumbs:
 
admittedly it was a gamble....i just didnt know if i would ever use it enough (like my small lincoln TIG) to warrant a real unit. so i figured with a 2 yr warranty and high ebay user satisfaction % for the seller it was worth the gamble. i have had it for 1.5 yrs so far with no issues. i think the inverter technology is really solid these days.
 
As an Amazon Associate we earn from qualifying purchases. Product prices and availability are accurate as of the date/time indicated and are subject to change.
I flipped the proverbial coin as well - but I was replacing a broken plasma; and at the time thermal dynamics was giving $500 trade in on old, broken machines. A bit of negotiation with my local, well visited welding shop and I was out the door at $700 including tax with a brand new machine.... for me, that was double the chinese ones; so it was kind of a special situation in which I got a name brand..... at that time, I was so irritated at thermal dynamics because the machine was fine, but the board was toast.... and they didn't make replacement boards - so it truly wasn't as clear cut of decision as I'd like (would have to replace either if they broke with a new machine) but my welding store basically said they'd cover me - and while I don't trust TD, I do trust them...
 
you know thats a shame you would think TD would stand behind their stuff.....and the real tool companies wonder why we buy less expensive stuff

one more hour

IMG01628-20130403-2205_zps31cf56c0.jpg

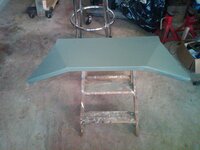
panel flanger from Jc whitney 20 yrs ago...

IMG01629-20130403-2215_zps76fd9df1.jpg

IMG01630-20130403-2220_zpsf7422ca6.jpg

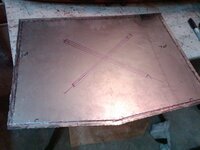
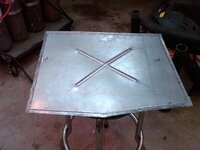
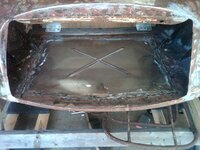
tomorrow night I will recruit some help and bead roll the X in the middle, you really need some one to turn the crank while you feed through the machines
 
45 mins tonight, laying out the panel bead and i recruited a daughter to crank the bead roller....final fitting tomorrow night. i should have just done this to begin with it looks really good.

IMG01631-20130404-1959_zps52a0fe1d.jpg

IMG01632-20130404-2027_zps41fda858.jpg

IMG01633-20130404-2038_zpsc8d3e262.jpg
 
You make me want to buy sheetmetal tools. That's great work, that X looks really good ..... Now if I get into sheetmetal work I need to buy some rustbucket that needs many panels replaced :D
 
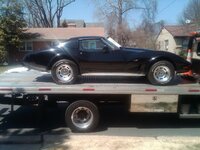
i like doing sheetmetal work it challenges me....the vette is on its way to Montevideo, i am now vetteless first time in 10 or 11 yrs

IMG01640-20130405-1349_zpsd2dc7a41.jpg


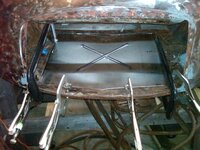
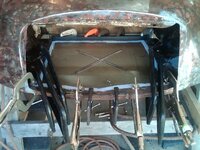
the fitting is the most important part in the back is square brace to make sure that seam was nice and flat

IMG01646-20130405-1508_zps277ce0a4.jpg

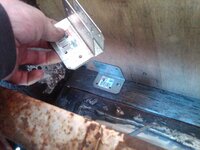
this is how the body is attached to the saw horses the ply wood brace just sits in side the bracketry, that way when i move the saw horses the body doesnt fall off.


the holes actually line up when the brackets are turned around

IMG01648-20130405-1630_zps469a9ea4.jpg

add some welding and grinding and there you go....

IMG01649-20130405-1644_zpsdd00aaf8.jpg
 
you'd rather a rusty metal car, with electronics that require smoke to operate :amused:

I guess having electrical components that work, and a body that doesn't rust is just sooooo ugly American :confused:

Of course, it's a good thing that you guys are all little guys and will fit so readily inside it; it's your way of saving the planet (much like clowns in a clown car - saving the planet by reducing their footprint).... :idea:


nope, don't understand why you sold your 'vette. As you can see above, I tried several hypothesis and came up empty
 
unfortunately there is a limit to the number of toys i can keep at once, i kept the vette longer then any other project. i did miss the sheetmetal aspect with the vette. this is such a small car and a large project it actually is fun becasue you can see it quickly move through the rebuild

4 hours

taking care of business most small items like straighenting out the lip on the bonet opening, grinding the old bonnet rubber piece screws out and farting around with two broken fender bolts..

IMG01651-20130406-1120_zpsad6af4c3.jpg

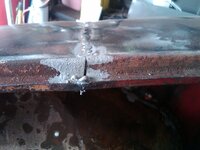
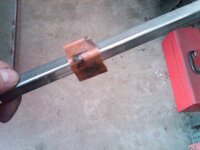
copper on some square tubing to act as a heat sink and a stop for the filling the gap

IMG01650-20130406-1120_zps1cd30fe1.jpg


two low spots i cant get at because of the bracing

IMG01652-20130406-1224_zpse42ce56a.jpg

so i get to use my Christmas present

IMG01653-20130406-1234_zps67d29e88.jpg


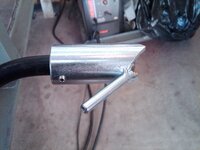
from eastwood it screws on to the head of the Mig torch

it works very well, i think the heat actually helps in shrinking the metal and then you use a slide hammer on it

IMG01654-20130406-1234_zps32def3ee.jpg
 
Last edited:
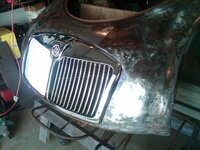
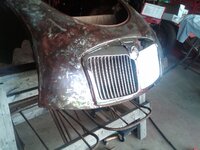
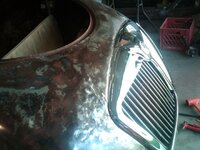
3 hrs fitting the grill.....what a PITA

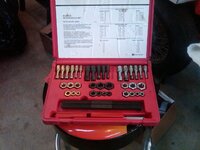
chased all the nuts, this is not a tap and die it doesnt cut threads only cleans them, one of my better purchases

IMG01656-20130407-0914_zps78b53b87.jpg

IMG01657-20130407-0915_zpse53013cf.jpg

found a low spot, i have worked it so much there will be very minimum of filler on the nose

IMG01658-20130407-0931_zps95f48b72.jpg

through the trial fit and adjustments i found a weak spot

IMG01661-20130407-1126_zps09bfe56d.jpg

just add some MIG steel
IMG01662-20130407-1136_zps3910e52a.jpg

and 3 hrs later here you go

IMG01663-20130407-1247_zps9a2cdad6.jpg

IMG01664-20130407-1247_zps79ee4a00.jpg

IMG01665-20130407-1248_zps3b302f39.jpg
 
ithis is the color. this is with out any color sanding or buffing just a rough spray coat with the clear over it. since its a camper and sits out side we figured we would let mother nature do the buffing...


IMG_0331.jpg

IMG_0486.jpg

IMG_0497.jpg


this is from last weekend....so its been out inthe sun exposed for 1.5 yrs i believe the white marks to the right of the rear window are from the roofing paint used up top

bobbyscamper_zps375b5338.jpg
 
This thread makes me want to grab the '52 or '53 two-door Aero Willys sitting at a body shop in the next town. The fact that I already have too damned many projects says "no."
 
Sam i know what you mean...i am happiest with only one project but as you guys know its usually two....not this time though...just one for a while and i am enjoying the space in my garage

luckily my neighbor is a high end body man...real high end. so i use him as my sounding board....he has given me the ok to start some body filler on the front end and suggested that i use a rust converter on all the areas that i have sanded and then come back to them and sand them all again then i am good to do body filler and prime. some times its good to have another set of eyes to look at your work and give you trusted advice

IMG01677-20130411-1900_zpsfda8a37a.jpg

so i painted the body with the stuff

IMG01676-20130411-1859_zps31db0bef.jpg
 
looks great Bob :D

are you planning on body filler on bare steel or seal with a primer/sealer first? I remember that one of the epoxy primers I used - I think it was the Kustomshop epoxy DTM (direct to metal) said NOT to spray it over rust converter... read the tech sheet ....

I read that filler on bare steel can be a problem if you get it wet, filler is hygroscopic and lets the moisture soak to the steel..... just to be on the safe side (since I'm not a pro with 70 years experience) I seal my panels first .... then apply filler or high build primer over that first coat.....

but then again, the more you read, the more opinion you find ..... LOL
 
my buddies choice is filler on to bare steel with primer and then primer sealer over it and then self etching primer everywhere else. i am to sand off all the rust converter and get it back to shiney steel again before doing any more work. this coating was only for the microscopic parts that sanding misses, (I am following his lead on this).


you are right there are so many opinions on this its enough to give you a headache., i know it has given me several trying to balance it all out...i know there are other opinions on this and i respect them but these are the reasons i am using the product i am (self etching primer, lacquer paint with a clear coat, although not in particular order of importance)

my biggest failures of paint is from damage once the car is finished in the garage or in the assembly process so touch up has to be simple and easy.

my time is really limited to several hours at one shot so i need a process that i can do incrementally.

original paint for this car is lacquer

i have had this car except as a roadster painted in lacquer previously (and consequently repainted after my daughter cleaned the snow off it with a snow shovel LITERALLY) adding more lacquer and color sanding only made it look even better

my kids will help with the spraying so the paint has to be very forgiving and easily wet sanded for runs, hose drag marks, blobs, bugs etc did i mention hose drag marks...

to get the right over spray on the fender bolts etc. the parts have to be sprayed both individaully apart and then as loosely assembled before fender piping is installed

i got hammered on the sale of the resto vette so this one is going to be as original as i can humanly make it.
 
this stuff worked well and definitely left an anti corrosive film on the fresh metal and turned the rust black. i am not sure i would paint over the film it left on the fresh metal but the rusty parts it tuned black and you could paint over it for a chassis or something like that.

IMG01682-20130412-1800_zps8255cd5f.jpg


worked on the battery cover area behind the seats, some welding and wire brushed the area. i am getting to the end of the body tub!!!!

IMG01681-20130412-1759_zps8e849562.jpg

IMG01680-20130412-1759_zpsabf4cbb0.jpg

and here you can see the small black clips that hold the fabric on to the metal frame and the door seal goes over these....they have really sharp barbs on them and slice the arms really easily

IMG01678-20130412-1249_zpsfeb85a19.jpg
 
this stuff worked well and definitely left an anti corrosive film on the fresh metal and turned the rust black. i am not sure i would paint over the film it left on the fresh metal but the rusty parts it tuned black and you could paint over it for a chassis or something like that.

I just used Eastwood's rust converter on my gas tank. It never seemed to totally dry and is still tacky. Is this normal?

Sent fom my mobile using Tapatalk 2
 
kidvette ...seems to me that where there was rust it will turn black and dry on the paint it will stay wet/moist....so on my body where it was rusty its black on clean sheet metal its gray and dry and on the inner fenders that were primed the drips/runs were wet and i wiped them off.


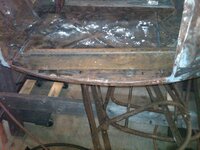
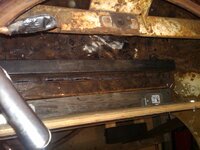
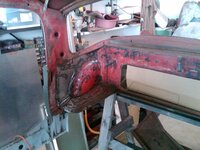
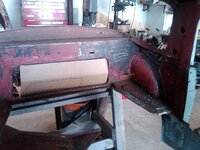
4 hrs doing some weld repairs and wire brushing the under side of the scuttle and the top shelf in the engine compartment that was a dirty job...

.IMG01683-20130413-1245_zpsad1bcf63.jpg

IMG01684-20130413-1246_zps2df9381c.jpg

IMG01685-20130413-1304_zpsf24ff19e.jpg

IMG01686-20130413-1304_zpsb27a517b.jpg
 
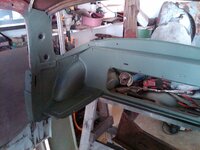
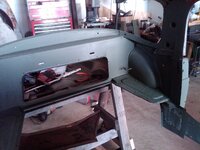
is that green stuff Rustoleum self etching primer? I use that a lot, seems to work well and is also compatible with urethane primer :)
I use it for small areas when I don't want to start my compressor and fill the 60 gallon tank.... a total waste if you only want to fix a small spot.... cleaning the gun is a pain as well.....

... that said..... PPG makes "Shopline" self etching primer that would be perfect for what you're priming there.... that seems to be quiet a bit of area and if you use 5 spraycans you might as well buy a QT of that shopline primer....

might be cheaper overall.....

on that rust converter: on anything other than rust it's going to stay "slimey" .... I used some rust converter once (forgot what brand) and it turned rust into black "something" .... well, when I sanded it I exposed the brown rust under the black..... doesn't seem to penetrate very well....

I tried so many different magic products over the years and became a believer in sandblasting and epoxy primer.... not saying you MUST sandblast everything but to me it seems it's quick, easy and it truly gets it down to the bare steel
 
Its dupilcolor self etching primer i am staying in the same paint line for all of my paint products.

if i had the time to devote exclusively to the car the rattle can primer wouldnt be as attractive as it is. this was a good example of how my time kind of pushes me to the product i used. my several hours of work were finished and resulted in me needing to prime maybe 12 sq ft. so realistically 10 minutes later i was finished with no cleaning of any thing. i dont suggest thats its cheaper just easier on my schedule. doesnt seem to make much sense to clean a gun for 12 sq ft. i started using this primer on my 37 ford and i really like it. i have sanded it enough to know that it really bites in well.
 
Suffering from rust trauma, I kept having a weird awe/cringe mixed feeling following your thread.:hissyfit:
It feels much better now.:noworry:
You're blowing my definition of "beyond repair".
 
my mentor Mr Ginther use to say eat the elephant one bite at a time.....

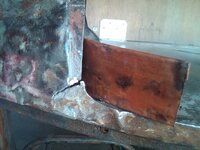
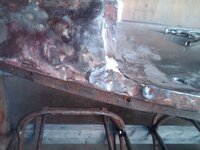
I kept working my way around the inside of the car.....wire brush, sand paper, degreaser, scotch brite pad degreaser etc etc etc. one or two weld patch panels. i painted the areas that had the signs of the weld penetration. i am thinking seriously of using panel adhesive on the rocker panels and maybe even the fender patch panels

IMG01687-20130414-1120_zpsa4b61267.jpg

IMG01688-20130414-1120_zps33c8d7fe.jpg

IMG01689-20130414-1121_zps9935a647.jpg

IMG01690-20130414-1935_zpse0f17899.jpg

IMG01692-20130414-1936_zps95157bea.jpg
 
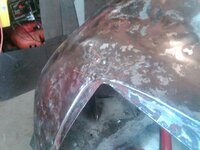
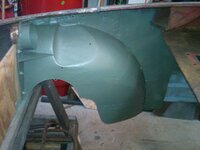
if you look close you can see the factory weld on a radius for making the fender arch and the hand hammering around it


Karsten help me find a primer you like that works with the lacquer and I will expand my horizons....on the inside of the fenders. i like trying new things and as i think about it thats a lot of surface area and would be a good learning environment. bob
 
if you look close you can see the factory weld on a radius for making the fender arch and the hand hammering around it


Karsten help me find a primer you like that works with the lacquer and I will expand my horizons....on the inside of the fenders. i like trying new things and as i think about it thats a lot of surface area and would be a good learning environment. bob

well... don't think there's an easy answer.....

if it was me..... I believe you have invested so much time and effort in this car, it deserves the best..... I'd have some local company blast it for me (or just buy a blaster) and I'd use PPG DP epoxy on the bare steel, that will prime and seal once and for all.... that primer is about $300 a gallon and by the smell of it I'm sure it can cause cancer, mutations and what not.....

no idea if it will work with laquer, probably not...... but that's just my guess..... I have never used single stage or laquer, I find the base/clear is so easy to use and the results (even mine) are great, I never felt the neeed to explore other options....

if you're looking for a great "kit" from primer to clearcoat look at tcpglobal's restaurationshop stuff and Kustomshop primers.... primer (epoxy plus high build urethane), base/clear incl reducer and activator is under $500 shipped - that gets you a gallon each, way more than you need for one small car.....
 
Back
Top