Rear suspension overhaul....

VetteMod - Corvette Restoration, Modding & Performance Forum

Help Support VetteMod Forum:

MYBAD79

Moderator
Joined
Mar 23, 2008
Messages
6,942
Reaction score
5
City & State/Province
sunny Florida
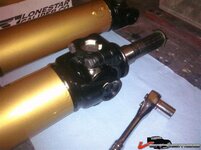
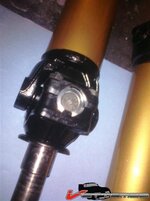
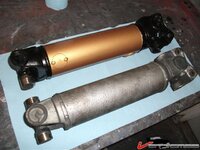
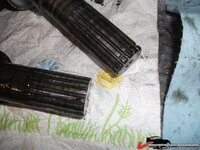
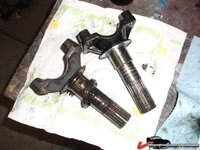
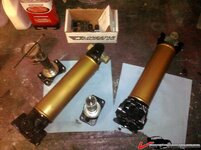
today I got the last parts for my rear suspension overhaul, the big brown truck delivered the straps, FedEx delivered the yokes.... USPS delivered the new half shafts yesterday, stripped and painted the shafts today.

The yokes are Lonestar with hardened tip, judging by the blue discolorization at the tip these seem to be hardened :thumbs:

The half shafts are FtWayneClutch 3" shafts with Spicer Ujoints, should last a while :)
214efbc1514760f.jpg
 
Karsten -
How long before TT makes a comment about the Gold -- that it looks like yellow and, where is the purple - or such?

Old thread reference -- but it was funny!

Those look sharp - BTW
Cheers - Jim
 
Nice pieces. Are you going to replace the bearings and seals in the diff?

diff seems to be fine, had it apart in 2004 and haven't driven a whole lot since then , I think I'll leave it alone.... unless of course I find something wrong this time (fingers crossed)
 
German tuning! all it needs is a blue diff with a yellow cover and a rebel flag on the spare tire carrier... :D

I dig black and gold!
 
Karsten -
How long before TT makes a comment about the Gold -- that it looks like yellow and, where is the purple - or such?

Old thread reference -- but it was funny!

Those look sharp - BTW
Cheers - Jim

maybe I should paint the diff "plum crazy" :drink::3rd:

I painted these half shafts a golden base coat, then a coat of clear with gold ghost pearl and medium gold pearl mixed in..... top coated with two coats clear :D

not that anybody sees these but I wanted to try something new (gold pearl) and if I messed it up It wouldn't be all that noticeable under the car ;)
 
As an Amazon Associate we earn from qualifying purchases. Product prices and availability are accurate as of the date/time indicated and are subject to change.
while I really like the color combo Marck suggested, I think I'm going to paint the diff gold pearl :bump:
 
Like I told my home remodeling clients, 'purple with pink polka dots'....

look for the STARE or 'reaction' and crack up laughing......

then saying it's YOUR house, not mine.....I can't tell you what to do.....

course if your 'house' was seen in public, well maybe something else applies....

like


'Taste'??

:hissyfit::crylol::bump:
 
Karsten
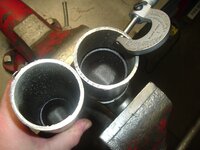
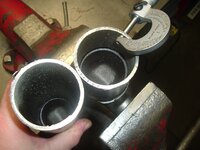
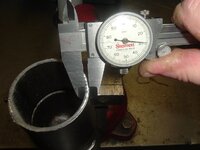
What is the wall thickness on those 3" shafts, 083" 095" or something else?

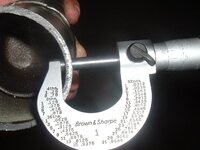
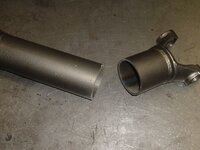
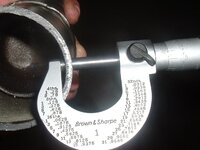
Were your old 3"s shaft junk? If so can you cut one in 1/2 and measure the wall thickness. I cut a 67 2.5" shaft in 1/2 last year and it was .130" wall- pretty good compared to what is offered today.
 
i "believe" my old shafts are 2.5", will have to measure.... they're 33 years old and had some major rust - I took a angle grinder with a sandpaper flapper disc to them and painted them back in 2004. Too bad there's no easy way to get he wall thickness other han cutting the shaft. I'll call FtWayneClutch and ask what wall thickness hey use on their shafts. They use solid Spicer joints and yoke ends so I hope they dont use thin wall pipe..... I'll have to see if the old shafts are 3", if they are I'll put old and new on a scale to see if here's a difference, hopefully the new ones are heavier....
 
I spoke with Ft Wayne today as well. I have a set of 2.5" x 095 on order for a street car. They should work out fine. However I was able to cut in 1/2 the set off this 71 and they were exactly the same tube thickness of the 67's, .132"

Again I don't have any scrap 3" shafts to cut in 1/2 to compare. For a street car with no abuse these are fine to use but for HP use I go to Tom's steel shafts, no aluminum, carbon fiber, or thinner walls.

197125INchShafts1326.jpg

197125INchShafts1325.jpg

197125INchShafts1322.jpg
 
I called them too. This topic seemed to be very fresh in their memory, apparently I called after you talked to them :D

I think the guys name is Tom, he's an older gentleman judging by the voice and the guy who builds these shafts.... seems to be a nice guy.... unfortunately he confirmed the wall thickness on their 3" half shafts is .085" ... however, he says he's certain the stock wall thickness of these 3" shafts is also .085" (who's going to cut an old shaft to verify ???)... I am not too concerned because I'm only at maybe 400HP but why the heck do they advertize these as "heavy duty" ???

I'll weigh my shafts once the old ones are out, if the old shafts are heavier I'll probably just use the new Spicer joints on the old shafts :mad::push:
 
I called them too. This topic seemed to be very fresh in their memory, apparently I called after you talked to them :D

I think the guys name is Tom, he's an older gentleman judging by the voice and the guy who builds these shafts.... seems to be a nice guy.... unfortunately he confirmed the wall thickness on their 3" half shafts is .085" ... however, he says he's certain the stock wall thickness of these 3" shafts is also .085" (who's going to cut an old shaft to verify ???)... I am not too concerned because I'm only at maybe 400HP but why the heck do they advertize these as "heavy duty" ???

I'll weigh my shafts once the old ones are out, if the old shafts are heavier I'll probably just use the new Spicer joints on the old shafts :mad::push:

Karsten, I'm confused why you're focusing on the weight of the shafts. Strength should be the issue. Seems to me 3" shafts at .085" wall should be stronger than 2.5" shafts at .132" wall. Also the 3" shafts (@.085" wall) should have the benefit of being lighter than the smaller .132" wall shafts (I just did a quick wall thickness multiplied by circumference to get the cross sectional area of the tube material).
What am I missing?
 
I haven't measured the diameter of my old shafts yet but it looks like my old shafts are 3" so the weight of old and new is probably the easiest non-detructive method to compare wall thickness. If they weigh the same I'll just use the new ones, but if the old ones are signifficantly heavier then that indicates heavier wall as the tube ends should be the same....

the new shafts sure look very nice now that they're gold pearl painted :push:
 
I haven't measured the diameter of my old shafts yet but it looks like my old shafts are 3" so the weight of old and new is probably the easiest non-detructive method to compare wall thickness. If they weigh the same I'll just use the new ones, but if the old ones are signifficantly heavier then that indicates heavier wall as the tube ends should be the same....

the new shafts sure look very nice now that they're gold pearl painted :push:

Got it!
 
I don't think you're going to have a problem but I would like to know as well what the thickness of the 3" shafts are. Like I said for HD use, I'll still use Tom's 3.5" x .134 shafts. I haven't seen one of those fail in hard use.
 
I spoke with Ft Wayne today as well. I have a set of 2.5" x 095 on order for a street car. They should work out fine. However I was able to cut in 1/2 the set off this 71 and they were exactly the same tube thickness of the 67's, .132"

Again I don't have any scrap 3" shafts to cut in 1/2 to compare. For a street car with no abuse these are fine to use but for HP use I go to Tom's steel shafts, no aluminum, carbon fiber, or thinner walls.

197125INchShafts1326.jpg

197125INchShafts1325.jpg

197125INchShafts1322.jpg

You should get a tube mike Gary or lay a pin on the flat part of the mike so it make contact on the inside radius then subtract the pin diameter from the final dimension. I know you know this just thought I let others know if they don't have a tube mike for measuring tube walls..

Danny
 
Hi Danny
Yeah I suppose you're correct but for this it was close enough to see if I was 040" over/under. I did check it first with a caliper too.

197125INchShafts1321.jpg
 
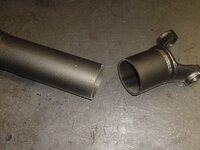
from this photo it seems that it's not .130" wall thickness, looks like .080" to me....judging by the size of the tube ends in relation to the tube it's a 3" shaft (the photo Gary posted shows the 2.5" tube is a lot smaller than the tube end) .... fortunately this is not my halfshaft, I found this photo on the web....

214f10bfe4e6de1.jpg
 
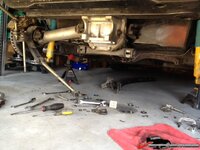
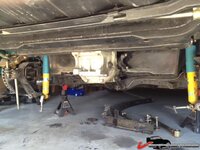
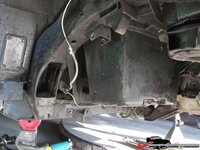
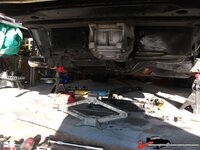
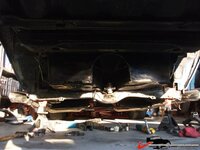
Update: took the rear suspension apart, should have the diff out tonight.... even the lower shock mounts came out easy, I'm glad I used lots of anti seize when I assembled this back in 2004...

214f2543ebd4520.jpg
.

214f2543ec1c3dc.jpg

.


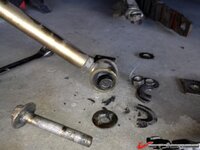
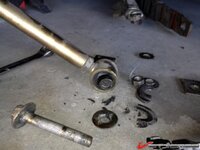
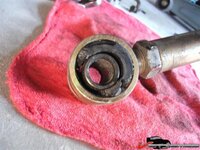
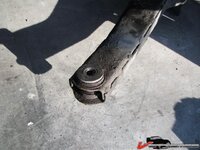
and here's some more poly rubbish: these strut rods are completely destroyed after only a little more than 5000 miles :
.
214f2543eba7e6c.jpg
 
Those poly ends look like mine did.

Question. Do you have some type of washer on the inner side of the lower shock rubber bushing? Or does the rubber bushing mount right up against the shock mount?
 
There's a washer between the bracket and the poly rod end - you can see it this picture (the washer is next to the bolt, the other pice that looks like a broken washer is poly....

214f2543eba7e6c.jpg


here's a close up of the ugliness:

214f25891226cc2.jpg

.

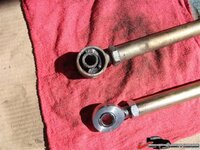
These rod ends should fix it once and for all....

214f258911ed10b.jpg

.

Here's the half shafts (old and new), both weigh the same, 10lbs acc to my old bathroom scale. Cannot "feel" a difference when holding one in each hand.... I'll see if I can use the precision scale at the UPS store to get exact numbers....

214f258912932ec.jpg
 
More stuff done today ....

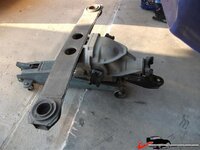
Removed the trailing arms and differential, again, anti seize that I applied 8 years ago saved the day :D

214f25e2339ba27.jpg
.
214f25e233d3272.jpg
.

Trailing arm bushings: I was very curious to see how the poly bushings held up. to my surprise these are in pretty good condition. The sleeve is somewhat loose but the poly did not deteriorate like the poly in other locations....

214f25e234041d1.jpg

..
214f25e2342a6e2.jpg
.
214f25e2344cd98.jpg
.

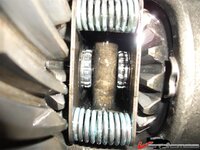
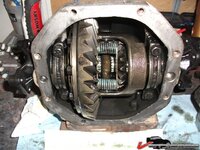
Now, here's the inside of the diff - hopefully Gary doesn't see anything wrong.... IMO it looks good, was working fine.... probably just new oil and put it back together with new yokes.... the pic below shows the new yokes (I am relly curious how the C-clip is installed - I cannot get there with the needlenose pliers :huh2:

214f25e23472363.jpg

.
214f25e23497cae.jpg
.

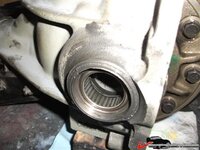
the yoke has worn the casing quiet a bit but fortunately there's enough meat to install the new seal....

214f25e234bbad0.jpg

.

old and new yoke:

214f25e234e5a9c.jpg
.
214f25e23517202.jpg
.
 
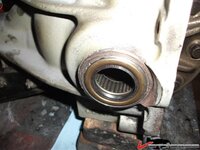
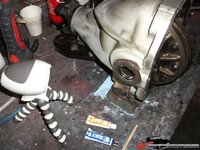
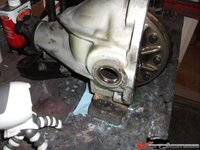
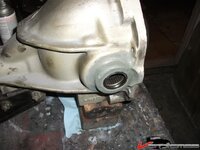
Fixed the damage on the casing today and installed the new seals....

here's what I started with:

214f275ab88c65a.jpg

.

The damage is purely cosmetic (fortunately) .... the seal is still held in place tight, there's more than half of the depth remaining but nevertheless I decided to clean and fix the area with JB weld epoxy

214f275ab8bb837.jpg
.

Sanded:
.
214f275ab91f012.jpg
.

and primered.... once painted it won't be noticeable, it's behind the yoke deflector shield anyways....
.
214f275ab8df692.jpg
.
 
Use a c clip pliers to install the c clip. Napa carries them.

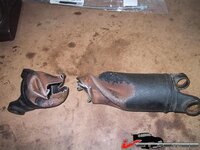
What happened to the old yoke? It looks like the top is gone. How was it held into the posi unit? C clip?

you might want to somehow flush the bearings since you sanded that JB weld around them...unless you somehow protected them when you sanded.
 
Use a c clip pliers to install the c clip. Napa carries them.

What happened to the old yoke? It looks like the top is gone. How was it held into the posi unit? C clip?

you might want to somehow flush the bearings since you sanded that JB weld around them...unless you somehow protected them when you sanded.

will check NApa after work today. The pliers I have are too short/bulky... can't get so far in there to reach the clip...

The old yokes are worn approx 1/4" .... these were worn before I bought the car. The previous owner had the diff repaired/rebuild but he didn't have the money for the new yokes .... obviously he had to replace bearings and clutches and what not, all the material from the yokes and the clips was inside the diff grinding stuff up....

When i opened the diff in 2004 I decided to go with upper strut rods and leave the side yokes "floating" ... well that never happened so now I'm replacing with stock stuff....

When I sanded the JB weld I had a rag stuffed in the hole to keep the bearing clean :)
 
Back
Top