Rack and pinion - homemade Steeroids with GrandAm rack

VetteMod - Corvette Restoration, Modding & Performance Forum

Help Support VetteMod Forum:

I'm going to post the dimensions and photos of the cardboard templates - stay tuned :D

A word of caution though: I believe I understand why Steeroids is using 3 U-joints..... It is masking variances in manufacturing their brackets and the frame .... with 3 joints the position of the rack isn't all THAT critical - if you want to get away with only two U-joints then it has to be spot on....

If you want it perfect then the final fit and weld has to be done with the stuff bolted to your specific frame.....

I can make another bracket - somebody willing to test fit it on his/her C3 ???

Another word of caution: this setup requires cutting the driver side engine mount.... this is to allow the steering shaft angle to be as smooth as possible and eliminate binding of the U-joints.....

If you used the 3 joints would you need to cut the driver side engine mount ?
 
I'm going to post the dimensions and photos of the cardboard templates - stay tuned :D

A word of caution though: I believe I understand why Steeroids is using 3 U-joints..... It is masking variances in manufacturing their brackets and the frame .... with 3 joints the position of the rack isn't all THAT critical - if you want to get away with only two U-joints then it has to be spot on....

If you want it perfect then the final fit and weld has to be done with the stuff bolted to your specific frame.....

I can make another bracket - somebody willing to test fit it on his/her C3 ???

Another word of caution: this setup requires cutting the driver side engine mount.... this is to allow the steering shaft angle to be as smooth as possible and eliminate binding of the U-joints.....

If you used the 3 joints would you need to cut the driver side engine mount ?

NO, but one of the intermediate shafts needs a support to keep it in line....kind of a PITA....
 
I'm going to post the dimensions and photos of the cardboard templates - stay tuned :D

A word of caution though: I believe I understand why Steeroids is using 3 U-joints..... It is masking variances in manufacturing their brackets and the frame .... with 3 joints the position of the rack isn't all THAT critical - if you want to get away with only two U-joints then it has to be spot on....

If you want it perfect then the final fit and weld has to be done with the stuff bolted to your specific frame.....

I can make another bracket - somebody willing to test fit it on his/her C3 ???

Another word of caution: this setup requires cutting the driver side engine mount.... this is to allow the steering shaft angle to be as smooth as possible and eliminate binding of the U-joints.....

If you used the 3 joints would you need to cut the driver side engine mount ?

NO, but one of the intermediate shafts needs a support to keep it in line....kind of a PITA....

More of a PITA than cutting the engine mount? Would there be any other reasons not to use the 3 joint? ..more slop or play?
 
I'm going to post the dimensions and photos of the cardboard templates - stay tuned :D

A word of caution though: I believe I understand why Steeroids is using 3 U-joints..... It is masking variances in manufacturing their brackets and the frame .... with 3 joints the position of the rack isn't all THAT critical - if you want to get away with only two U-joints then it has to be spot on....

If you want it perfect then the final fit and weld has to be done with the stuff bolted to your specific frame.....

I can make another bracket - somebody willing to test fit it on his/her C3 ???

Another word of caution: this setup requires cutting the driver side engine mount.... this is to allow the steering shaft angle to be as smooth as possible and eliminate binding of the U-joints.....

If you used the 3 joints would you need to cut the driver side engine mount ?

NO, but one of the intermediate shafts needs a support to keep it in line....kind of a PITA....

More of a PITA than cutting the engine mount? Would there be any other reasons not to use the 3 joint? ..more slop or play?

Oh, I dunno, just remember cutting my crescent outta the mount really easy with a hole saw in my 1/2" drill....as I recall it was a 3" saw....honestly I did not know of the existence of the heim joints at the time, or the application of same for supporting the shaft, I did this all outta junkyard I pull it parts, so used what I found, had to make up my own U joints from many joints I pulled apart....most of the joint pieces came from Lumina mini vans I forget where the shaft came from....I did this on my own, winter 01-02 along with other extensive mods.....:drink:
 
Three joints require a support on the steering shaft to keep it all aligned. The third joint would sit right by the header so clearance can be an issue. A third joint has no advantage really other than you could call it a true 'bolt on' ... And these joints are $75 each so not really cheap ....

Less is more .... I really like the clutter-less and clean stuff , no pump , no lines, no reservoir .... Just simple .... Same for the U-joints, two joints are enough and a much cleaner install
 
As an Amazon Associate we earn from qualifying purchases. Product prices and availability are accurate as of the date/time indicated and are subject to change.
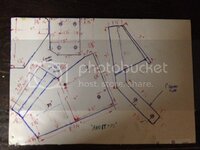
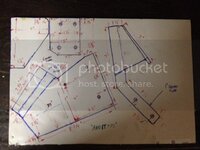
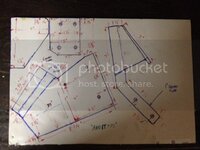
Ok, here are the templates for the parts, the cross beam is 1" tubing and in my case 28" with a little meat for final fitting once the other two pieces are bolted yo the frame ....

photo_zps273ddf6d.jpg

On the driver side the 1" square tubing piece is 3/4" offset towards the driver side ...
 
Last edited:
Karsten, having a hrd time reaing the dimensions on the photo. Can you email a higher res original to me?
 
Do I sense a CAD drawing?

BBShark - going to do a CAD and plasma set up? ;)
Sounds like a sweet idea. Anyone have access to FEA for comparing in steel and Aluminum? Just wondering if there could be further weight reduction.

Cheers - from the sidelines - Jim
 
Sooo....two questions. First, how much of a difference/benefit do you feel between the rack conversion and a well functioning stock system. Is it worth the conversion now that you've done it? I've completely gone through my stock system and it doesn't leak, and there isn't any real play in the system, but I've not driven a C3 with R&P steering. And, I wonder if this will fit on a BBC conversion. I was watching Gunter's work and was interested, but I really don't want to bang the crap out of my headers to get room for the steering shaft, especially if there isn't that much difference.
 
Dave, our car are SO much different, I not sure it's a fair comparo.....but we get together some nice day and you welcome to drive my car, but I carry a GUN......in the passenger side......:yahoo::devil:


but seriously, with a BBC vs my basically ZZ4 200 4r setup, the only real difference you likely to feel is the steering ratio stock being ~16-1 and mine or Borgeson being 12-1, honestly I LOVE being able to turn a corner by flipping the wheel ~90* instead of doing a hand over or twist my wrist....


It's a personal thing, I guess, no way to describe it in typing much less verbally.....

I ain't doin nuttin, as per typical, so call me, and we get a sammich around noon and you find out what you think....no biggie.....


:harhar:
 
Sooo....two questions. First, how much of a difference/benefit do you feel between the rack conversion and a well functioning stock system. Is it worth the conversion now that you've done it? I've completely gone through my stock system and it doesn't leak, and there isn't any real play in the system, but I've not driven a C3 with R&P steering. And, I wonder if this will fit on a BBC conversion. I was watching Gunter's work and was interested, but I really don't want to bang the crap out of my headers to get room for the steering shaft, especially if there isn't that much difference.

The R&P setup requieres less space than the stock box so you should have better header clearance than stock.
Now for the benefit: with the PS rack you get the 2.5 turns lock to lock , the manual rack is 3.7 turns just like stock.
Driving the manual rack: it doesn't really feel that much different than the stock PS setup, like I said I like the clutter free install without the pump, reservoir and that stuff .... I like it simple ...
 
Ok, here are the templates for the parts, the cross beam is 1" tubing and in my case 28" with a little meat for final fitting once the other two pieces are bolted yo the frame ....

photo_zps273ddf6d.jpg

On the driver side the 1" square tubing piece is 3/4" offset towards the driver side ...

Thank you for your time on these. I really appreciate the time and effort to post and make these brackets. I'm hoping I can get everything together soon so I can start working on getting my rack installed.
 
Last edited:
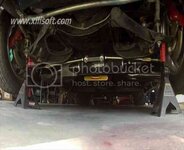
re-did the center link.... there was nothing really wrong but I wanted more thread engagement on the rod ends and ball joints... anyways, here's a video of the finished install:

th_MyMovie_zpsd06e0d13.jpg
 
Looks good! I just might wanna do that too! Have to run power though, not sure how I'd eliminate the pump from the serpentine set up if I removed it.
 
Looks good! I just might wanna do that too! Have to run power though, not sure how I'd eliminate the pump from the serpentine set up if I removed it.

If you "have to" run power (wife driving the car, etc) ... The later style pumps with the remote reservoir aren't all that bad....it's just that I prefer the un-cluttered look and the simplicity.... feel free to stop by and check out how the manual steering "feels" compared to stock, I don't think it's all that different minus the "slop" .... The effort isn't really much different that stock, hard to explain but once you put your hands on the wheel it's very 'clear'.....

Like I said, stop by if you like .... Drop me a PM so I'm here :)
 
Last edited:
dumb question

I noticed that on your passenger side bracket there is a plate that bolts to the bottom of the frame,how is this fastened to the frame ?Did you drill & tap the frame?
Gimpy
 
I noticed that on your passenger side bracket there is a plate that bolts to the bottom of the frame,how is this fastened to the frame ?Did you drill & tap the frame?
Gimpy

I cut the frame, inserted a plate (1/4" thick), welded it in place, then drilled and tapped it from the bottom.... Probably way overkill......
 
I cut the frame, inserted a plate (1/4" thick), welded it in place, then drilled and tapped it from the bottom.... Probably way overkill......[/QUOTE]


Likely not overkill,as you said earlier in this thread "it is steering",not sure how I'm going to do the passenger side yet, but I like that plate,I am not able to weld on my frame(don't have a good welder where the car is)but I'll find a solution.
Thanks for the quick reply & posting your work!
Gimpy
 
Likely not overkill,as you said earlier in this thread "it is steering",not sure how I'm going to do the passenger side yet, but I like that plate,I am not able to weld on my frame(don't have a good welder where the car is)but I'll find a solution.
Thanks for the quick reply & posting your work!
Gimpy

you can cut the frame (a 1/4" slot) to insert the plate, bolt it all up and weld the frame back together later..... just make sure when you weld the frame you also weld the plate - otherwise it's loose inside the frame once the bolts are out....
 
:hissyfit: Seems that everybody with an install, wether it's from a company product, or their own design, used much more steel in the thing than I did.....

yet mine has been there for since '02 now.....wore out a rubber doughnut from grease/oil more than any wear, I check it once in a while, and it seem stable and fine.....maybe I"m rong, but I don't see all the fuss on those brackets, all the cross bracing, and concentration on the place where the old p/s ram bracket was located....I used one of them bolt holes for my triangulation, but that's IT, :clobbered::rolleyes:
 
Well.... I guess you can at any time say "eh.... good enough" or you keep going and build something that is better than anything you can buy....

on that same note: I also painted the entire bracket with epoxy primer and metallic paint, that's a bit overkill too but I don't like rust either....

:beer:
 
Ok, here are the templates for the parts, the cross beam is 1" tubing and in my case 28" with a little meat for final fitting once the other two pieces are bolted yo the frame ....

photo_zps273ddf6d.jpg

On the driver side the 1" square tubing piece is 3/4" offset towards the driver side ...

Do you happen to have a larger photo or a scan of those templates? A few of the numbers are hard to read. I need to get to work on this project...
 
Back
Top