My steering install

1Michel

Well-known member
Joined
Apr 25, 2008
Messages
1,519
Location
Saint Joseph du lac, Québec
Since my big truck is in the shop I had the week to finaly play with the Vette.
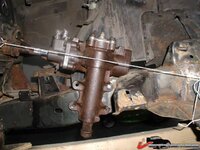
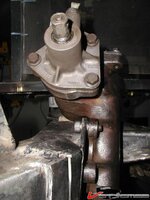
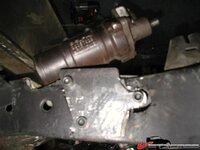
I picked up a Jeep steering box and started installing it.
I've been looking at pretty much everybody's install and decided to go Norval's way notch the frame, align the box as much as possible with the steering column then sink the assembly into the frame.
Since my welding is crappy and I dont want to learn on a piece as important as the steering assembly I'll just make the parts and tackweld them in place. Later my son who is a certified welder will come over and finish the welds properly.

So here we go.

I started by trying to align the box. I took some 200mph tape and tied the column with the box.
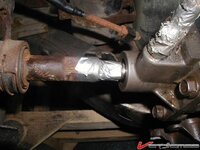
18048e6259fdb3dc.jpg

Hey originaly they call it a rag joint, I call it tape joint. Steering migght be a little soggy with this type of joints. LOL

Then I used a piece of rope and aligned the box from the top.
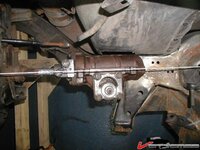
18048e625160b4f6.jpg
then from the side
18048e6259ee500f.jpg

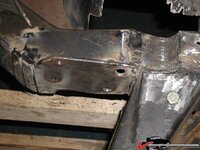
I found out that if I wanted to align it straight, the bottom of the box was hitting the top of the frame so I decided to make a notch to clear it.
I didnt want the box to touch the frame.
took a deep breath and riped thru it. First cut.
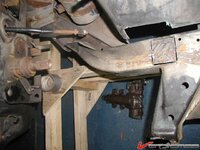
18048e6259f639b1.jpg


Once the first notch was made I could align the box pretty straight.
I marked it on the frame for reference and started to plan where I was going to cut the side of the frame and size the plate. This is going to be a big hole.
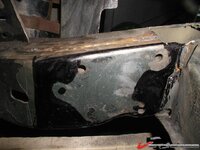
18048e625f5ad2c4.jpg

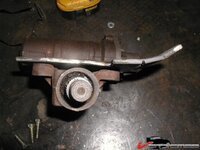
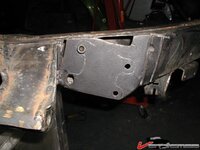
I then made a plate from 1/4 in thick and installed the box on it. Since I wanted it to be big enough and follow the bend of the frame I made two lines with the grinder and cut it about half way deep to be able to bend it. 1/4 in plate wont bend easy. Later the welder will make a pass over and wlll solidify it.

Here I started to make a notch on the plate to clear the pitman arm.
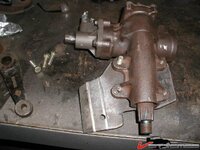
18048e625f6d926a.jpg

18048e625f8afa2b.jpg

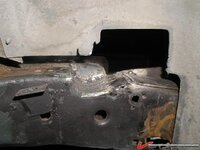
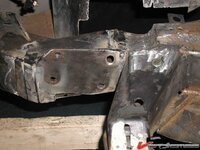
Ok now I was there, I had to make the big hole.
I cut the side of the frame in order to install the new plate .
The hole for cylinder support access was already blocked when I did my frame gussets.
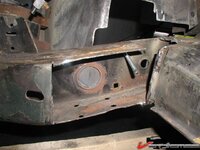
18048e625f779e8d.jpg

I'll take some more pics later this afternoon.
 
Last edited:
How did you do it? adapters? cut the frame??? details...details :D See you edited the psot :) I like what you're doing there :)
 
Thanks Marck.
Yeah I have some problems with the computer so I have to put thing one piece at a time.
If I dont throw out the computer out the window or sledge hammer it, I'll get there.
 
Great post! This is the first Jeep box install I've seen where the box is sunk into the frame. That is what I'm planning to do as well. Here are some pics showing how I'm planning to box that section of the frame in.

88561.jpg


69892.jpg


Looking forward to your updates on this thread.
 
Thanks Marck.
Yeah I have some problems with the computer so I have to put thing one piece at a time.
If I dont throw out the computer out the window or sledge hammer it, I'll get there.

Snot your puter, the web has been dicked up today....slower than a grocery cart uphill.....

:sos::chinese:
 
Great post! This is the first Jeep box install I've seen where the box is sunk into the frame. That is what I'm planning to do as well. Here are some pics showing how I'm planning to box that section of the frame in.

I took the idea from one of your posts Kidvette. Actually I took a lot from a lot of posts.

The only difference with your design is that the box you show has 3 holes, the jeep box I have has 4 holes.
One of them will be situated about 3/4 in on top of the frame on the plate.
I also plan to pass 3 of the bolts thru the frame the same manner as the original.

If I wanted to align the box with the steering shaft I had no choice.
I found out I could use the top left original hole then I went from there.
 
Last edited:
Ok heres a few pics from last night.

This one is from inside the wheelwell

18048e68fb567667.jpg


This is the plate installed as you can see I had a bit of problems with the alignement of one of the holes.
I dont mind because the holes will be enlarged so I can pass some pieces of 1/2 pipes thru it. Since I plan use the thread on the steering box and drive the bolts thru the frame. The pipes will prevent the frame from crushing when the bolts will be torqued in place and will add maybe a bit of stiffeness.

18048e68fb4bd03e.jpg


Here you can see I made a notch at the botom of the plate to make room for the pitman arm. It was a bit close.

18048e693f6c1a04.jpg

Another thing that's bothering me a bit is the gap on the right lower side near the engine mounts. it's a bit too large, I'll wait to see what the welder thinks and maybe I'll make another one that fits better. no big deal at this point because it's only tackwelded.

Today I had to return the box because I found out the double D shaft on it was bent. when I turned the pitman arm it was not rotating well so I picked up another one this afternoon.

Tomorow I'll clean it up take the pitman arm off (that's a PITA) and reinstall it to make sure everything is lined up. then finish up the notch under the plate for the pitman arm clearance.
 
Last edited:
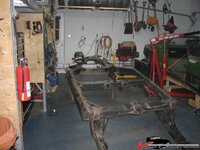
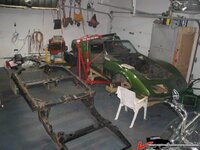
Ok today I took the body off the frame and turned the frame around so I could finish up under the box.
Didn't go as well as I planned.

I first painted the plate and scribed the location of the box.
Now I dont like that plate at all. The holes are messed up and tomorow I'll make another one that will fit better and the holed will align better.
18048e82ac9be63e.jpg

This pic shows how high the top bolt will be over the frame
18048e82bd0e72b0.jpg

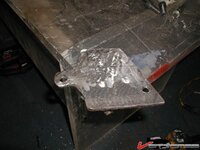
I was going to put some tubes inside the frame like GM did but I changed my mind ( I do that a lot). Instead, I made another plate that will be on the other side of the frame.
It will support the bolts and stiffen up the area a bit.
18048e82d6ded89b.jpg


Here I mocked it up on the frame with the box, it needs some more triming and I'll use some 1/8 plate to tie everything together I didn't cut the frame under the plate like I did on the other side.
One of the bolt ended up where the frame bends and was not going to sit flat. So I had to make a tab in the plate to sit the bolt on a flat plane.
I'll make a round section around the tab with 1/8 plate to tie it to the frame.

Ths pic is not clear, I'll get some more tomorow as I go along.

18048e8325cceaf8.jpg

Kinda looks like crap right now but once everything is welded together it will be nice and stiff.

Messed up the garage but this is fun.
18048e83ceb43da6.jpg
18048e83ceac7986.jpg
 
Last edited:
Ok didn't have time to play much today but I took out the plates and I'll have some new ones made with the exact hole location on it this week.

The one on the outside of the frame is going to be a bit longer to cover more on the frame of the car, the body is back on the frame and I made some more measurements this afternoon.

I didnt like the way this was going. So I asked my son to make those at the shop and I will install them later.

I decided to make 2 plates and sandwich them over the frame of the car.
The reason I wanted to make it this way is because I wanted to use the thread of the steering box and drive the bolts thru the frame like the original was installed.
It's a little more trouble to make it this way because everything has to be paralell and the frame is not but hey, it's more fun this way.

I know that the box is in line with the steering column so it's a matter of installing those plates, weld everything together and clean up the welds.
 
that's some serious fabrication - good job :D

I hope my rack and pinion conversion is going to be less work :sweat:
 
that's some serious fabrication - good job :D

I hope my rack and pinion conversion is going to be less work :sweat:

Karsten, if a rack takes 30% of that amount of effort, you overDOing it....

and yes, that install looks GREAT, Mike, you really went apeshit over that one....hope you got other reasons than just the steering to be pulling that body off...jeebus.....

:lol::crutches:
 
It is a lot of work but the car is dismantled anyway and like I always said since I started this project, I'm not in a rush.
I did get apeshit a bit but since the car is dismantled I wanted to do it this way.
Also I'm not that good at fabricating stuff and I have to do things twice to get it right.
Today I just got back from New-York and brought some new 1/4in plates and this weekend I'll make some new ones that will fit better.

When everything is tied up and welded I'll install the front end, the rest of the steering assembly, wheells and all.
Put some hoses on the pump and drive it with an electric motor.
I'll be able to make it turn and check if everything fits right.
If I have to I'll temporarly reinstall the engine and the body.
It looks like a lot of work but hey, I'm getting good at taking the body off the frame, It takes me about 15 minutes by myself.
I use some straps and the engine hoist so it's no big deal anymore.

I dont want to have something knocking somewhere after the frame is powder coated
 
Top