1958 MGA Coupe

Looks good.

What is the latch problem?

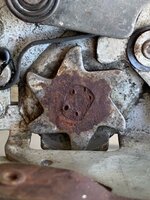
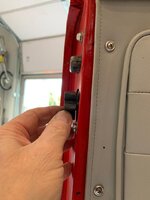
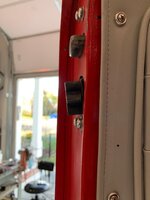
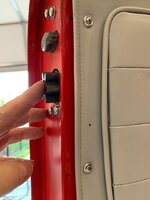
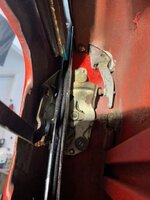
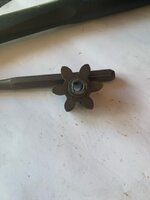
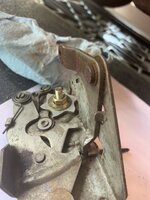
the star wheel that is on the door that turns and latches on to a cog on the body shut face pillar is no longer parallel and tight and it wobbles which disconnects from the internal parts that allows it to rotate and then hold the door in place.

That is interesting. So it's like a pinion gear that "latches" onto a tooth on the door jamb?


so i have been going over this mechanism with the ME who wrote the article on how to fix it. I think i understand it, the pinion gear is on a shaft with an internal star gear held in place by a circlip....the pinion function is only to the turn star gear when it goes into the shut face receptacle, the star wheel acts as a cog for the latching operation. the star wheel circlip has gone AWOL and nothing is holding the star wheel to the pinion shaft and the pinion can walk all over the place. the star wheel and the cog are what keep the pinion "locked" in place.

time to finish the 50s lemans style racing tube bumper.

I painted the last coat and then clear coated and finally mounted, that was kind of a fun little project.

05112021.2.jpg
05112021.1.jpg


next to fix the ac compressor clutchon the DD and then to tackle the MGA door lock pinion gear that gave up the ghost....i am hoping the door lock mechanism can slip out the bottom of the door if the door window lower brackets are removed.....we will see. removing this window is a nightmare
 
Nice job on the chopper.


thanks.....several weeks now and the solar panel is keeping the battery charged even with the kids leaving the lights on

Door latch repair


On my 58 MGA coupe the pinion fell off the door latch, it had been wobbly for a while and closing the door was always difficult with the wobble.
Any one who has disassembled an MGA Coupe door knows the difficulty in removing the window in order to remove the door lock assembly and I put this repair off for several months. However today was the day for the repair. I was fortunate enough to discuss the repair with David Adams who wrote this repair procedure

DOOR LATCH Repair, Ratchet Star Wheel, MGA Coupe (mgaguru.com) https://mgaguru.com/mgtech/coupe/cp113e.htm


I had remembered reading how someone was able to remove the lock with out taking out the window and I was determined to try that method

Heres the problem

door_star1.jpg

door_star2.jpg

door_star3.jpg
05152021.5.jpg
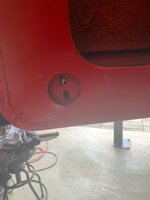
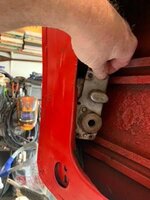
I was able to disconnect the lever arm and remove the nut and bolt holding it in place and slip the latching mechanism out. I had to remove the bottom window channel screws to slip it by it. It took a little bit of wiggling and force and it came out in. from taking the door panel off to having the latch in my hand was about 10 minutes
05152021.18.jpg

05152021.2.jpg

05152021.17.jpg

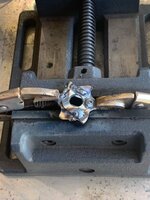
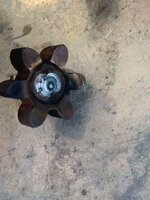
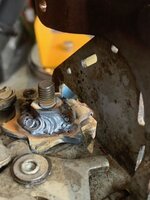
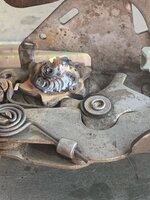
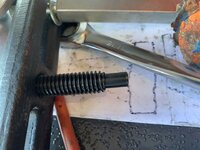
Once I had it out the repair was pretty straight forward I used a TIG welder. I had .005 axial end float on both sides


05152021.10(1).jpg
05152021.11.jpg
05152021.8.jpg


05152021.16.jpg
05152021.15.jpg
05152021.13.jpg

05152021.12.jpg


installation was the reverse and although i dreaded doing this is, it could not have been easier. Thanks To David Adams for walking me through it.
 
Last edited:
lasers?

nice weld

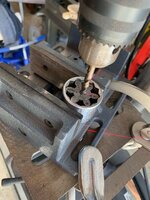
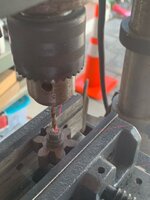
thanks the lasers are on the drill press, i did it the old fashion way and set it up just over my vise to drill it out. that star wheel is about the size of a quarter,

the TIG did nice welds but the piece was so small it got hot really fast and i must have had the post weld % and duration set too high and long becasue it kept heating up after i let off the trigger. ( digital setting with pulse two touch trigger)

maybe i should create a cheat sheet on the settings.

the TIG is so clean i really am appreciating that more and more. for scale that bolt is a 1/4"diameter


this time i cleaned the welding rod and the tungsten rod with acetone and i thinked it helped
 
Last edited:
well its time to do my 300 mile shake down inspection. where i live you can drive for 40 minutes and go 10 miles, so it takes lots of time to rack up miles....throw into that building a house and it takes several years to go 300 miles.

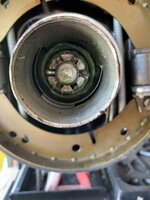
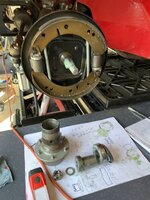
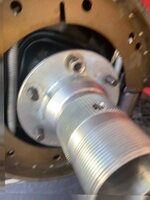
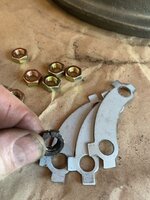
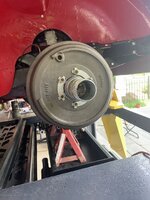
so as I look at the car I found one of the axle straps was breaking, not broken but almost there, so I replaced that,I changed the oil and filter, all the brakes and shoes look good, adjusted all the brakes and the big surprise was that even though my hub spindles looked pretty good they just had a bit more wear then i was comfortable with so i am replacing 3 of the four hubs, my RR hub is almost brand new so that is getting left alone.

Had a nice visit by a local forum member Leon Y. who has a beautiful light blue coupe shown here ( looks white) at the British car day in Md last sunday, his car is next to the show winner. Leon said it was an all original mineral blue coupe. looked like fun.

001.jpg

but i was fighting off cicadias and 95* heat and doing this

001(20).jpg


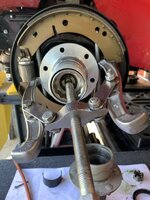
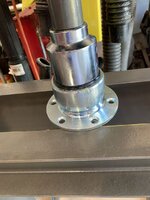
i used two pullers one in a socket with a v shaped bottom that is good until the axle stub meets the bearing then you need a flat nose (or small socket) on the puller stud to make the bearing pull past the axle stub

001(11).jpg
001(9).jpg
001(16).jpg


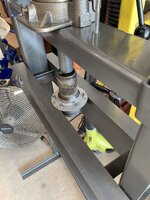
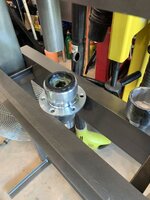
then you have to use the press to press out the old bearings and use a socket on an extension to reach the bearings this both for taking them apart and pressing in the bearings into the new hubs
001(18).jpg
001(14).jpg
001(13).jpg

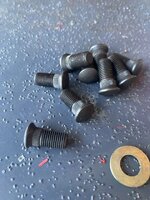
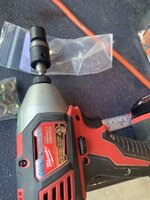
then pulling in the new studs, you can see why new hardware is good after 60 yrs, i used a nut and an impact driver to pull them in

001(6).jpg

001(3).jpg
001(4).jpg
001(2).jpg

and then done, bend these tabs first so you can get a drift underneath them easy enough


001(1).jpg


all in all it went pretty well on the front hubs, the only issue is my right hand side hub spins freely but when the brake drum gets tightened down all the way it is binding on something, i thought it was the backing plate at first but thats not it, a .05 shim eliminates the binding completely , I am going to get some smaller shims to see if i can determine whats going on and look for the shiney spot after a drive. perhaps its combination of manufacturing clearance issues popping up. When looking for smaller shims I see that Wilwood sells them for spacing there calipers to get distancing right so i am not to worried about shimming the brake drum. I think i will send Moss an email and see if they have had any issues with the tolerances on the right front hubs.
 
You have cicada's there also? My wife was laughing as I tried to cut the lawn with a zero turn. I would get swarmed and take my hand off the lever and the mower take a hard right loop :crap:
 
oh yeah the cicadias are freaking miserable here, i measured the decibel level at 75 sitting on my screen porch the other day, they kept flying into my garage and landing on me... i hate them
 
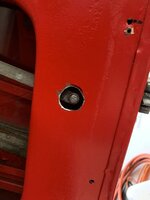
for some reason my passenger side door would sometimes not engage the striker plate when i went to close the door. it seemed the pinion peak would strike the striker plate and not rotate. my initial thought was that it was indexed wrong but i never really put it all together.


so after spending lots of time fiddling with the striker plate I went into the door cavitiy to remove the door lock mechanism, since there was nothing left to adjust.

I was not sure what i was seeing and I conferred with David Adams who helped me figure out my other lock and we discovered something very interesting.
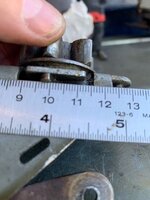
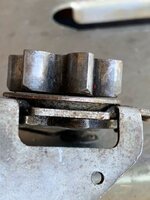
06162021.7.jpg
06162021.1.jpg
06162021.2.jpg

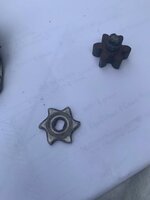
It didnt jump out at us at first but we soon realized that the star wheel valleys looked different then a normal MGAs star wheel and the relationship of the star wheel valleys to the pinion valleys were different.

the MGA valleys were smooth and radiused David called it "lazy" and mine were angular
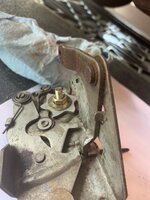
05152021.8(1).jpg


here is a picture of Davids pinion and star wheel from Barneys weblsite cp-113e you can see that the star wheel peak is lined up to the pinion valley, David called a a valley/peak relationship, mine had a peak/peak relationship, and the difference meant that the pinion peak was striking the striker when it should have been the valley being in that location
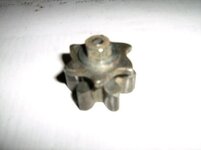

06182021.3.jpg

but WHY and HOW did this get happen? the fix was easy enough once we realized what was going on i had to reindex the starwheel to the pinion and did this by grinding the Double D shaft and pressing the star wheel on, putting it back in the door and then testing it, it took me two filings to get the relationship right but when indexed properly it worked exactly as it was suppose to. i just need to get the thrust washer and i can finish the repair,

But the question remained where did this pinion gear and different star wheel come from? the pinion gear was a mm smaller in thickness and had a bevel cut on the inside of the wheel and was indexed wrong. i had recalled seeing this mechanism previously at a car show but could not remember the car so i started the searching.....not british cars from the 1950s.....but a wider search of 1950 door locks wielded the results

1950- 1954 ford/mercury door latch listed on ebay as 1950 Mercury 4-door rear latch pair. 0M-7426412,0M-7426413
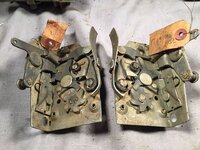
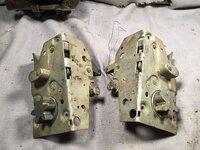
06182021.2.jpg
06182021.1.jpg

i will finish the write up and repair later today

i just picked up the thrust washer so its time to go to work.

David Adams notes indicated it should be hardened thrust washer 1.406 OD, 0.625 ID. .020 thick

i got close with 1.0 OD, 0.625 ID, .020 thickness and its hardened so thats what i am using.

heres the pinions side by side, funny if you think about it since an MGA door is not close to the weight of a 1950s mercury door.
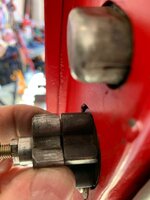
06182021.7.jpg


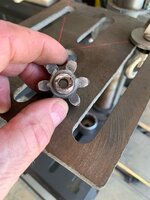
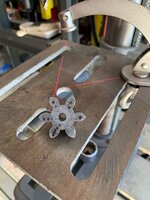
heres how i drilled the hole in the pinion, the socket gave me 90* sides and machined flat surfaces, i scribed the pinion peaks and used center punch to mark the hole.

i kept aligning the vise with the socket and pinion so that the drill press bit didnt drift when i lowered it.
06182021.6.jpg
06182021.5.jpg
06182021.4.jpg

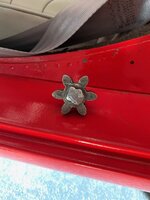
i put a slight mushroom cap on the welded shaft
06182021.8.jpg

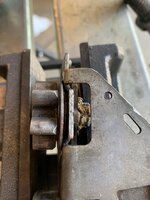
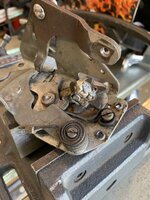
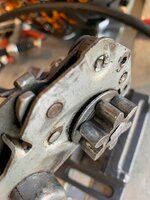
so this star wheel repair was a little more difficult since I had to reindex the star wheel to the pinion gear. Where previously i welded the washer to the star wheel out side of the lock mechanism with this lock i needed to see the star washer on the double D shaft before i obscured the view with the washer.

doing this inside the lock mechanism didnt give me much room for the TIG torch so i decide to use the MIG welder, less pretty welds but you can really direct the moment or two of heat and wire. not the prettiest of welds but its not going any where. pretty much the same methodology as the previous repair on the drivers side.
001(5).jpg
001(4).jpg
001(3).jpg


so if you are a purist stop reading at this point...

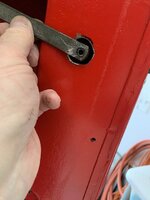
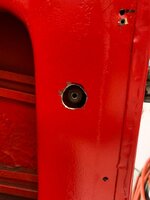
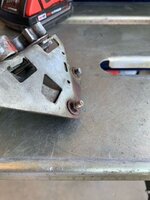
on the drivers side door the lever arm from the inside door release handle to the latch mechanism had a bolt where a rivet once was, removing the nut and bolt let the latch mechanism come out really easily. This car still had the rivet which meant a lot of work to get the latch out, so 2 minutes with my reciprocating saw and it no longer had the rivet...... add an access hole and you have a pretty easy way to get the latch mechanism in and out. and I mean super easy less then a minute to get the latch/lock mechanism out once the lever arm bolt is removed.

the rivet can be seen before i drilled it out, and that carriage bolt and nut was there and replaced an original rivet, I used nyloc nuts for both spots
06162021.5.jpg


001(2).jpg
001(1).jpg
001.jpg


and the door works great. I couldn't have done it with out David Adams helping me figure out what was going on. And the ford/mercury pinion and star wheel are definitely
an option and those parts are cheap.....today on ebay $30 "buy it now" gets them and includes shipping for both door latches

and this is what the final door closing action is like,
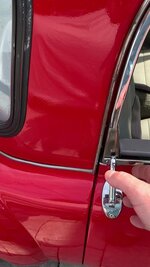

001(49).jpg


got a chance today today to knock off a few more of the last items on my shake down list.

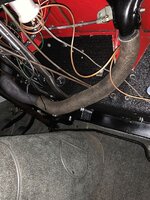
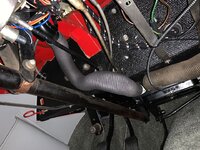
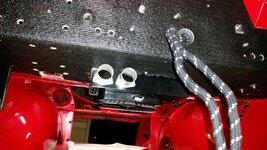
hooked up the demister tubes to the heater box and replaced the broken demister cable, that was a PITA. The cable has a connector at the end under the heater box on the flap that is almost impossible to get at unless you are Gumby with really long arms, and that was done my crawling into the foot well area, NOT FUN. the Lift did help with the demister tubes so at least on occasion when I put the demister tube in I could be standing and leaning into the cockpit.

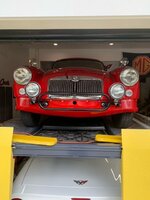
kind of what that area looks like before it gets lowered onto the frame
20160614_211938_zpsdpb5iffv.jpg

001(1).jpg
001.jpg


my do to list is getting very short

1. replace left rear spindle
2. diagnose and probably replace fuel sender unit
3. add furflex door trim
4. put on finishing strips on bottom of fenders and rocker panel
5. put the chrome trim piece in the window seal gasket


then what do I do????? I really like the process of working on the cars once they are all sorted out I usually find a new project and start all over again....i am on the fence as to what I am going to do, so if you have been desiring a coupe let me know, maybe you can influence my decision.
 
That is quite the diagnostic/detective project.

Is a de-mister the English version of a defroster?
 
funny terms for sure.....the MGA forum is a good bunch of guys from all over the world, so the ME who was helping me with figuring out the door parts is in England, another guy is in Belgium, etc etc.....so the terminology is always fun in the email exchanges.

its all good, i remember meeting a guy from Ireland once at a party and we had to have a written conversation, same written words but the pronunciation differences made it so it we couldnt understand each other

boot = trunk
hood = convertible top
torch = flash light
bonnet = hood
demister = defroster vents
prise = lever off something

a cunt isn't the same thing there as it is here....
 
time for a new project....yet to be determined, so far under the belt has been
three motorcycles, 74 cj 5, 65 c10 fleet side, 54 mgtf, 53mgtd, 69 tr 6, 3000 healey, 60 mga roadster, 58 coupe, 61 econoline van, 8? 280zx, 69 vette convertible, 77 vette restomod, my slightly customized 04 vette, 37 ford, i can t think of any more at the moment.

and half of them have been major restorations, so i am not sure what is next, it has to have staying power and capture my interest , maybe even do something i havent done before. decisions decisions decisions

heres the ebay listing, vehicle is in Arlington VA
https://www.ebay.com/itm/224626071314?hash=item344cc1d712:g:flUAAOSwNbdhUhZ9

photo bucket link

https://app.photobucket.com/u/bobs77vet/a/7276b573-7d64-4ea6-97f3-d7bf6e3dfbad

and the restoration thread

https://www.mgexp.com/forum/mga-forum.2/1958-mga-coupe-driver-quality-restoration.2085517/
 
Good luck with the sale, I've really enjoyed watching the build. Looking forward to living vicariously through your next build. :)
 
That is an impressive list of past projects. I wish I had your focus and energy.

Can't wait to see what's next!
 
three motorcycles, 74 cj 5, 65 c10 fleet side, 54 mgtf, 53mgtd, 69 tr 6, 3000 healey, 60 mga roadster, 58 coupe, 61 econoline van, 8? 280zx, 69 vette convertible, 77 vette restomod, my slightly customized 04 vette, 37 ford,

Nice list, made me think about all the fast cars I've owned.
 
Top